Technique Tuesday – Treat Basket

Posted on

Happy Tuesday everyone!!!! You know what that means…..I’m sharing a fabulous technique with you! This week it is the adorable little basket! You can use it for candy, treats, homemade goodies, or any type of gift!!! It is always fairly quick and simple too!

Treat Basket Tutorial, www.LaurasStampPad.com

Supplied Needed: Cardstock, Scissors, Scoring Tool (Stampin’ TrimmerSimply Scored Tool, or Bone Folder), Sticky Strip, Hole Punch, Brads, decorations/embellishments, and TREATS!

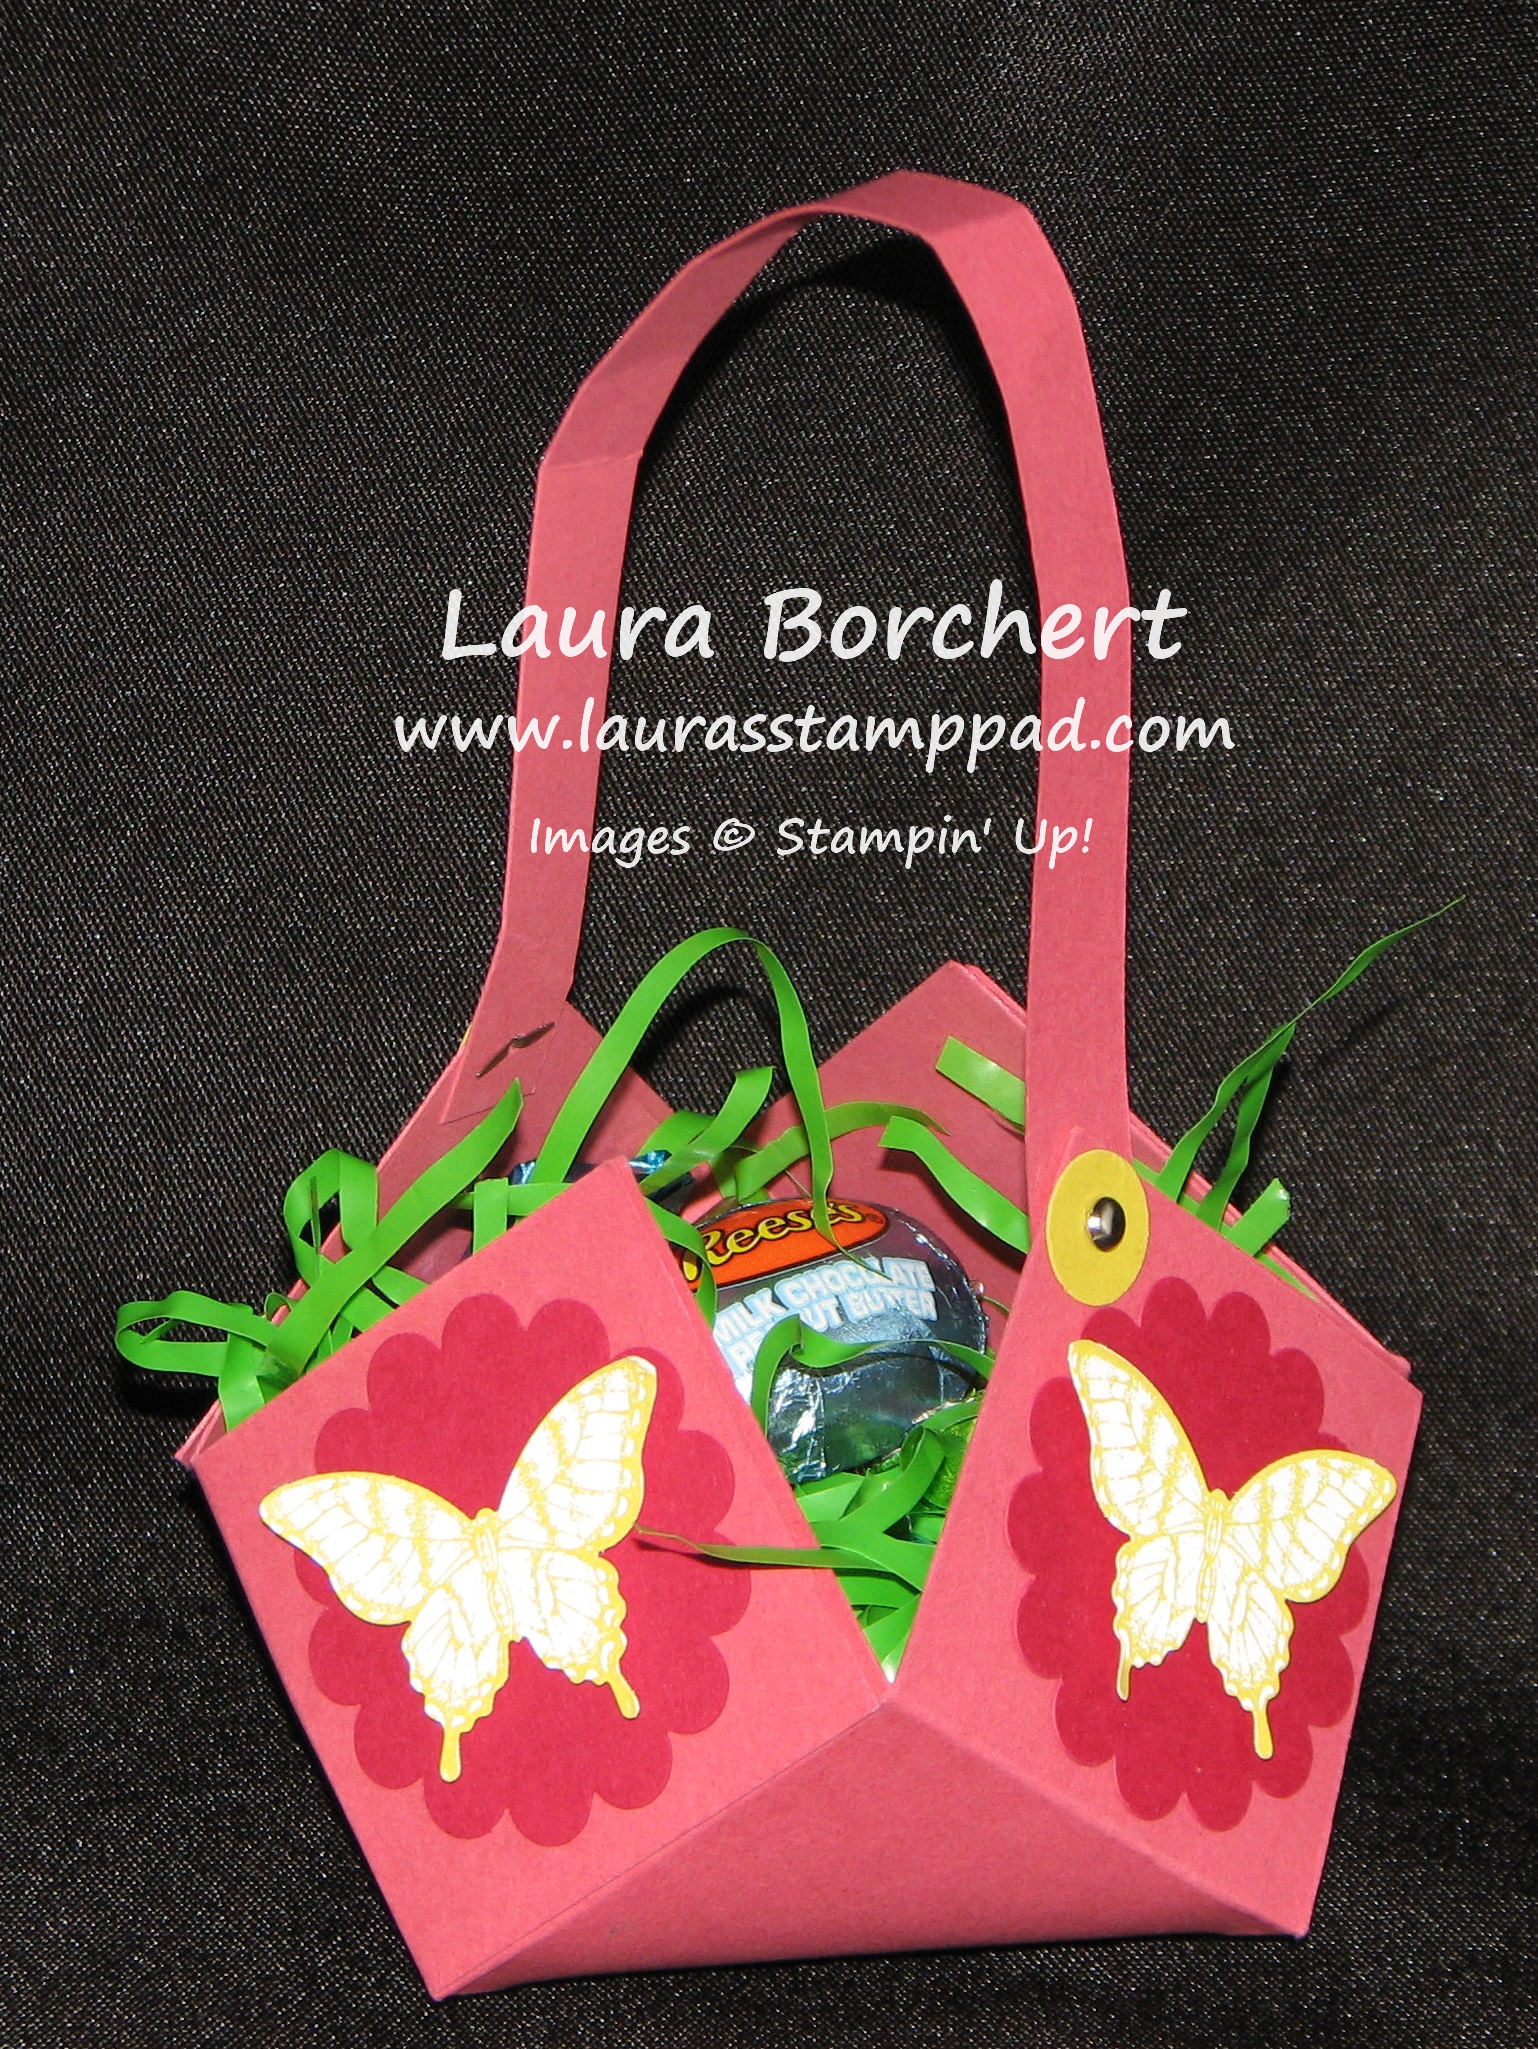
Using an 8” x 8” piece of cardstock, you will score at 2”, 4”, and 6” on both sides of the square. This will give you 2” squares all over. Cut up 2” to the first score line on all sides. This will make the corners fall off. Apply Sticky Strip to one of the squares on all four sides. Fold the sides together to make a point (overlapping 2 squares together). For the handle, cut a ½” x 8” piece of cardstock and attach with brads. Decorate as you wish! I used the Scallop Circle Punch on all four sides. Then I stamped the butterfly from Papillion Potpourri and punched it out with my Elegant Butterfly Punch. Of course I attached the butterfly with Stampin Dimensionals to add some texture and allow for bending the wings forward!!! Super cute and it would look great as treats for a Bridal Shower, Baby Shower, or any other events with Treat Bags. You could always put the name of the guest on one of the sides and it could double as a place card!!! Here is a video for you to watch how this was created!!! Be sure to “Like” this video and “Subscribe” to my Channel so you don’t miss out on any of my Video Tutorials!

Happy Stampin’

~Laura


Technique Tuesday – Nice & Simple Notepads!

Posted on

It is Tuesday and so I’m sharing a fabulous technique with you!!! This week it is these adorable Notepads!

Notepads, www.LaurasStampPad.com

 I LOVE these super simple notepads! They make perfect gifts! I actually gave them to all of my Bridesmaids for part of their gift! Stampin’ Up sells our clear stamp cases 4 in a pack so it is super easy!!!!

Supplies You Will Need:  Clear Cases, Designer Series Paper, Jr. Legal Paper Pads (or Post-It Packs), Ribbon, and Sticky Strip

Take your Designer Series Paper and cut it down to 10-1/2 x 7″ and slide it into the clear front cover! (This is great for those pieces you have been holding onto forever for that perfect project or large scraps!) Add Sticky Strip to the back of your pad of paper and adhere that to the inside cover. (NOTE: If you are using Jr. Legal Pads, you will have to cut off a little over an inch to make it fit! I have found Post-It packs and various others that fit without cutting!) Then you can decorate the spine of your case with ribbon! Done!

The best thing about these is you can always add more paper once you run out so no need to throw it all away once it is gone! It is perfect to toss in your purse because the edges won’t get ruffled! Or you can put one by the phone and you will always be able to find it because of the clear plastic case and fabulous decorations! Make a few of these to have on hand for that last minute gift you might need this Holiday Season!

Happy Stampin’

~Laura