Technique Tuesday – Watercolor Ray of Sunshine!!!

Posted on

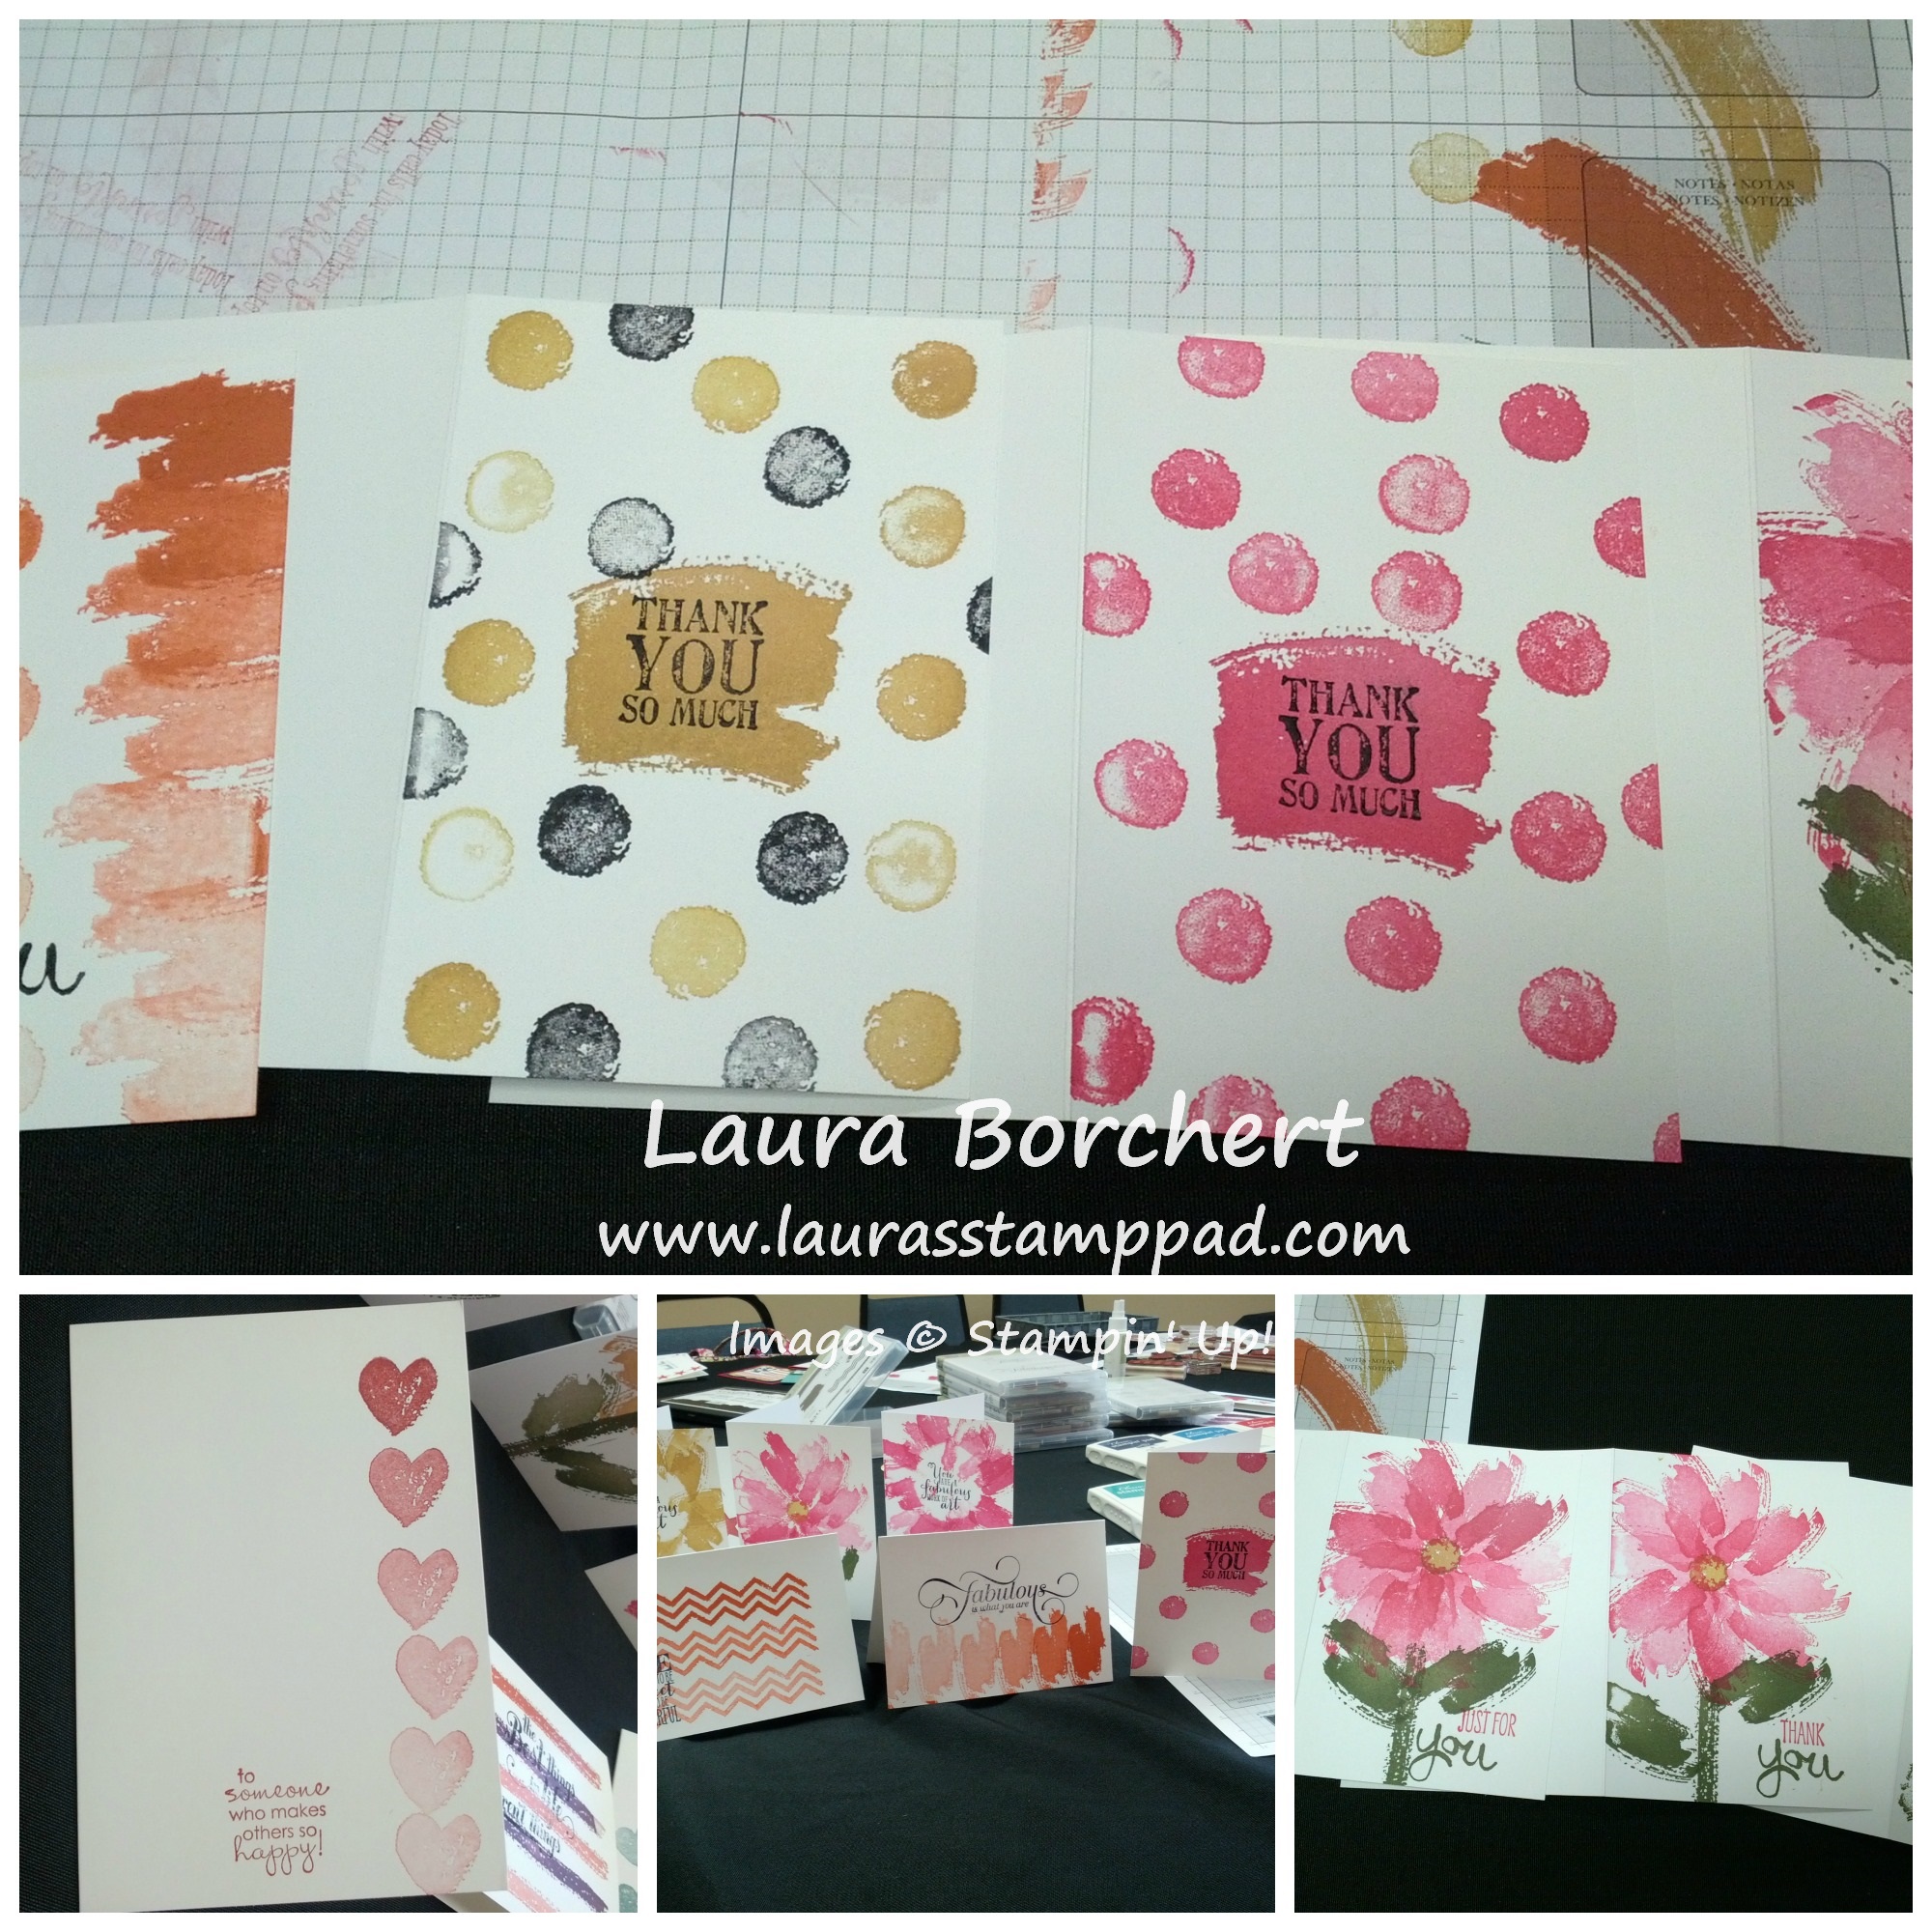
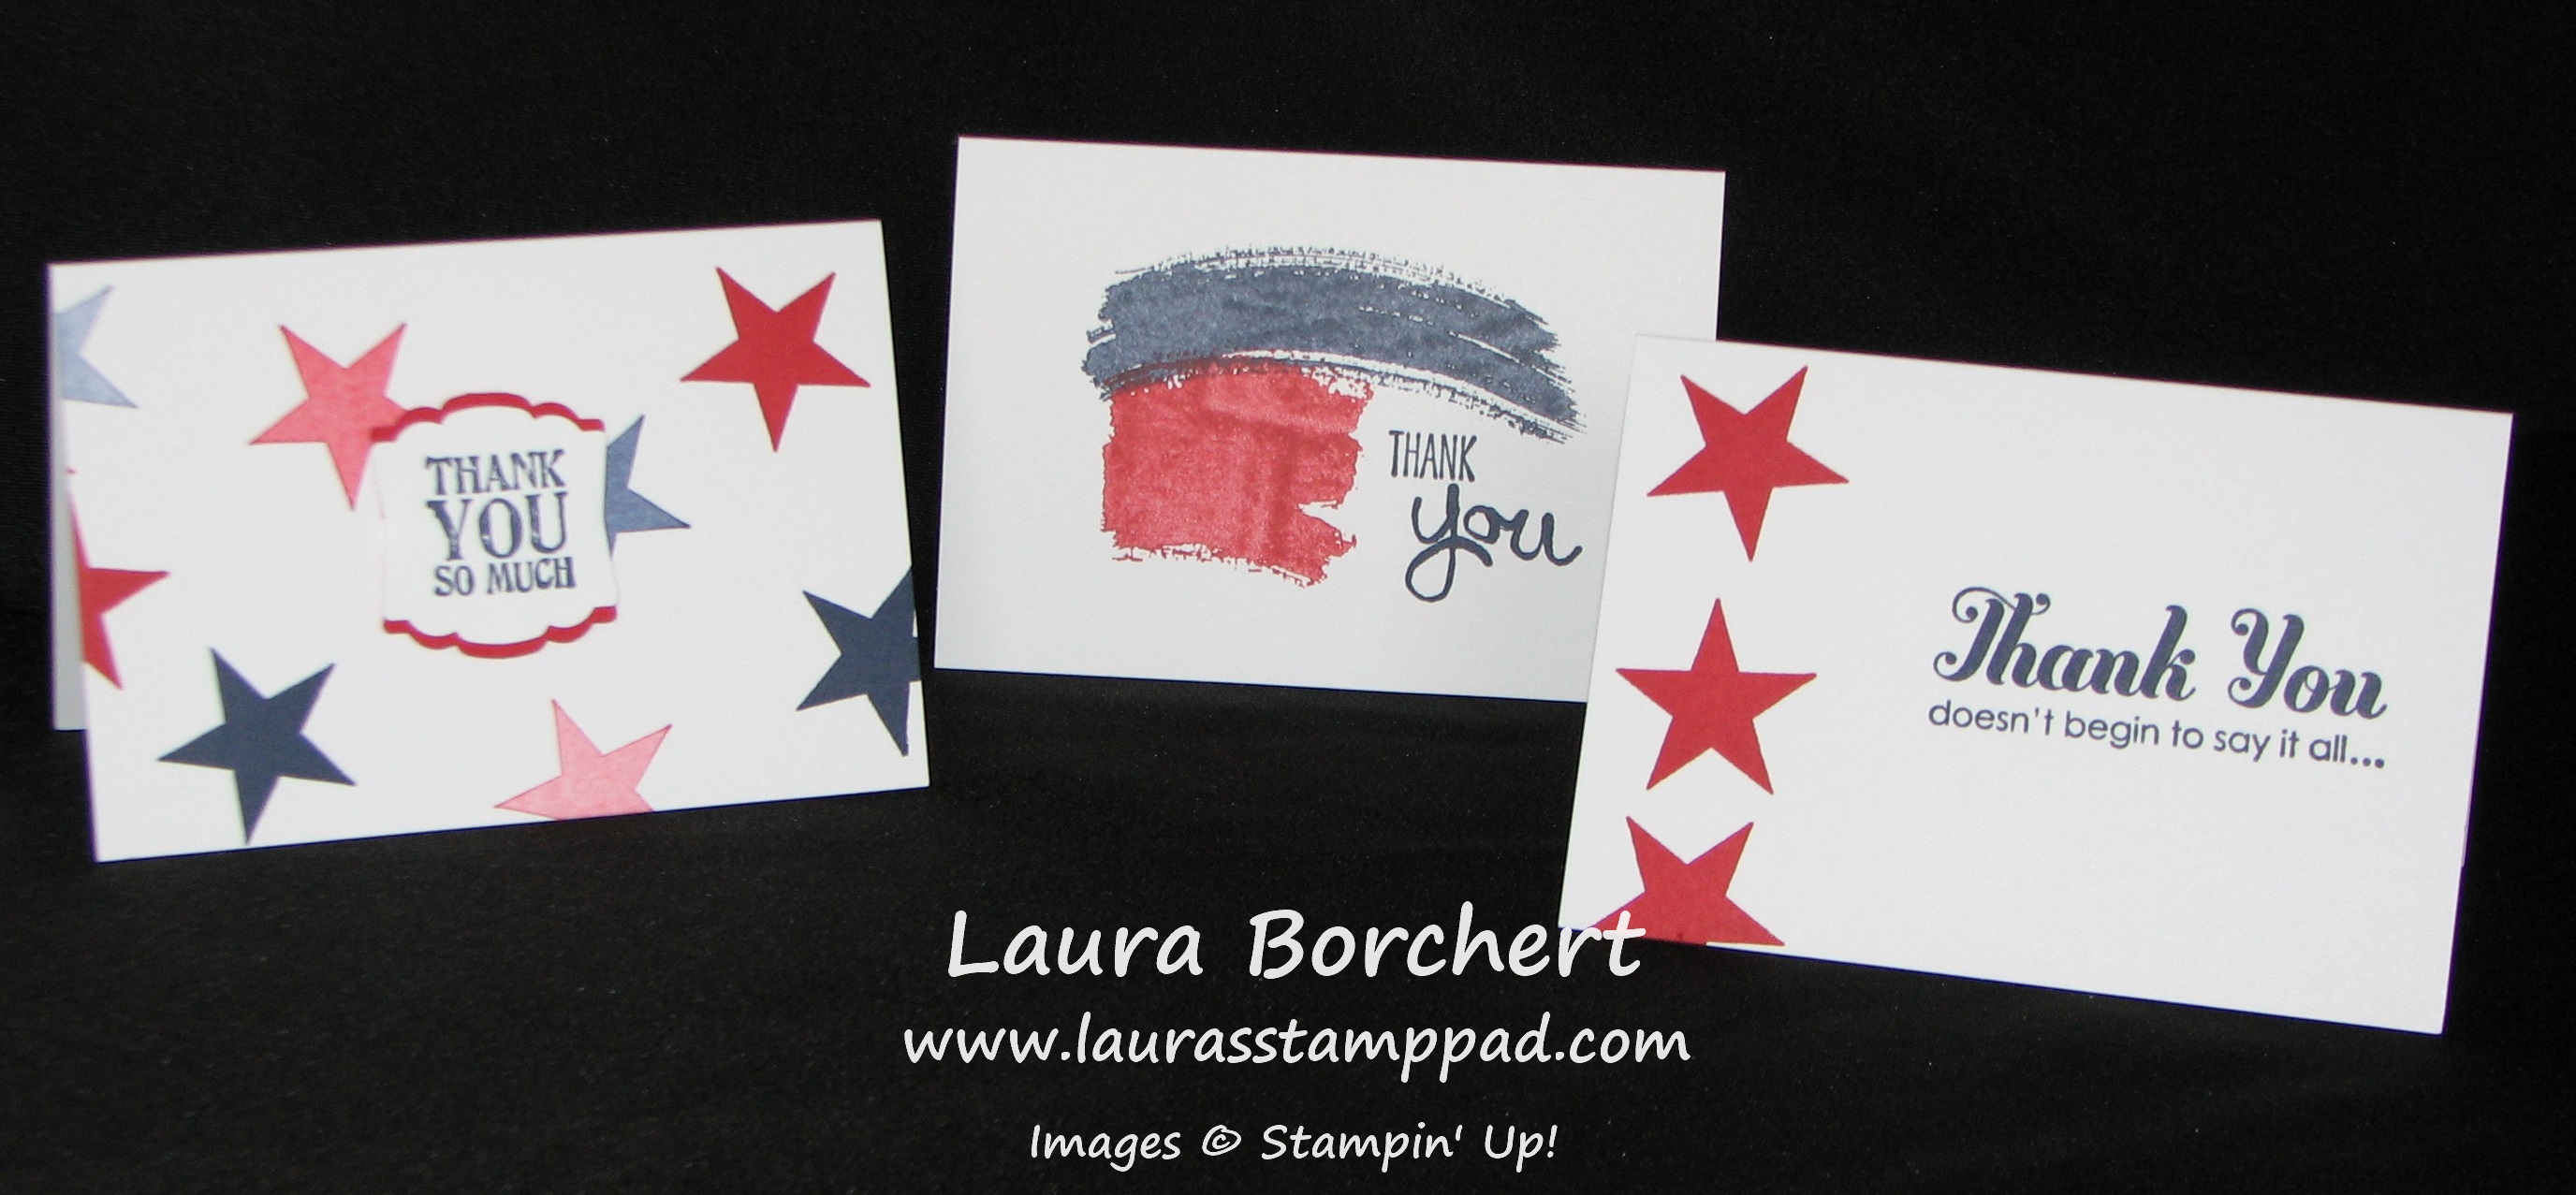
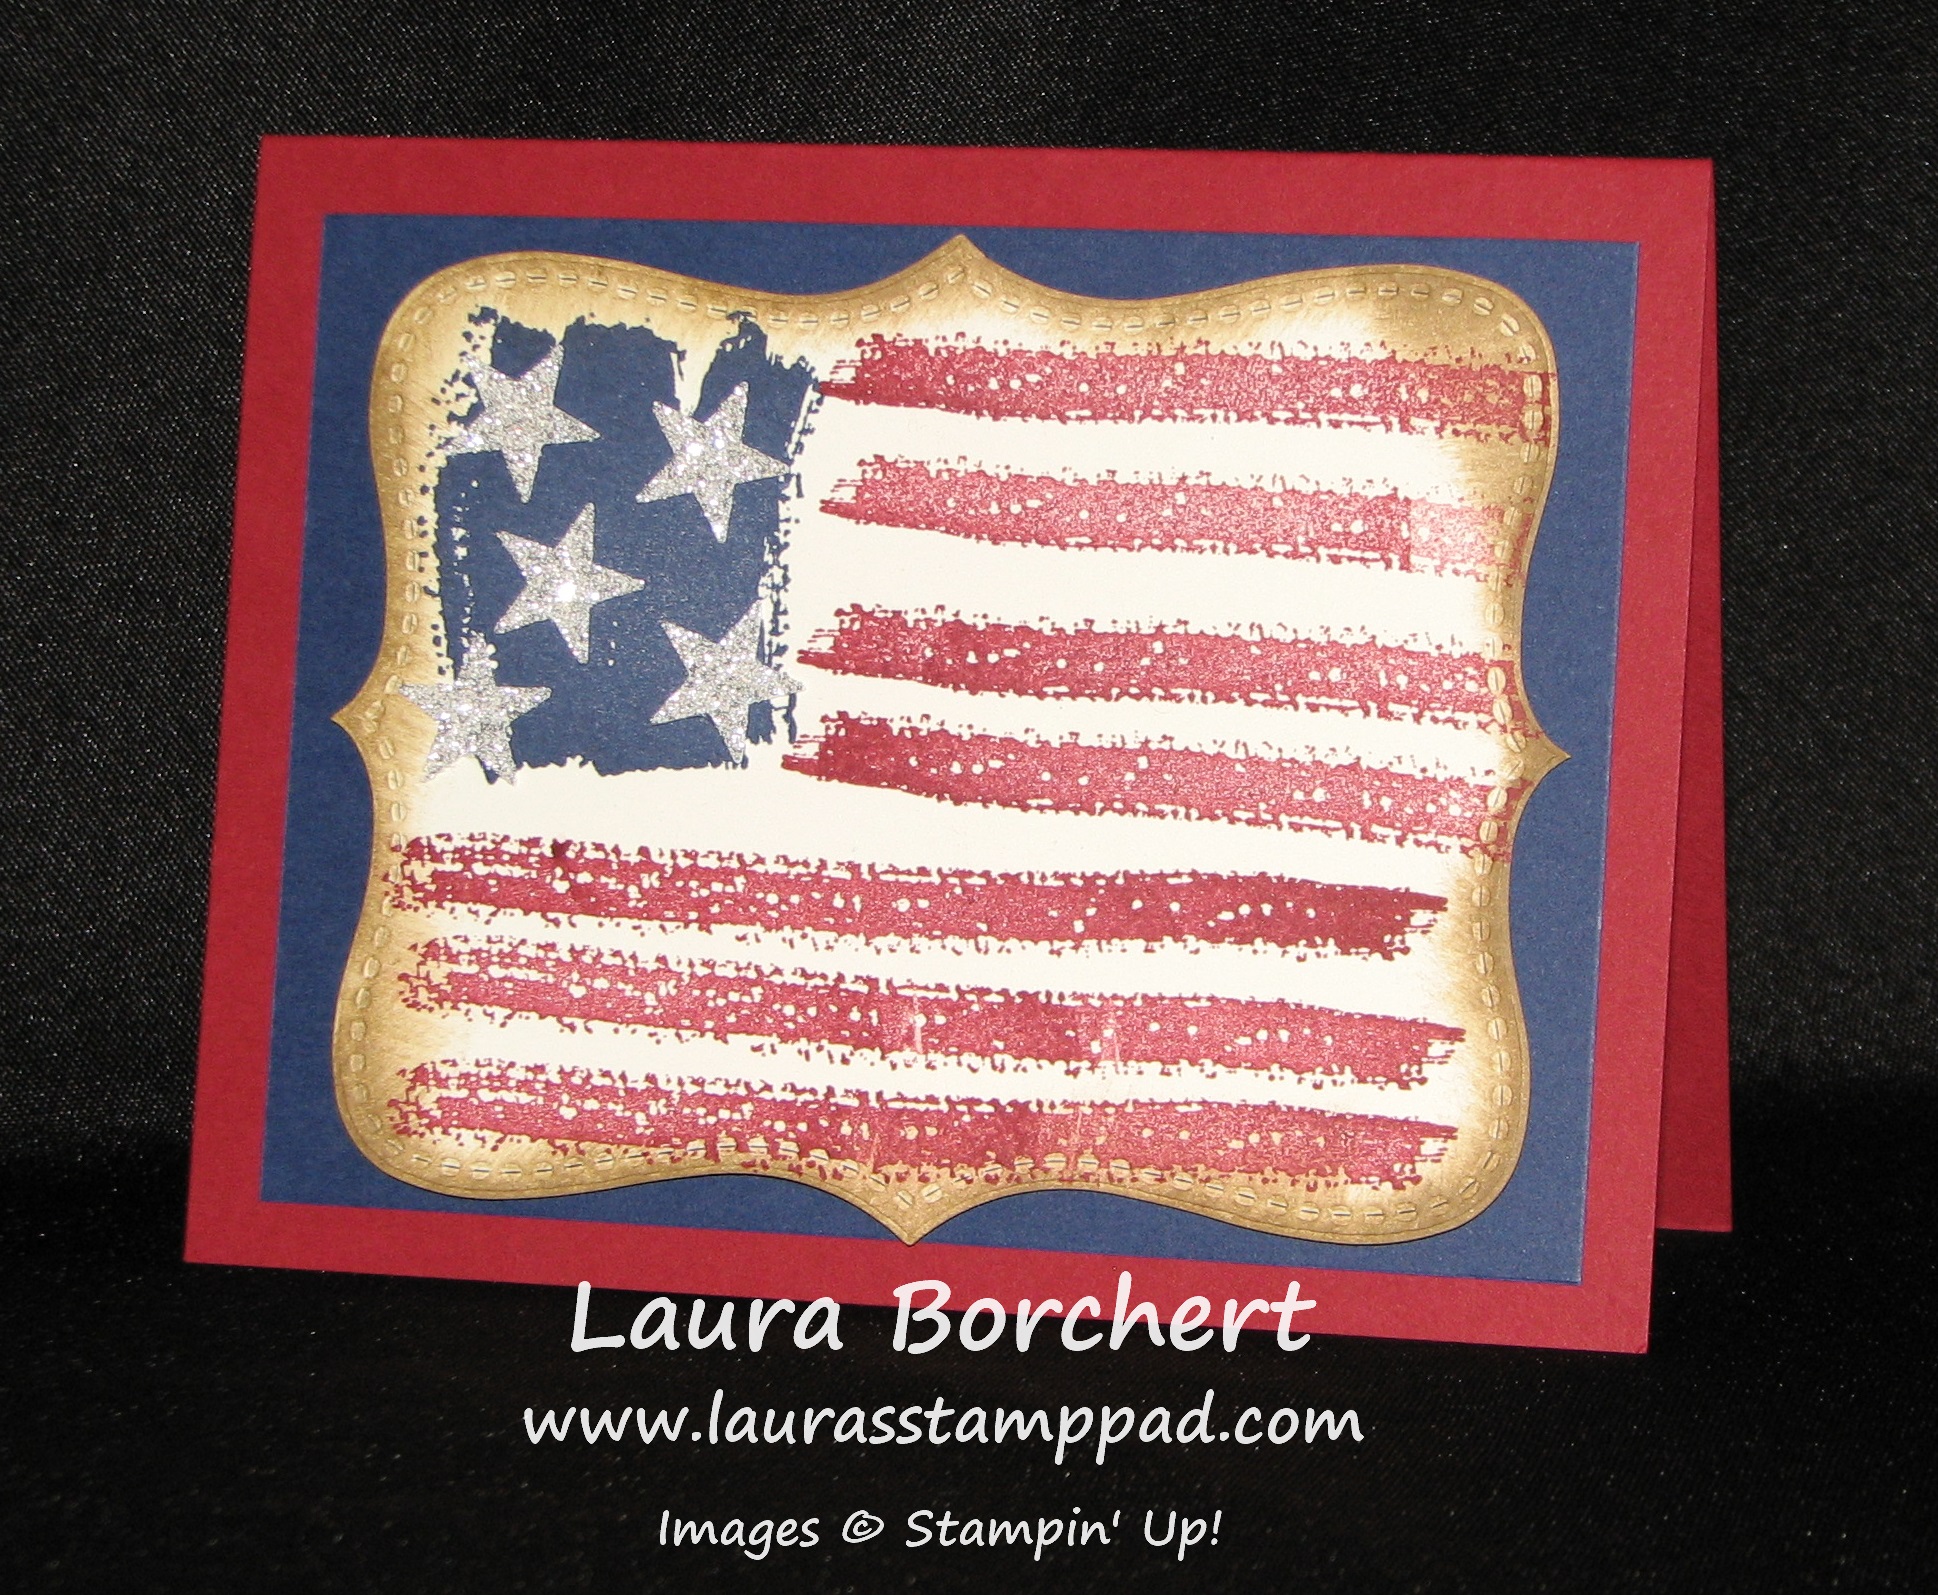
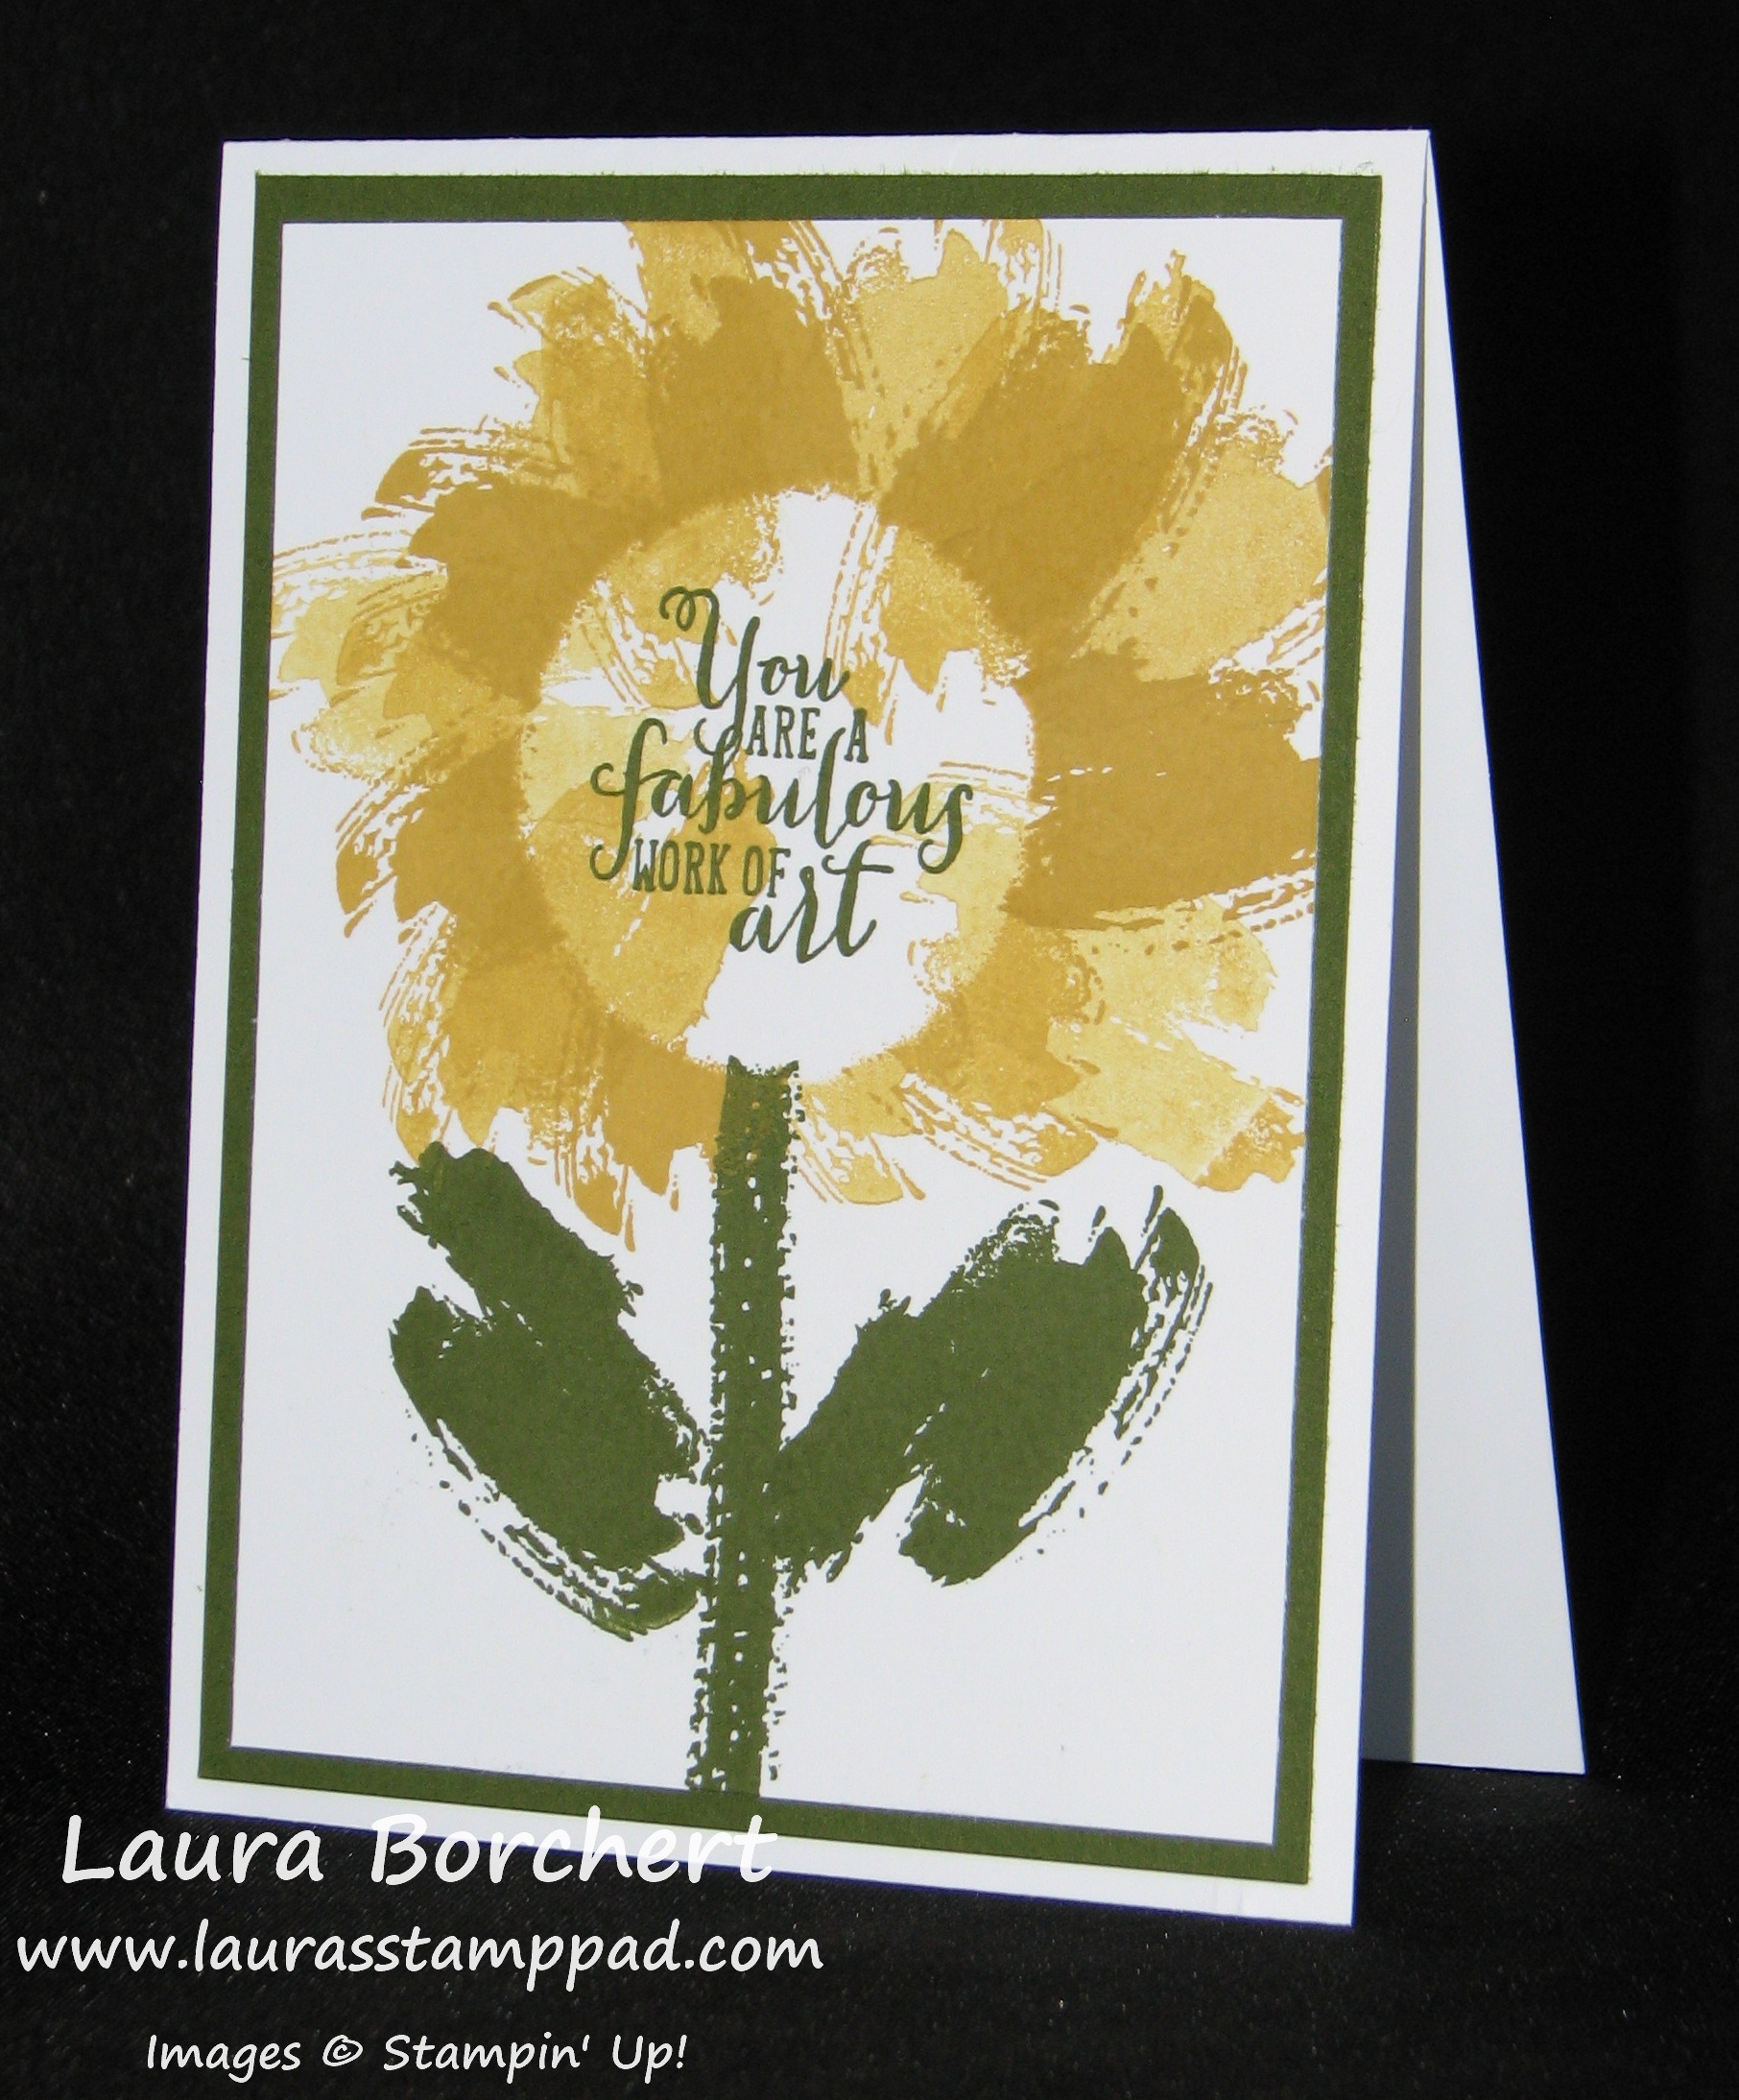
Happy Tuesday!!!! That means I have a fabulous technique to share with you today and it includes the best stamp set ever – Work of Art!!! You probably could have guessed that one, right? ๐Ÿ˜‰

Work of Art Sunshine, www.LaurasStampPad.com

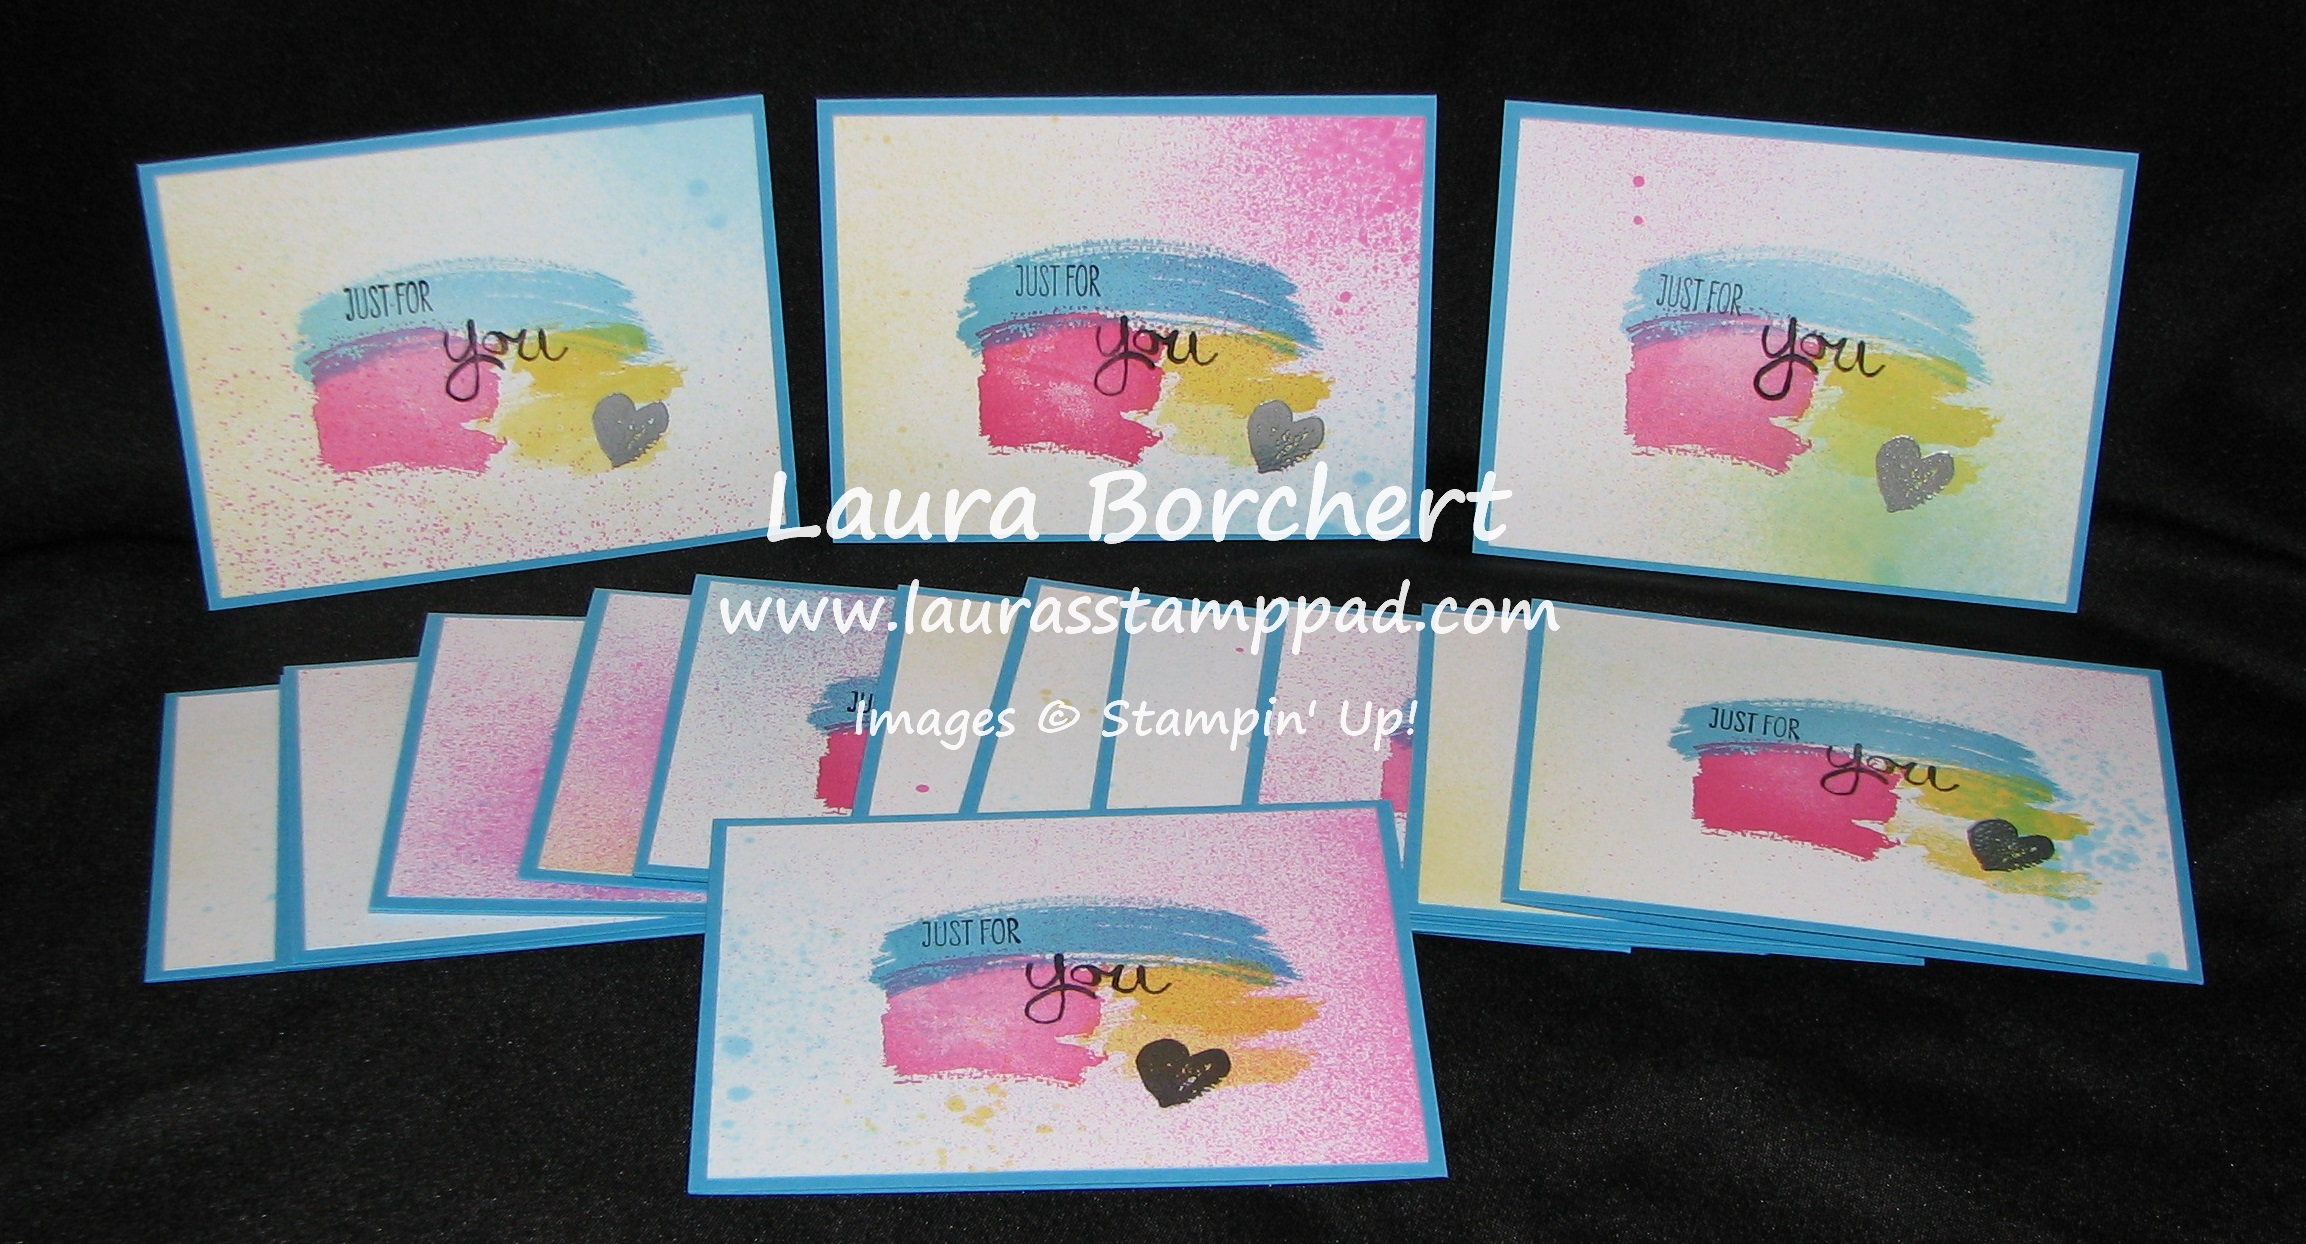
Supplies Needed: Work of Art Stamp Set, Watercolor Paper, Spritzer with Water, Island Indigo Ink, Daffodil Delight Ink, Pear Pizzaz Ink, Coastal Cabana Ink, and Soft Sky Ink, Sequins, Itty Bitty Punch Pack

Starting with a piece of Watercolor Paperย measuring 3-3/4″ x 5″, you will stamp the long image from the Work of Art Stamp Set 2-3 times in each color. I started straight up and down with Island Indigo, then Coastal Cabana, Soft Sky, Daffodil Delight, and Pear Pizzazz. As you go along, you will want to angle them like rays of sunshine! Then you will need to place the paper into a box or on a towel and spritz ALL OVER! I really mean all over. The colors will start to run and bleed and that’s a good thing. The piece of paper will also start to curl and that’s okay! This will take some time to dry or you can use your Heat Tool! Once it is completely dry, it is time to assemble! I added it to a piece of Daffodil Delight (4″ x 5-1/4″) and then my card base of Island Indigo (4-1/4″ x 11″). I stamped the Thanks three times from the Lots of Thanks Stamp Set! I added a few Daffodil Delight flowers from the Itty Bitty Punch Pack and some Gold Sequins (adhering them with Mini Glue Dots). Of course when working with watercolor, no two will come out alike so don’t worry if your’s doesn’t look exactly like mine. For a Video Tutorial on this fabulous technique, click here or check out the video below!

Happy Stampin’

~Laura


More Quick and Simple Work of Art Cards!!!!

Posted on

Work of Art Quick & Simple, www.LaurasStampPad.com

I feel like all I need to do is post this picture! Of course, I can’t leave it at that so let me do some talking! ๐Ÿ˜‰ All of the cards above were created with 3 things – Work of Art Stamp Set, Note Cards & Envelopes, & the New In-Color Ink Pads! I would say that 3 supplies makes for simple cards, right? Many of the cards were created by inking the image and stamping it multiple times to get that variation in color! You can check out a video on the plaid card by clicking here! The 2 in the back on the right were created at the same time, the one on the right is full strength ink and the one on the left is the 2nd stamp ink. You can see I also stamped my envelopes to match each one! Super fun and cute!

Work of Art Quick & Simple, www.LaurasStampPad.com

I did these cards in one of my classes and the picture above showcases some of the amazing ideas my stampers came up with! I love the Polka Dot cards….who doesn’t love Polka Dots?? Also, I had lots of stampers love to flower card (check that out here) and they recreated it with a dot in the center and in PINK (melon mambo)! Love it!!!! So many amazing ways you can use this stamp set and I love how my original ideas got everyone’s creativity flowing! I hope you try out the Work of Art Stamp Set and let me know in the comments below which one your favorite is!

Happy Stampin’

~Laura


Quick & Simple Work of Art Cards!!!

Posted on

Patriotic Word of Art, www.LaurasStampPad.co

Aren’t these cards amazing??? I got out my Notecards and Envelopes Pack, Night of Navy Ink Pad, Cherry Cobbler Ink Pad, Work of Art Stamp Set, Perfect Pennants Stamp Set (the star), and Lots of Thanks Stamp Set! Boom! Amazing cards! There is no adhesive or layering on these cards so they really are quick and simple! The card on the far right was created by inking up the image and stamping all the way down without re-inking! I love the color variations you can get with just one color!

Patriotic Word of Art, www.LaurasStampPad.co

Here are a few others! The card in the middle was created at the same time as the card in the middle in the top photo. The top photo has the full strength ink and the bottom photo has the 2nd Stamp Ink which is why is it a shade lighter. Doing that really makes card making go fast! Now I did add a little cardstock and punching to the card on the left above! ๐Ÿ˜‰ I needed the greeting to POP so I stamped the greeting onto Whisper White and used my Artisan Label Punch and then a second one to layer behind in Cherry Cobbler!

You can also check out my amazing Patriotic Wreath here! And be one the lookout for more quick and simple Work of Art Cards coming next week! ๐Ÿ™‚

Happy Stampin’

~Laura


Celebrating 4th of July!!!!

Posted on

The 4th of July is next week and while I probably should have posted this fabulous card a week or 2 ago, better late than never right? This card would be perfect for a 4th of July Party Invitation or if you have a friend like me who’s Birthday is ON the 4th then you could send it to them! This would be great for Labor Day Parties as well so keep it in mind for a few months! ๐Ÿ˜‰

Flag Work Of Art, www.LaurasStampPad.com

This amazing card was created with the Work of Art Stamp Set (I’m telling ya, that set is fabulous)!!! I used Night of Navy and Cherry Cobbler for the flag and brushed the edges with Baked Brown Sugar! For the Night of Navy, I used the larger “swish” that is in the Work of Art Stamp Set and then added a Silver Glimmer Stars using my Itty Bitty Punch Pack star! The stripes were created using the long straight image from the set. I thought the Baked Brown Sugar softened the edges and made the flag look more rustic! I added that with my Sponge Daubers! All of this was stamped on a piece of Very Vanilla that I ran through my Big Shot with the Top Note Die! The possibilities are truly endless with this stamp set! Of course, I want to give a shout out to Lizz Orr who gave me the idea for the card!

Happy Stampin’

~Laura


Sunflower Work of Art!!!

Posted on

Happy Monday everyone!!!!! I know I know…that is a little too much excitement for a Monday but maybe this fabulous card will brighten your day!!! Of course this was created with the most amazing stamp set ever…..

Sunflower Work of Art, www.LaurasStampPad.com

THE WORK OF ART STAMP SET!!!!! Isn’t it fabulous? I used the long image for the stem and the small “swishy” image for the leaves and petals! The New In-Colors – Hello Honey and Mossy Meadow are perfect sunflower colors! To get the petals, I punched out a circle with my 1-3/4″ Circle Punch of scrap paper and placed it at the top of my stem. Then I inked up the image in Hello Honey and stamped, moved it over a bit, and stamped again. This is how I got the the dark and light shades for the petals. Once I had gone all the way around the circle, I took my circle mask off and inked up the image, stamped off, and then stamped with part of the image in the middle to add just a little bit of color. Then I stamped the greeting in Mossy Meadow!

Pink Flower Work of Art, www.LaurasStampPad.com

I just had to try this flower our in PINK!!! I did this one in Melon Mambo and Mossy Meadow! Now I want to do it in Purple….I’m thinking Elegant Eggplant! ๐Ÿ™‚ Be sure to check out the Video Tutorial by clicking here or seeing it down below!

Happy Stampin’

~Laura


Technique Tuesday – Perfect Plaid!

Posted on

Happy Tuesday!!! You know what that means……I have a fabulous technique to share with you today! This one is super fun and really rather easy! The best part….you can mix and mingle a million different colors and come out with something different each time! I love that!

Work of Art Plaid, www.LaurasStampPad.com

How cute is that? I mean masculine! ๐Ÿ˜‰ I used the Work of Art Stamp Set! This is by far my favorite stamp set right now. You can see more samples using this set here and here!

Supplies Needed:ย  Work of Art Stamp Set, 2-3 Ink Pads, Cardstock

I used the long straight image from the Work of Art Set to create this look. You can use 2-3 different colors. I found when I used a 3rd color, I always felt it was off because I either didn’t have enough of that 3rd color or it was just a mess of too many colors but I’m crazy like that. My piece of cardstock measures 3-3/4″ x 2-1/2″. I decided to use this size because it fits the stamp. You could go big and have it layer the entire card (4″ x 5-1/4″) but you would need to stamp twice to create the line all the way across. I used the NEW In-Colors – Lost Lagoon and Mossy Meadow for the card pictured above. You will ink up one of the colors and stamp down, moved about 1/4″ and stamp again without re-inking. Ink up with that color and keep doing that all the way across. Then turn your piece 90 degrees and with the 2nd color do the same thing, stamp, move up a little and stamp again without re-inking. You could also do all dark (inking and stamping) along one side and all light stamping (stamping off once) along the other side. You can mix it up to however you wish….endless possibilities! Here is a Video Tutorial for you to watch this technique in action! Be sure to like and subscribe to the video so you never miss out!

Click here to check out more videos of mine! I hope you enjoyed this technique and try it out yourself. Let me know in the comments below what you think and if you try it out, send me a photo of your project! I love seeing what you all come up with!

Happy Stampin’

~Laura


Amazing Work of Art!!!

Posted on

The New Catalog is here! That means NEW stamps and accessories and paper and dies and embellishments and IDEAS!

Confession: I would have never looked twice at this stamp set – Work of Art

…BUT Stampin’ Up gave it to me for FREE at the New Catalog Premiere and I LOVE LOVE LOVE (a million more) it!!!! I have played this this set in so many ways and with so many colors. So just order yours now by clicking here and sit back and read my blog daily because A LOT more samples will be shown! Today I thought I would start off with quick and simple cards!

Work of Art Notecards, www.LaurasStampPad.com

Check these out! All you need is a package (or 5) of Notecards and Envelopes and a few stamp pads! I used the NEW In-Colors – Blackberry Bliss, Hello Honey, Lost Lagoon, Mossy Meadow and Tangelo Twist! These colors are deep yet vibrant! I love the Purple (Blackberry Bliss) and the Yellow (Hello Honey) goes really well with Blackberry Bliss. As for the rest, the more I play with them the more I love them! For all of the cards above I used the 5 In-Colors and the Work of Art Stamp Set. I used all of the images and had so much fun! Many times, you see that I inked up the stamp and then stamped 2-3 or 4 times before going back to the ink. I love that Ombre effect that it gives and I love how it looks so soft or arty or some word I can’t seem to come up with! I decorated each of the envelopes to match the Notecard which is super cute I think. I did have fun with that Blackberry Bliss plaid look (Hello, future man card! My farming family wears lots of plaid!)!

I hope you enjoyed these amazing cards and be on the lookout for many many more because this set is just too much fun to put in the drawer!!! Also, don’t forget about my NEW CATALOG GIVEAWAY, Click here!

Happy Stampin!

~Laura


THE NEW CATALOG IS HERE!!!!

Posted on

NEW Stampin' Up Catalog, www.LaurasStampPad.com

What a way to start off your Monday!?!?!?! The New 2014-2015 Stampin’ Up Catalog is officially here!!! I am soooo excited because I love this NEW catalog. I love the new stamps – Age Awareness is fabulous. I love the new embellishments and ribbon – Stitched Satin Ribbon is beautiful! I love the new Designer Series Paper – Sweet Taffy says LAURA all over it but Back to Black looks amazing too. I love my black and white!!!! I love love love all of the kits for stamping, gift giving, treats, treats, and more treats. LOVE IT! Also, there is an index for the Accessories this year! Even better….there is an index for greeting and alphabet stamps WITH A PHOTO! How amazing is that!?! Oh I could go on and on….which I will do at my New Catalog Girls Night Out Event which is June 10th!!!!! You are all invited!!

Work of Art, www.LaurasStampPad.com

This is using the NEW Work of Art Stamp Set which is amazing!!! Thank You to Stampin’ Up for giving it to me for FREE because I don’t think I would have looked twice at this set! Check out my Video Tutorial on this card!!!

Happy Shoppin’

~Laura