Brusho Background With Banners!!!

Posted on

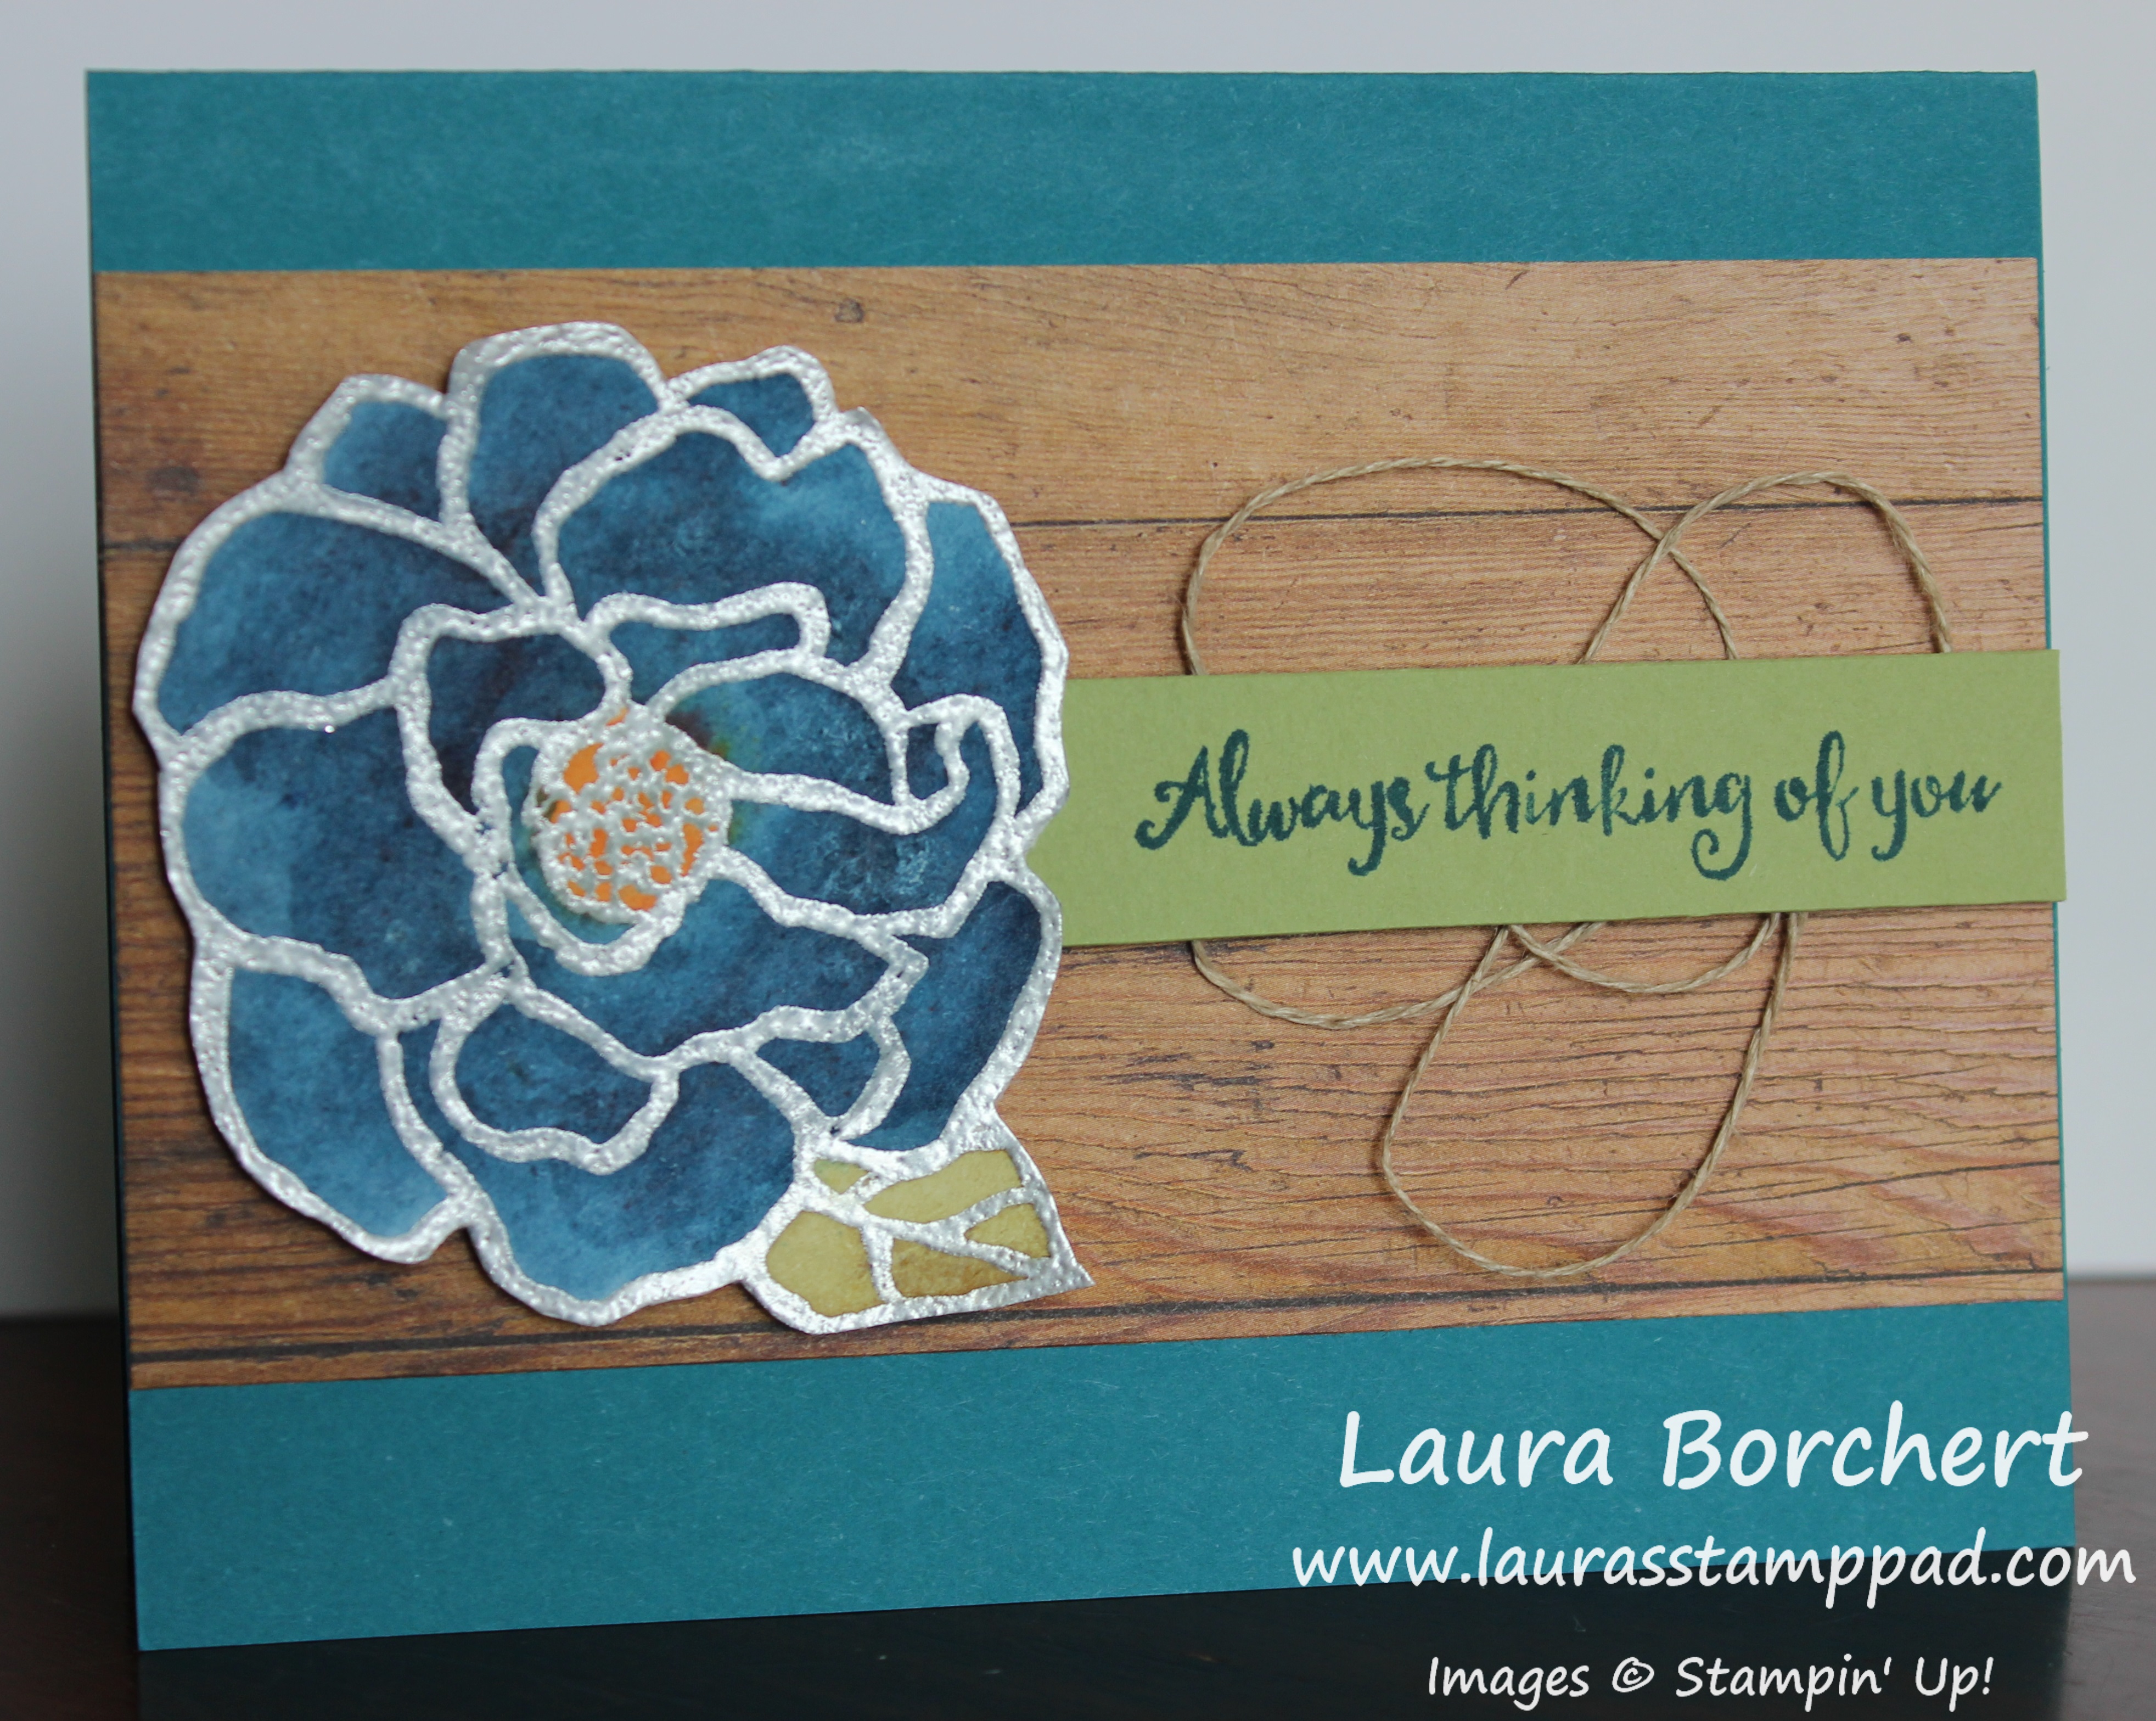
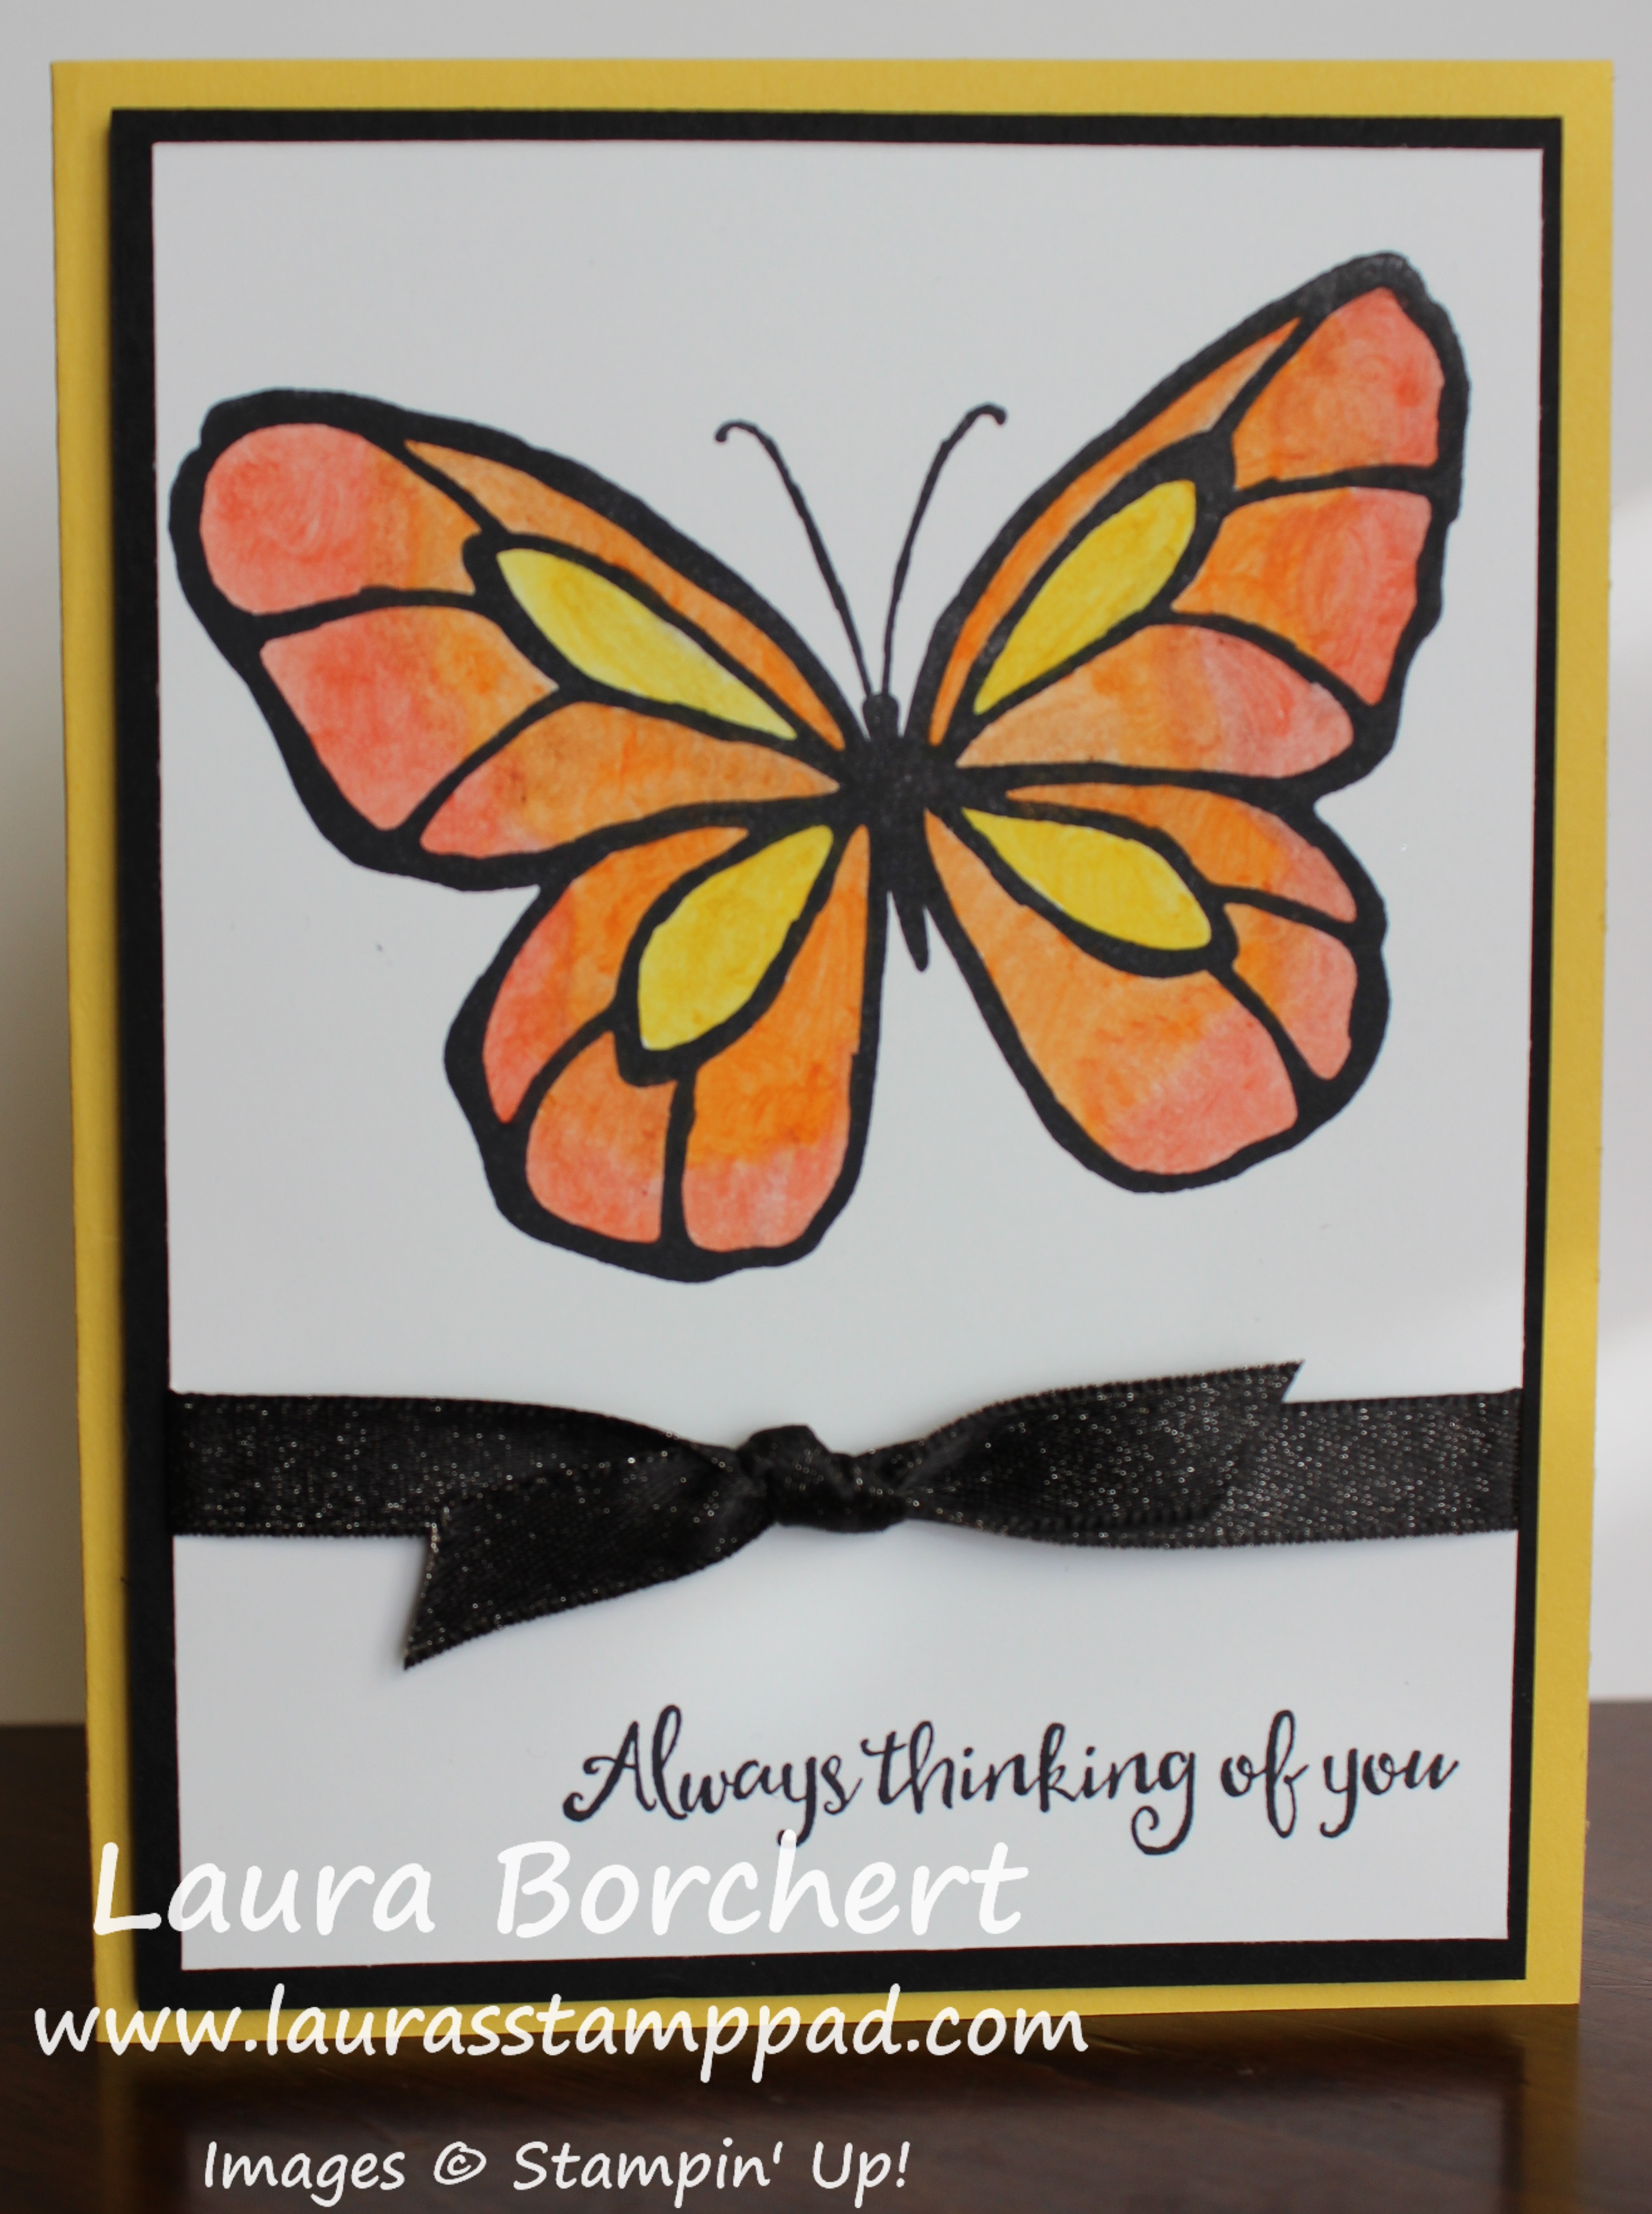
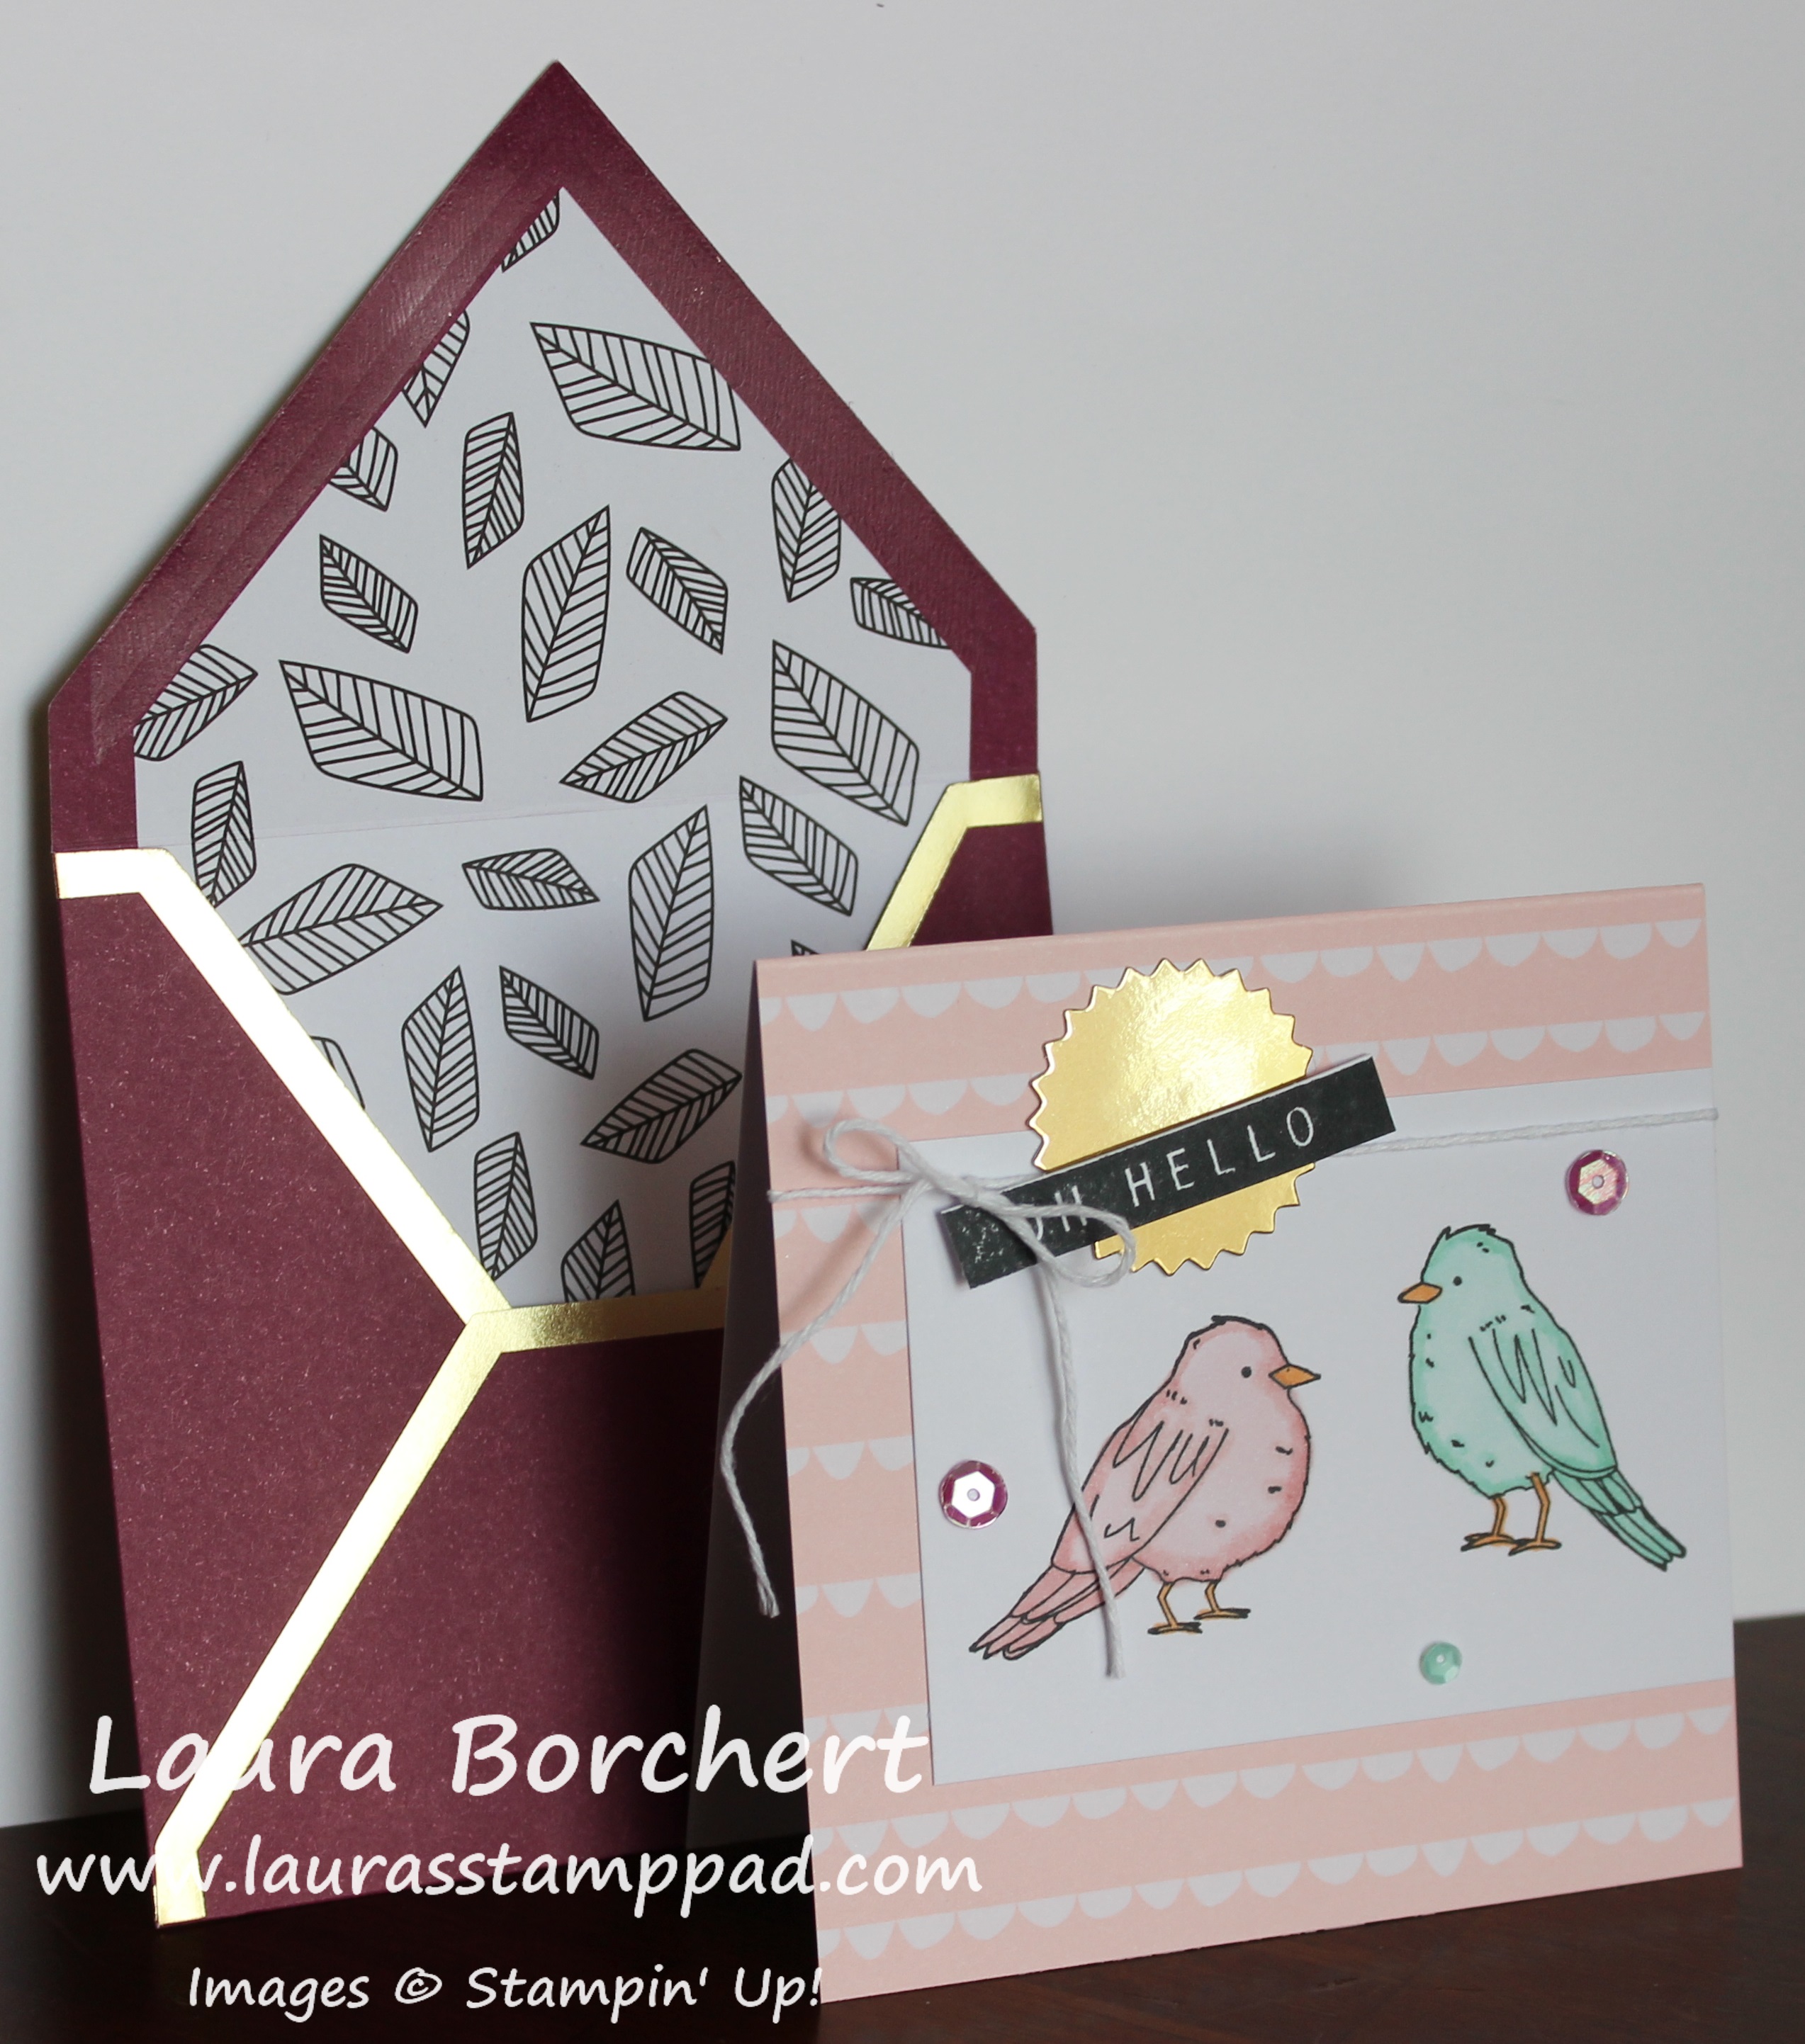
This card uses lots of fun new stuff from the Occasions Mini Catalog! The Brusho Background is super fun and colorful and then those perfectly placed banners with the Stamparatus!!! Love it!

Brusho Background, www.LaurasStampPad.com

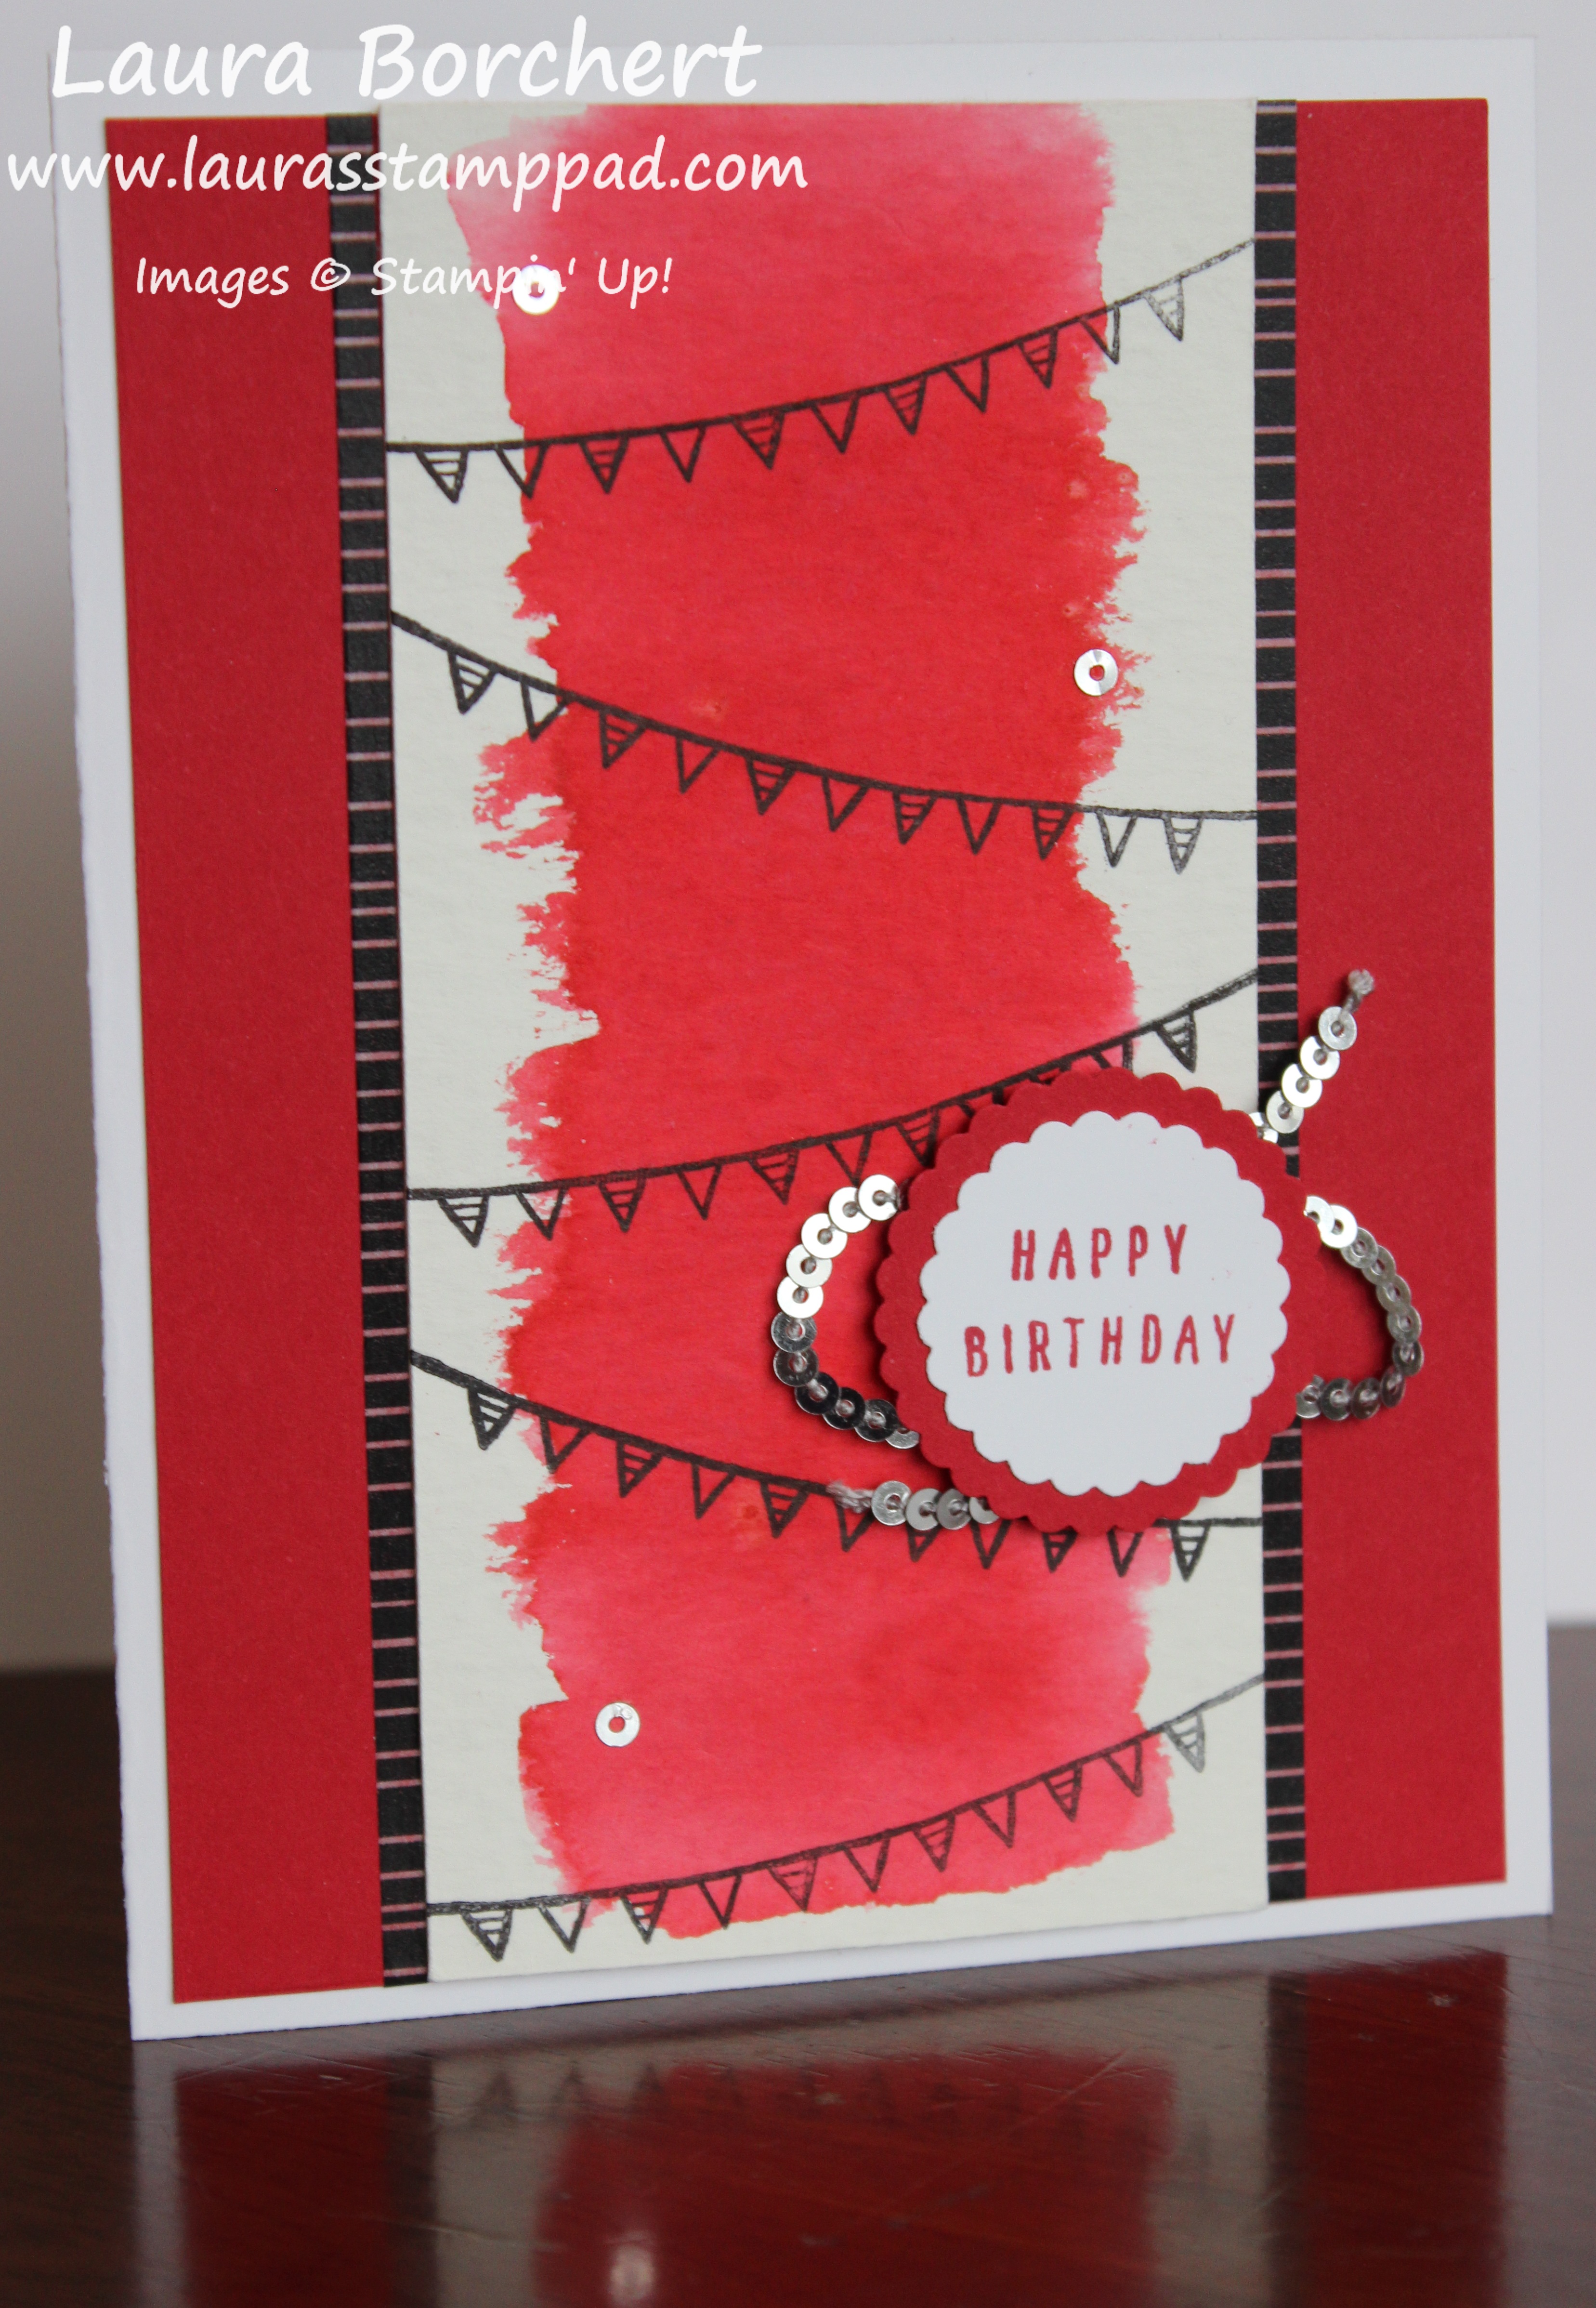
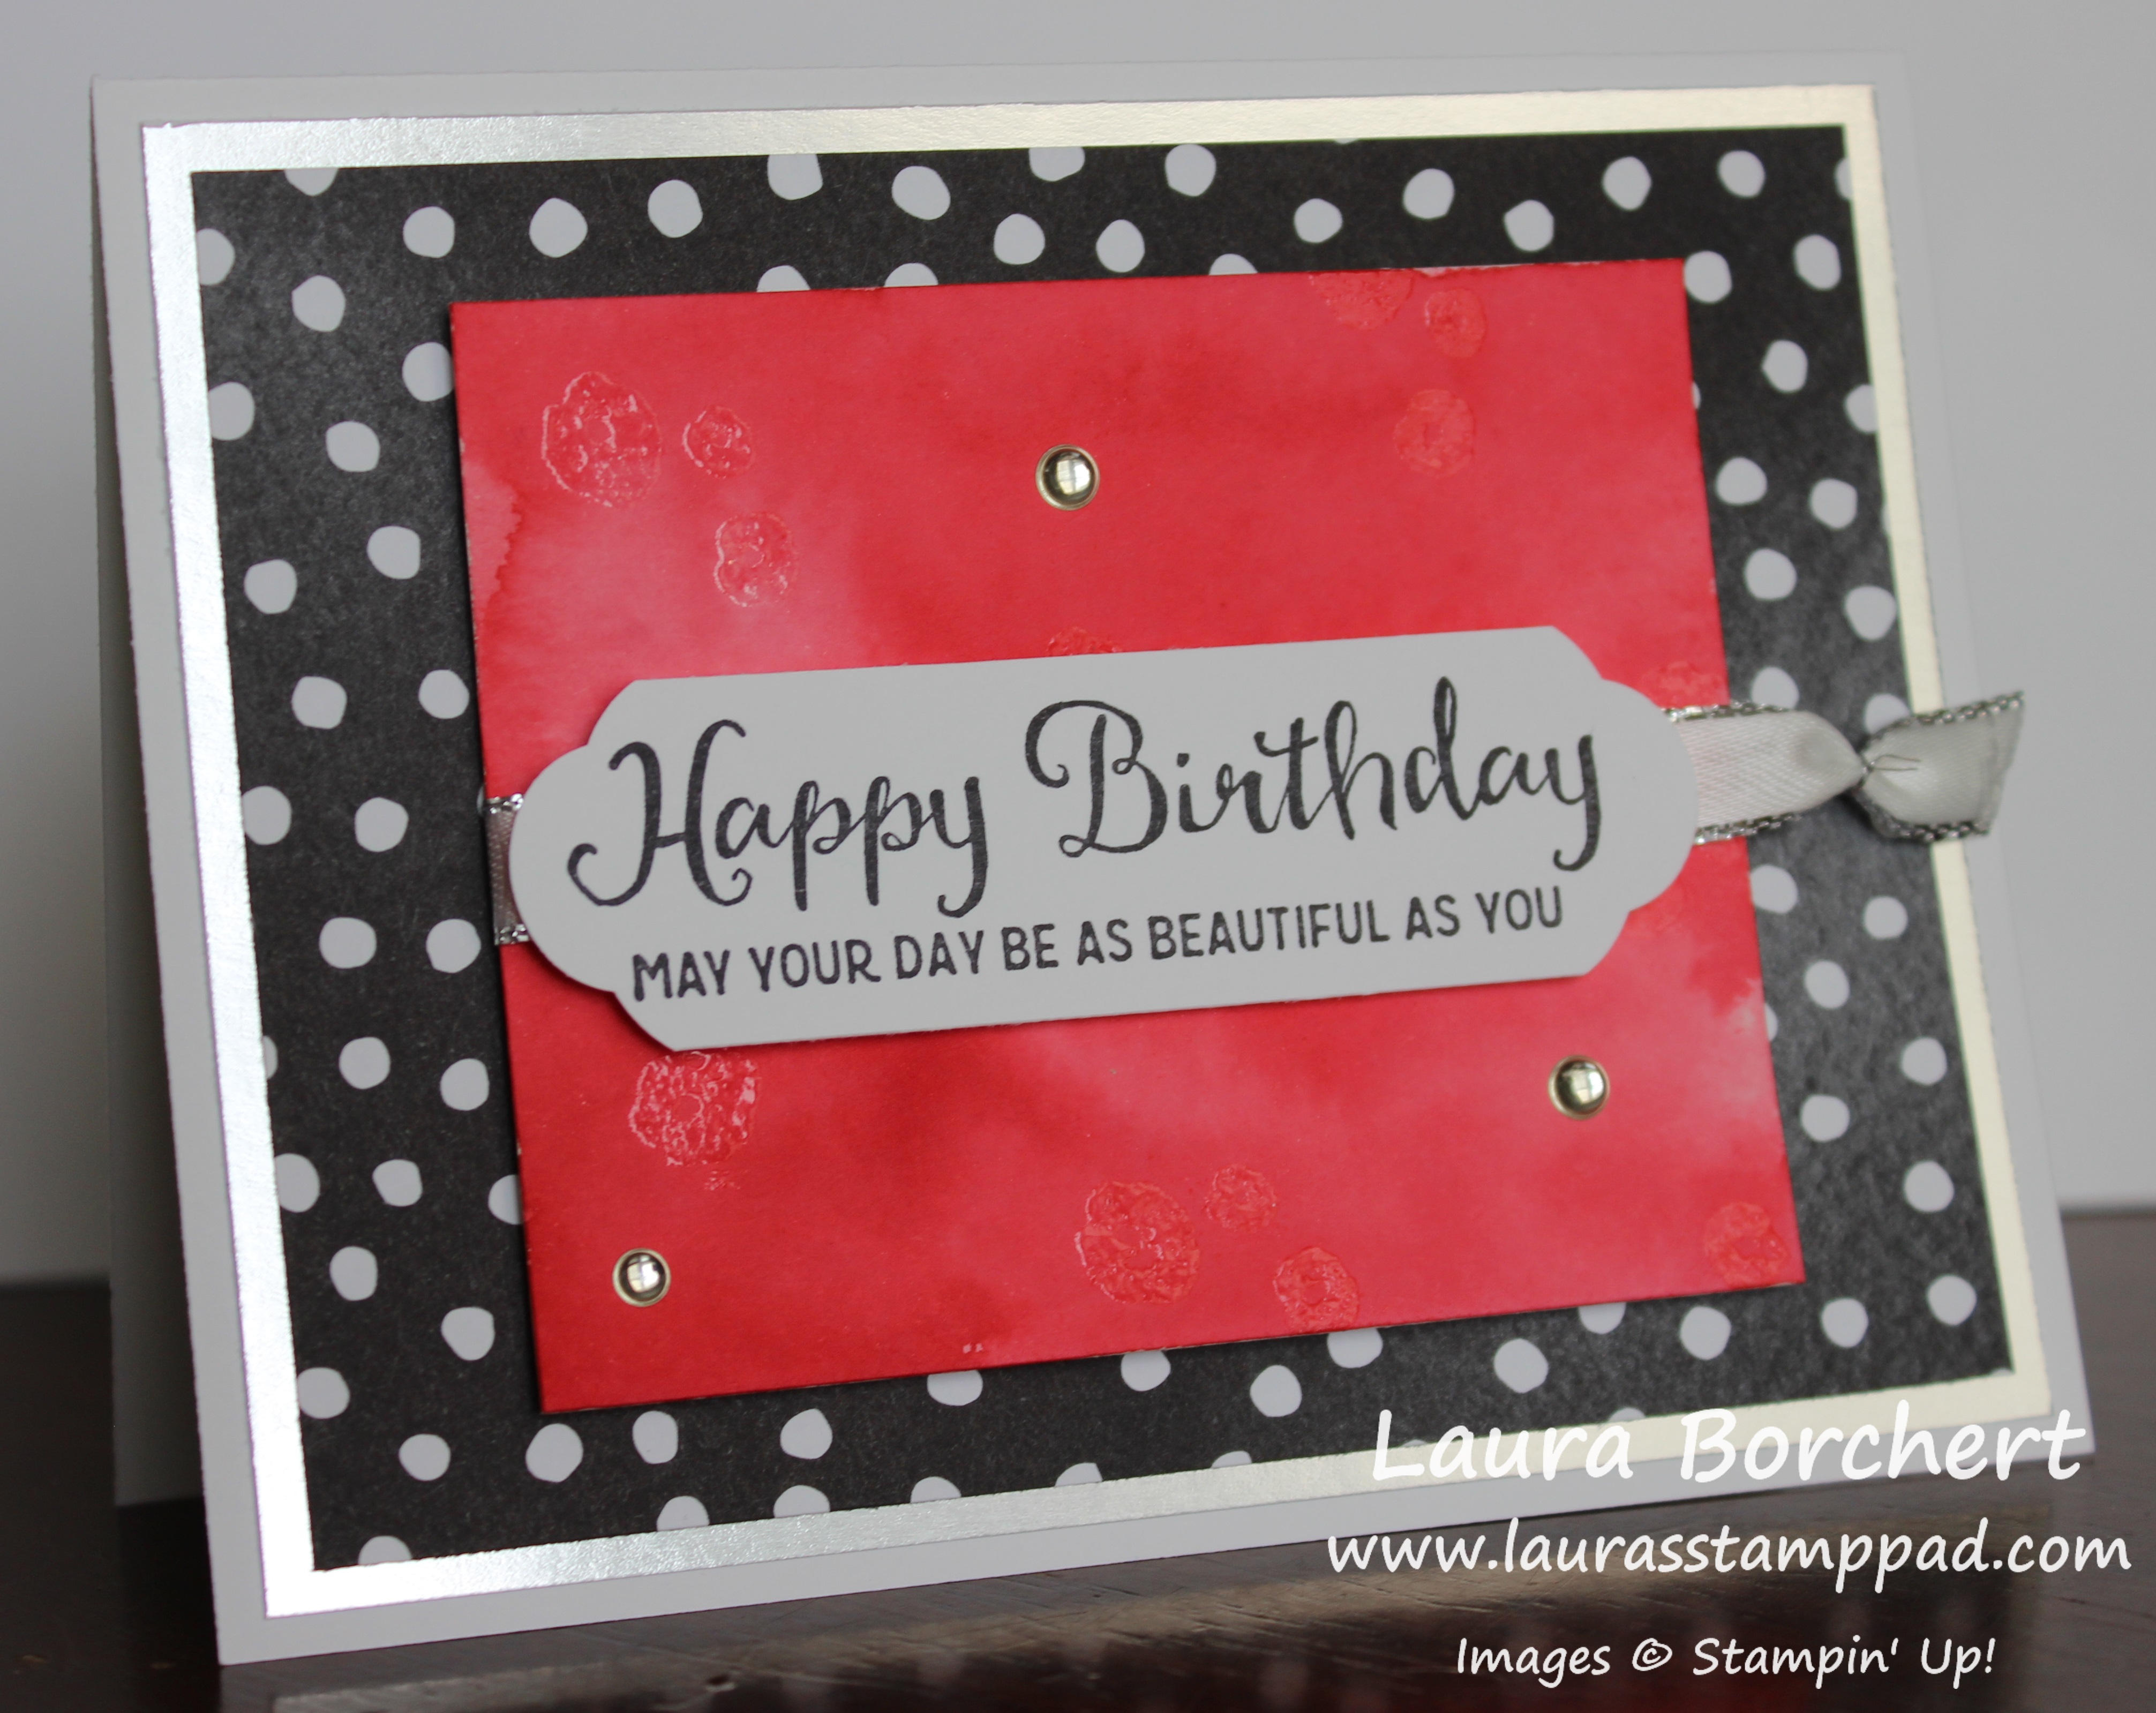
I started with a Whisper White card base. Next, I took a piece of Watercolor Paper (3″ x 5-1/4″) and brushed some water over it as a base with the Aqua Painter. Then I tapped on some Brusho Crystal Colour and mixed it and brushed it side to side with the Aqua Painter. I would recommend adding just a bit of color because it is easier to add more than it is to take some off when it’s too dark. A little bit goes a long way with Brusho as well. It’s super vibrant! If you have no patience (like me), drying it with the Heat Tool really speeds things up, otherwise just set it aside to dry.

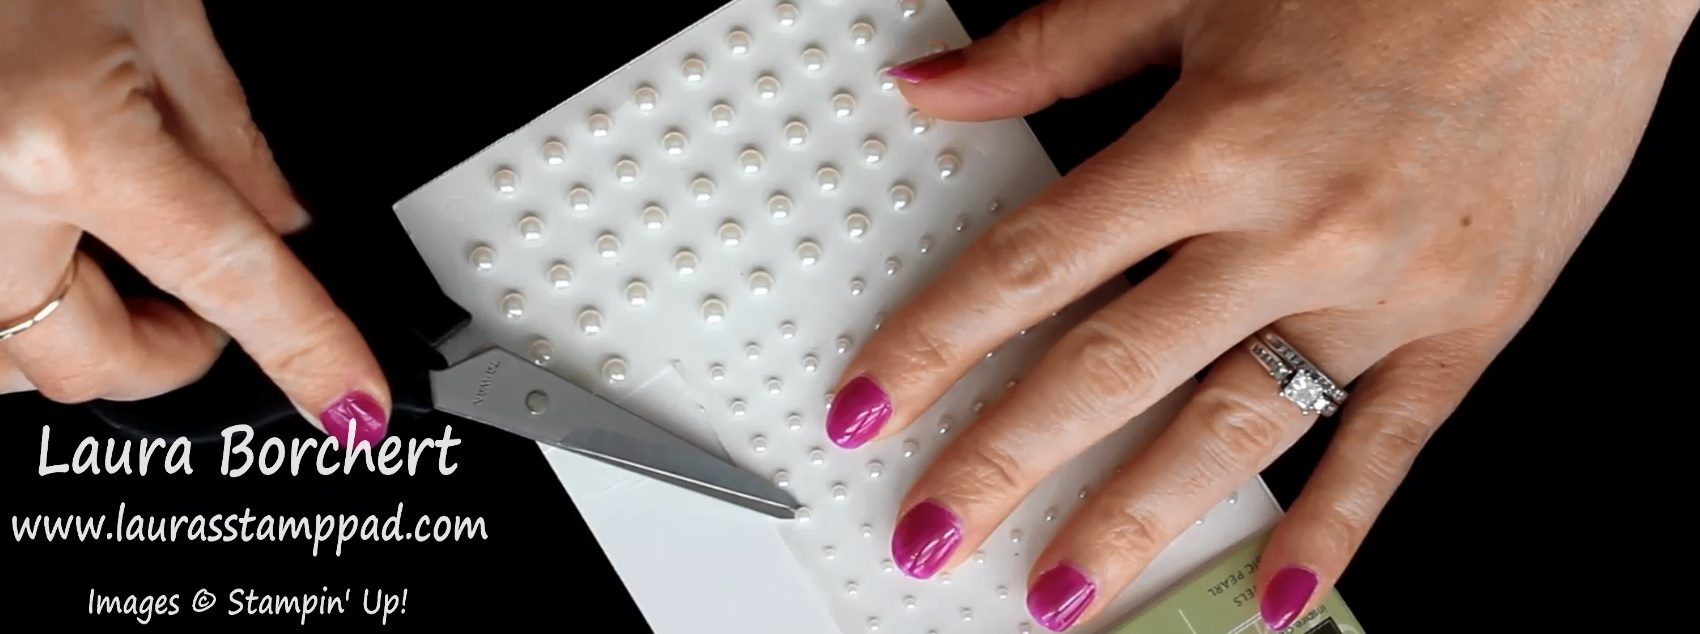
Once it is dry, I placed this piece in my Stamparatus and added the banners from the In The Trees Stamp Set. Using the Stamparatus, for that perfect swag/ I just love how the hinges of the Stamparatus make it so easy to go down the cardstock. I did one swag 3 times skipping a hinge each time and then rotated the image the other direction and stamped twice! Next, I added this to a piece of Real Red cardstock (4″ x 5-1/4″) down the center. Since it is Watercolor Paper and tends to curl, I like to use Tear And Tape for a nice strong, secure hold onto my cardstock. Using the Pick A Pattern Washi Tape pack, I added a little strip to either side of the Watercolor Paper and then added this to the card front!

Sequin Greeting, www.LaurasStampPad.com

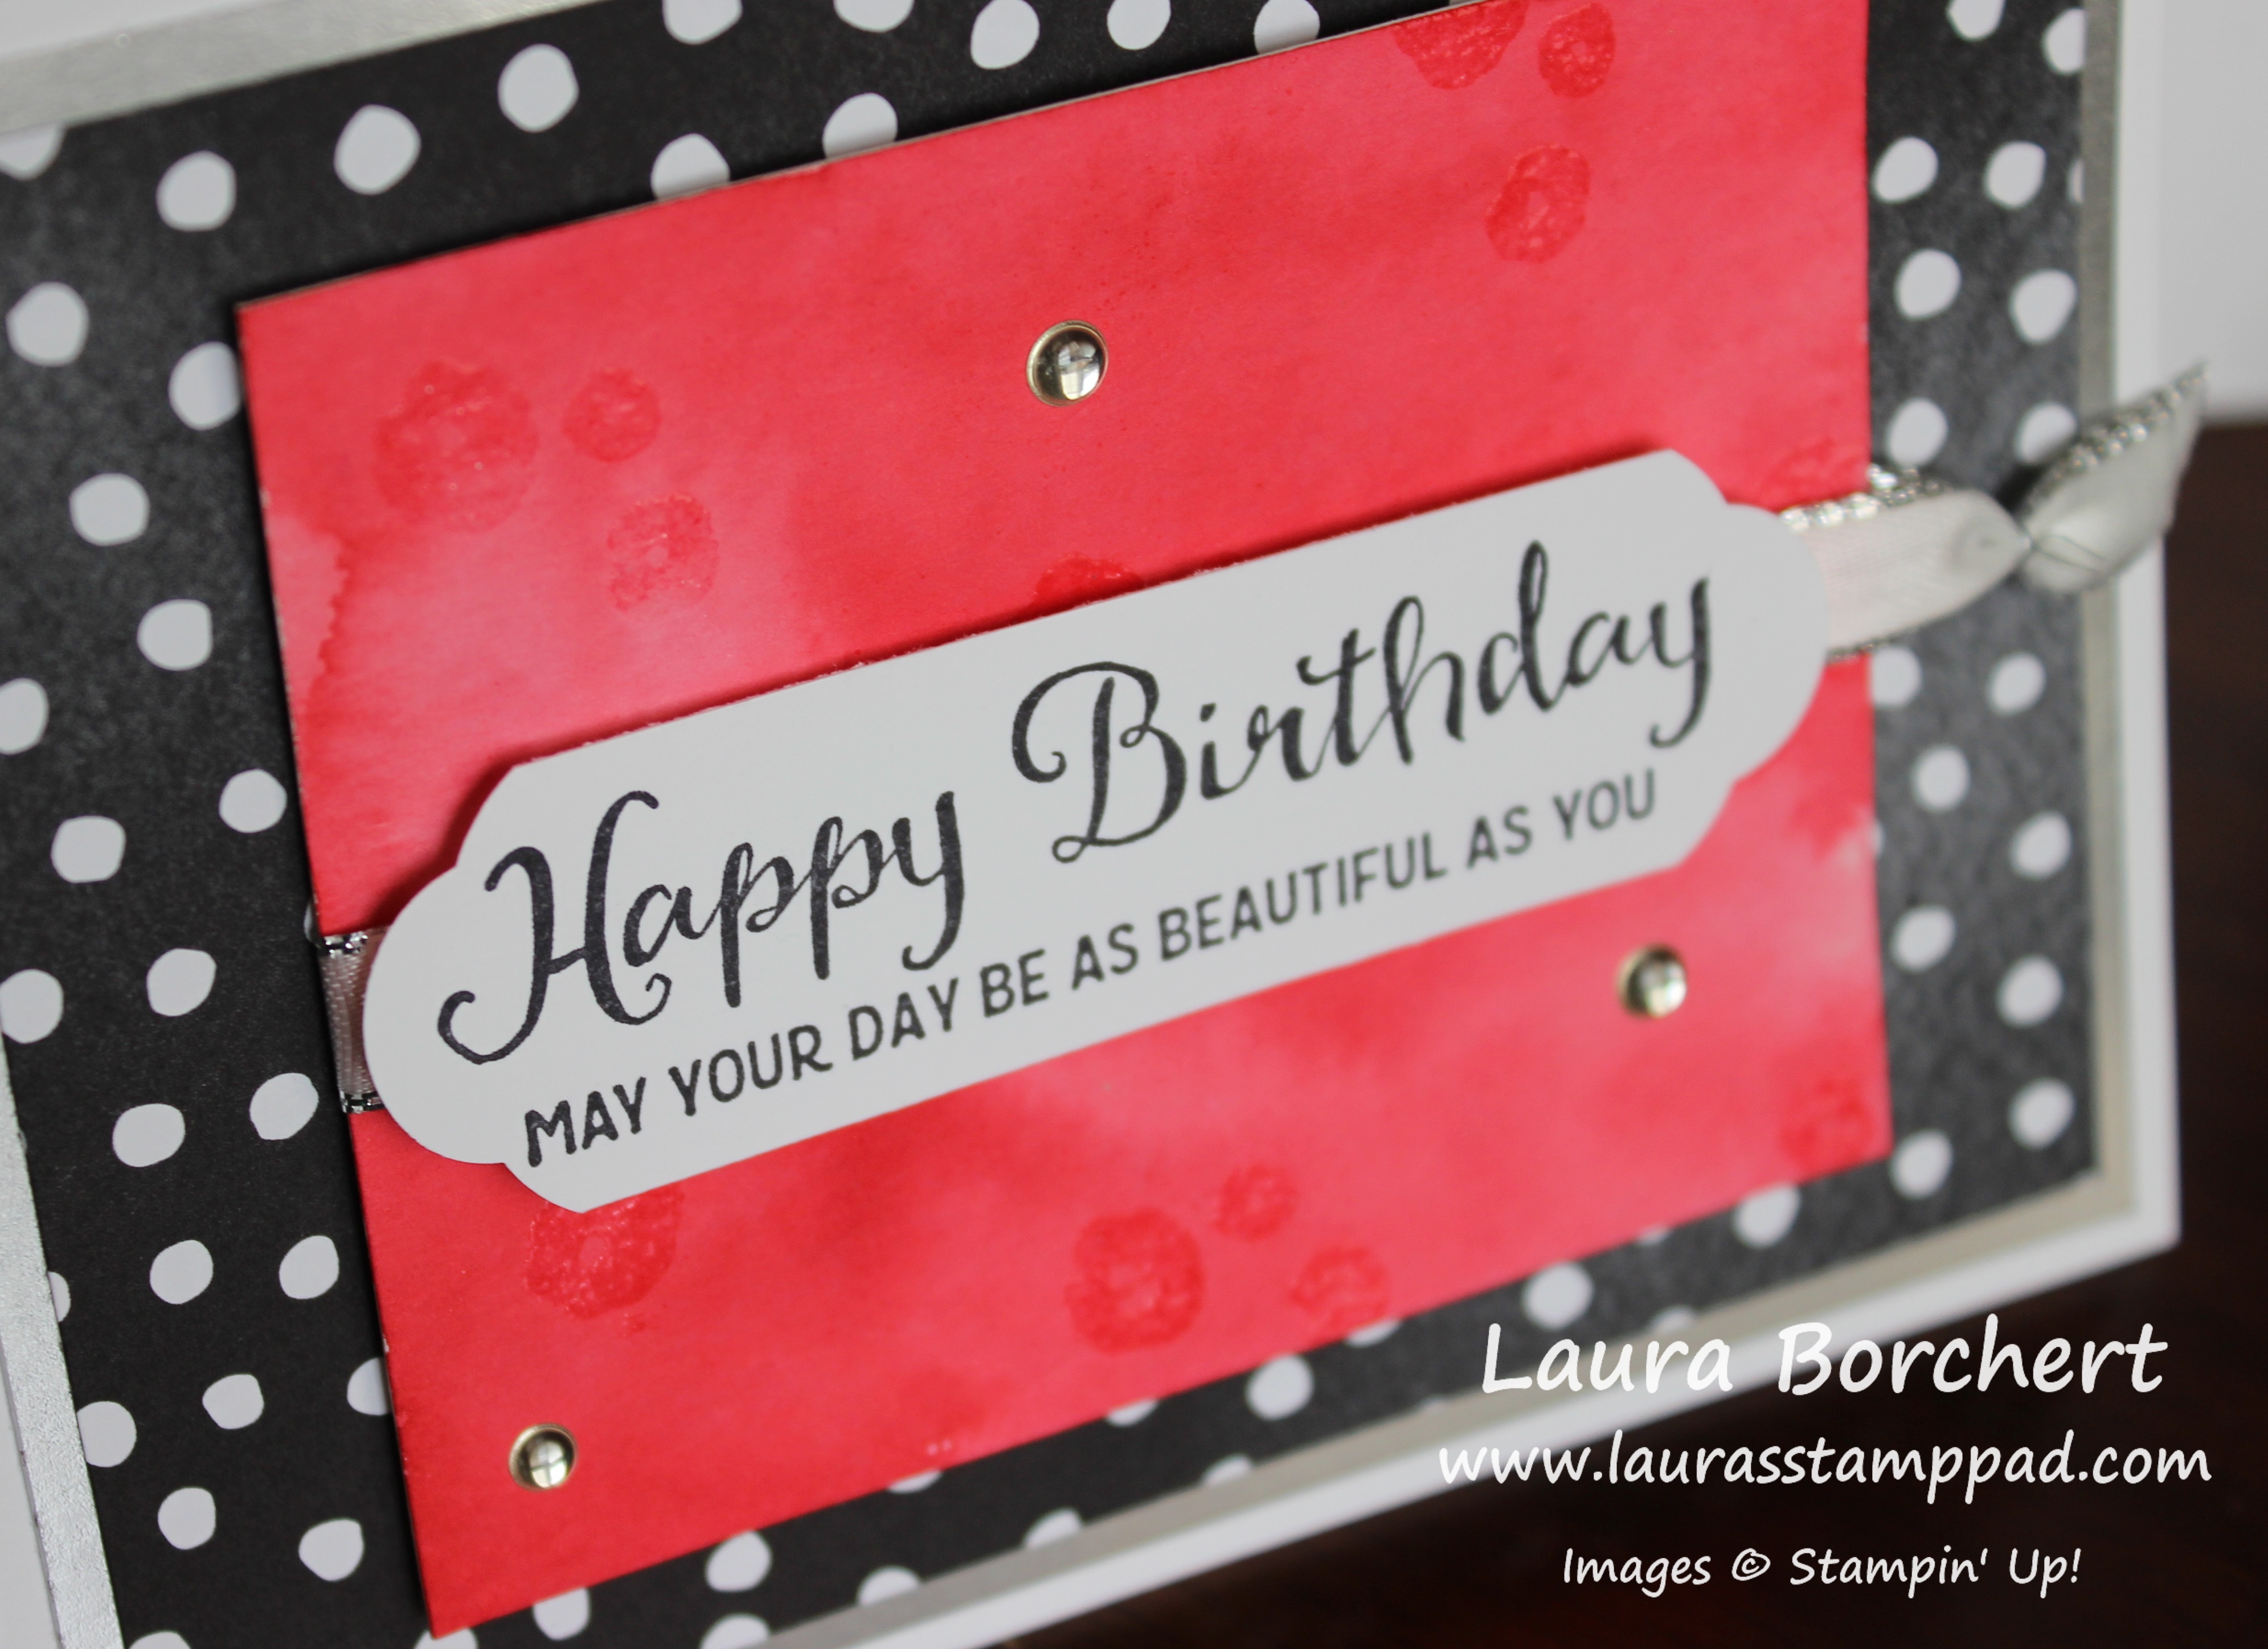
For the greeting, I stamped it from the In The Trees Stamp Set by stamping the happy first, cleaning it, and then the birthday. Next, I punched it out with the NEW 1/8″ and 3/8″ Scallop Circle Punches. Then I laid some Silver Sequin Trim on the back in a “S” shape and secured it with Stampin’ Dimensionals. I added this piece to the card front and using the Fine Tip Glue Pen to add a few loose sequins!

If you would like to see this all in action, check out the Video Tutorial below or click here! Be sure to give the video a thumbs up if you liked it and don’t forget to subscribe if you are new. If you would like a notification when I post a new video, be sure to click the bell right next to the subscribe!!!

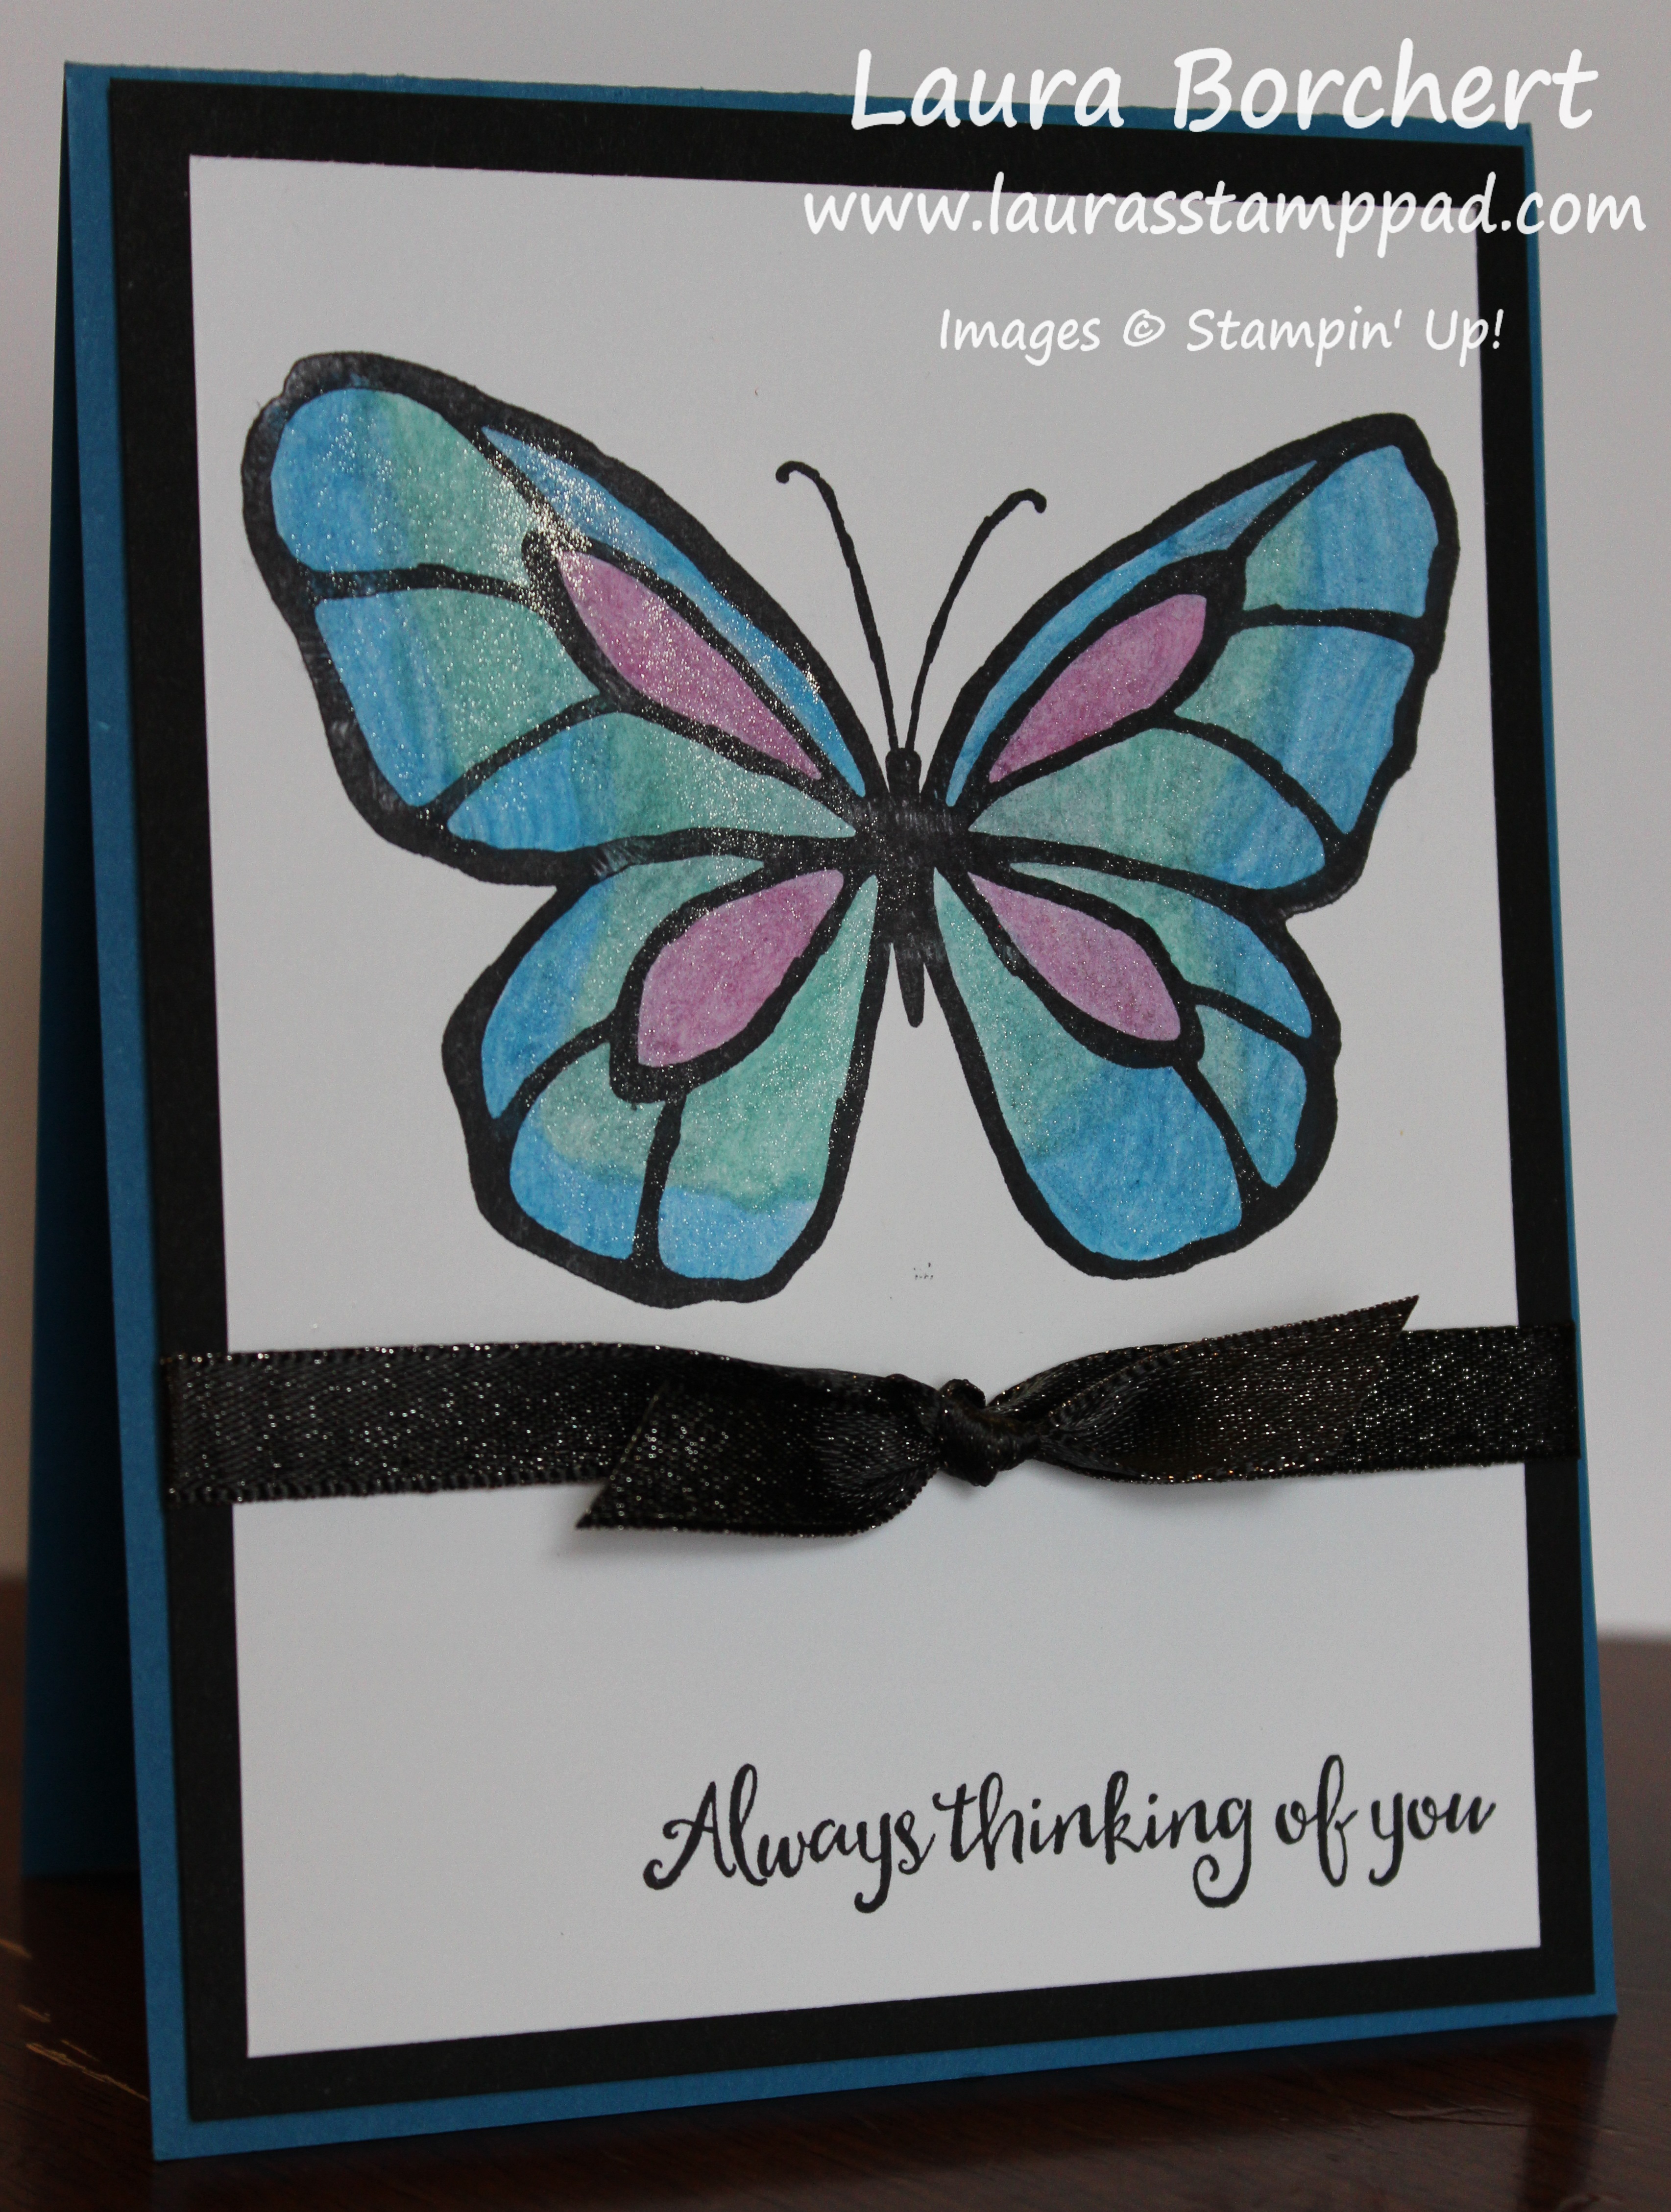
Stay tuned as I have played with a few other colors with this and I’ll be sure to share those soon! What color would you use?? Let me know in the comments below! Also, if you pre-ordered the Stamparatus back in November (during the first opening), you should have received an email yesterday to finalize your order. I’m so excited to start getting these things in your hands. For those in the 2nd pre-order period, yours are coming real soon!!!

Happy Stampin’

~Laura

Product List


Technique Tuesday – Brusho Color Palette!!!

Posted on

Happy Tuesday!!! You all know what that means…..I have a fabulous technique to share with you today!!! I’m showing your how to create a Brusho Color Palette!!! I prefer to have more control and precision with my crafting so I love coloring with Brusho like this!!!

Brusho Color Palette, www.LaurasStampPad.com

I love the rustic look of this card with that metal shine from the silver embossing and bold color from the Brusho Crystal Colour. Let’s get started!!

I started with a Island Indigo card base. Next, I layered on a piece of the Wood Textures Designer Series Paper. For the greeting, I took a strip of Pear Pizzaz cardstock and stamped the greeting from the Beautiful Day Stamp Set in the Occasions Mini Catalog. The greeting was stamped in Island Indigo Ink. Then I took some Linen Thread and wrapped it around my fingers to create the loops. I slid the loops off my fingers and placed them on the back of the greeting. Using Stampin’ Dimensionals, I secured the loops all over the back and made sure the ends were held tight. The greeting was placed on the far right side of the card!

Rustic Flower, www.LaurasStampPad.com

Now for that stunning flower and amazing technique using the Brusho Crystal Colour. I stamped the flower from the Beautiful Day Stamp Set in Versamark Ink onto Watercolor Paper. Then I added Silver Embossing Powder and set it with the Heat Tool. Be sure to firmly stamp the flower since the watercolor paper is textured but of course don’t press so hard that you rock or end up with Versamark Ink all over. 🙂 It’s a delicate balance.

For the color palettes, I took a clear block, tapped a little Brusho Crystal Color onto it and added some drops of water from an Aqua Painter. Then I used the Aqua Painter to color the flower. I used the Brilliant Blue, Moss Green, and Yellow! To be honest, I prefer to use the green in this way because of the color combination used to create the green. I find that when I tap it on the purples and yellows pop too much and I prefer a more green look. After coloring the flower and allowing it to dry, I added some Stampin’ Dimensionals and placed it on the left hand side of the card!

If you would like to see this all in action, check out the Video Tutorial below or click here! Be sure to give the video a thumbs up if you liked it and don’t forget to subscribe if you are new. If you would like a notification when I post a new video, be sure to click the bell right next to the subscribe!!!

Happy Stampin’
~Laura
Product List


Black & White With A Pop of Red!!!

Posted on

Last week, I showed off the NEW Brusho Crystal Colour and ways to color with it!!! This fabulous black & white with a pop of red was created using the Brusho Crystal Colour as well! That vibrant background

Black & White With A Pop of Red, www.LaurasStampPad.com

I started with a Whisper White card base. Next, I layered on a piece of Silver Foil  Paper measuring 4″ x 5-1/4″ and Petal Passion Designer Series Paper (3-3/4″ x 5″). This can all be done while waiting for the focal point to dry! 🙂

 Red Brusho Crystal Colour, www.LaurasStampPad.com

Using a piece of Watercolor Paper measuring 3-3/4″ x 3″, I wet the entire thing with an Aqua Painter. Then I tapped the Red Brusho Crystal Colour over the top. A little bit goes a long way…..trust me. I love bold vibrant colors and like 8 drops of the powder is perfect! At this point, I used the Aqua Painter to color in the entire piece of paper. If you wish to have a more swish swish look or just the dotted looked, leave it as is. It really is fun how many different ways it can be used! After allowing it to dry, I stamped the dots from the Beautiful Day Stamp Set in Versamark all over. Then I poured Clear Embossing Powder over the top and set it with the Heat Tool. This is how I got those shiny dots!

Spot the Dot, www.LaurasStampPad.com

Next, I added some Silver Metallic Edge Ribbon around the card and tied the two ends on the right hand side with a little bit of Silver Metallic Thread. For the greeting, I stamped it from the Beautiful Day Stamp Set in Basic Black  Ink. I used the Pretty Label Punch to get those nice rounded ends. After stamping the greeting, just turn the punch upside down and slide the greeting in from the top so only one side is in the punch. Punch and then rotate to do the other side. I added the greeting with Stampin’ Dimensionals and used them to add the watercolor paper to the card front!

Check out the Post & Video I posted last week to see more on Brusho Crystal Colour and tips and tricks!

Happy Stampin’

~Laura

Product List


Technique Tuesday – Blending Butterflies!!!

Posted on

Happy Tuesday!!! You all know what that means…..I have a fabulous technique to share with you today! I’m blending butterflies with Watercolor Pencils and a Blender Pen and oh how stunning do they look……

Blending Butterflies, www.LaurasStampPad.com

Don’t you think this looks super real and gorgeous?? I love it! Then I did the blue/purple one for the video and fell deeper in love!!! There are so many ways to color stamped images and while the latest one is fun, sometimes its great to play with your favorite. I have colored this butterfly with the New Brusho Crystal Colour (see here) and now I did this one. Honestly, I think I prefer Watercolor Pencils! I try to mix things up and try it all to show you!

The card base is Daffodil Delight. Then, I took a piece of Whisper White (3-7/8″ x 5-1/8″) and stamped  the butterfly and greeting from the Beautiful Day Stamp Set from the Occasions Mini Catalog! I used Archival Black Ink since I am watercoloring. Next, I used the Watercolor Pencils and just added in some color. I used Real Red, Pumpkin Pie, and Daffodil Delight for this card!

Using Blender Pens, www.LaurasStampPad.com

After adding all the color, I started with the lightest and blended with the Blender Pen. I kept the yellow in place in the center. Then I blended and smeared around the Pumpkin Pie. Making sure to clean the pen tip in between so the color didn’t super mix together. Then I blended the red starting on the outside and then smearing with the orange in middle. I just love how it turned out!

Tri Color Butterfly, www.LaurasStampPad.com

Next, I layered this piece onto some Basic Black measuring 4″ x 5-1/4″. I tied some Basic Black Shimmer Ribbon around it between the butterfly and greeting for a little pop and texture. Then I added this piece to the card front with Stampin’ Dimensionals!!!

Blue Butterfly, www.LaurasStampPad.com

Here is the finished card from the one I did on the video below! I used Pacific Point, Bermuda Bay, and Rich Razzleberry for this one! LOVE IT!!! Which one is your favorite – Yellow/Red/Orange or Blues/Purple?? Let me know in the comments below!

If you would like to see this all in action, check out the Video Tutorial below or click here! Be sure to give the video a thumbs up if you liked it and don’t forget to subscribe if you are new. If you would like a notification when I post a new video, be sure to click the bell right next to the subscribe!!!

Happy Stampin’

~Laura

Product List


Technique Tuesday – Brusho Crystal Colour!!!

Posted on

Happy Tuesday!!! That means I have a fabulous technique to share with you today! I’m showing you the NEW Brusho Crystal Colour from the Occasions Mini Catalog!

Brusho Crystal Colour, www.LaurasStampPad.com

I love the bright vibrant color that this stuff creates! Look at that stunning butterfly!!! Gorgeous!

I have found that Watercolor Paper works best with the Brusho Crystal Colour since it requires a decent amount of water to dissolve it! First, I stamped the butterfly from the Beautiful Day Stamp Set in Versamark Ink and added Gold Embossing Powder! I set it with the heat tool! Now for the coloring fun, I used the Aqua Painter to wet the area of the butterfly. Using the Red (Brilliant Red), Orange (Gamboge), and Yellow colors, I tapped some onto the butterfly. With yellow on the outside, then orange, and red in the middle. The thing about tapping it on is that you don’t really know where it is going to fall or how much. This is one of those techniques that no two are going to come out the same!

Beautiful Butterfly, www.LaurasStampPad.com

After tapping the powder on, I used the Aqua Painter to blend it all together. I did wipe off the brush tip after each color to try to keep a nice fade and not just blend them all together! Be sure to allow it to dry before assembling the card. When I don’t have a lot of patience, I used the Heat Tool!

Golden Butterfly, www.LaurasStampPad.com

Next, I layered the butterfly onto Pumpkin Pie (4″ x 3-1/4″) and then Real Red (4-1/4″ x 3-3/4″) cardstock! The Real Red was cut with more on the bottom so I could add the Double Stitched Daffodil Delight Ribbon! Before adding this to the Whisper White card base, I stamped the dots from the Beautiful Day Stamp Set all around in Daffodil Delight Ink! Of course, I added the butterfly layers to the card front with Stampin’ Dimensionals for a little bit of texture!

If you would like to see this all in action, check out the Video Tutorial below or click here! Be sure to give the video a thumbs up if you liked it and don’t forget to subscribe if you are new. If you would like a notification when I post a new video, be sure to click the bell right next to the subscribe!!!

Happy Stampin’

~Laura

Product List


Laura’s Craft Room Tips & Tricks!!!

Posted on

Hello Stampers! We all love to craft. We all go through times where we want to throw something away because it’s frustrating! Today, I’m sharing some Craft Room Tips and Tricks of mine to help you with a few frustrations you might have! I hope you find these useful!!!

Fine Tip Glue Pen, www.LaurasStampPad.com

My first one is with the Fine Tip Glue Pen. This stuff is amazing for adhering small objects or delicate die cuts! It can be frustrating trying to put the needle back in it though. I have found that placing your find behind the tip and using that as a guide to slide the needle down into the tip helps. If you hold it up in the air and try to get it in, it takes much longer trying to get things lined up!

Clear Block Color Palette, www.LaurasStampPad.com

When you need some color to use with the Blender Pen or Aqua Painter, just press a clear block into the ink pad! Then you have some color. Many like to press the ink pad into the lid but I find that messy. Also, sometimes I don’t want the ink pad open for the entire time I’m coloring. This way I have my color and I can add drips of water to dilute the color or not. Once I’m done with the color palette, I simply run it under water to clean, use a baby wipe, or wipe it with rubbing alcohol and a paper towel!

Craft Room Tips & Tricks, www.LaurasStampPad.com

The next tip is about cleaning your cleaning pad!!! I know that might sound odd but it’s true. After using the Stampin’ Scrub for a while, you might notice that cleaning your stamps on there is making them dirtier than before. That means it is time to clean the Stampin’ Scrub! Red really seems to stick to the pad so after using red a lot, it’s a good idea to clean it! Simply run it under water until the water runs clean. Sometimes I’ll add a little squirt of hand soap but it’s not really necessary! After rinsing all the color out, let it dry and it’s good as new again!

Scissor Tweezers, www.LaurasStampPad.com

This tip is one that I use a lot. Sometimes it’s hard to get those little Rhinestones and Pearls on your project and perfectly placed (cough cough on that ink spot that somehow appeared). I have found that using Paper Snips as little tweezers really helps. Simply snip under the rhinestone or pearl, lift up and place it exactly where you want it on your project. Then put your finger on the top to hold it there and slide the scissors out. Of course, you could use tweezers but the bonus to this is that the Paper Snips have multiple uses and they are always on my craft table where as I have tweezers in my craft room…..couldn’t tell you where though!

Blender Pen Tip, www.LaurasStampPad.com

It happens….no worries! The tip of the Blender Pen smooshes down into the barrel. It is not a lost cause! Simply take a pair of tweezers and pinch the end and lightly pull. This will bring the marker tip back out of the barrel and you can use the pen like normal again. I’m not sure if it’s the same pen or 2 different ones but I have had this happen twice now and this trick works  perfectly!

Post It Note Tape, www.LaurasStampPad.com


Post It Notes or Post It Note Tape is your best friend with die cutting! This stuff is sticky enough to hold the die in place but not so sticky that it will rip your cardstock. I use this to hold framelits in place. It’s always super frustrating to stamp an image and then have it cut wrong. Then you have to start all over again. Another way I use it is for lining things up. For example, the quilt die was centered on my card and rather than measuring each time, I added the Post It Note Tape to either side and put a pen mark for the edge of the paper. Then I added this to each card to die cut and knew it was lined up! I can usually get 5+ cranks through the Big Shot before the piece starts to fall apart or not be sticky.

If you would like to see this all in action, check out the Video Tutorial below or click here! Be sure to give the video a thumbs up if you liked it and don’t forget to subscribe if you are new. If you would like a notification when I post a new video, be sure to click the bell right next to the subscribe!!! Let me know if you have any tip and tricks to share in the comments below!

Happy Stampin’

~Laura

Product List


Technique Tuesday – Stampin’ Blends!!!

Posted on

Happy Tuesday everyone! Today, I have a fabulous technique to share with you and that uses the Stampin’ Blends.

Stampin' Blends, www.LaurasStampPad.com

So of course, any technique can have its modifications so I’m going to show you my technique today. Try it out and try a few other ways to see what works best for you!

I have found that when using the stamping blends, I prefer to go Light, Dark, Light or sometimes Dark and then Light. So let’s get started on what I mean. First, I stamped the image from the Color Me Happy Stamp Set in Memento Black Ink. Memento Ink is necessary because it won’t bleed with the alcohol marker.

Next, I took the Light Pumpkin Pie and colored in the center. Then I colored the edges with the Dark Pumpkin Pie Marker. Finally, I went back in with the Light and blended the colors so they didn’t look so sharp like in the middle photo. I simply color in a circular motion around the area to blend it together. You don’t want to do this for a really long time or the paper will get super saturated. If you feel this is happening, just wait a bit for it to dry completely and then go back. I also find that sometimes I need to stop and let it dry for second and then go back and look at it. Sometimes when I’m working on one, I’m not happy with the look but move on and then look at it later and wonder why I didn’t like it.

Birdie Blends, www.LaurasStampPad.com

For these birdies, I let the stamped image guide me along. I used the Bermuda Bay Stampin’ Blends and Pumpkin Pie Stampin’ Blends for the one on the left. Pool Party and Pumpkin Pie for the one on the right. Using the dark marker, I went around the edge, dotted all of the dots, and went along all the lines on the wing. Then I filled in the entire tail with the dark. After that, I went back through and filled in with the light marker. This is one that I stopped after filling it in and did the beak and feet. Then I went back and swirled around to blend in any areas I thought looked too distinct. I stayed away from the center of his belly to keep that the lightest. Some of my birdies achieved this more than others. Each one is going to come out different just because it is handmade! 🙂

Shades of Flowers, www.LaurasStampPad.com

For these flowers, I did a little blending and a little selective coloring. The middle flower was just colored in the light Calypso Coral Stampin’ Blends and then dark in those folded tips and the center. The other two flowers were blended. I did the one on the left with all edges of the petals outlined in the dark marker and then blended in with the light marker. The flower on the right was the opposite with light on the edges. That one was a little harder to stay away from the edges. I colored it with the Light first and then Dark and then back with the Light. Just have fun with it and try lots of different variations. Another fun option is mixing colors….Cherry Cobbler and Daffodil Delight…..Bermuda Bay and Pool Party…….Pumpkin Pie and Cherry Cobbler. Let me know what combination you would use in the comments below!

If you would like to see the unboxing and reveal of this kit, check out the Video Tutorial below or click here! Be sure to give the video a thumbs up if you liked it and don’t forget to subscribe if you are new. If you would like a notification when I post a new video, be sure to click the bell right next to the subscribe!!!

Happy Stampin’

~Laura

Product List


Color Me Happy Project Kit!!!

Posted on

The Color Me Happy Project Kit just became available on November 1st. It is super fun and fabulous. This kit uses the NEW Stampin’ Blends alcohol markers!!

Color Me Happy Project Kit, www.LaurasStampPad.com

These cards are super cute and a great way to get started with Stampin’ Blends. I love how the images help me with shading and coloring. Also, I have to say that the envelopes in this kit are like beyond amazing. They are colorful and gold trimmed! Amazing!!!

Purple & Pink Flowers, www.LaurasStampPad.com

Okay, so of course this is my favorite because it has flowers. I colored some Rich Razzleberry and some in Pink Pirouette. I simply colored all around the borders of the petal with the dark marker and then blended and filled in with the light color. That gold trim has a sticky back which makes it super easy to use but be careful with wrinkles!

Paper Lanterns, www.LaurasStampPad.com

This card is my second favorite because I think it looks like a great Man Card and I love those colors! The paper lanterns were super fun and easy to color. TIP: Be sure to stamp a lantern in the place of the popped up lantern so you still have the string and tail. (opps on my first one!) Another tip would be to stamp rather high up so that your string hits the string going side to side. Of course, if you are a bit off, you can always draw it in with a marker! 🙂

Party Line of Lanterns, www.LaurasStampPad.com

Again with these lanterns, I simply colored the outer edge with the darker color and then blended and filled in with the lighter color!

Color Me Happy Stamp Set, www.LaurasStampPad.com

This card I super love because that greeting is fabulous and scroll-y and has a drop shadow. There are so many coloring options for that. You could color it the same color in light and dark or mix and match. Eeeee So much fun and you all know I send lots of thank you cards each month. (Anyone who orders from me each month receives a card from me.)

Thank you, www.LaurasStampPad.com

That gold trim around the greeting is so fabulous and the color combination for this card is just amazing!

Little Birdies, www.LaurasStampPad.com

I love this little birdies on this card but that greeting was a pain in the rear. Thank goodness, Stampin’ Up gives you extra labels. Since it is a solid image, be sure to ink it up really well and stamp on a piece of scrap a few times. This helps rough up the stamp and allow for the ink to cover the stamp much better.

Colored in Birdies, www.LaurasStampPad.com

For the birdies, I colored in dark all around the edge and on each dark mark. Also, I colored in the tail with the dark. Then I took the light marker and colored in the center and blended it all together. These birdies are just beautiful and would make a fun love birds card for a wedding, anniversary, engagement, etc.

Which one is your favorite? Let me know in the comments below!

If you would like to see the unboxing and reveal of this kit, check out the Video Tutorial below or click here! Be sure to give the video a thumbs up if you liked it and don’t forget to subscribe if you are new. If you would like a notification when I post a new video, be sure to click the bell right next to the subscribe!!! Stay tuned for more videos on Stampin’ Blends!!!

Happy Stampin’

~Laura

Product List


Front Door Is Ready For Fall!!!

Posted on

Happy Monday!!! My front door is ready for Fall…..well at least this card is!!!

Front Door Is Ready For Fall, www.LaurasStampPad.com

This card is a bit more detailed than I usually make but it sure is fabulous and turned out amazing!!! Change up the decorations around the door and you have a card for every occasion!

I started with a Very Vanilla card base. Next, I took a piece of Cherry Cobbler (4″ x 5-1/4″) and ran it through the Big Shot in the Brick Wall Embossing Folder. To give a little color and texture to the bricks, I lightly brushed the bricks with a Sponge Dauber and some Cherry Cobbler ink. Then I added this to the card front!

Inside Front Door, www.LaurasStampPad.com

Now for that cute door. I stamped the door image from the At Home With You Stamp Set in Early Espresso onto the Wood Textures Designer Series Paper! Then I die cut it with the coordinating At Home Framelits (Bundle & Save 10%). Be sure that the framelit that creates the open door is on the correct side. You don’t want the door to open backwards. I layered  a piece of Very Vanilla behind the door and stamped the greeting on the inside in Cherry Cobbler Ink.

Front Porch Fall Flowers, www.LaurasStampPad.com

The flowers were all stamped on scrap vanilla cardstock in Basic Gray Archival Ink. Then I used Blender Pens and ink from the ink pads to color everything! I used Cherry Cobbler, Early Espresso, Pumpkin Pie, Crushed Curry, and Garden Green! It turned out perfect, I think. I added these to the card front with Stampin’ Dimensionals for some texture! Just fabulous!!!

Do you like to color with Blender Pens or an Aqua Painter? Let me know in the comments below!

Happy Stampin’

~Laura

Product List


Quick & Simple Watercolor Christmas!!!

Posted on

This quick & simple Watercolor Christmas card is perfect for making multiples and yet super adorable and made with love!

Quick & Simple Watercolor Christmas, www.LaurasStampPad.com

I started with an Old Olive card base. Next, I took a piece of Very Vanilla measuring 4″ x 5-1/4″. I stamped the greeting and trees from the Watercolor Christmas Stamp Set. The greeting was stamped in Cherry Cobbler Ink and the trees in Basic Gray Archival Ink. I like the softer look of gray than black. Then, I took the Old Olive Watercolor Pencil and added color to each tree. Using the Blender Pen, I smeared the color around and filled in the trees. Once I was finished with the trees, I added it to the card base. To finish it off, I added some Cherry Cobbler Double Stitched Ribbon around the top. See how simple that was? This card is perfect for making multiples this season!

Don’t forget there are only a few days left of the Buy 3, Get 1 Free Designer Series Paper Special. Also, orders over $75 will earn the Free Stamp Set of the Month from me. This month you get to pick from the Daisy Delight Stamp Set or Graceful Garden Stamp Set. You will also earn Laura’s Loyal Stampers Stickers once your order hits $40!

If you would like to see this all in action, check out the Video Tutorial below or click here! Be sure to give the video a thumbs up if you liked it and don’t forget to subscribe if you are new. If you would like a notification when I post a new video, be sure to click the bell right next to the subscribe!!!

Happy Stampin’

~Laura

Product List