Creating a Double Fold Card!!!

Posted on

Happy Tuesday!!! You know what that means! I have a fabulous technique to share with you today!!! We are creating a double fold card and it is beautiful!!!

Creating a Double Fold Card, www.LaurasStampPad.com

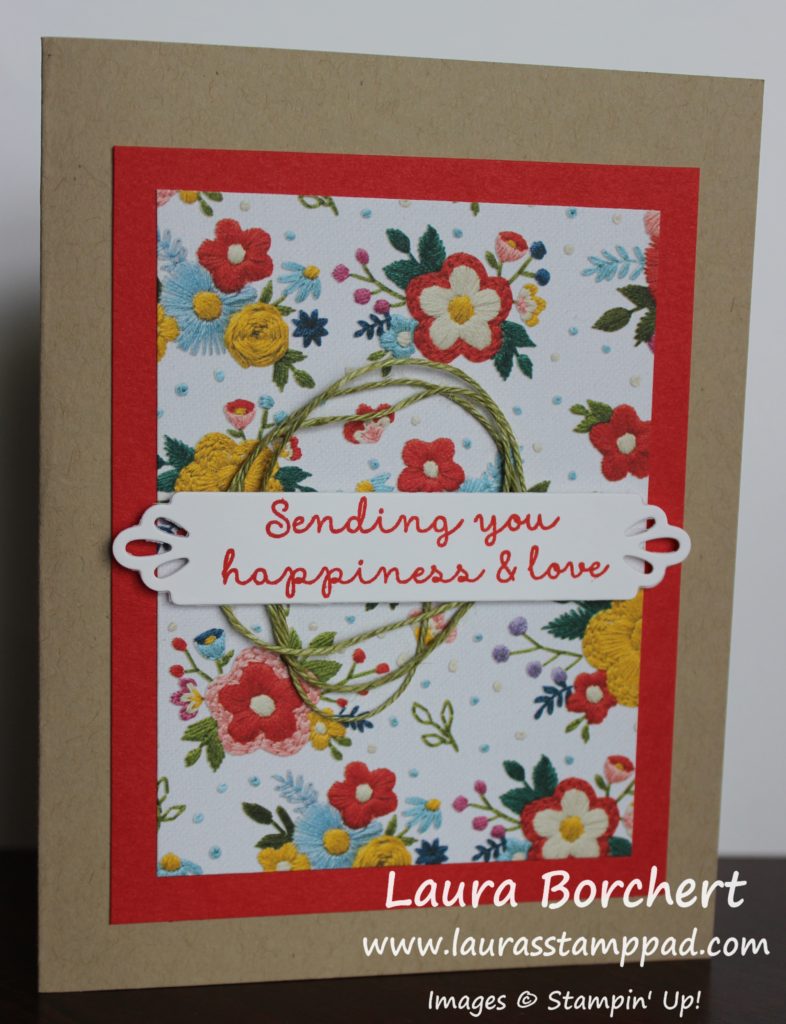
I used the Perennial Essence Suite and I love how it turned out. The little flower piece opens to the right and then the designer paper piece opens to the left! It’s super fun! Also, the flower is all blingy with Wink of Stella. This photo just doesn’t show how amazing this card is!

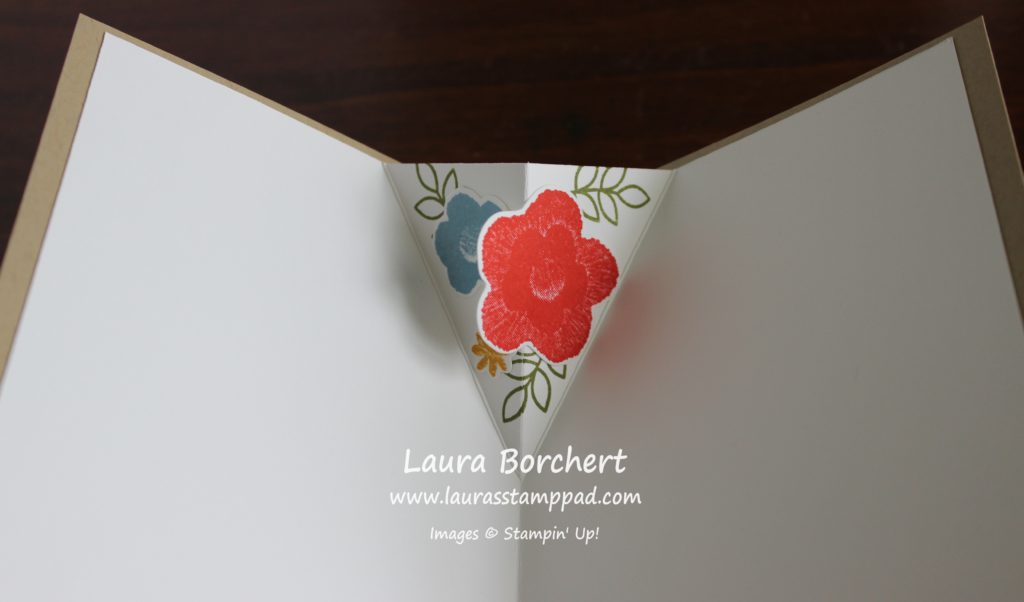
I started with a card base of Purple Posy measuring 5-1/2 x 7-1/4. So this is like a normal card base but with a little 1-1/4″ piece taken off the front. Next, I layered on the Blackberry Bliss (5-1/4″ x 2-3/4″) and Perennial Essence Designer Series Paper (5″ x 2-1/2″). For the inside piece, I stamped 3 flowers from the Floral Essence Stamp Set along the left hand side of a piece of Whisper White (4″ x 5-1/4″). I found that stamping the middle flower first and then the two side ones worked best for spacing!

For the 2nd fold out piece, I started with a piece of Purple Posy measuring 3″ x 6″ and I folded it in half. Next, I layered on a piece of Blackberry Bliss measuring 2-3/4″ x 2-3/4″. On the 2-1/2″ square of Whisper White, I stamped another one of those big flowers and colored it with Stampin’ Blends. I used the Blackberry Bliss Dark Marker for all of the lines and accents on the flower. Then I went over it and filled in with the Blackberry Bliss Light Marker. For the center and greeting, I stamped them with Crushed Curry Ink. To finish it off, I added Wink of Stella all over it. #SafeGlitter 🙂

Floral Essence Stamp Set, www.LaurasStampPad.com

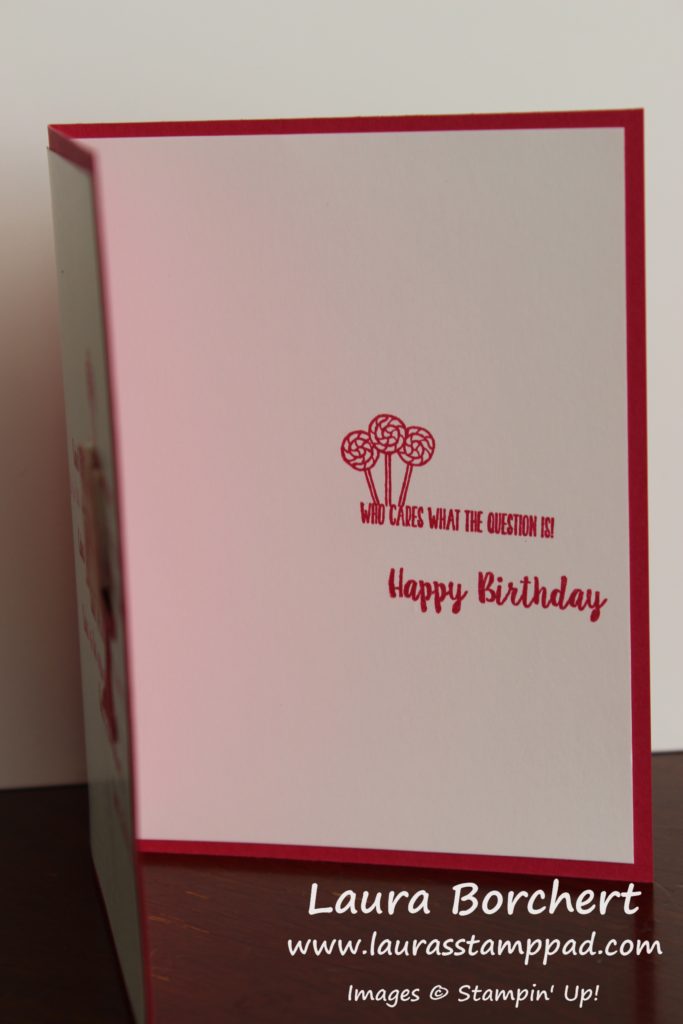
Next, I layered the flower onto the Blackberry Bliss square and stamped the greeting inside the mini card. Make sure the crease of the card is on the right hand side. Then I added adhesive to the back and placed like a sandwich around the left side flap. Making sure it was centered up and down and in far enough on the side so it wasn’t hanging off, I pressed it down! Now you are done creating a double fold card.

Check out more samples using the Perennial Essence Suite here and here. Also, if you would like to make these cards, click the supply list below!

If you would like to see all of this in action, check out the video below or click here! Be sure to give the video a thumbs up if you liked it and don’t forget to subscribe if you are new. If you would like a notification when I post a new video, be sure to click the bell right next to the subscribe!!!

Happy Stampin’

~Laura

Product List

Fussy Cutting Frenzy!!!

Posted on

Do you like to fussy cut?? You know where you cut out an image by hand rather than having a punch or framelit! I’m not a fan of it because I don’t have the patience. Apparently the day I made this card I had lots of time because I went on a Fussy Cutting Frenzy!!!

Fussy cutting frenzy, www.LaurasStampPad.com

Minus the fussy cutting frenzy that took place to make this card, it was a fairly simple card. The amazing Mosaic Mood Designer Series Paper and Memorable Mosaic Stamp Set did all the hard work!

I started with a Mint Macaron card base. Next, I stamped along the side using the Memorable Mosaic Stamp Set and Mint Macaron Ink. TIP: Start somewhere in the middle with the circle image. Then stamp the twisted image on either side and fill in till it is complete. Also, make sure the twisted image is on the edge/falls off the edge. The designer paper will cover up the other end so if they aren’t all level, that’s okay! I did this same stamped image on the inside of the card too!

Next, I added the piece of Mosaic Mood Designer Series Paper measuring 3-1/4″ x 5-1/2″. Be sure it covers up all of the ends of the twisted stamped images. Then I fussy cut out the hummingbird from another piece of the Mosaic Mood Designer Series Paper. This paper is so gorgeous! Using Stampin’ Dimensionals, I added the hummingbird to the card front!

For the greeting, I stamped it in Soft Suede Ink and punched it out with the coordinating Timeless Label Punch (Bundle & Save 10%). Then I stamped it again in Terracotta Tile Ink so I could fussy cut (hand cut it out) out the word kindness. Next, I glued the word kindness over the other one and flipped it over to add the ribbon. Using Stampin’ Dimensionals to secure the ribbon, I laid the ribbon down in a squiggle pattern and then added it to the card front.

Memorable Mosaic, www.LaurasStampPad.com

For the inside, I did the same pattern of stamping along the edge and then I added some Very Vanilla cardstock to write on! This also covers up the unevenness of the twisted stamped image! 🙂

If you would like to see all of this in action, check out the video below or click here! Be sure to give the video a thumbs up if you liked it and don’t forget to subscribe if you are new. If you would like a notification when I post a new video, be sure to click the bell right next to the subscribe!!!

Happy Stampin’

~Laura

Product List

Technique Tuesday – Pop Out Insert!!!

Posted on

Happy Tuesday!!! You all know what that means! I have a fabulous technique today that I got from the amazing stamper Ronda Wade!!! This Pop Out Insert really takes a card up a notch. I went simple on the front since the inside is so fabulous!!!

Sending Happiness & Love, www.LaurasStampPad.com

I used the Needlepoint Nook Suite from the Occasions Mini Catalog for this card and it is just fabulous! The images look so real and that just blows my mind!!

I started with a Crumb Cake card base. Next, I layered on a piece of Poppy Parade (3-1/2″ x 4-1/2″) with some Needlepoint Nook Designer Series Paper on top (3″ x 4″). For the greeting, I die cut out the label from the Needlepoint Elements Framelits. Using the greeting from the Needle & Thread (Bundle & Save 10%), I stamped it in Poppy Parade Ink. Before attaching it to the card front, I added a few loops of Old Olive Linen Thread.

Now for the real fabulous part!!! The inside of the card has this beautiful pop out insert. This is something that can be inside any of your cards. Simply score, fold, and decorate!!! I started with a piece of Whisper White measuring 5-1/4″ x 8″ and folded it in half at 4″. Then with a pencil, I marked 1-1/2″ on either side of that center score line. Measuring 2-1/2″ down the center score line, I made another mark with my pencil. Then using the score blade on the Stampin’ Trimmer or a ruler and Bone Folder, score from the 2-1/2″ mark to the 1-1/2″ mark. This creates a little triangle. Next, I folded on all of the lines to create that pop out.

Be sure to decorate before adding it to the card. I stamped a few leaves first. Next, I stamped and die cut the flowers from the Needle & Thread Bundle. These images can hang off the top of the cardstock because they are folding down when the card closes so they won’t hang out the top.

When adding the insert to the card, I used Tear And Tape because it is super strong. Once the tape it on, place it inside the card, open the card flap, peal off the tape backing and then press the card closed. This ensures that the insert will still allow the card to close flat. Next, flip over the card and repeat. Again be sure to press the card closed to seal the adhesive for that perfect look. When you open the card it might not go all the way to the fold or seem a little off on the sides but that is okay. The important part is that it closes flat.

If you would like to see this all in action, check out the video below or click here! Be sure to give the video a thumbs up if you liked it and don’t forget to subscribe if you are new. If you would like a notification when I post a new video, be sure to click the bell right next to the subscribe!!!

Happy Stampin’

~Laura

Product List


Creating Stained Glass!!!

Posted on

Happy Tuesday!!! You all know that means I have a fabulous technique for you and this one is super cool! Creating stained glass on a card makes it look gorgeous and so real!!! This Easter card is perfect because it looks like a church window!

Creating Stained Glass, www.LaurasStampPad.com

Isn’t it just BEAUTIFUL?!?!?! I love it! I used the Stampin’ Blends to color the stained glass and the butterflies!!!

Starting out, I cut a Pool Party card base. Next, I took a piece of Whisper White measuring 3-3/4″ x 5-1/2″ and added it to the card front! Using a piece of the Graceful Glass Designer Series Paper, I colored the BACK of it with Stampin’ Blends Markers!

Coloring Vellum With Stampin' Blends, www.LaurasStampPad.com

I used the Dark Stampin’ Blends colors because the vellum makes the color lighter already and I love bright colors over a super light pastel. Once it was colored, I had to trim off the top and bottom a bit to make it fit my card. The piece is 6″ tall and my card is just 5-1/2″! Stampin’ Up vellum is amazing because it is thick enough that Snail adhesive doesn’t show through. In the past I have hated vellum because it is so hard to adhere it without the adhesive showing through. This is not the case and I am pumped!!!

Church Stained Glass Window, www.LaurasStampPad.com

I finished off the card with stamping a butterfly from the Butterfly Gala Stamp Set. Using the Butterfly Duet Punch, I punched it out and colored it with the same Stampin’ Blends! It is amazing!!! You could use the lighter marker for the butterfly since you don’t have that vellum toning down the color. Again, I love bold colors so I went with it! I added the butterflies with Stampin’ Dimensionals for some texture. The greeting is from the Itty Bitty Greetings Stamp Set and punched out with the Classic Label Punch. Then I added some Gingham Gala Adhesive-Backed Sequins for some texture and bling! It’s perfect!!!

If you would like to see this all in action, check out the video below or click here! Be sure to give the video a thumbs up if you liked it and don’t forget to subscribe if you are new. If you would like a notification when I post a new video, be sure to click the bell right next to the subscribe!!!

Happy Stampin’

~Laura

Product List

My Amazing Card!!!

Posted on

Have you ever created a card and thought oh my goodness this is AMAZING?? I sure hope you have because all card are amazing and made with love. I will admit I don’t have that OMG feeling with all cards though. This feeling comes about once a year or sometimes longer. My last most amazing card was this one in November 2016! I still have that card and admire it randomly. Well today I’m sharing another one of my amazing cards! This one just screams beauty at me and I LOVE IT!

My Amazing Card, www.LaurasStampPad.com

I hope you love it as much as I do but if not that’s okay too! The colors, the pattern and that little hint of bling do it for me!!!

I started with a Highland Heather card base and layered on a piece of Coastal Cabana measuring 4″ x 5-1/4″. Next, I took a piece of Whisper White (3-7/8″ x 5-1/8) and placed it in the Stamparatus. Using the Florentine Filigree Stamp Set and a Spectrum Pad, I created that amazing background! The colors for the Spectrum Pad are Gorgeous Grape, Highland Heather, Pool Party, Coastal Cabana, and Bermuda Bay. It is super easy to create because the Stamparatus does all of the work with spacing and stamping. Simply notch down the plate after each row.

Layering Circles, www.LaurasStampPad.com

TIP: The hardest part is probably making sure the ink pad is always stamping the correct color on the same end. Place the ink pad above the Stamparatus Plate after inking each time with the flat side of the ink pad on the left side.

Now for the focal point of those layered circles!!! Using the same Florentine Filigree Stamp Set, I stamped the circle image in Bermuda Bay and in Gorgeous Grape. I used the Layering Circles Framelits for the Bermuda Bay Circle and the 2″ Circle Punch for the Gorgeous Grape one. Next, I stamped the greeting in Bermuda Bay and slide the long skinny piece of Whisper White into the 1-1/4″ Circle Punch. That is how I got those slightly rounded ends. Then I added some of the Pool Party and Silver Baker’s Twine to the back securing with Stampin’ Dimensionals for texture. I finished off the card with a few Gingham Gala Adhesive Backed Sequins for some bling!

Isn’t it just fabulous??? What color combination would you use for your Spectrum Pad?? Let me know in the comments below because I have 2 left to ink up and I just can’t decide on the colors.

If you would like to see this all in action, check out the video below or click here! Be sure to give the video a thumbs up if you liked it and don’t forget to subscribe if you are new. If you would like a notification when I post a new video, be sure to click the bell right next to the subscribe!!!

Happy Stampin’

~Laura

Product List

It’s a Piece of Cake!!!

Posted on

Happy Tuesday!!! You know that means I have a fabulous technique to share with you! This one is a Piece of Cake….lol! It uses the Piece of Cake Stamp Set and coordinating Cake Builder Punch too! 🙂

Piece of Cake, www.LaurasStampPad.com

Look how fabulous this card is in each of the colors. It can be masculine or feminine!!! All you need is the card base and 2 pieces of Whisper White measuring 4″ x 5-1/4″. One is for the front of the card and the other is for the inside.

Wink of Stella Cake, www.LaurasStampPad.com

For the front, I stamped the greeting from the Piece of Cake Stamp Set all over the center of the cardstock. After inking up the image, I stamped 3 times before going back to the ink for that fun variation of color. It is super cool to get 3 different shades from 1 ink pad! Next, using the same color, I stamped the cake stand in the same ink onto the same cardstock color. For the sample above, that was Melon Mambo. The cake was then stamped in Melon Mambo Ink onto Powder Pink cardstock. Using the Cake Builder Punch, I punched out the images.

Purple Birthday Card, www.LaurasStampPad.com

One of the best ways to save paper with the dual punch is to cut long skinny strips. Using the Fine Tip Glue Pen, I added the cake stand to the card front. Before adding the cake, be sure to stamp the lollipops. Simply place the cake down on the plate, move it down a 1/4-1/2″ and then stamp the lollipops. Then I added the cake with Stampin’ Dimensionals. Using the cake as a guide really helps get the spacing correct.

Using the Fine Tip Glue Pen again, I added glue all over the drips of the cake and then poured Dazzling Diamonds over the top for a fun glittered look (Gorgeous Grape card). For the Melon Mambo card, I went the safe glitter route and used Wink of Stella!

Masculine Birthday Cake Card, www.LaurasStampPad.com

For a more masculine look, on the Bermuda Bay card, I just colored in the drips with the Fine Tip Glue Pen and let it dry for a nice glossy look! Which one is your favorite???

Cake Is the Answer, www.LaurasStampPad.com

A little decoration and fun on the inside of the card too!!!

If you would like to see this all in action, check out the video below or click here! Be sure to give the video a thumbs up if you liked it and don’t forget to subscribe if you are new. If you would like a notification when I post a new video, be sure to click the bell right next to the subscribe!!!

Happy Stampin’

~Laura

Product List

All Adorned!!!

Posted on

Happy Tuesday!!! You all know what that means….I have a fabulous technique to share with you today!!! This All Adorned Sale-A-Bration Stamp Set is perfect to use on a Stamparatus because the images interlock. The set is photopolymer so you can see through the images and use it on blocks as well!

All Adorned, www.LaurasStampPad.com

I am loving Night of Navy and Pineapple Punch together. The contrast is AMAZING and the colors work for many occasions. This card is perfect to have on hand and just stamp a greeting on the inside when you need it.

I started with a 4″ x 8″ Night of Navy card base. I wanted the square look since the pattern looks better for a square. It still fits into a regular envelope with a little room on the side but that’s okay and this way it will still cost the same postage. Next, I took a piece of Pineapple Punch measuring 3-1/2″ x 3-1/2″ and stamped the corner image on each corner. This was super simple with the Stamparatus. Simply line it up to stamp in one corner and then rotate your cardstock around! Perfectly lined up and in the corner each time! I love that!

Then for that fabulous focal point, I stamped the 2 layering images overlapping each other using the Stamparatus. First, stamp 1 of the images. I started with the Night of Navy image. Next, place the other stamp over the top and pick it up with the clear plate of the Stamparatus. Then ink it in Pineapple Punch and stamp. That image was then punched out with a 2″ Circle Punch and layered onto a Night of Navy piece punched out with the 2-1/4″ Circle Punch. I added these to the card front with Stampin’ Dimensionals.

For the Bride, www.LaurasStampPad.com

For the inside, I stamped a few of the images on the corners to make it all match with the front. I used the greeting from the Well Said Stamp Set because I’m going to use this card for an upcoming Bridal Shower!! The perfect little card for any occasion!

Now is the time to get the Stamparatus because you just need $1 more and you will earn this All Adorned Sale-A-Bration Stamp Set for FREE!!! Click the supply list below to start shopping!

If you would like to see this all in action, check out the video below or click here! Be sure to give the video a thumbs up if you liked it and don’t forget to subscribe if you are new. If you would like a notification when I post a new video, be sure to click the bell right next to the subscribe!!!

Happy Stampin’

~Laura

Product List

Double Z Fold Candy Card!!!

Posted on

Happy Tuesday!! You all know that means I have a fabulous technique for you! With Easter around the corner, let’s bring on ALL THE CANDY!!! Easter is my favorite holiday and Easter candy is AMAZING! Jelly Beans, Peeps, and Reese’s Eggs are just a few of my favorites. What is your favorite! Okay back to this fabulous technique of a Double Z Fold Candy Card!!!

Double Z Fold Candy Card, www.LaurasStampPad.com

Isn’t it beautiful???? I am loving the fun colors. Hello, Lisa Frank! Am I right? Eeee It just makes me so happy. This card uses all the goodies in the How Sweet It Is Suite!

First, I started with a Coastal Cabana card base measuring 4-1/4″ x 11. That is right, this is a regular card size! Simply fold in half like you normally would for a card and then fold that front piece back (in half) to create your first Z. You can also score it if you wish at 2-3/4″ and 5-1/2″. I added a piece of the How Sweet It Is Designer Series Paper the the inside of the card (stripes ~ 4″ x 5-1/4″) and another piece to the left side front flap (polka dots ~ 4″ x 2-1/2″).

Birthday Treats, www.LaurasStampPad.com

Now for that second Z on our card, I used Gorgeous Grape (3″ x 9″) and scored it at 3″ and 6″. This creates three 3″ squares. Fold it to create a Z and add adhesive to the back square making sure the next square is on the left side. Place it down on the striped paper. Next, place the top Z on the polka dotted paper with the card all folded and laying flat. Place your fingers at the edge of the purple 3″ square as a guide to know how much adhesive you will need for that flap (video explains better). Lift the 3″ purple square and add adhesive to the polka dots. It is typically 2 lines of Snail Adhesive. Once your adhesive is down, place the Z over it by pressing flat. Don’t hold the card up to connect it or it might not close flat.

Candy Jar Die Cuts, www.LaurasStampPad.com

Now it is time to decorate!!! Using the Jar of Sweets Framelits, I die cut out the candy jars from the How Sweet It Is Stamp Set. I love that these coordinate and line up perfectly. I also die cut the candy pieces with the framelits. Using the Sweetest Thing Stamp Set, I stamped the greetings to coordinate. Don’t forget you can bundle and save 10% when you get the stamps and framelits together! The Whisper White layers measure 2-3/4″ x 2-3/4″! Just have fun with all the possibilities!!!

Birthday Z Fold Card, www.LaurasStampPad.com

If you would like to see this all in action, check out the video below or click here! Be sure to give the video a thumbs up if you liked it and don’t forget to subscribe if you are new. If you would like a notification when I post a new video, be sure to click the bell right next to the subscribe!!!

Happy Stampin’

~Laura

Product List

Using Both Sides of the Paper!!!

Posted on

Happy Tuesday!!! You all know what that means! I have a fabulous technique to share with you today!!! We are using both sides of the paper from the How Sweet It Is Designer Series Paper to create 2 cards!

Using Both Sides of the Paper, www.LaurasStampPad.com

Which one is your favorite – the left or the right?? Let me know in the comments below!! To be honest, I don’t know that I could pick. I really had a lot of fun with this card style……as you can see below with all the different options I just had to try out!

I started with a Whisper White card base. Next, I layered on a piece of the How Sweet It Is Designer Series Paper (5-1/2″ x 2-3/4″) and tied some ribbon around the card. I used the Gorgeous Grape Striped Ribbon and the Granny Apple Green/Coastal Cabana Reversible Ribbon. Check out the same below where I even mixed those up and used the reversible ribbon on the purple dotted paper. The paper is the same piece for both cards just the left card using one side and the right card using the other!

Gum drops in the candy jar, www.LaurasStampPad.com

For the greeting, I stamped it from the Sweetest Thing Stamp Set. I used the same images for the focal point too. I stamped the candy jar in Coastal Cabana and die cut it with the Layering Ovals Framelits. Then I really had fun with the different candy options in the Sweetest Thing Stamp Set. Gum drops, hard candy, jelly beans, gummy bears, and chocolates….YUM!!! Using Stampin’ Blends, I colored them in!

Sweetest Thing Stamp Set, www.LaurasStampPad.com

After coloring, I layered the oval onto a scalloped oval of Coastal Cabana and added it to the card front with Stampin’ Dimensionals. I added some Glittered Enamel Shapes to some for a little pop of texture and glitter.

So many fun looks and combinations with this amazing bundle. Click the supply list below so you can get started on creating your favorites!!! Which is your favorite??? If you would like to see this all in action, check out the video below or click here! Be sure to give the video a thumbs up if you liked it and don’t forget to subscribe if you are new. If you would like a notification when I post a new video, be sure to click the bell right next to the subscribe!!!

Happy Stampin’

~Laura

Product List

Memories & More Card Collections!!!

Posted on

Happy Tuesday!!! You all know that means I have a fabulous technique to share with you today!!! Have you ever heard of the Memories & More Card Collections?? Did you know that you can scrapbook and make cards with these? They are like a kit that is super quick and simple but there are lots of ways to use them!

Memories & More Card Collections, www.LaurasStampPad.com

This fabulous card has no stamping on it at all. I used the large card from the Happiness Blooms Memories & More Card Collection. Simply add that to the Happiness Blooms Cards & Envelopes and you are all done. I embellished a bit with some punched flowers from the Bitty Blooms Punch Pack and Happiness Blooms Enamel Shapes from the Suite. How fabulous is that??

Happiness Blooms Cards & Envelopes, www.LaurasStampPad.com

Here is another fabulous card using the other size of the Card Collection and the Cards & Envelopes in the pack! For this one, I didn’t stamp at all. I just simply added a few Enamel Shapes!

Scrapbook with Memories & More, www.LaurasStampPad.com

The Memories & More Card Collections can also be used in scrapbooking for quick and simple pages. Just drop in the cards for a fabulous look or greeting or embellish it as you wish! I’m just so impressed at how fun and versatile these Memories & More Card Collections are. I challenge you to check them out and use them for cards and scrapbooking! Check out the supplies below!

If you would like to see this all in action, check out the video below or click here! Be sure to give the video a thumbs up if you liked it and don’t forget to subscribe if you are new. If you would like a notification when I post a new video, be sure to click the bell right next to the subscribe!!!

Happy Stampin’

~Laura

Product List