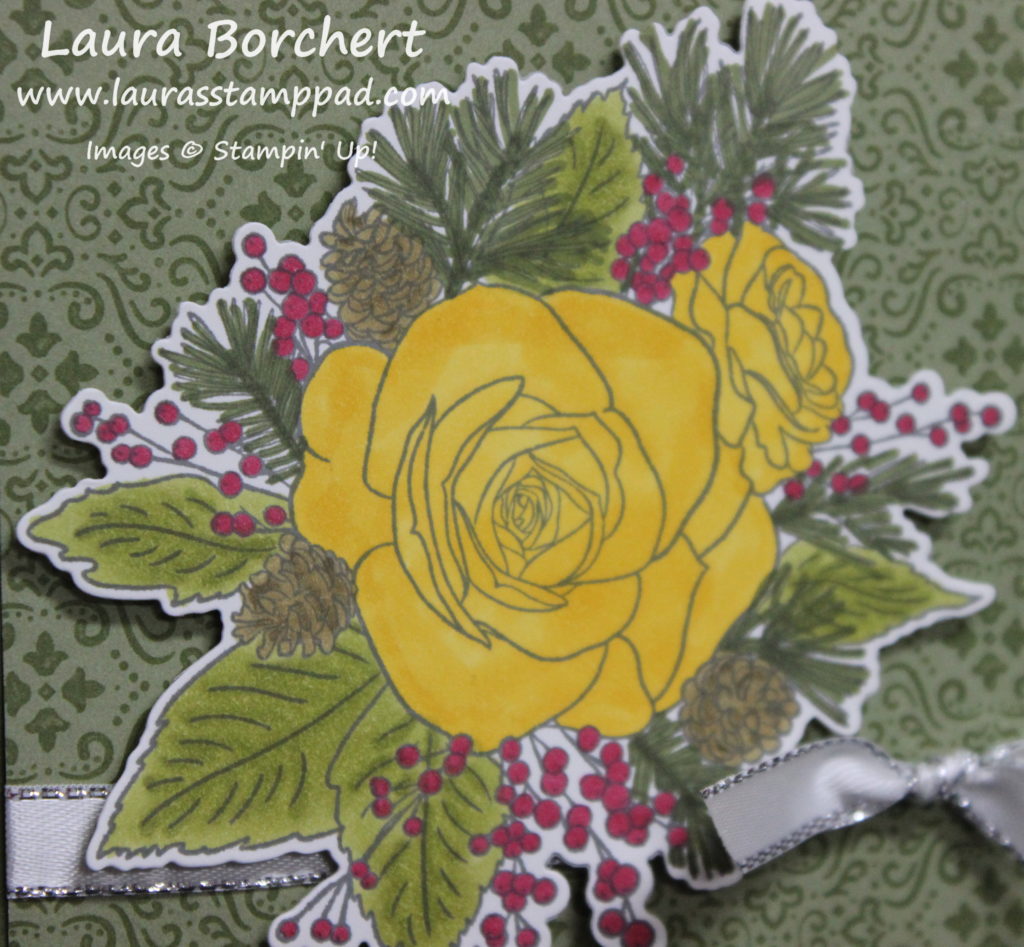
Happy Tuesday!!! Today’s technique is a bit tricky…..stamping or coloring! Can you guess which one I did on these Christmas Roses?? Which one do you prefer??
I am just loving the Christmas Roses Stamp Set that just came out this month! The image is stunning and so fun to color! The card above is actually colored rather than stamped with all of the coordinating images. While stamping was easy to do as the images are photopolymer, I found coloring to be more fun!
This card was created super quickly as I just stamped in the image in Basic Gray and then colored it with Stampin’ Blends. Next, I die cut it with the coordinating Roses Dies. After that, I added it to the card. The card base is Mossy Meadow with a piece of the Christmastime Is Here Designer Series Paper!!! While the Suite has a lot of gold in it, I decided to branch out and use some silver for the card.
Meanwhile, stay tuned for tomorrow’s card where I show more fabulous samples using the Christmastime is Here Bundle. Remember it is while supplies last so get these fun products before they are gone!
If you would like to watch me show off these Christmas Roses, check out the video below or click here! Be sure to give the video a thumbs up if you liked it and don’t forget to subscribe if you are new. If you would like a notification when I post a new video, be sure to click the bell right next to the subscribe!!!
Happy Tuesday!!! It’s been a month since we closed on the house and I think FINALLY I’m starting to get back into a routine/groove. Maybe?!?!?! Either way, I have a fabulous double fold technique to share with you today that is super cute!!!
This card uses the Come to Gather Suite from the Holiday Mini Catalog. I am super loving the blues and greens this season. It’s a nice change from the typical reds, oranges, and yellows.
Since I did a full video tutorial on this double fold card, I’ll post a link to that below rather than typing out the full directions!
Also, don’t forget that the Free Stamp Set of the Month is your choice between the Day of Thanks Stamp Set and the Perfectly Plaid Stamp Set! Click here to start shopping! Stay tuned for the November Free Stamp Set of the Month!
If you would like to watch me make this fabulous card, check out the video below or click here! Be sure to give the video a thumbs up if you liked it and don’t forget to subscribe if you are new. If you would like a notification when I post a new video, be sure to click the bell right next to the subscribe!!!
Adding Cool Whip is always necessary when having hot chocolate right?? As a kid, we always ate the cool whip and then said we were done. I don’t think any of us really liked hot chocolate but we enjoyed the cool whip!
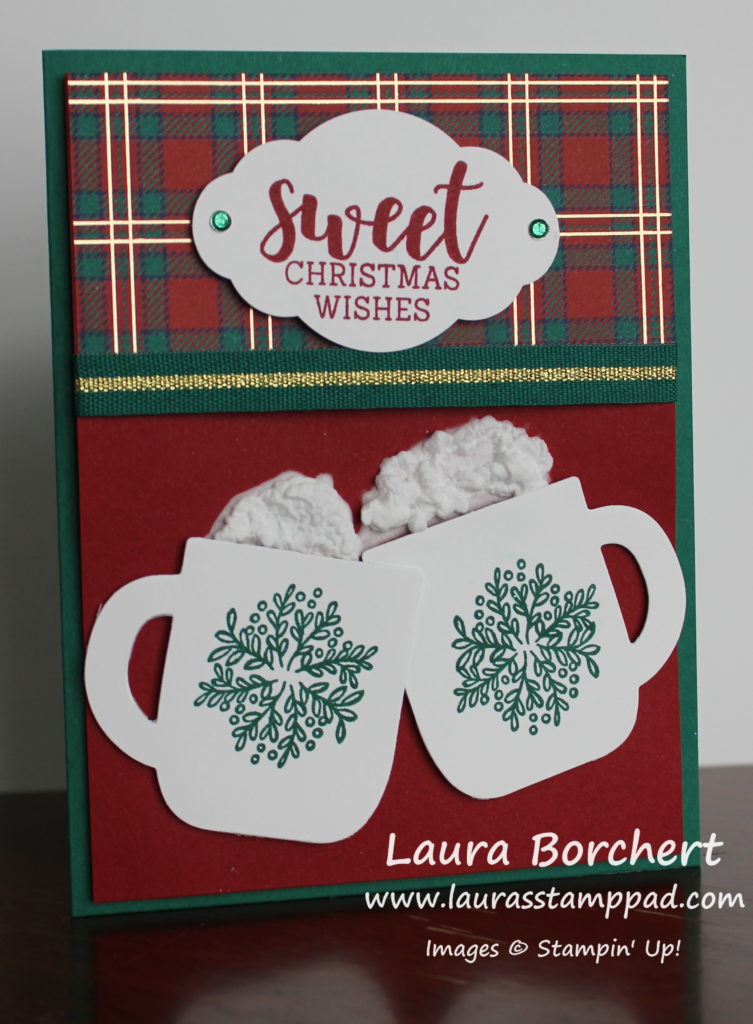
How sweet is this card?? I just love the cute factor and that fun texture!!! So let’s get started on how I created this card!
I started with a Shaded Spruce card base. Then I took a piece of Cherry Cobbler measuring 4″ x 5-1/4″. Next, I die cut the white mugs with the Cup of Cheers Dies and placed them on the card. Scoot the mugs down a bit and using a pencil, draw a line across the top of the mugs from side to side. This will be your guide for adding the Puff Paint and making sure it isn’t too wide or too high on the card. Now let’s add puff paint and set it with the Heat Tool!
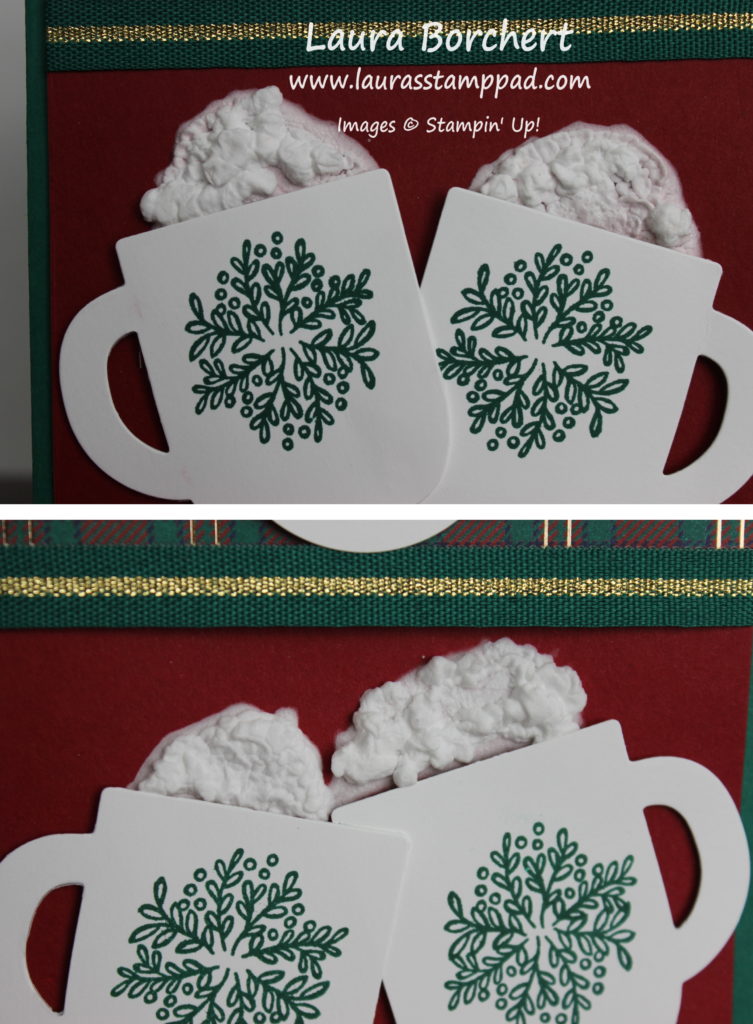
TIPS FOR USING PUFF PAINT: It is very liquidy so be careful not to use too much or have it spill all over. After applying a thin layer, start heating it from the bottom of the cardstock to set it. Once you see a little shine around the edges, move to the top side to heat it. Be sure to hold it there for a decent amount of time because first it will look dry and then it will start to puff. Add more puff paint to fill in holes or increase your area. You can always add more but can’t always take it back. Also, remember that no 2 puff paints are going to look the same. It’s kind of like watercoloring!
After the Puff Paint is done, you can assemble the card. Don’t assemble first because the heat tool can melt your ribbon. I stamped the mugs with the Cup of Christmas greenery piece in Shaded Spruce Ink and then added them below the Puff Paint with Stampin’ Dimensionals! Then I added a piece (2″ x 4″) of the Perfectly Plaid Designer Paper at the top. Taking the Shaded Spruce & Gold Ribbon, I added a strip across the card where the designer paper and cardstock meet. Securing the ends on the back side with Stampin Dimensionals and then added this piece to the card front.
For the greeting, I stamped it from the Cup of Christmas Stamp Set and punched it out with the Pretty Label Punch. Then I added it to the card front with Stampin’ Dimensionals and finished it off with Holiday Rhinestones on either side!
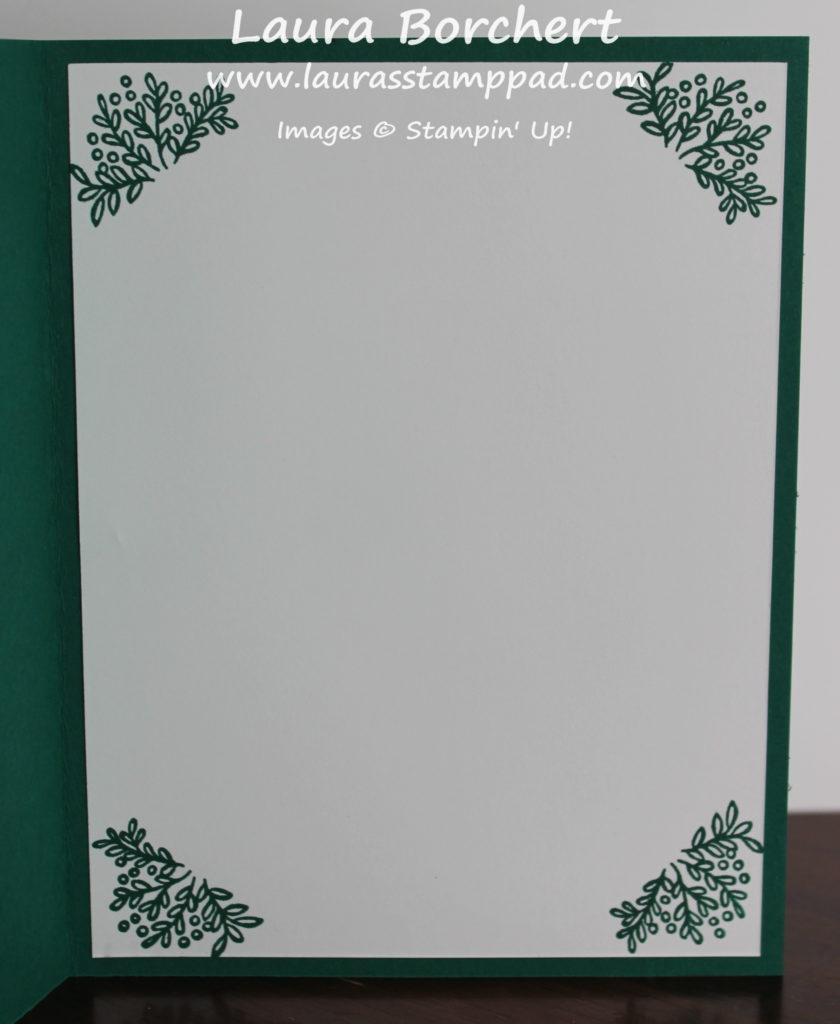
For the inside of the card, I added a piece of Whisper White measuring 4″ x 5-1/4″. Using that same greenery stamp, I stamped each corner in Shaded Spruce Ink.
If you would like to watch me adding cool whip to this fabulous card, check out the video below or click here! Be sure to give the video a thumbs up if you liked it and don’t forget to subscribe if you are new. If you would like a notification when I post a new video, be sure to click the bell right next to the subscribe!!!
Happy Tuesday!!! You all know what that means!!! I have a fabulous technique to share with you today and it’s super simple! Check out this adorable scallop ribbon border on this card. The cool thing about this is that you can get 2 cards for every 5 inches of ribbon. I cut the ribbon in half!!!
This card is super simple and perfect for making multiples!! The pack of Brightly Gleaming Designer Paper has so many great prints that would all work in this same color scheme.
I started with a card base of Pretty Peacock measuring 4-1/4″ x 11″. Next, I cut 2 pieces of Very Vanilla measuring 4″ x 5-1/4″ (for the front and inside). Then, I cut the Brightly Gleaming Designer Paper into 4″ x 4″ squares. That means you can get 9 cards from 1 sheet of designer paper with no waste. YEAH!! I added Tear And Tape along the bottom of the designer paper and since it’s a perfect square it doesn’t matter where the bottom is. Then taking the Pretty Peacock Scallop Trim Ribbon, I cut it in half so I could get 2 cards for every piece. Press the half piece of ribbon into the Tear And Tape on the edge and trim off the extra on the ends.
After adding adhesive all around the other sides of the designer paper, it is then added to the Very Vanilla piece. Next, I stamped the greeting from the So Many Stars Stamp Set in Celestial Copper Ink on the bottom. I am loving this shiny copper ink. With the coordinating Star Framelits, I die cut a star in Copper Foil Paper. You could also use the Brightly Gleaming Foil Elements! The Fine Tip Glue Pen is amazing for adhering delicate items like this.
If you would like to see this Scallop Ribbon Border in action, check out the video below or click here! Be sure to give the video a thumbs up if you liked it and don’t forget to subscribe if you are new. If you would like a notification when I post a new video, be sure to click the bell right next to the subscribe!!!
In January, we shall have snow much fun….but for now I’m holding onto Summer! 🙂 How about you? Do you love snow or summertime? While we are enjoying the Summer sun and Fall leaves changing, we can still play with snow in our crafting!!! Check out these cuties!!!
This is the perfect kind of snowman because it comes out perfect no matter how much snow you get and you get to stay inside all warm!
I started with a Coastal Cabana card base measuring 4-1/4″ x 11″. Next, I cut 2 pieces of Whisper White measuring 4″ x 5-1/4″. One is for the front and the other is for the inside of the card! Then I took a piece of Sparkle Glimmer Paper measuring 4″ long and as tall as you wish. I ripped the top side for a snowy slope look. TIP: Rip away from you for a cleaner look. Also, if you are struggling to rip it because of the thick plastic-y back, use you scissors to get it started. Place this on the Whisper White as a guide for where to stamp your snowman so he isn’t floating in the air.
The snowmen were stamped from the Snowman Season Stamp Set and in Basic Gray Ink for that more subtle look. For the bigger snowman, I stamped him onto scrap white and punched him out with the coordinating Snowman Builder Punch. Using Stampin’ Blends, I colored in the buttons (Pumpkin Pie) and nose (Basic Black). I added the punched out snowman to the card front with Stampin’ Dimensionals. Then using the Let It Snow Embellishment Kit, I added some warm and cozy felt pieces. To spruce up the other snowman, I added Shimmery Crystal Effects to the snowballs!
For the greeting at the top, I added a strip of Let It Snow Designer Paper and added the greeting from the Snowman Season Stamp Set. I stamped the greeting in Real Red and added some Holiday Rhinestones!
For the inside, I stamped the third snowman in the set in Basic Gray Ink. Using Stampin’ Blends, I colored him in! I also added the greeting in Real Red Ink. All the images are from the Snowman Season Stamp Set! It’s such a cute set! I love it!!!
If you would like to make this card, check out the supply list below!
If you would like to watch me create this cute let it snow card, check out the video below or click here! Be sure to give the video a thumbs up if you liked it and don’t forget to subscribe if you are new. If you would like a notification when I post a new video, be sure to click the bell right next to the subscribe!!!
The Holiday Mini Catalog begins tomorrow and I CAN NOT WAIT!!! There are so many fabulous products from Fall to Winter and Halloween to Valentine’s Day! I thought I would start off with this fun Fall or Back to School Card with coloring apples!
Oh how I am loving Stampin’ Blends and the coloring fun you can create. Red apples would be super fun too!
I started with a Whisper White card base. Next, I took a piece of Night of Navy (4″ x 5-1/4″) and layered some of the Come to Gather Designer Series Paper on the left side! I used the Rectangle Stitched Shapes to die cut the designer paper to a little extra flare. The greeting was also die cut with the Stitched Rectangles and stamped in Night of Navy from the Harvest Hellos Stamp Set!
For the apples, I stamped them in Basic Gray Ink onto scrap white. These are all from the Harvest Hellos Stamp Set and I punched them out with the coordinating Apple Builder Punch. Using the Granny Apple Green Stampin’ Blends, I colored in the apples and leaves. The stems and seed were colored in Soft Suede Stampin’ Blends. TIP: I found that by adding the dark color around the bottom and sides only and then blending it all with the light marker worked the best. I colored a million apples with the entire lower half in dark and it just would not blend out well. Have fun with it and enjoy a little variation in color because after all nature has variation.
I added the apples to the card front. One of them is flat and the other one and half are popped up on Stampin’ Dimensionals! Of course I had to have some dimension on the card! If you would like to recreate this card and coloring apples, check out the supplies listed below and you can start ordering the Holiday Mini Catalog goodies tomorrow!
If you would like to watch the coloring apples and assembling, check out the video below or click here! Be sure to give the video a thumbs up if you liked it and don’t forget to subscribe if you are new. If you would like a notification when I post a new video, be sure to click the bell right next to the subscribe!!!
Happy Tuesday!!! You all know what that means! I have a fabulous technique to share with you! In fact, more than one fun technique today! I am showing you some easy stamping with the Stamparatus and creating your own designer paper!!! Let’s get started!
First, let’s start with the fun background “designer paper”! It is super to create because you just stamp all over! I used a piece of Seaside Spray and stamped the images from the Everything Amazing Stamp Set. Starting with the biggest image (the balloons), I stamped them randomly and falling off the cardstock. Then I added in some party hats in Night of Navy Ink as well. Filling in the holes, I stamped the confetti in Seaside Spray Ink. Once this was complete, I tied some ribbon on the bottom and added this to a Grapefruit Grove card base!
For the greeting focal point, I used the Stamparatus and the new Grid Mat! The Whisper White piece measures 4″ x 2-1/2″ and the greeting just fits perfectly which is why the Stamparatus comes in super handy. First, I stamped the Amazing in Seaside Spray. Next, I lined up the other greetings and stamped them in Night of Navy! Of course, once you greetings are all set in the Stamparatus, it’s super easy to make multiples! Boom Boom! Using the Detailed Trio Punch, I rounded 2 of them to add some texture and then added it to the card front. I finished it off with some Rhinestones for a little bling!
For the inside of the card, I added a few balloons and a party hat. You could always add those to the envelope too! Check out the supply list below if you would like to make this card! Have fun creating your own designer paper with this stamp set or any set. It’s super fun!
If you would like to see this all in action, check out the video below or click here! Be sure to give the video a thumbs up if you liked it and don’t forget to subscribe if you are new. If you would like a notification when I post a new video, be sure to click the bell right next to the subscribe!!!
Happy Tuesday!! You know what that means! I have a fabulous technique to share with you today!!! Check out this fun floating Hot Air Balloon Card!!! I love how Window Sheets can create so much illusion on a card!!!
All the beautiful Hot Air Balloons floating in the sky. I have been to St. Louis to the Hot Air Balloon Race and it was amazing. I would love to go to the one in Arizona!
This card has a Seaside Spray card base measuring 4-1/4″ x 11. I started by stamping the clouds and small hot air balloons all over the center of the card front. I used the stamps from the Above the Clouds Stamp Set. The clouds were stamped in Seaside Spray and the balloons in Basic Gray. Be sure to stay in the middle of the so that your images aren’t coming out the sides from your frame. I placed a scrap piece over the edge if I wanted an image near the edge.
Next, I die cut the Stitched Rectangle frame by placing the 2 framelits down and securing them with a Post It Note so I could create multiples and they would stay in place. I added a piece of Window Sheet to the back of the frame and then added it to the card front with Stampin’ Dimensionals!
To finish off the front of the card, I added a Hot Air Balloon flat on the Window Sheet for that floating Hot Air Balloon look. There are 2 different styles of balloons in the Above the Clouds Stamp Set as you can see in the photos above. Using Stampin’ Blends, I colored them in and punched them out with the coordinating Hot Air Balloon Punch. The baskets were both stamped onto Basic Gray and punched out. I thought the border needed a little something so I tied a little bow with some Whisper White Baker’s Twine and secured it with a Mini Glue Dot.
Of course, I had to stamp on the inside with a few clouds and balloons and that fabulous greeting! I think this will be a perfect card for my nieces and nephews!
If you would like to see this all in action, check out the video below or click here! Be sure to give the video a thumbs up if you liked it and don’t forget to subscribe if you are new. If you would like a notification when I post a new video, be sure to click the bell right next to the subscribe!!!
Happy Tuesday!! You know what that means! I have a fabulous technique to share with you today and that is the Masking Technique! Super easy to do but really gives a fabulous scenery look to your project which is major WOW factor.
Doesn’t that Hot Air Balloon look like it is floating in the clouds? Isn’t it super fabulous? Let’s get started on how I did this masking technique!
I started with a Terracotta Tile card base. Next, I layered on a piece of Pretty Peacock (4″ x 5-1/4″). Then I stamped the greeting from the Above the Clouds Stamp Set along the left hand side on Very Vanilla (3-3/4″ x 5″). I did this part with one of the bigger greetings and it looked too wordy. A few stampers at class actually stamped the bigger greeting just once in the upper left corner. There are lots of different options for the greeting! After stamping the greeting, I layered on a piece of the Woven Threads Designer Paper (2″ x 3-3/4″) across the lower half.
Now for that fabulous focal point and masking technique! First, I die cut the circle and scallop circle with the Layering Circle Framelits. On the Very Vanilla circle, I stamped the large hot air balloon from the Above the Clouds Stamp Set. I stamped the outline in full strength Terracotta Tile and then the solid background in the same ink but stamped off once. The balloon looks so lonely so it needs some clouds. Using the Hot Air Balloon Punch, I punched out a scrap balloon and placed it over the stamped one. Then I inked up the clouds in Pretty Peacock and stamped off once and then right over the top of the balloon. This gives that fabulous cloud look without it stamping over the balloon. Once I finished stamping, I added this to the scallop circle and then to the card front with Stampin’ Dimensionals!
For the inside of the card, I stamped another balloons and a few clouds. Oh yeah….the basket of the balloon was stamped in Early Espresso! What color combination would you use for your Hot Air Balloon card and this masking technique!
If you would like to see this all in action, check out the video below or click here! Be sure to give the video a thumbs up if you liked it and don’t forget to subscribe if you are new. If you would like a notification when I post a new video, be sure to click the bell right next to the subscribe!!!
Happy Tuesday!!! It is Tuesday. I feel like I need a giant neon sign telling me the day of the week as I am soooo off after last week. Tuesday means I have a fabulous technique to share with you! Woot Woot! I totally don’t feel like an artist but today I’m going to show you how easy it is to do! This card makes coloring like an artist possible and easy!!!
Isn’t this card just stunning?!?! I can’t believe I DID IT! Like that was colored and created by me. It still amazes me. I just love how Stampin’ Blends make me feel….like an artist!
I started with a Pool Party card base measuring 4-1/4″ x 11″. After folding it in half for my card, I cut off 2″ from the bottom. This allows a little peekaboo to see the inside of the card! On the inside, I added a piece of So Saffron (4″ x 5-1/4″). Using the Free As A Bird Stamp Set, I stamped the greeting in Basic Gray and the flowers in So Saffron. On the upper front flap of the card, I layered Bird Ballad Designer Series Paper (3-1/4″ x 4″) to some Calypso Coral (3-3/8″ x 4-1/8″).
Using the Free As a Bird Stamp Set and coordinating Stitched Nested Labels, I created that fabulous focal point. I stamped the birds in Basic Gray because I like that lighter look for coloring rather than black!
Using various Stampin’ Blends, I started coloring. Pool Party was used for the flowers and Old Olive for the leaves. The branches were colored in Soft Suede. Now for the birdies, I colored the beaks in Dark Soft Suede. Next, I colored the top of the head to that little line at the eye in Soft Suede. Then I colored the belly and bottom most part in Dark Calypso Coral. I slowly moved my way to the center. Using Light Calypso Coral, I colored over the dark coral and up a little higher. Then using the Crumb Cake, I colored the Soft Suede and down into the coral. To finish it off, I went back over the coral and crumb cake with the Light Calypso Coral to blend it all together.
A couple tips when doing this is to give it time. After going over the colors to blend them, give it a bit to blend and dry because after a minute or so it will look better. This is better than coloring over and over and over again. I tend to color each one and then go back over each one. Another tip is sometimes I need to set it aside or walk away and then I come back and I’m like oh wow, look at that! It’s fabulous then! Just have fun coloring like an artist!
I added this piece to the card front by applying Tear And Tape just on the top half and sticking it on the bottom edge of the card front! Perfect!
If you would like to see all of this in action, check out the video below or click here! I will say that I did different colors….on accident but it still looks fabulous so just have fun with it! Be sure to give the video a thumbs up if you liked it and don’t forget to subscribe if you are new. If you would like a notification when I post a new video, be sure to click the bell right next to the subscribe!!!

")
")


")
")


 Specialty Designer Series Paper")
 Striped Ribbon")


")
 Scalloped Linen Ribbon")


")


")


