Butterflies & Rainbows!!!

Posted on

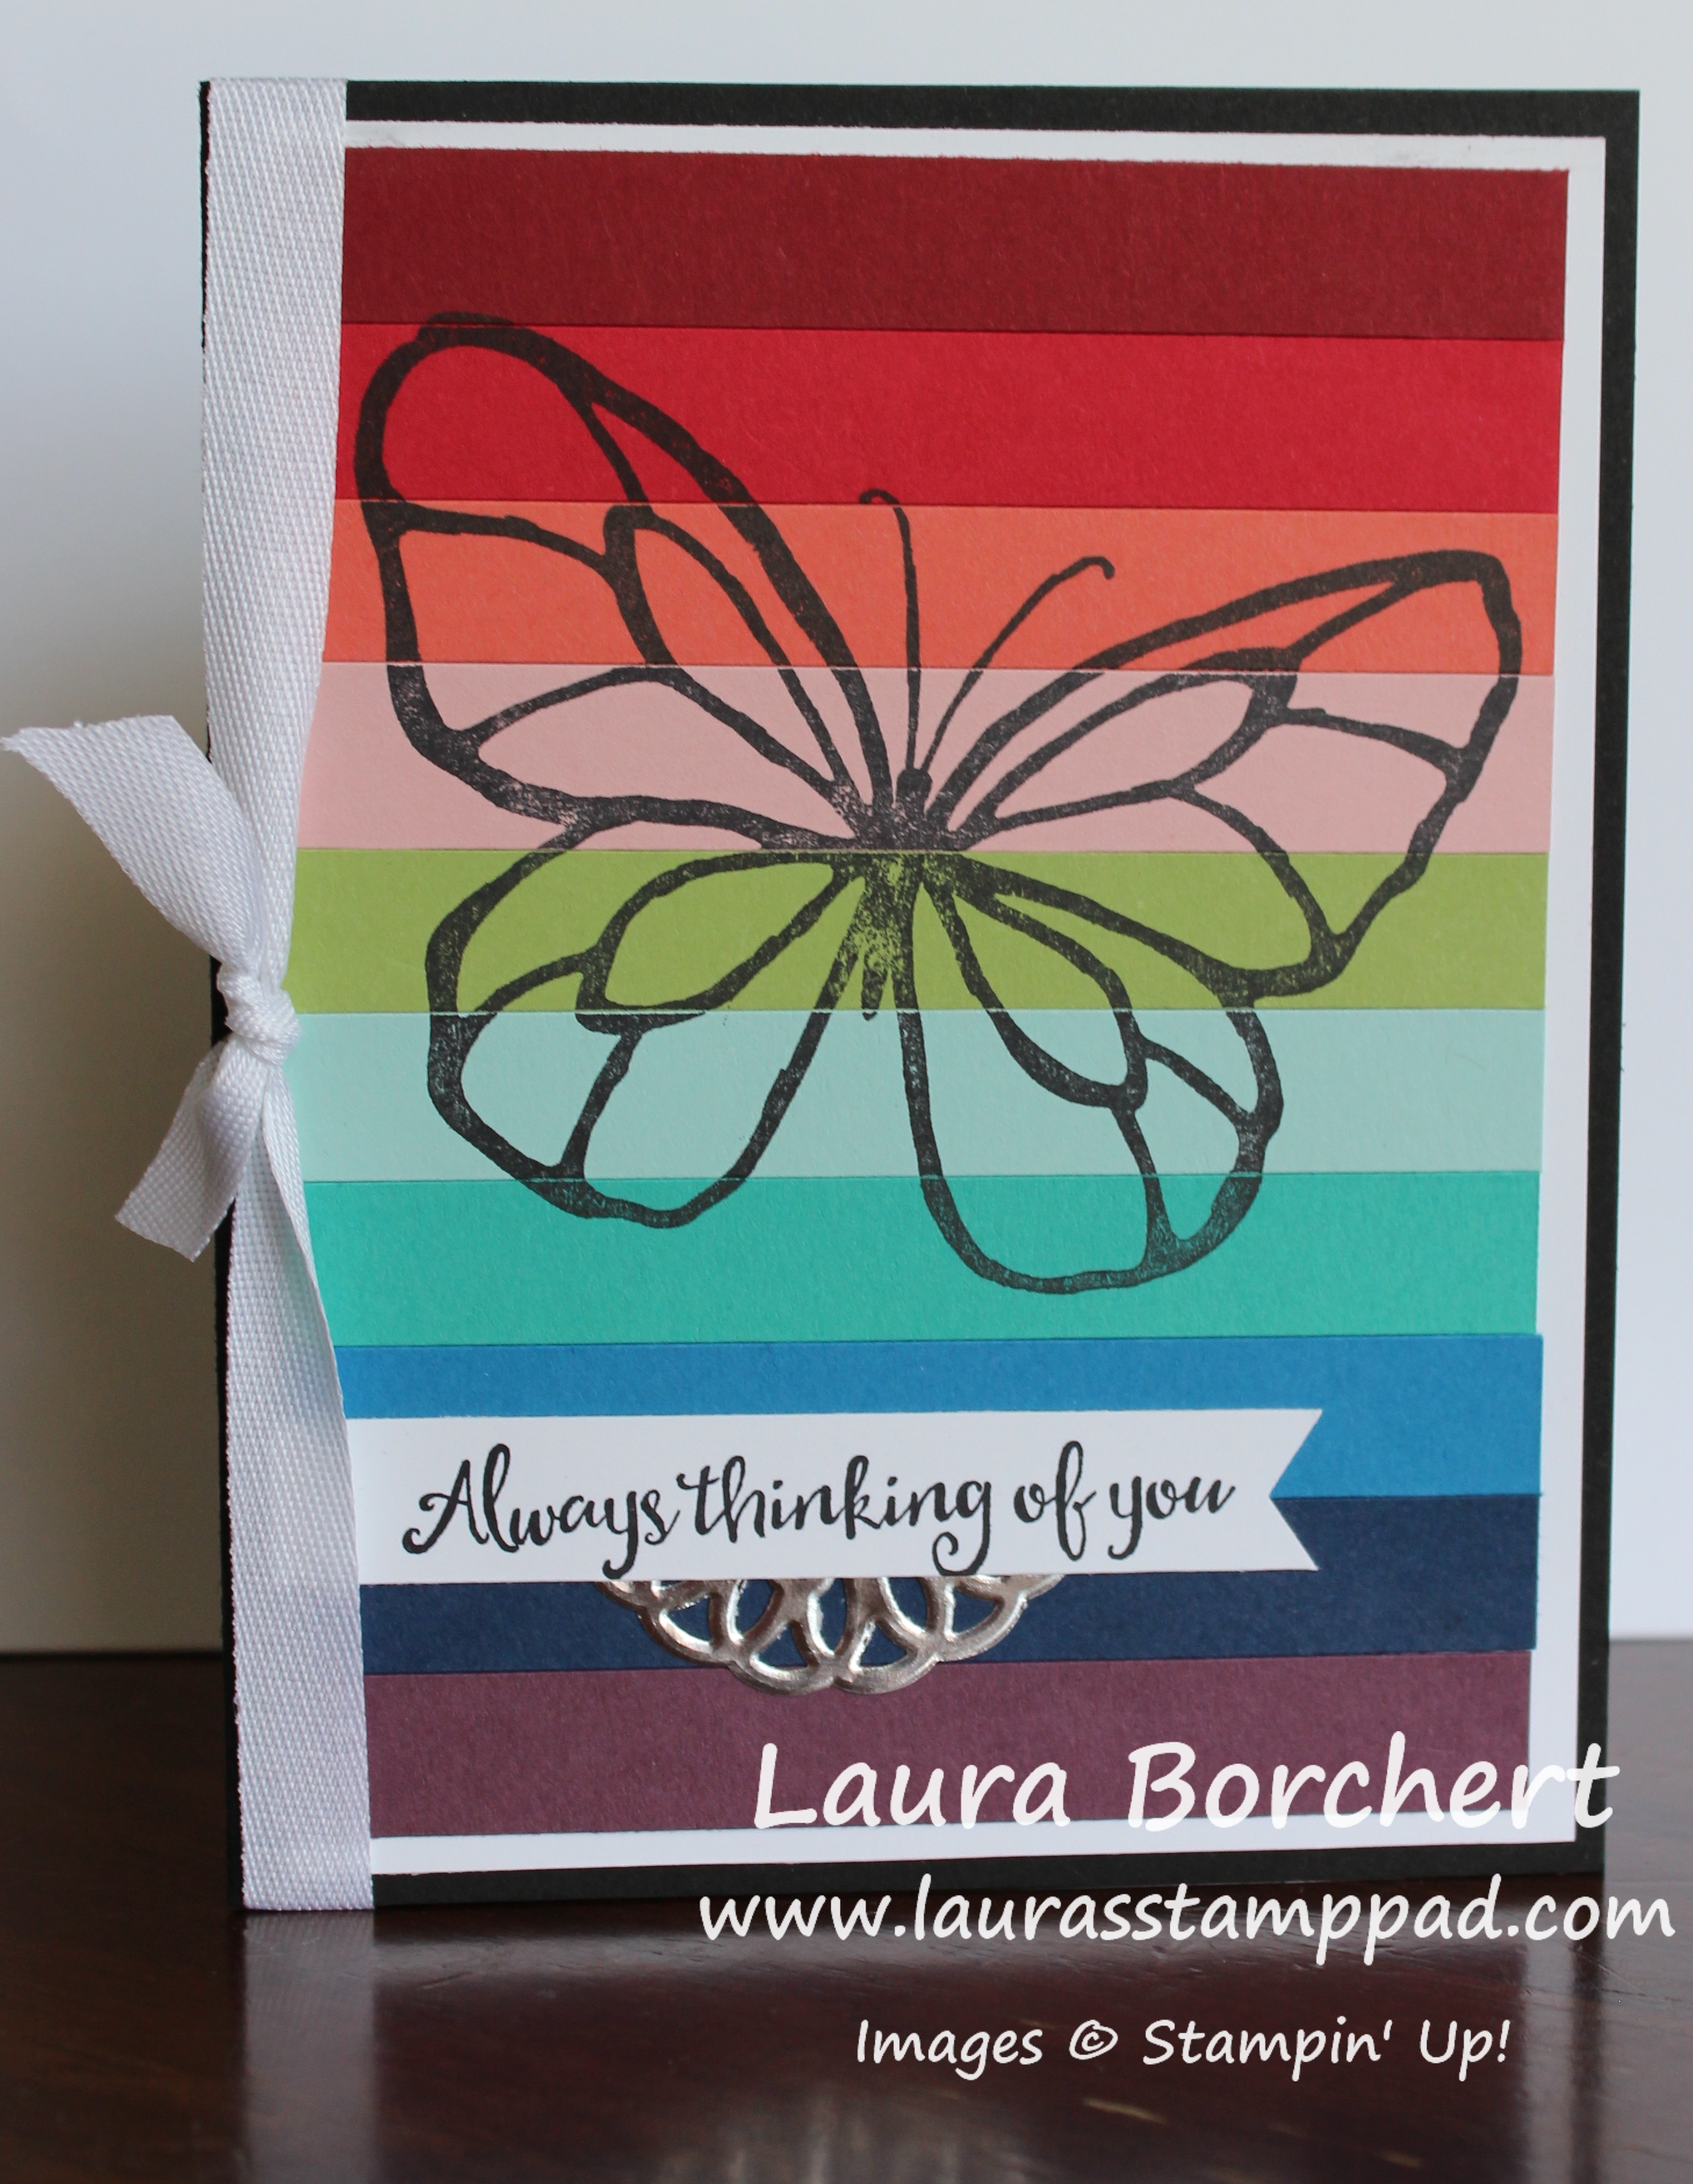
Happy Monday!!! I hope you all had a wonderful weekend! You all know I love bright colors and this card just makes me so happy. You could always change up the greeting because the image is so versatile. This Butterflies & Rainbows card could be done with lots of colors or just a few. It’s a great way to use up scraps too!

Rainbows & Butterflies, www.LaurasStampPad.com

Rainbows & Butterflies are a sign of Spring to me and I just love Spring so much! It’s my favorite season for sure! A sign of new life and bright beginnings! I am so excited for our little rainbow baby to arrive and start that new adventure this Spring! 🙂

I started this card with a Basic Black card base. Next, I cut 2 pieces of Whisper White cardstock measuring 4″ x 5-1/4″. One is for the front and the other is for the inside to write on since black is hard to see. Then I added strips of cardstock that measured 1/2″ x 3-3/4″. The colors from top to bottom are Cherry Cobbler, Real Red, Calypso Coral, Powder Pink, Pear Pizzazz, Soft Sky, Bermuda Bay, Pacific Point, Night of Navy, and Rich Razzleberry.

TIP: Add 3 lines of adhesive up and down to the white piece and then just place the strips on top. This makes it easier rather than adding adhesive to each little piece. The other tip is to roll with the punches for this card. Spacing and all might not come out perfect for each card because cutting 1/2″ to the inside of the line is smaller and to the outside is larger. With so many pieces and slightly different measurements, it could be off a little. Simple trim the white to not exist or be smaller or leave off a color if you need to! It’s all okay and still made with love! Also, it’s okay if you leave out a color. It happens! 🙂

Rainbow Background, www.LaurasStampPad.com

After getting the background all created, I stamped the butterfly from the Beautiful Day Stamp Set in Basic Black. BIG TIP: I used the Stamparatus for stamping the butterfly in my class so we could stamp it a few times for a nice darker look. You will notice on my sample above, it is not a crisp solid black butterfly. This tends to happen when you have a rough surface or solid stamped image. With the Stamparatus, simple stamp it, ink it up again, and stamp again. It is always in the same spot so no worries about it not lining up. I love that tool!

For the greeting, I used the same stamp set and stamped on a Whisper White piece and then cut banner tips on the right side. I added the greeting to the lower portion of the card. To finish off the card, I tied some Whisper White Classic Weave Ribbon around the spine of the card. This is for a little texture and to cover up any problems with spacing on the strips. 🙂

Let me know in the comments what colors you would use for this card! Would you stick with shades of one color? Rainbow? 2-3 of your Favorite Colors? Whatever you have the most scraps of? I would love to hear your ideas!

Happy Stampin’

~Laura

Product List


My 14th Anniversary with Stampin’ Up!!!

Posted on

Today is my 14th Anniversary with Stampin’ Up and I just can’t believe it!!! That is a long time and I have loved every minute of it. In fact, I almost feel like it just keeps getting better and better! The more people I meet, the more lives I touch, and the more fun I have makes it so much fun and fulfilling! In honor of my 14th Anniversary, I’m sharing my 14 Favorite Stampin’ Up Products right now!

My 14th Anniversary with Stampin' Up, www.LaurasStampPad.com

These are my 14 Favorites right now! Of course you can check out my past anniversary favorites here and here! I try not to pick the same items each year but there is some similarity because I love brights and flowers! 🙂

Beautiful Day Stamp Set – I am loving the big bold butterfly and flower for coloring and the full focal point on your card. These images are large and make the perfect focal point and all you need! Here and here are some samples using this!

Picture Perfect Birthday Stamp Set – I send lots of birthday cards and this set is super fun! I love how you can build candles and so much more. Also, that bow is super fun. Candles are great for all ages too! Love it!!! Here and here are some samples using it!

Berry Burst – This is my favorite color right now. I just love the deep pink and all the colors that coordinate so well with it!

Crinkle Seam Binding – This is a ribbon that I am so surprised I love because I hated normal seam binding in the past. I love the hint of shine and that texture of the crinkle. Also, this seam binding doesn’t fray as much as the old seam binding did. Here and here are some samples of me using this!

Silver Metallic Edge Ribbon – I just love bling and this white ribbon is perfect for any project. Add color with Stampin’ Blends or re-inker and you have any color! AMAZING!

Petal Passion Designer Series Paper – I love black and white designer paper and flowers! You can color this paper with Sponge Daubers, Stampin’ Blends, or leave black and white! This paper is fabulous! Here and here are some samples using it!

Myths & Magical Designer Series Paper – I have super fallen in love with this paper because its super fabulous! Use it as a background or fussy cut out the little mermaids or unicorns for a focal point. Also, one side of each sheet has a glitter bit on it! Here and here are some samples using this paper!

Stampin’ Blends – I’m not a huge fan of coloring and I don’t really consider myself an artist but these markers make it fun and easy! I love the beautiful color, no streaks, and blending ability! Have no fear as they will be back in stock soon! 🙂 Here and here are some samples using Stampin’ Blends!

Layering Ovals, Layering Circles, & Stitched Shapes (3) – I find that I use one or multiples of these for almost each project. Layering a Stitched Circle with a Scallop Circle is just amazing! I can’t put these down. Scroll through my blog and you will see I use this ALL THE TIME!!!

Everyday Label Punch – While I love framelits, I still find punches so handy because punch punch punch and you are golden. It is so much faster than a crank through the Big Shot. This one is perfect for greetings and punch a second one, cut it in half, and layer with it. LOVE IT! Check that out here!

Perennial Birthday Card Kit – This kit is so fabulous because the box is adorable. It comes with 16 all occasion cards inside and the amazing birthday calendar dividers. This kit is perfect to give as a gift too! Click here to see it all!

Stamparatus – This thing is a miracle tool for multi-step stamping. It makes it such a breeze. I have also been using this for when I stamp on a plastic table at different events. Plastic tables have give in them and so sometimes you don’t get a nice solid image because of this. Using the Stamparatus is perfect because it’s so hard and solid. Perfect! Also, have you ever stamped in black but the image didn’t come out perfect and solid? Using the Stamparatus makes it easy to stamp it, ink it again and stamp it for a more solid smooth look! If you didn’t get this in a pre-order, don’t worry. It is coming June 1st!!!!

Those are my 14 favorites right now! Are any of them your favorites as well?? Let me know in the comments below if we share some favorites or what some of yours are. I would love to hear from you! Check out all of this in my Video by clicking here or the video below! There is also a Bump Shot in the video of little Ziggy! Enjoy! 🙂 Be sure to give the video a thumbs up and don’t forget to subscribe so you don’t miss out on future videos and Ziggy when she arrives!

Happy Stampin’

~Laura

Product List


Technique Tuesday – Perfect Tree Placement!!!

Posted on

Happy Tuesday!!! You all know what that means! I have a fabulous technique to share with you all today! Create the perfect tree placement from the In The Trees Stamp Set using the Stamparatus!!!

Perfect Tree Placement, www.LaurasStampPad.com

Doesn’t this scene just look so relaxing, peaceful, and Spring-like?? Oh how I am counting down the days till Spring (34 more days)!!!! Let’s get started on this beauty!

I started with a Crumb Cake card base! Next, I took a piece of Whisper White measuring 4″ x 5-1/4″ for all the stamping! I started with the trees, then the hammock, and finished with filling in with flowers and birds! All of the images were stamped in Memento Black Ink since I colored them in with the Stampin’ Blends alcohol markers! I used the Stamparatus for the perfect placement on the trees and hammock. Stampin’ Up created the amazing notched hinges so we can move the stamp over. After stamping the first tree, I moved it over 2 full spots (into the 3rd spot over) which is the perfect spacing amount for the hammock to hang between them! How simple and cool is that?!?! I love it!!!

Spring Flowers & Trees, www.LaurasStampPad.com

For the coloring on the tree, I did not color each individual leaf! Heck no do I have the patience for that. LOL I colored big spots with the dark Old Olive and then blended it all together with the light Old Olive for a little variation in color! The trunk was done in Crumb Cake and the hammock in Real Red! I colored the flowers with Old Olive and Daffodil Delight. Then I thought it needed some green grass. There is a grass stamp in the set but I went with use swiping some of the light Old Olive Marker across the bottom. The awesome thing is that there aren’t streaks like when using a marker! I loved how it turned out!

To finish off the card, I added this piece to the card front and added the greeting onto a strip of Real Red. For a little bit of texture, I tied some Linen Thread around the greeting and added it to the card front with Stampin’ Dimensionals!

If you would like to see this all in action, check out the Video Tutorial below or click here! Be sure to give the video a thumbs up if you liked it and don’t forget to subscribe if you are new. If you would like a notification when I post a new video, be sure to click the bell right next to the subscribe!!!

Happy Stampin’

~Laura

Product List