Technique Tuesday – Using a Sponge Brayer!!!

Posted on

Happy Tuesday!!! I hope you are all having an amazing week! I have a fabulous technique to share with you today!!! I am showing you how to use the New Sponge Brayer on the Irresistibly Floral Designer Series Paper so you can get this fabulous look!!!Happy For You, www.LaurasStampPad.com
I am having so much fun with the Irresistibly Floral Designer Paper because it has FLOWERS and there are so many different fun ways to add color. I love it!!!

SUPPLIES NEEDED: Irresistibly Floral Designer Series Paper, Sponge Brayer, Ink Colors of Choice

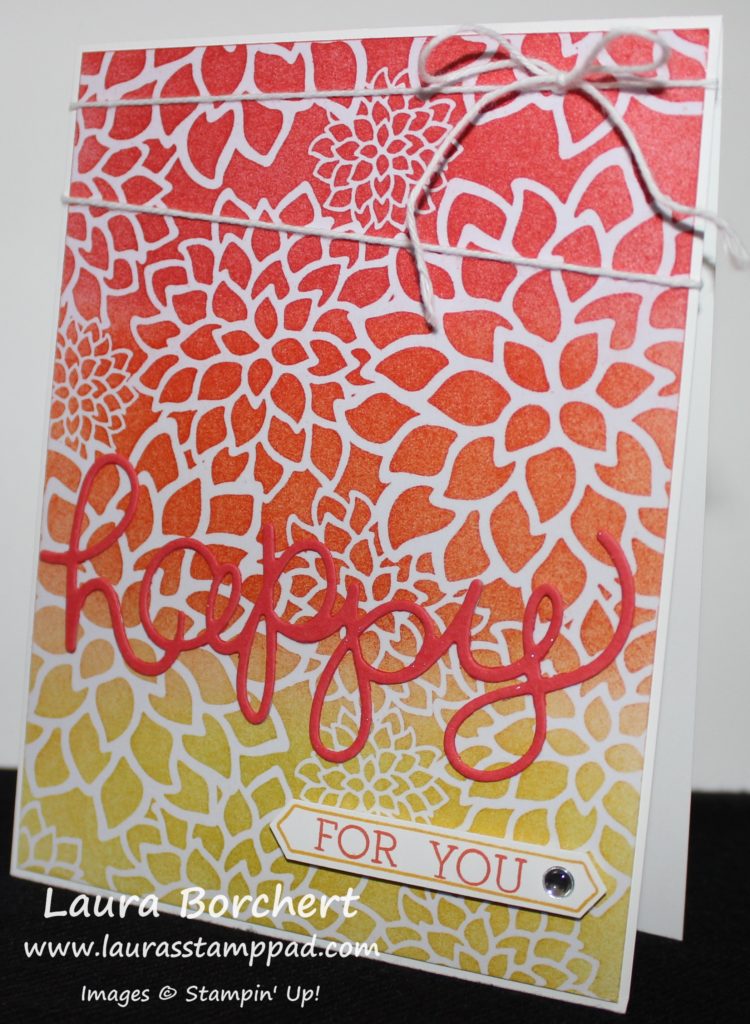
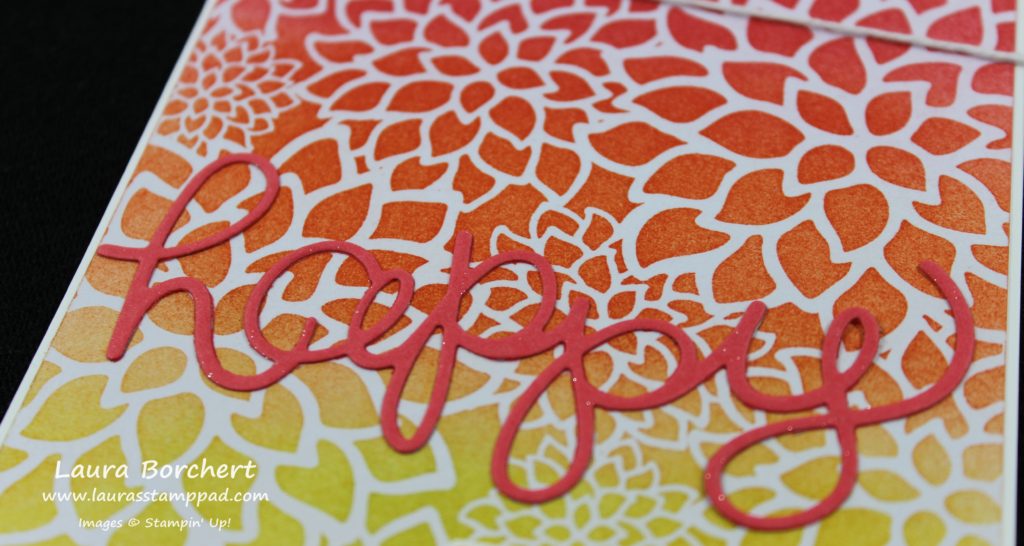
I started with a piece of the floral image from the Irresistibly Floral Designer Series Paper measuring 4-1/8″ x 5-3/8″. I didn’t want much of a border on my card front, just the beautiful flowers! I started with the lightest color – Daffodil Delight and rolled the Sponge Brayer over the ink pad. The sponge won’t pick up the ink like your are mopping up color, it will just be ever so slightly colored. Then I rolled it over the end of the Designer Paper – back and forth. The color will start to appear and you can continue until you have the desired shade. You will want to go about 1/3 of the way across the paper. Using a paper towel, you will want to wipe off any excess ink as it tends to sit on top of the embossed image. Then I changed out the sponge to a new one and did the same with Tangerine Tango. You will want to go over the top of the yellow a bit on that overlap portion so that it doesn’t look like stripes but instead like it fades into the next color. Wipe off the excess ink with the paper towel and then change out the sponge and finish off the Designer Paper with Watermelon Wonder. Be sure to go over that Tangerine Tango just a bit so your colors fade into each other! Wipe off the excess ink and you are all done!!! You can wash out your sponges with water and just keep squeezing them until they run clean and allow them to dry.

HAPPY, www.LaurasStampPad.com

To finish off the card, I added this piece to a Whisper White card base and tied some Whisper White Baker’s Twine around the top of the card. For the greeting, I die cut the Happy from the Hello You Thinlits. I brushed some Wink of Stella over the top for a little shimmer and added it to the card front with the Fine Tip Glue Pen! If I would have planned this card out a little better, I would have put the yellow on the top of the card and placed the greeting up there so it popped some more. I already had it adhered to the card so I just went with it! I stamped the Crushed Curry border from the Thoughtful Banner Stamp Set and added the greeting from the Crazy About You Stamp Set (it coordinates with the Hello You Thinlits). I punched out the greeting with the Classic Label Punch and added it to my card with Stampin’ Dimensionals. I added a little Metallic Enamel Shape for a little more bling! This card is so bright and cheery and could be used for any occasion!

If you would like to see this in action, check out the Video Tutorial below or click here. Don’t forget to give it a thumbs up if you liked it and be sure to subscribe if you are new. I post every Tuesday and Thursday!

Happy Stampin’

~Laura

Technique Tuesday – Irresistibly Floral Fun!!!

Posted on

Happy Tuesday!!! You know what that means! I have a fabulous technique to share with you today! The many different ways to emboss resist (the easy way)! The Irresistibly Floral Designer Series Paper is 12″ x 12″ white paper that is embossed in clear with a design – flowers, stripes, dots, and more! It is stunning paper and you can add color to use and really make the images POP!!!

Blue.Green Stripes, www.LaurasStampPad.com

How fabulous is this card??? It would have been perfect for Father’s Day! It’s just screams Man Card!!! Love it!!!

SUPPLIES NEEDED: Irresistibly Floral Designer Paper, Sponge Daubers, Ink of Choice

I cut a piece of the stripes Irresistibly Floral Designer Series Paper into a 4″ x 5-1/4″ piece. For this one, I used Sponge Daubers to color the stripes. I felt like I had more control and the sponge dauber is about the width I wanted in color! I started in the middle and worked my way to the sides. I just went up and down with the dauber adding as much color as I wanted. Once I was done with each color, I wiped off the excess ink with a paper towel! You can do a rainbow of colors or pick any amount of colors you wish! I used Emerald Envy and Dapper Denim. Then I added this piece to a Emerald Envy card base and wrapped some of the Whisper White Thick Baker’s Twine around the card. It really gives this card a nautical look, doesn’t it? For the greeting, I die cut a label from the Lots of Labels Framelits with the Big Shot. I stamped the greeting from the Tin of Cards Stamp Set and added a few of the Stars from the In-Color Enamel Shapes Pack. I added the greeting piece to the card with Stampin’ Dimensionals. It is a big bumpy over the ribbon so you will for sure want to use Dimensionals or you can always place the greeting below the ribbon!

You can always change up the colors or even add color in other ways like with Markers, Stamping, Spritzers, and Sponge Brayers. There are endless possibilities.

If you would like to see all of the paper in the Irresistibly Floral pack and the different ways to color it, check out the video tutorial below or click here. Don’t forget to give it a thumbs up if you liked it and be sure to subscribe if you are new. I post every Tuesday and Thursday!

Happy Stampin’

~Laura


Happy 8th Birthday!!!

Posted on

8th Birthday, www.LaurasStampPad.com

I just couldn’t not share this card with you all. I know that the Birthday Bouquet Designer Series Paper is no longer available but it’s too cute to not share. Also, I know we all have tons of Designer Paper that we are hoarding so you can always use your favorite!

I started with a Pool Party card base and added a piece of the Birthday Bouquet Designer Series Paper (4″ x 5-1/4″). For the greeting banners, I cut a strip of Blushing Bride cardstock into a 1″ strip and added the banner tips to the right hand side. I stamped the Happy in Watermelon Wonder close to the right hand side banners. Then I trimmed off on the left hand side. I then added banner tips on the left side, stamped the Birthday and trimmed it off. I found it easier to cut around the greeting rather than trying to make it fit. Also, it’s a great way to use up those little scraps. I added these banners to the card front. For the main part, I die cut out a 2-1/2″ Circle with the Layering Circles Framelits. I brushed the edges of the circle with a Sponge Dauber and Watermelon Wonder Ink. I added this to the center of my card front. For the 8, I stamped it from the Number of Years Stamp Set onto Whisper White cardstock and die cut it with the Large Numbers Framelits. I stamped the “th” and banner from the same set and die cut it out as well. I added the 8 to my card front with Stampin’ Dimensionals. You will have to cut the hexagons in half or use some of the edging. The “th banner” was added to the card flat! You could always create this card but leave off the number until it is time to use it. You could create this girly card and a more masculine card to always have on hand, then die cut the numbers as needed!

Stock up on the NEW Designer Series Paper and lots of the other items in the New Catalog this month with all of these special offers. Have you checked out the New Catalog? Click here to see it all! As a Hostess, you can earn an additional $35 in Free Product when your party reached $350. That can be a single order, catalog party, online party, or private class with your friends. If you Want It All, you can join Stampin’ Up in June and get $125 in any product of your choice for $99 PLUS 2 additional stamp sets!!! Click here for more information!

Happy Stampin’

~Laura


Antique Awesomeness!!!

Posted on

Rustic Elegance, www.LaurasStampPad.com

Collage stamping, antique, rustic, and lots of fun would define these cards! This is not my typical style but I did have lots of fun creating them! I had all intentions to do a rustic with gold look but after creating it, I thought I would do another option with the Paper Doily. I like them both a lot but I do think I like the Paper Doily better! Let me know in the comments below which one is your favorite!!!

Golden Doily, www.LaurasStampPad.com

I started with a Rose Red card base and then layered on a piece of Tip Top Taupe measuring 4″ x 5-1/4″ with Stampin’ Dimensionals. I took a piece of Very Vanilla (3-7/8″ x 5-1/8″) and stamped the dots image from the Timeless Texture Stamp Set in Tip Top Taupe. Yes, I stamped that image about 15 times to cover the background and I did get excited after the last stamped image after I realized I did it without messing up!! 🙂 I stamped the floral image in Rose Red and the little dots in Blushing Bride. If you look real close you can see those light pink dots. I added the Gold Doily to the right side and trimmed off a little bit of it. I took a strip of Very Vanilla and created the banner tips with the Banner Triple Punch. I stamped the greeting in Rose Red from the Rose Wonder Stamp Set. I brushed the edges with a Rose Red Sponge Dauber to make the greeting pop a little more. I added the greeting with Stampin’ Dimensionals and then added this to my card base!

Rustic Doily Thank You, www.LaurasStampPad.com

I started with the same card base for this one. I stamped the floral image from Timeless Textures Stamp Set all over in different directions with Rose Red ink. I stamped the cheese cloth image in Tip Top Taupe. For the little dots, I stamped those in Tip Top Taupe but I stamped about 3 times before going back to the ink. This gave a variation of color. I added a half of a Tea Lace Doily (old style) but you can use the New Delicate White Doilies. I created the same type of banner greeting as I did above but I added some of the Tip Top Taupe Lace Trim (retired) to the bottom of the banner greeting. I love that little extra texture and decoration on the greeting! To finish off the card, I added some Pearls in groups of 3 using different sizes. When I finished this card, I squealed with delight. It’s just so fabulous!!

Let me know in the comments below which one you prefer!

Happy Stampin’

~Laura


Live. Laugh. Love.

Posted on

Live Laugh Love, www.LaurasStampPad.com

I love this stamp because it’s so fabulous and a great way to live your life – Live, Laugh, Love!!! Get out that fancy china and use it! Buy some fresh flowers to enjoy! Go swing at the park and see how high you can go! Dance in the rain! Eat that second piece of cake! Laugh till it hurts! Live life to the fullest and who cares what others think! 🙂

For this card, I started with a Very Vanilla card base and then added a piece of the Playful Palette Designer Series Paper Stack (4″ x 5-1/4″). There are so many beautiful images to pick from, I truly had a hard time! For the greeting, I die cut one of the Lots of Labels Framelits in Very Vanilla and stamped Live Laugh Love in Emerald Envy. The greeting is from the New Layering Love Stamp Set! I wanted the greeting to POP a little so I brushed the edges with a Sponge Dauber and some Peekaboo Peach Ink. I added the greeting to my card front with Stampin’ Dimensionals!

Room In Your Heart, www.LaurasStampPad.com

Here is another one with the same concept. I used a different piece of Designer Paper from the Playful Palette Stack and a different greeting from the Layering Love Stamp Set. I stamped the greeting in Peekaboo Peach and brushed the edges with Sweet Sugarplum. These are all part of the New In-Colors! Love it!

Have you checked out the New Catalog? Click here to see it all! Don’t forget that June is a great time to get lots of items on your wish list. As a Hostess, you can earn an additional $35 in Free Product when your party reached $350. That can be a single order, catalog party, online party, or private class with your friends. If you Want It All, you can join Stampin’ Up in June and get $125 in any product of your choice for $99 PLUS 2 additional stamp sets!!! Click here for more information!

Also, if you would like to see what the Perfectly Wrapped Project Kit looks like, check out my reveal video here!

Happy Stampin’

~Laura


Paper Pumpkin Flower Stamps!!!

Posted on

Paper Pumpkin Flowers, www.LaurasStampPad.com

I don’t play with my Paper Pumpkin Stamp Sets much after I do the kit….it’s kind of sad isn’t it???? These sets are super fun and I love using them for the kit but then they go in a box and I forget about them! 🙁 I saw a sample similar to this one and just HAD to pull that stamp set back out of the box! I love it!!!! You can do this in soooo many different color combinations!

I started with a Whisper White card base and stamped the flower from the March Paper Pumpkin Kit in Tangerine Tango and the leaves in Cucumber Crush! I went across the card front diagonal and it totally looked like a twisted ribbon where it went wide every inch or so. The more I tried to fix it, the more it just looked the same only wider so I stopped. For the greeting, I used the same set and stamped it in Tangerine Tango. I punched it out with the Decorative Label Punch and the sponged the edges with Cucumber Crush and a Sponge Dauber! I wanted a little pop of color to off set the greeting. I added a little loop of Cucumber Crush Lace Trim behind the greeting and adhered it to the card with Stampin’ Dimensionals! Love it!

This card is quick and simple and fairly cheap to create since there aren’t any layers, not a lot of adhesive and scraps of ribbon and cardstock can be used for the greeting! You can change the colors to make the recipient’s favorite color!!! I can’t wait to try purple!

What color would you use to create this card? Let me know in the comments below! If you want to see more samples of Paper Pumpkin, click here! If you would like to get your own Paper Pumpkin Kit, click here to get signed up for the June Kit!

Happy Stampin’

~Laura

Ribbon Retire

Be sure to check out the Retiring Items before they are gone at the end of May!


Background Blues!!!

Posted on

Birthday Boy Card, www.LaurasStampPad.com

You all know how I struggle with a good man card because I just love flowers, ribbons and bling! Well check out this one!!!! I love it and I think it’s a perfect Man Card!!! I will be making multiples of this one to have on hand!!!

I started with a Soft Sky card base. Then I cut a piece of Night of Navy measuring 4″ x 5-1/4″ and White White measuring 3-3/4″ x 5″. On the Whisper White, I stamped the tea cup stain image from the Timeless Textures Stamp Set all over in Soft Sky and Night of Navy. Just randomly stamp and be sure to fall off the sides to make it look like the pattern continues. I adhered this piece to the Night of Navy and then wrapped some Linen Thread around the 2 pieces a few times and tied a knot (no bow since it’s a Man Card)! 😉 I added this piece to the card base with Stampin’ Dimensionals. You all know I love those things and I like to use them when there is ribbon (or something wrapped around) because it allows for it to still look smooth! For the greeting, I stamped the Happy Birthday in Night of Navy and die cut with the Deco Label Framelits. I brushed the edges with a Sponge Dauber and Soft Sky Ink and attached it with Stampin’ Dimensionals as well! Just perfect!!!!

What do you like to use for your Man Cards? Let me know in the comments below! I always need help with Man Cards! Also, if you would like to see more samples using the Timeless Texture Stamp Set, click here and here!

Happy Stampin’

~Laura

Project Life Retire

Be sure to check out the Retiring Items before they are gone at the end of May!


My Love For Dimensionals!!!

Posted on

Birthday Boy Balloons, www.LaurasStampPad.com

You all know how much I love Stampin’ Dimensionals!!! Well today I am showing all the fabulous ways to use them and some of the reasons why I use them! One of the reasons is so that my cards looks smooth when I add Ribbon or Linen Thread to a card like the one above. I wrapped the Linen Thread around the cardstock three times and added it to the card base with Stampin’ Dimensionals rather than Snail Adhesive so it wouldn’t be all bumpy over the thread! See!!! Perfect!

So for this card, I used a Mint Macaron card base. Then I took a piece of the Birthday Bouquet Designer Series Paper from the Occasions Mini Catalog (3-3/4″ x 5″) and adhered it to a piece of Lost Lagoon (4″ x 5-1/4″). I wrapped some Linen Thread around 3 times. I think this is the perfect Man Card ribbon! 🙂 I added this piece to my card base with Stampin’ Dimensionals. For the greeting, I used the Party Wishes Stamp Set and Lost Lagoon Ink. Also, I brushed the edges of the greeting with Lost Lagoon and a Sponge Dauber. I added the greeting to the card with Stampin’ Dimensionals too! Again, I like using them when placing on top of ribbon so that it’s nice a smooth. This is a great man card in a paper pack full of flowers and other beautiful patterns!!!

If you would like to see an Up Close & Personal on Dimensionals and other ways I use them, check out the video tutorial below or click here!! Don’t forget to give it a thumbs up if you liked it and be sure to subscribe so you don’t miss any other videos!

Do you all love Stampin’ Dimensionals as much as me? Or do you think you will start using them more now?? I sure hope so! 🙂

Happy Stampin’

~Laura


Balloon Bouquet!!!

Posted on

Pink Balloon Bouquet, www.LaurasStampPad.com

Eeeeee! This card just makes me so excited I have to scream! PINK! BLING! RIBBON! SPONGE DAUBERS!!! I love it!!! You could always change up the color to your favorite color/s or even for a more masculine card! I’m super excited about the Balloon Celebration Stamp Set and coordinating Balloon Bouquet Punch (Bundle and Save 15%)!

I started with a Melon Mambo card base. Then I took a piece of Whisper White measuring 4″ x 5-1/4″. I stamped the balloon strings and greeting in Basic Black. Then I stamped one large and one small balloon outline onto Melon Mambo cardstock and punched them out. I also punched out one large and one small balloon in Blushing Bride Glimmer Paper and Dazzling Diamonds Glimmer Paper. You will want to adhere the balloons from the bottom up (shortest strings first)! I did half of them directly to the cardstock and the other half with Stampin’ Dimensionals! Then I brushed the edges of the cardstock with Melon Mambo and a Sponge Dauber and added it to the card base. For the bow, I used Melon Mambo Cotton Ribbon and used the Fork Bow Technique! You can check out the video tutorial on that here! I adhered the bow to the card with a Mini Glue Dot! Perfect!!!

Balloon Celebration, www.LaurasStampPad.com

TIP: So you might notice a bit of an outline of a balloon on the glimmer paper….DON’T DO IT! I added the balloon border to the Melon Mambo balloons and I liked how it really defined the balloon so I thought I would do the same with the Glimmer Paper. It didn’t dry and then smeared and got all over my fingers/project. I guess it eventually dried but I wouldn’t recommend doing it. 🙂 That’s what I’m here for….to make the mistakes and pass along the tips!

If you would like to see more samples and some basics on the Balloon Celebration Bundle, check out my video tutorial here or by clicking below! Don’t forget to give it a thumbs up if you enjoyed it!!!

Happy Stampin’

~Laura


Hawaiian Birthday!!!

Posted on

Birthday Flowers, www.LaurasStampPad.com

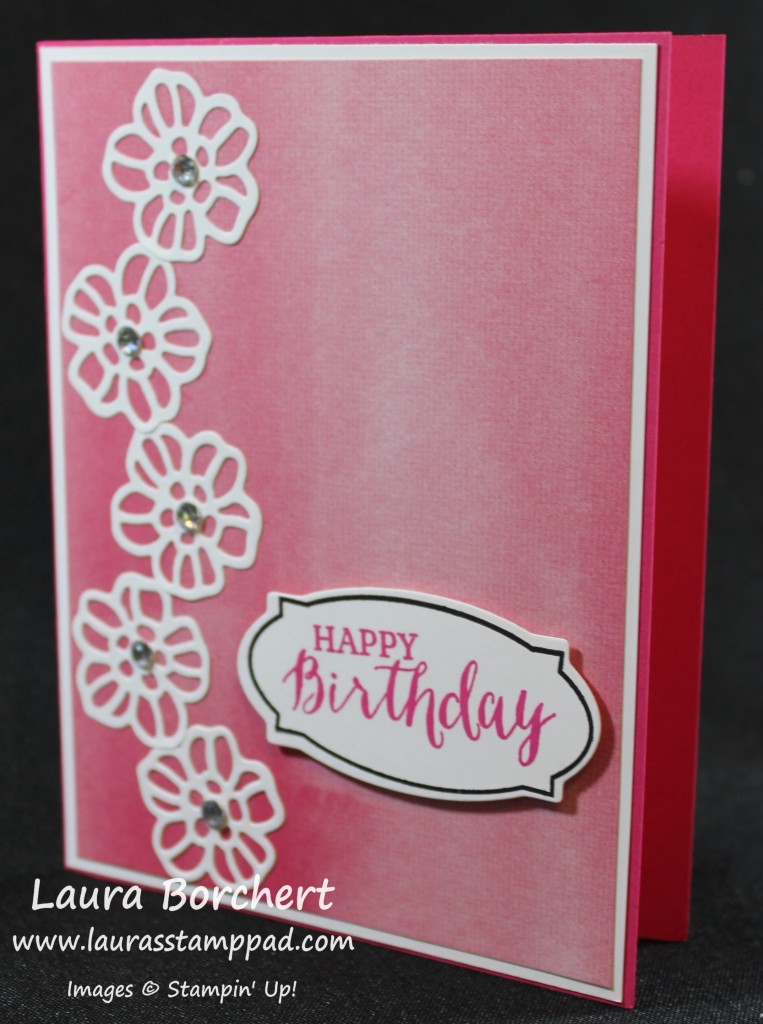
This card seems to scream fun, flirty, and Hawaiian. Is that a Hawaiian flower?? Either way I am in love with it and it’s PINK!!! I started this card off with a Melon Mambo card base. I layered a piece of Whisper White on top measuring 4-1/8″ x 5-3/8. Then I used some of the Perfectly Artistic Designer Series Paper (no longer available). You could always create some of your own paper like this with Sponge Daubers or the Watercolor Wash Stamp Set. This piece measures 4″ x 5-1/4″. I die cut the flowers from the Rose Garden Framelits. Of course, I used the Die Brush to help pop the image out of the framelits and pop all the paper out of the holes! I love that little tool! Check it out in action here! I used the Fine Tip Glue Pen to adhere the flowers to the card front and added a Rhinestone for a little bling!! For the greeting, I used the Rose Wonder Stamp Set (Bundle & Save 15%). I stamped the label in Basic Black and the greeting in Melon Mambo and then die cut it with the Rose Garden Framelits! I am in love with the Rose Wonder Bundle. The greetings, the flowers, the leaves…..I love it all!!! If you would like to see more samples, click here, here, and here!

Happy Stampin’

~Laura