November My Paper Pumpkin!!

Posted on

I know I’m a little behind on completing my November Paper Pumpkin Kit! Just like everyone, the past couple of weeks have been crazy! I finally finished my kit this past week…..just in time to use the tags on my presents but too late for Holiday Cards.

November Paper Pumpkin, www.LaurasStampPad.com

The goodies arrived in the middle of November and I was super excited! You can check out this video which I did when I first opened it! That was so exciting to open and share with all of you! I instantly loved the stamps which have perfect greetings. My Christmas Cards were all complete but I needed a greeting for the inside and this one was PERFECT! I stamped….correction my husband stamped that on the inside of my cards while I completed the rest and stuffed them in the envelopes. He is so fabulous! 🙂 Then life got in the way and time flew by and I finally sat down last week to do the rest of the kit. I am using the tags for my presents but I’m done with my cards so I created winter birthday cards! I did them exactly like the instructions but with a greeting from Remembering Your Birthday Stamp Set!

November Paper Pumpkin, www.LaurasStampPad.com

Super cute and now I’m ready for all of my January Birthdays! Love it!!!!! Also, for the popped out letters on the tags, I created this quick and simple Birthday Card!

Age Awareness Nov MPP, www.LaurasStampPad.com

I took a Note Card and Envelope, added some Washi Tape to the top and bottom. I used the greeting from the Age Awareness Stamp Set and added the letters HAPPY. Fabulous!!!! I can’t wait to get my December Kit in the mail any day now! Be sure to subscribe to my YouTube Channel so you don’t miss out on the December My Paper Pumpkin Reveal! Make sure you are signed up before January 10th so you can receive the January Kit! These also make fabulous Christmas Presents! Click here to see the pre-paid subscription options!

Happy Stampin’

~Laura


Technique Tuesday – Pom Pom Fun!!!

Posted on

Happy Tuesday!!! That means I have a fabulous technique to share with you and today it is making cut little Pom Poms!!!!

Pom Pom Party Hat, www.LaurasStampPad.com

I am loving the Pink little Pom Pom on that party hat!!!! It is just so fluffy!!! And fairly easy to make! Let’s get started!

Supplies Needed: Baker’s Twine (I prefer to use the Thick style), a fork or piece of scrap paper, and a needle

The supply list is short and a little odd but you will see! For this card, I used the Thick Strawberry Slush Baker’s Twine. Since I wanted a smaller pom pom, I just wrapped the twine around the tines of a fork about 10 times. Then you will take another piece of the twine and loop it through the middle tines and tie all of your loops together. Now you can slide the loops off of the fork and cut all of the loops. I do kind of like all of the loops too…super cute! Once you can have cut your loops, you can either stop there or take your needle and run it up each piece of Baker’s Twine to fray the ribbon into lots of smaller strands. This is the part that sometimes can take awhile and make you want to go crazy! Once you think you have done them all, you find another one. 🙂 Fluff all of the pieces and your Pom Pom is complete!!!! I attached the Pom Pom to the Sweet Taffy Designer Series Paper triangle with Stampin’ Dimensionals. I layered the party hat onto a piece of Strawberry Slush that I had run through my Big Shot with the Alphabet Press Embossing Folder! The greeting is from Remembering Your Birthday and I punched it out with my Decorative Label Punch!

Pom Pom Box, www.LaurasStampPad.com

For this adorable gift box, I decorated it with the All Is Calm Designer Washi Tape which is super simple. Then I used the Silver Baker’s Twine for the pom pom. To make this one a little bigger, I wrapped the twine around a piece of scrap paper that was wider than the fork. Again 10 times around, slide it off and tie it in the middle, cut the loops and fray it!

To see this all in action, check out my Video Tutorial!!! Be sure to give the video a thumbs up if you liked it and don’t forget to subscribe so you don’t miss out on any future videos (like the one on Thursday 😉 )

Happy Pom Pomin’

~Laura


It’s Not About The Number, It’s The Memories!

Posted on

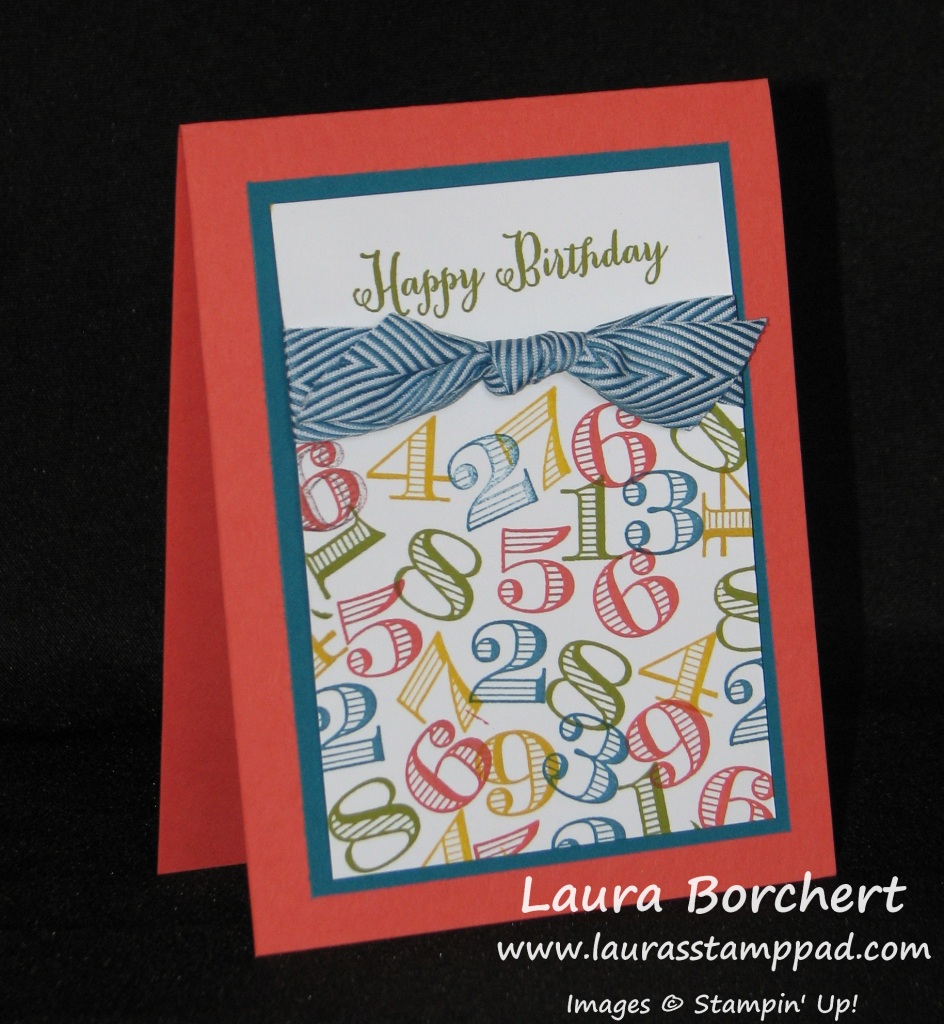
Memorable Moments, www.LaurasStampPad.com

Birthdays are very special! Everyone has one and it is a day to celebrate YOU and all the memories you have created each year! I love how this card represents the many years. This card doesn’t specify which year you are on but shows many numbers to make a colorful background! I love it!!!! I used the Memorable Moments Stamp Set for all of the numbers and the greeting is from Remembering Your Birthday! I used Island Indigo, Crushed Curry, Old Olive, and Calypso Coral Ink Pads for all of the numbers and stamped about 4 of each number in various colors.Of course, I had to add in a little ribbon and I picked the Chevron Island Indigo Ribbon for this one! I like how the ribbon separates the greeting from the colorful numbers!

I hope you enjoyed this card and try out this color combination on your next project! And remember it is not about the number, it is about the memories you make each year! 🙂

Happy Stampin’

~Laura


Pink & Sprinkles!!!!

Posted on

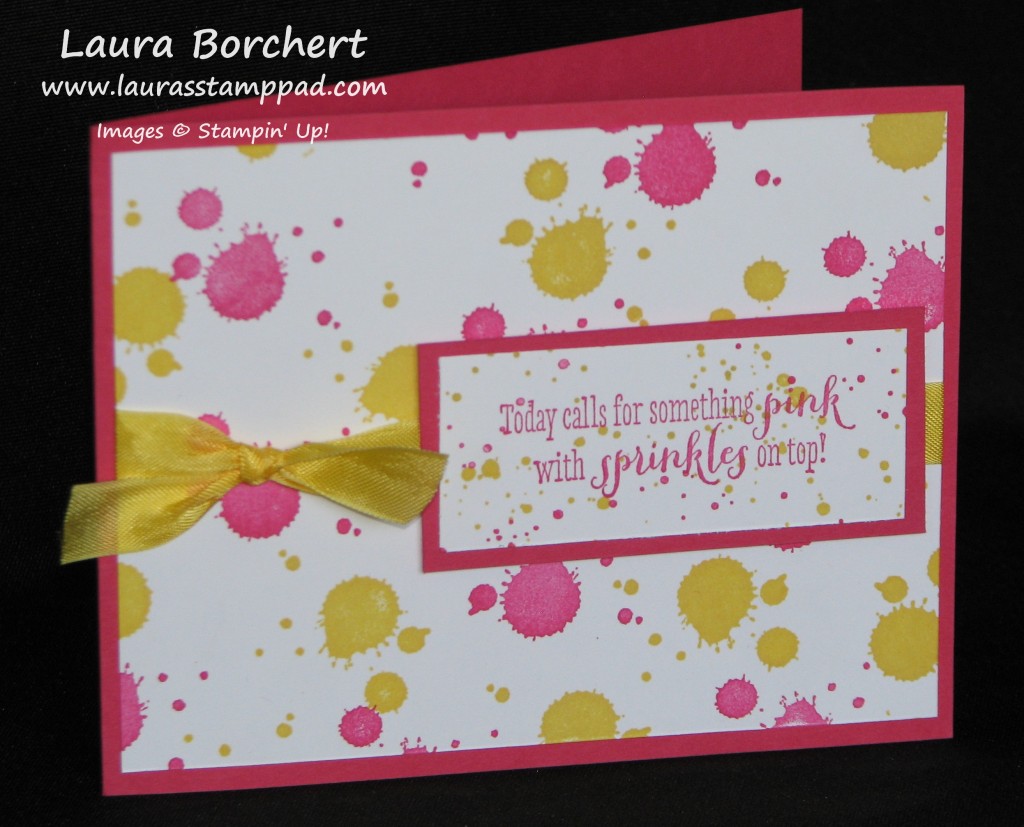
Pink & Sprinkles, www.LaurasStampPad.com

This card is just fabulous because it uses the color PINK (Melon Mambo) and it mentions SPRINKLES (I love them)!  This was one of the cards that we made at my Birthday Celebration Class last week! I used my Gorgeous Grunge Stamp Set for the background with Melon Mambo & Daffodil Delight Ink. Then for the greeting I used my Remembering Your Birthday Stamp Set and another stamp from Gorgeous Grunge for those little dots in the background! Gorgeous Grunge makes some amazing backgrounds! You could even do this in boy colors like blues and greens, blue and gray, 2 shades of blue or green. I see some inspiration happening. 🙂 Okay, back to the card, I added some Daffodil Delight Seam Binding to give the card some POP and texture! This is a fairly simple simple card and the little greeting piece uses up scraps! Bonus!

For more samples using the Gorgeous Grunge Stamp Set, click here and here!

Happy Stampin’

~Laura


Amazing Birthday Weekend!!!

Posted on

Happy Monday and Happy Labor Day!!! I hope you are enjoying this long weekend (if you actually get the day off)! I used the long weekend as an excuse to celebrate me birthday even longer!!!! As some of you may know, my husband (who is not the crafty one in the house) has started making my cards for all occasions! You can check out his other card here! I absolutely love it because it’s handmade and it was made by my sweetie! Well here is the card I got for my Birthday this year!

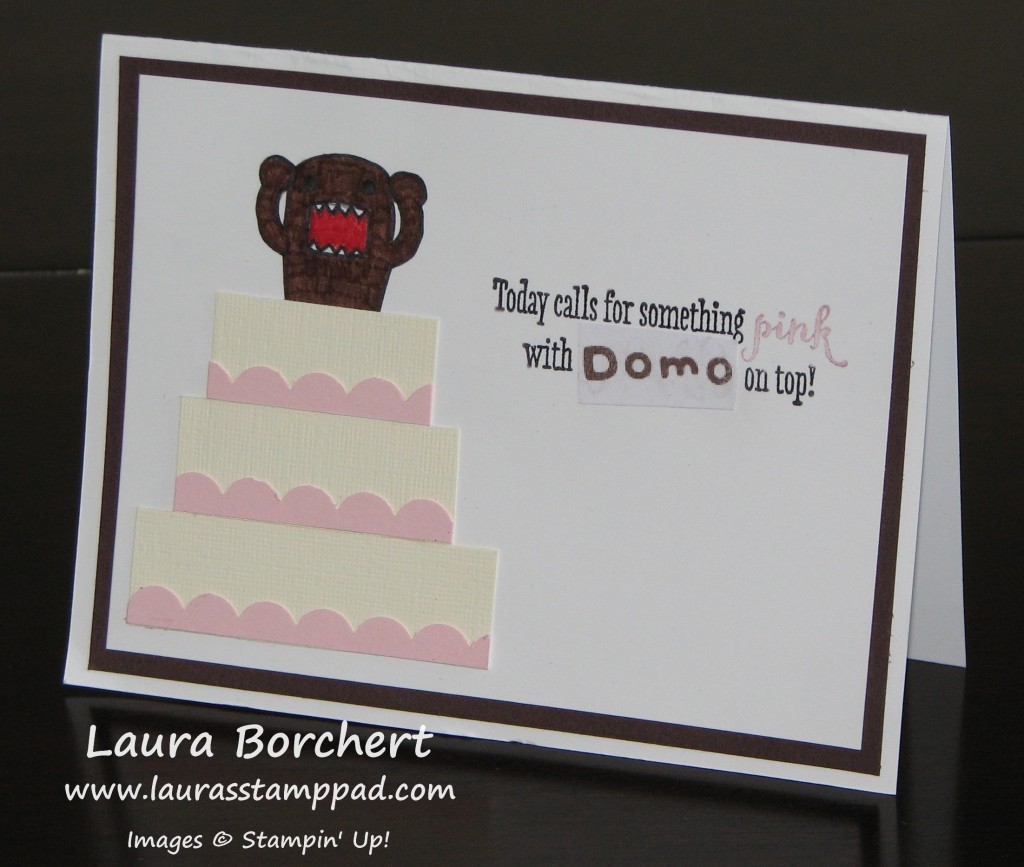
Domo Birthday Card, www.LaurasStampPad.com

He used a Whisper White card base with Chocolate Chip and Whisper White layers. He had drew the little Domo character on the top of the cake and the cake was created with Very Vanilla & Pink Pirouette cardstock. NOTE: He even picked through my scraps of Vanilla and found textured cardstock. Bonus Points! Of course the scallops were created with the Scallop Border Punch! The greeting is from Remembering Your Birthday and he covered up the word sprinkles with Domo! I love it and think he did an amazing job!!!!

Stamp Class Fun, www.LaurasStampPad.com

I had a class scheduled for August 28th, the day before my Birthday!  As I was planning the projects, I thought this will be my Birthday Celebration class so we shall do all things Birthday, add in some PINK and lots of FUN! Well fun was had for sure! I think my neighbors a few blocks away must have been wishing they could have joined in the fun! We were laughing, chatting and having a good time!!!! It was the perfect Birthday Celebration! I made cupcakes for everyone and they all had a candle in them! One of my stampers shares my Birthday so it was wonderful to celebrate with her as well! I LOVE the people, relationships, and fun that Stampin’ Up! has brought to my life! I am so very thankful for Stampin’ Up and all of these amazing ladies that celebrated with me and those that weren’t able to attend! Thank you all! You are AMAZING!

Who wants to party next with lots of fun and stamping? Don’t forget that when you hostess in September and your party reaches $300, you will earn an exclusive Good Greetings Stamp Set on top of your regular Hostess Goodies! You can see one of the stamps (I Love You) in this sample!

Happy Stampin’

~Laura


Technique Tuesday – Make Your Own Stencil!

Posted on

Happy Tuesday!!! That means I have a fabulous technique to share with you today!!! I’m going to show you how to create your own stencils because how cute is this card?

Punch Stencil Card, www.LaurasStampPad.com

Okay so I know this card is super cute already because its PINK, has flowers, has some bling, and says the word sprinkles in the greeting! Love it! Now let me know tell you how to create this amazing card!

Supplies Needed: Itty Bitty Punch Pack, Scrap Paper, Watercolor Paper or regular cardstock, Sponge Dauber, Blender Pens, or a Maker

I used the Flower from the Itty Bitty Punch Pack for my sample but you could really use any punch image. Punch the image from a piece of scrap paper! This is not your stencil! For the sample above, I used Watercolor Paper and my Blender Pens to get the look! You could use regular cardstock and a marker or your SPONGE DAUBERS! You know how I love my sponge daubers. I then moved the stencil all over the paper for a random look (some falling off the edges or in the corners). Also, I used my sponge daubers for the edge of the greeting just to add a little color! How simple is that? So you may be asking, why can’t you just punch the image in any color of cardstock for the same look? You can most certainly do that as well. It would give a more textured look because each punched image would be raised up! So many fabulous possibilities!!! Here is another sample created by Vel at one of my stamp classes!!!!

Punch Stencil Card, www.LaurasStampPad.com

I love the colors together! So beautiful and the Daffodil Delight really pops and brightens the card up! This card is sure to brighten anyone’s day! We both used the Remembering Your Birthday Stamp Set for our greetings! Both cards have a coordinating greeting on the inside as well! I hope you try this out with some of your punches and leave a comment down below or send me your photos! I would love to hear and see what you come up with!

Happy Stampin’

~Laura