The March 2020 Paper Pumpkin Kit was AMAZING! I love the Spring look and the fun rain boots! It also came with an extra stamp set which is super fun too! Check out all 12 of the cards in this kit!
I just love all of these cards! The coordinating striped envelopes are super cute too! I’m not 100% sure which color goes with which card but that’s okay!
This card is so fun because of all the colorful boots. My first card was that bottom left hand card. Notice that the green boots don’t line up with the girl’s boots. Oppps! I didn’t realize that they matched up and so I just placed the boots down. 🙂 No one will notice! This card has the clear raindrops on it that add just a little bit of texture and shine!
The bunny is adorable and makes this a fun Easter card! You can see that a I used the clear epoxy dots for this card. The photo doesn’t show it very well but there are like 3 above the flowers and 2 over by the bunny!
I’m not a huge fan of storms because….well…they are scary! Seeing these beautiful flowers and cute boots just proves to me that there is still beauty during the storm. There is hope that we will get through it and we will!
Paper Pumpkin is so much fun and I love getting something new each month that is a surprise! I love getting card kits that are perfect for the time of year we are in. Join in the fun with me and get Paper Pumpkin too! Click here to sign up for 1 month or as long as you want!
The Three Cheers to You All Inclusive Card Kit is PERFECT for right now! This is something that you can do anywhere. In bed, in front of the TV, at the kitchen table! Also, anyone can do it because it comes with everything to create the cards except scissors! Spend an afternoon of homeschooling craft class with the kids, enjoy it your self, or give it to your neighbor who is alone.
There are 4 card styles and 3 each of them for a total of 12 cards! It also comes in this adorable box which you can use to store them in or gift them in. You could also use it for a completely different gift as a gift box!
This one is my favorite! I love the soft subtle colors because that makes it perfect for a baby boy or girl! Heck, it just says tiny miracles so that could be a new puppy, kitten, or even a small step in the right direction in life!
This one is my second favorite card! I just love color combination. That linen thread with the large bow behind the greeting is kind of cool. That’s how the instructions said to do it and I like it! Another fabulous way to add ribbon to cards!
I love this greeting so much! It is just the cutest greeting ever and works for so many occasions! The simple blue with that hint of foil is just perfect!
The final card in the Three Cheers For You Card Kit has that exact greeting! This was the first card I made like this and the rest of them I added more Linen Thread. I felt it needed more foofoo and texture and this one looked too simple! That’s the awesome thing about these kits is that there is plenty of supplies and you don’t have to follow the directions!
Click on the supplies listed below to see all of the All Inclusive Card Kits available right now! Enjoy one yourself or give one to a friend!
The Kerchief Card Kit is one of the new Sale-A-Bration items that you can earn for FREE. I LOVE this kit! It’s so beautiful with the foil accents and vellum layers.
Isn’t this card beautiful? It’s the perfect card to send to anyone at any time. It might be for sympathy, going through a tough time, a promotion a work, good news to celebrate. Anything at all! After all I think we should send more cards just because! 🙂
This kit comes with all of the supplies to create 4 each of these 2 designs. The decorated envelopes are included as well. No stamping or supplies necessary except scissors to cut the twine. I ended up not using the twine on the blue card. I just felt it was beautiful without so I am holding on to it for another project!
Get this Kerchief Card Kit for FREE when you spend $50 now till the end of March! Click here to start shopping and earning! Don’t forget that the Free Stamp Set of the Month for orders of $75 or more before shipping and tax is the Perfectly Framed Stamp Set! That means you can earn lots of FREE stuff during Sale-A-Bration!
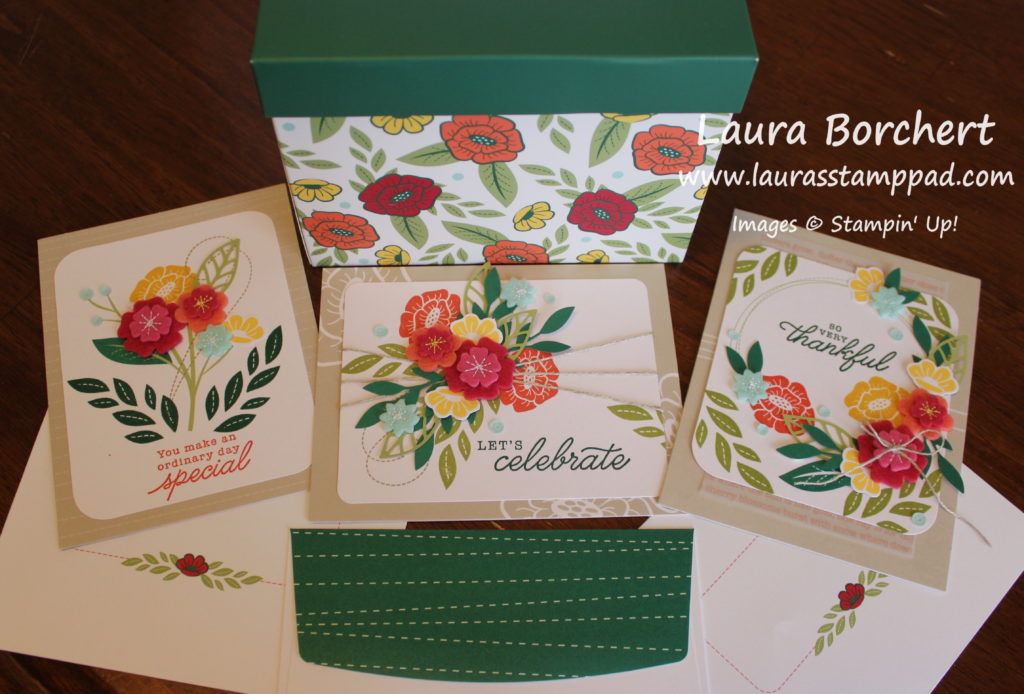
Stampin’ Up does some amazing Project Kits! These are perfect for gift giving because some some all inclusive meaning all you need is scissors. Some are more detailed and some require the purchase of additional supplies like stamps and ink. The awesome thing about the ones that don’t come with stamps and ink is that you can purchase multiples to make for gifts and not end up with 5 stamp sets. All inclusive are good to give the entire thing and the others are perfect for making and gifting or enjoying yourself! The For the Love of Felt Kit is fun to make and give!
This kit is super cute with 3 designs of cards, 4 each. The envelopes have a pretty green pattern on the back lip and the front has a cute box to write the address or name in! All of this fits into a little card box that coordinates. It scream gift box! Actually I think the box looks like a cute recipe box but either way I love it!
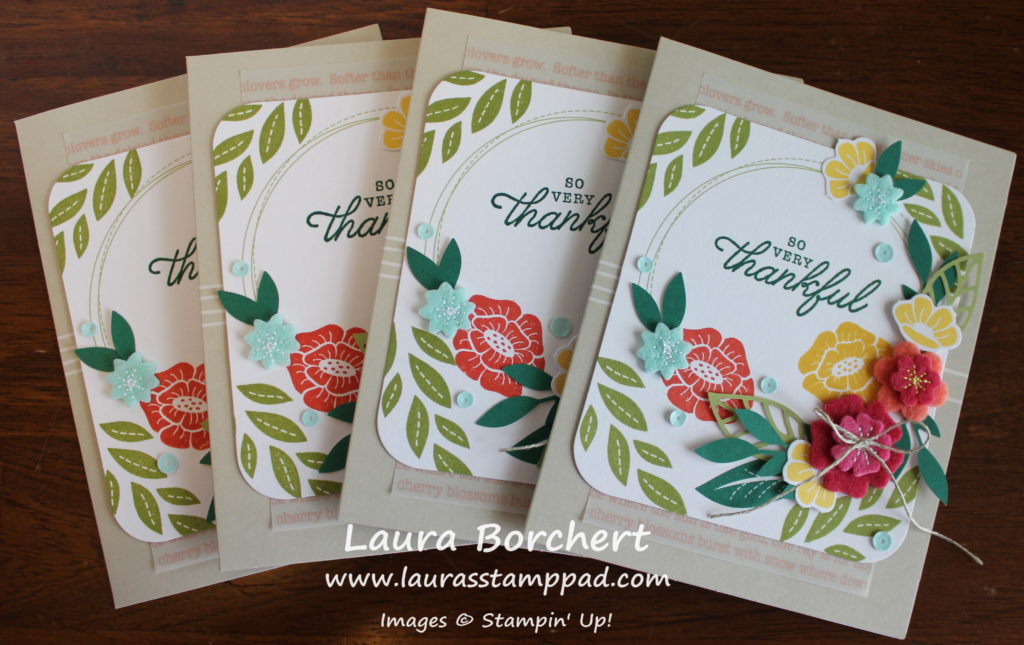
This was the hardest card of the set I think! There are lots of details and layers and flowers! I would almost suggest doing this one last because it also has a ton of pieces. I did it first and was counting out all the pieces to make sure I wasn’t using them all up. If it was the last set, you wouldn’t have to worry about that. First, I stamped the leaves on all 4 corners. Then I built up the outside and worked my way to the big flower in the middle. This means I did the little blue and yellow ones at the top and the coral and blue off to the left and then slowly worked my way to the main focal point. For the leaves, I used Mini Glue Dots to secure them.
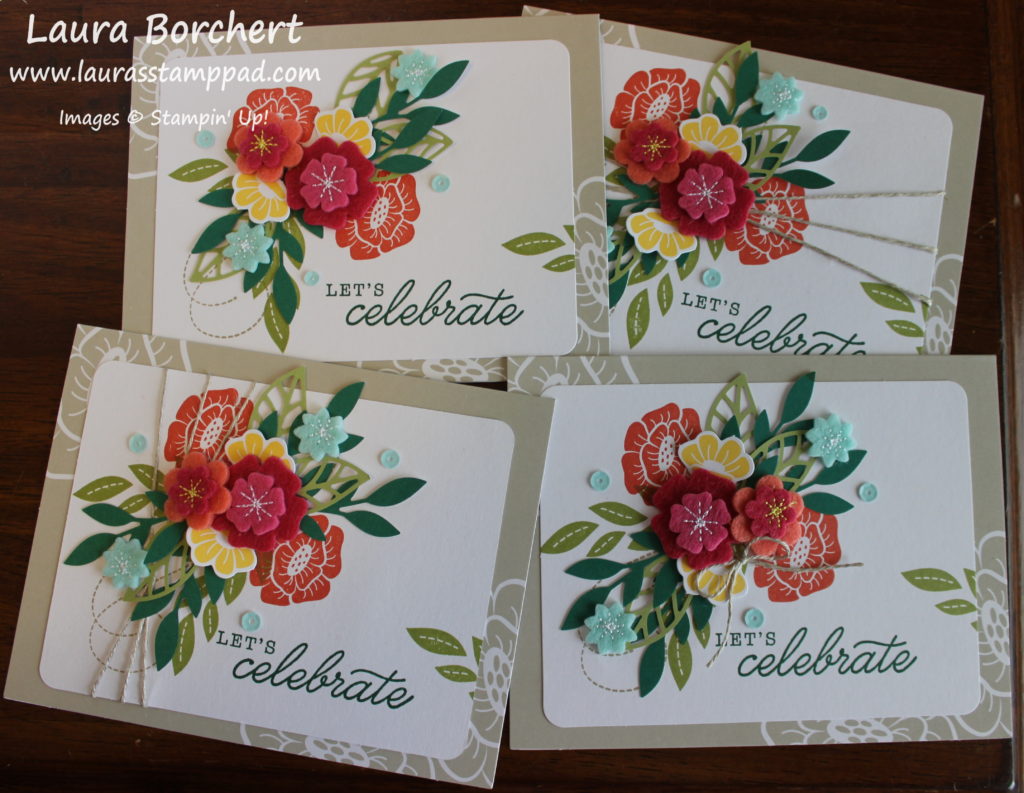
This card was the easiest one. I whipped these 4 together really fast. Stamp, stamp, glue, glue! For the felt flowers, I used Multipurpose Adhesive Glue.
These cards I did a little different for each one….a little on purpose! So, the first card I did (top left), I finished it and realized I forgot the thread. So I nailed it on the second card (top right) and wasn’t so sure I liked it. The thread went right over the coral flower. For the next card, I did the thread vertical (bottom left) and really liked that one. On the last card, I thought I might as well try another option just to see so I went with a little bow. Following the direction is fun but doing your own thing is even more fun!
Which card is your favorite?? Let me know in the comments below. Also, let me know if you like getting handmade greeting cards for a gift or giving handmade greeting card as a gift.
If you would like to see the For the Love of Felt Project Kit, check out the video below or click here! Be sure to give the video a thumbs up if you liked it and don’t forget to subscribe if you are new. If you would like a notification when I post a new video, be sure to click the bell right next to the subscribe!!!
Happy Tuesday!!! You all know that means I have a fabulous technique to share with you today!!! Have you ever heard of the Memories & More Card Collections?? Did you know that you can scrapbook and make cards with these? They are like a kit that is super quick and simple but there are lots of ways to use them!
This fabulous card has no stamping on it at all. I used the large card from the Happiness Blooms Memories & More Card Collection. Simply add that to the Happiness Blooms Cards & Envelopes and you are all done. I embellished a bit with some punched flowers from the Bitty Blooms Punch Pack and Happiness Blooms Enamel Shapes from the Suite. How fabulous is that??
Here is another fabulous card using the other size of the Card Collection and the Cards & Envelopes in the pack! For this one, I didn’t stamp at all. I just simply added a few Enamel Shapes!
The Memories & More Card Collections can also be used in scrapbooking for quick and simple pages. Just drop in the cards for a fabulous look or greeting or embellish it as you wish! I’m just so impressed at how fun and versatile these Memories & More Card Collections are. I challenge you to check them out and use them for cards and scrapbooking! Check out the supplies below!
If you would like to see this all in action, check out the video below or click here! Be sure to give the video a thumbs up if you liked it and don’t forget to subscribe if you are new. If you would like a notification when I post a new video, be sure to click the bell right next to the subscribe!!!
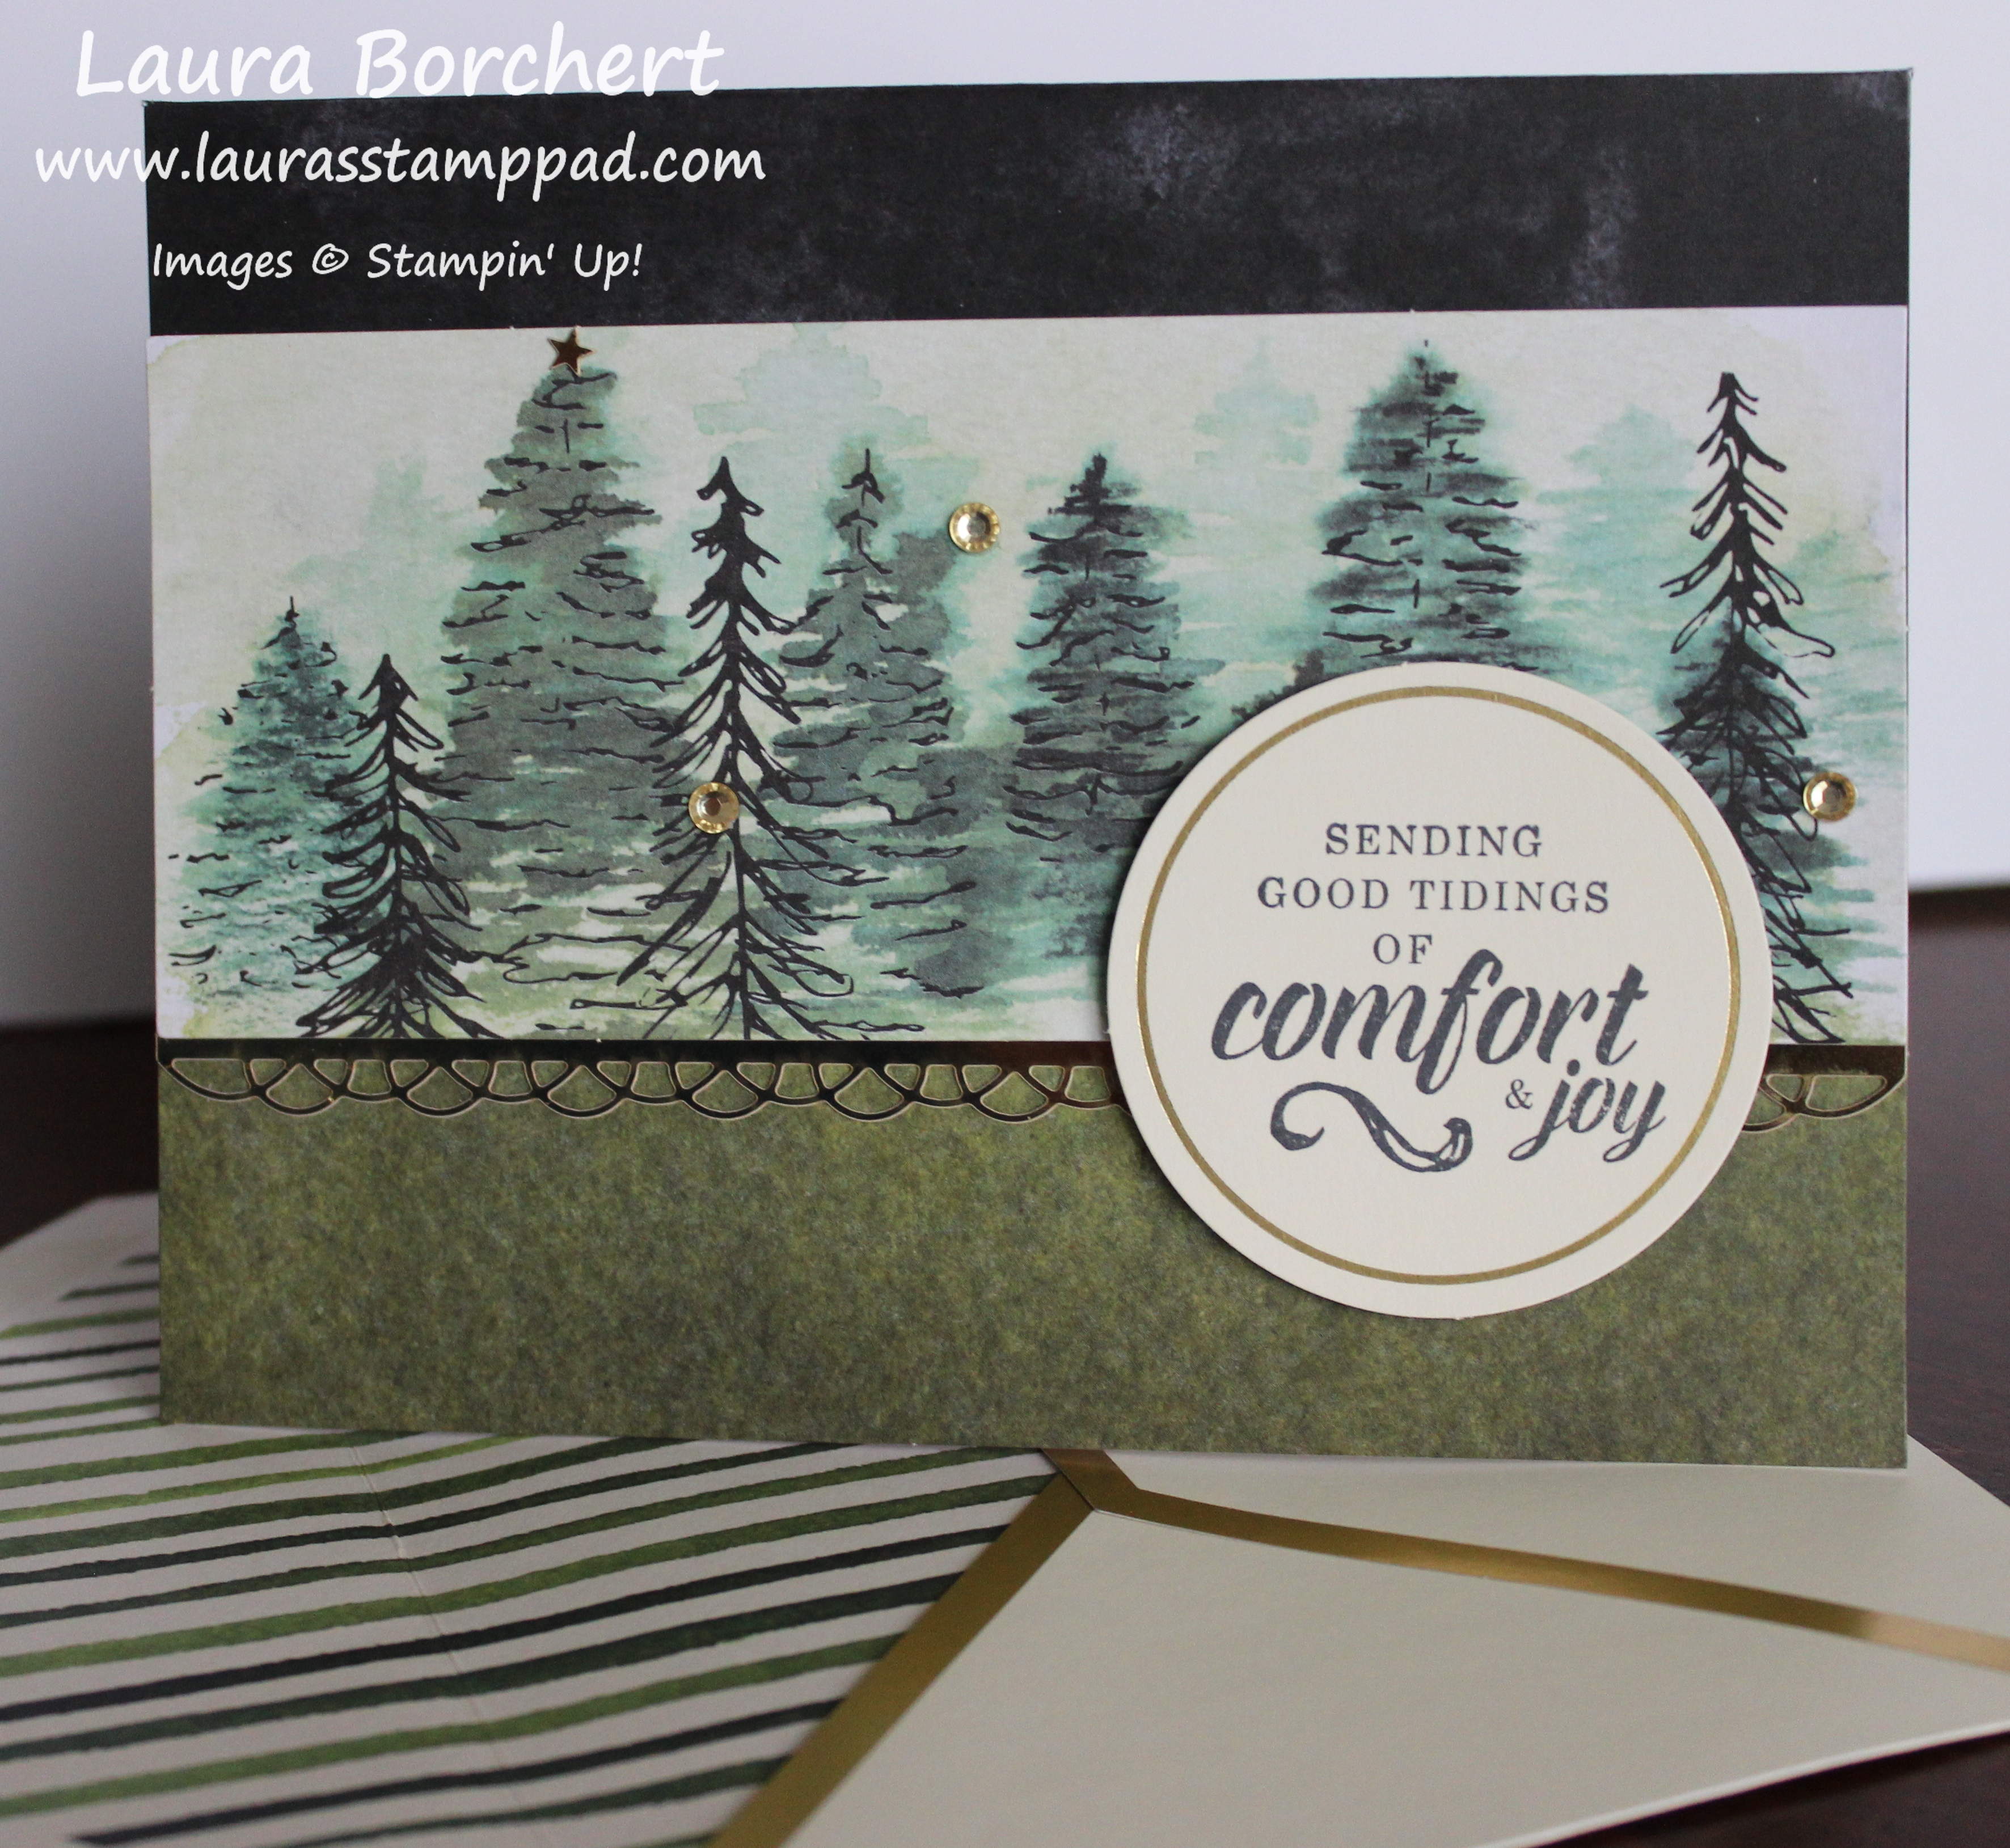
Happy Thursday!!! Today, I’m sharing the Timeless Tidings Project Kit and let me tell you it is amazing!!! At first glace, I was like oh wow that’s pretty. It’s also amazing to get 20 cards in the kit. Then I opened it up and loved all the gold trims and pretty envelopes and printed pieces. Now I’m even more in love!!
Look at these beauties!!!! Aren’t they amazing? Those gold trim envelopes with stripes on the inside are super fun too!!! The other bonus that I was SUPER impressed was how simple these cards were. I honestly did 1 of each of these 4 while watching Claire (5 months old) in less than 30 minutes. That blew me away!
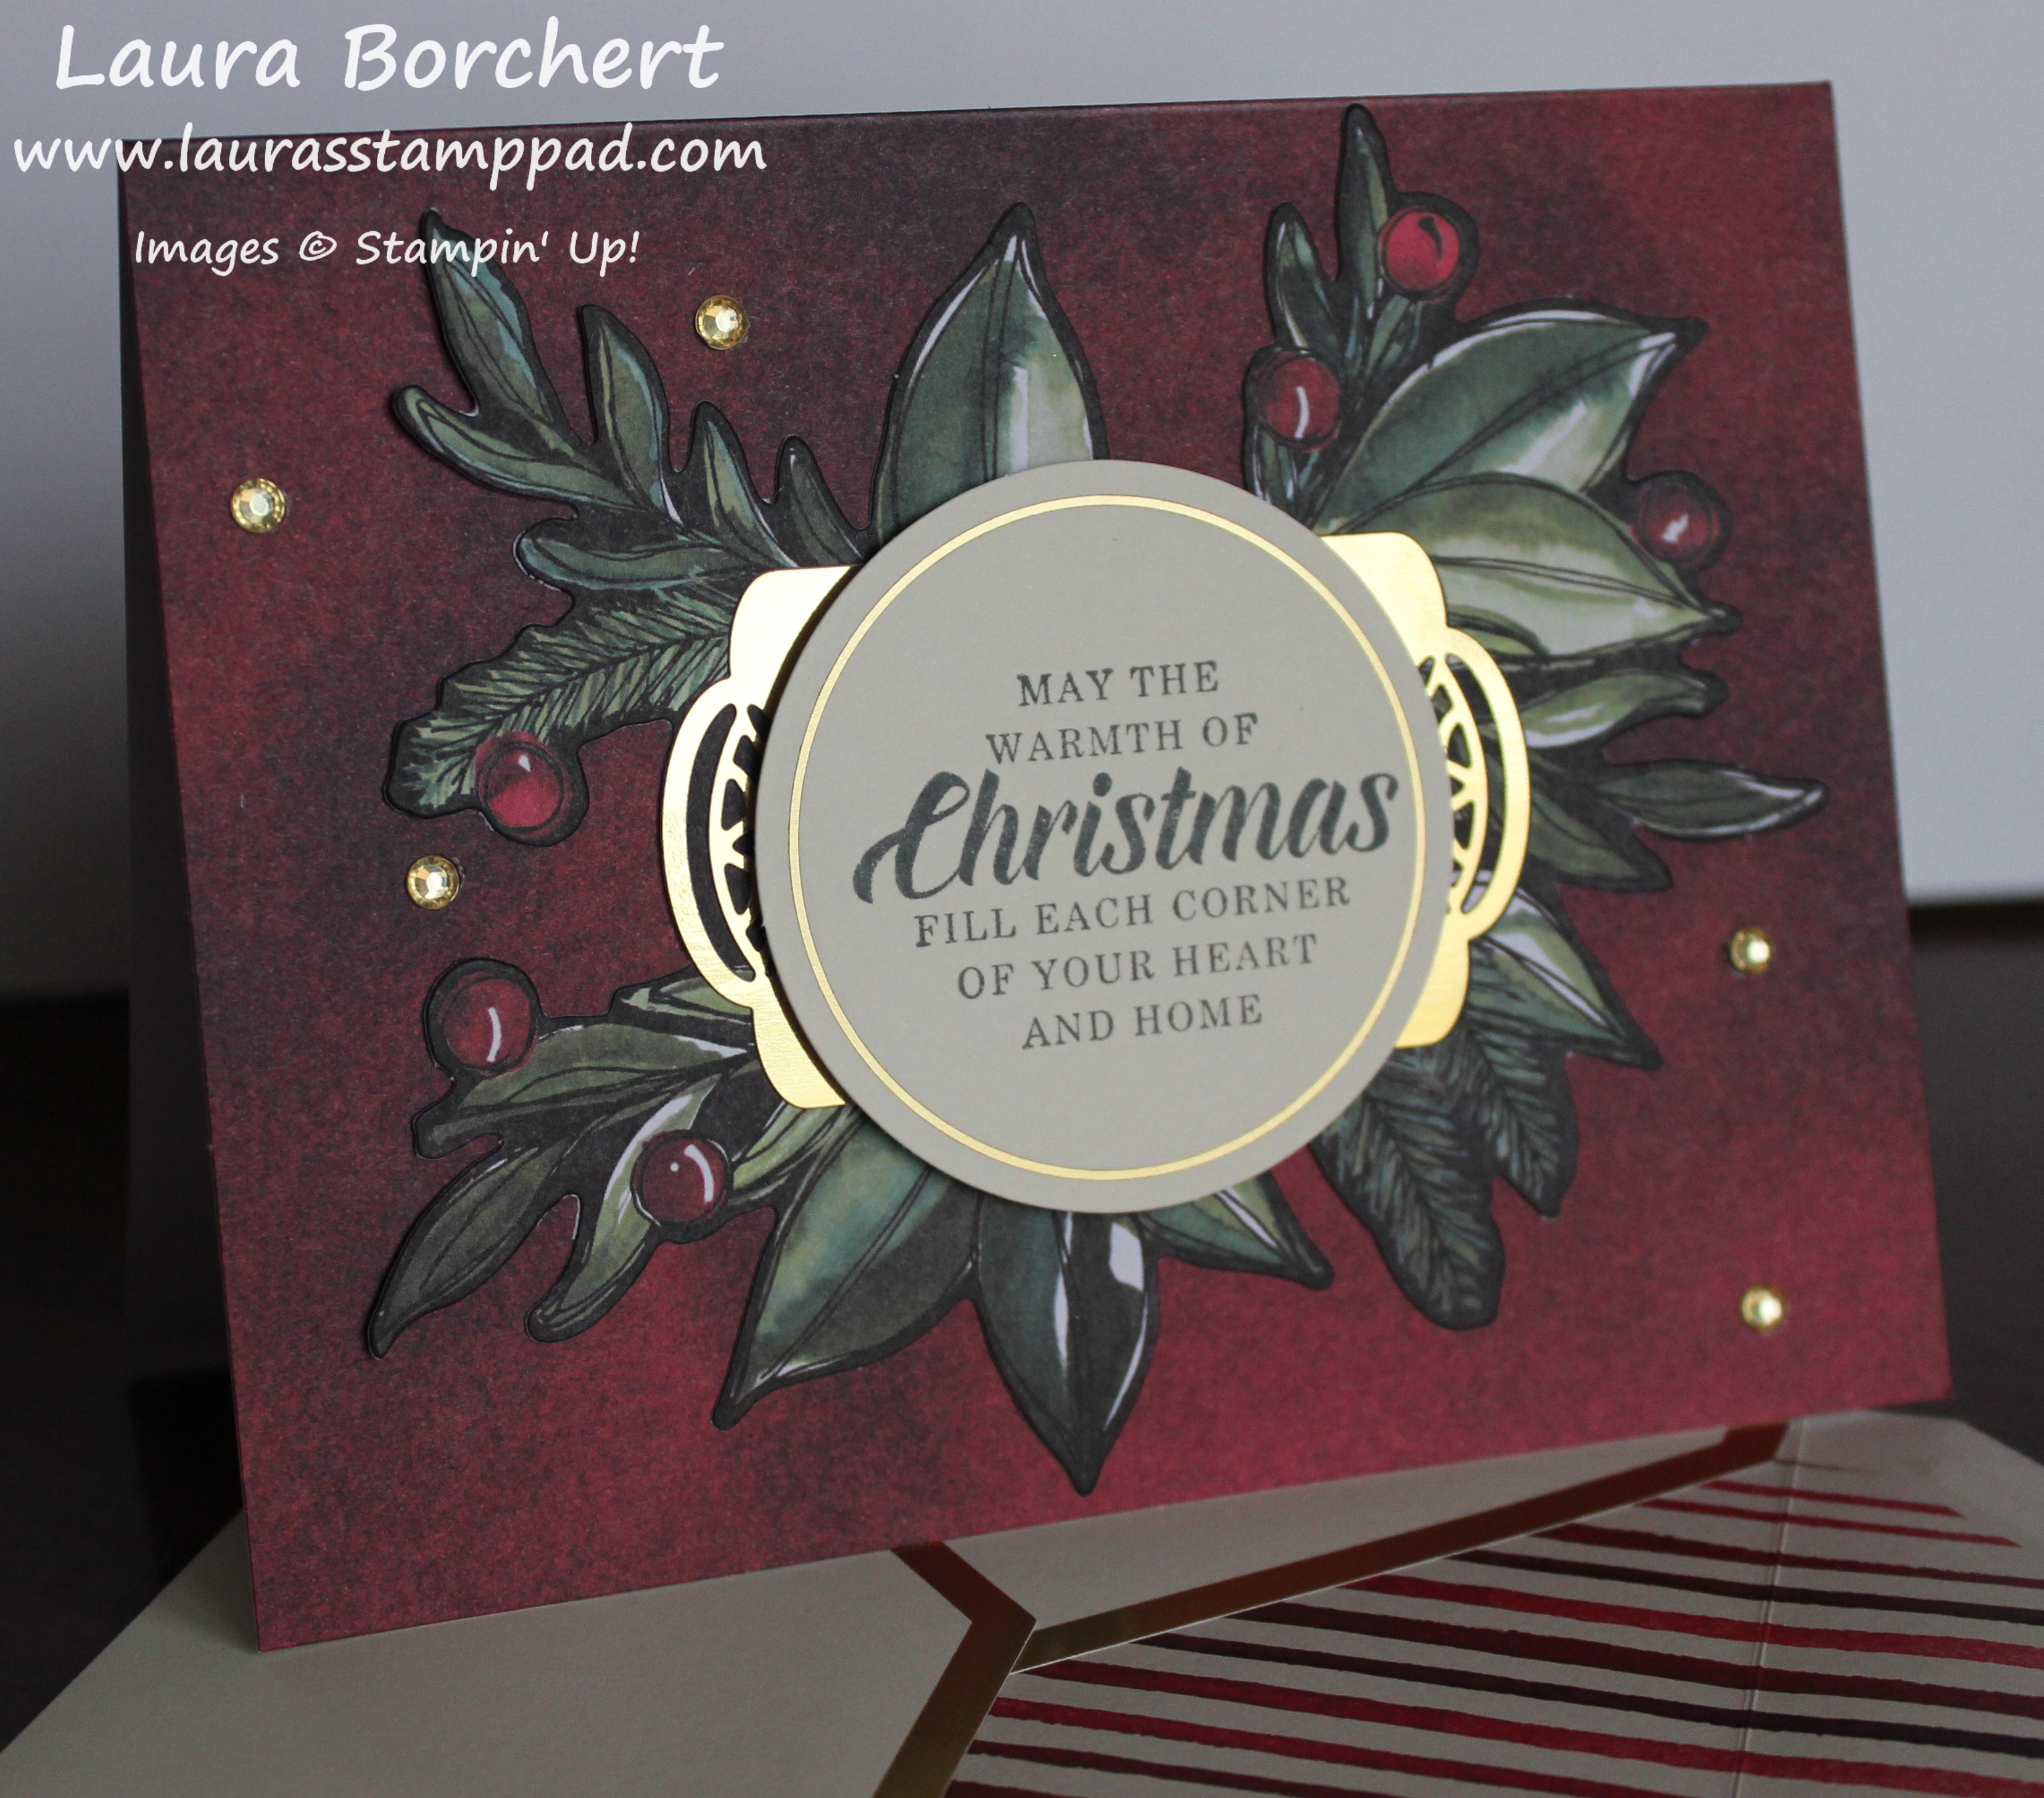
This one is my favorite! I love the big flower and little gold scallop. When looking at the card base, there is a black V along the card and this is for lining up the gold scallop trim. It makes layering super simple and easy. No worries about putting the gold trim up to high or low. I will say that the greeting is pretty TIGHT on that banner so be careful!
This one is my second favorite and honestly it would make a fabulous masculine birthday card too! Again, this card had a line to show where the gold trim. The gold trim for this one is the one with the little star on it. The instructions didn’t mention using the star but I added it to the one tree because why not. Stampin’ Up only added the star so you could differentiate which trim is used for which card. How perfect!!!! 🙂
I love the gold banner layered behind the greeting on this card. Simply layer each piece together for a fabulous look and add some gold rhinestones all over. Simple and fabulous!
So for this card, I actually popped up the holly piece with Stampin’ Dimensionals. Since the greeting goes over the top and I didn’t want it be double popped so I only added Stampin’ Dimensionals to the far right side and then regular Snail to the left side. This made it nice and smooth!
Which one is your favorite??? Let me know in the comments below! Click the links below to snag this kit for yourself!!!
If you would like to see the unboxing and reveal of this kit, check out the video below or click here! Be sure to give the video a thumbs up if you liked it and don’t forget to subscribe if you are new. If you would like a notification when I post a new video, be sure to click the bell right next to the subscribe!!!
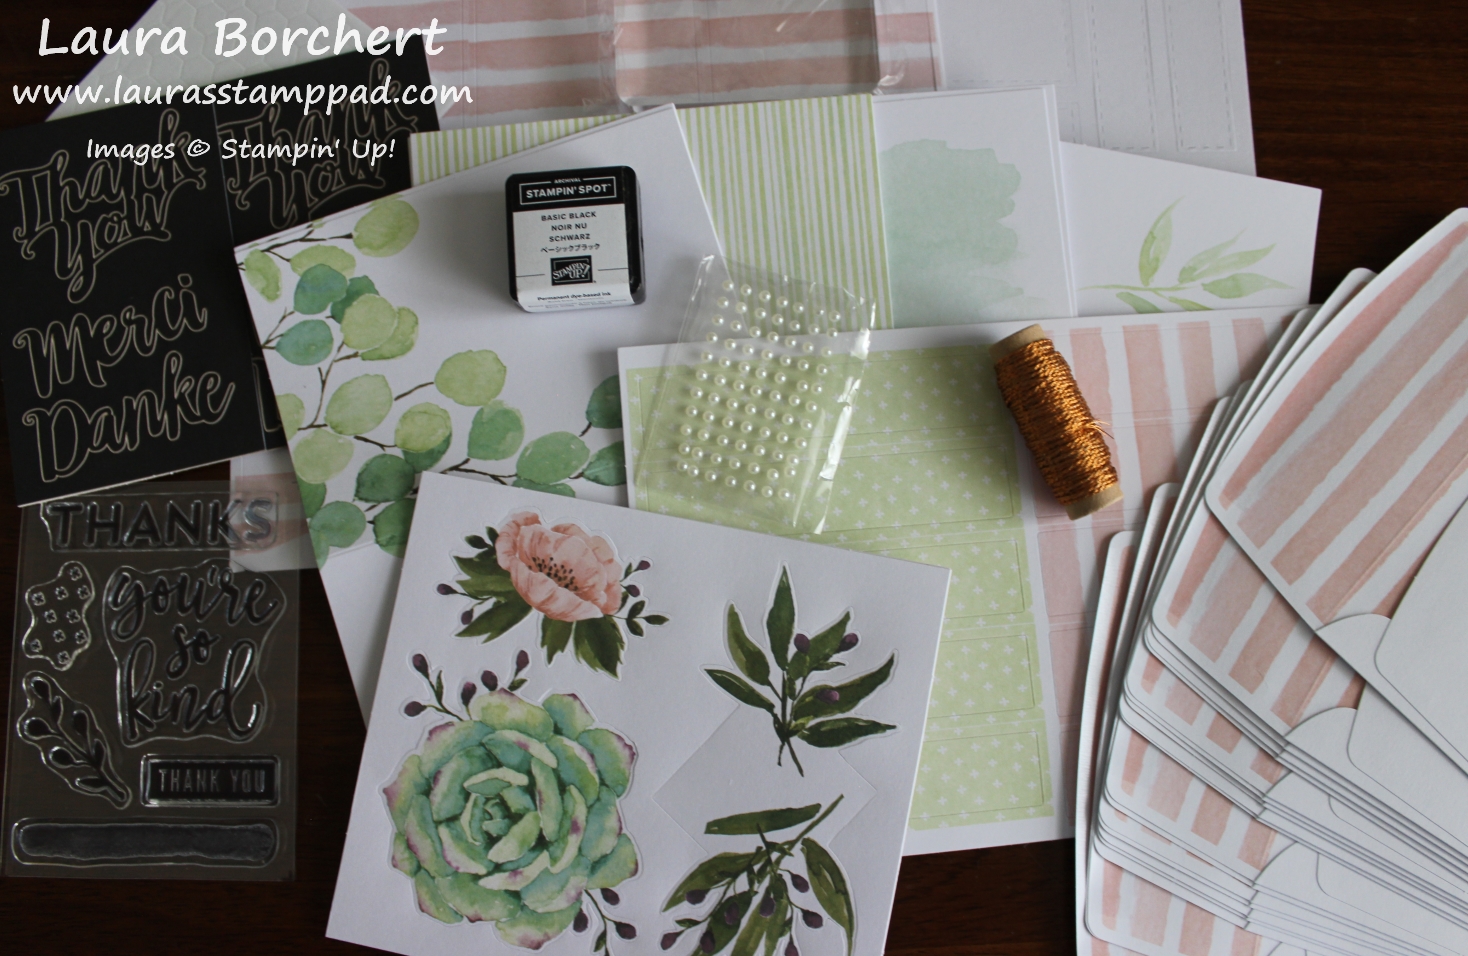
Happy Tuesday! I’m taking a bit of a break from Technique Tuesday but here is a fabulous kit for you to check out! The Notes of Kindness Card Kit is one of Stampin’ Up’s NEW All Inclusive Kits and it’s beautiful!!!
This kit does have flowers in it so you know I was in love at first sight. I love the mint and light pink color combination as well. The stamps are all Thank You which is something I use a lot so I’m excited there too. Any time I need more quick Thank You Notes, I can just purchase a Refill Kit too. I love that option. This kit is perfect for gift giving since it includes everything you need. It’s also great to grab and go if you want to stamp on vacation or while waiting for your oil to be changed. Just grab the box and some scissors!
This kit has a watercolor look to some of the images. There are die cuts, sticker pieces, and banners for stamping. The white banners for the greetings have a stitched edge which adds a little texture and fun to it. I am a big fan of the Stitched Shapes Framelits for that reason! Pearls and Copper Thread are the embellishments. I’m not sure I would have pairs copper with this color combination so I can’t wait to put this kit together and try it out….and then use on future projects.
I will be putting this kit together soon…..hopefully! Then I will share the completed look and my thoughts on steps and all. Click the photos below to get your kit to enjoy with me! Let me know what you think of this kit!
If you would like to see the unboxing of this kit, check out the Video Tutorial below or click here! I hope you found this super useful. Be sure to give the video a thumbs up if you liked it and don’t forget to subscribe if you are new. If you would like a notification when I post a new video, be sure to click the bell right next to the subscribe!!!
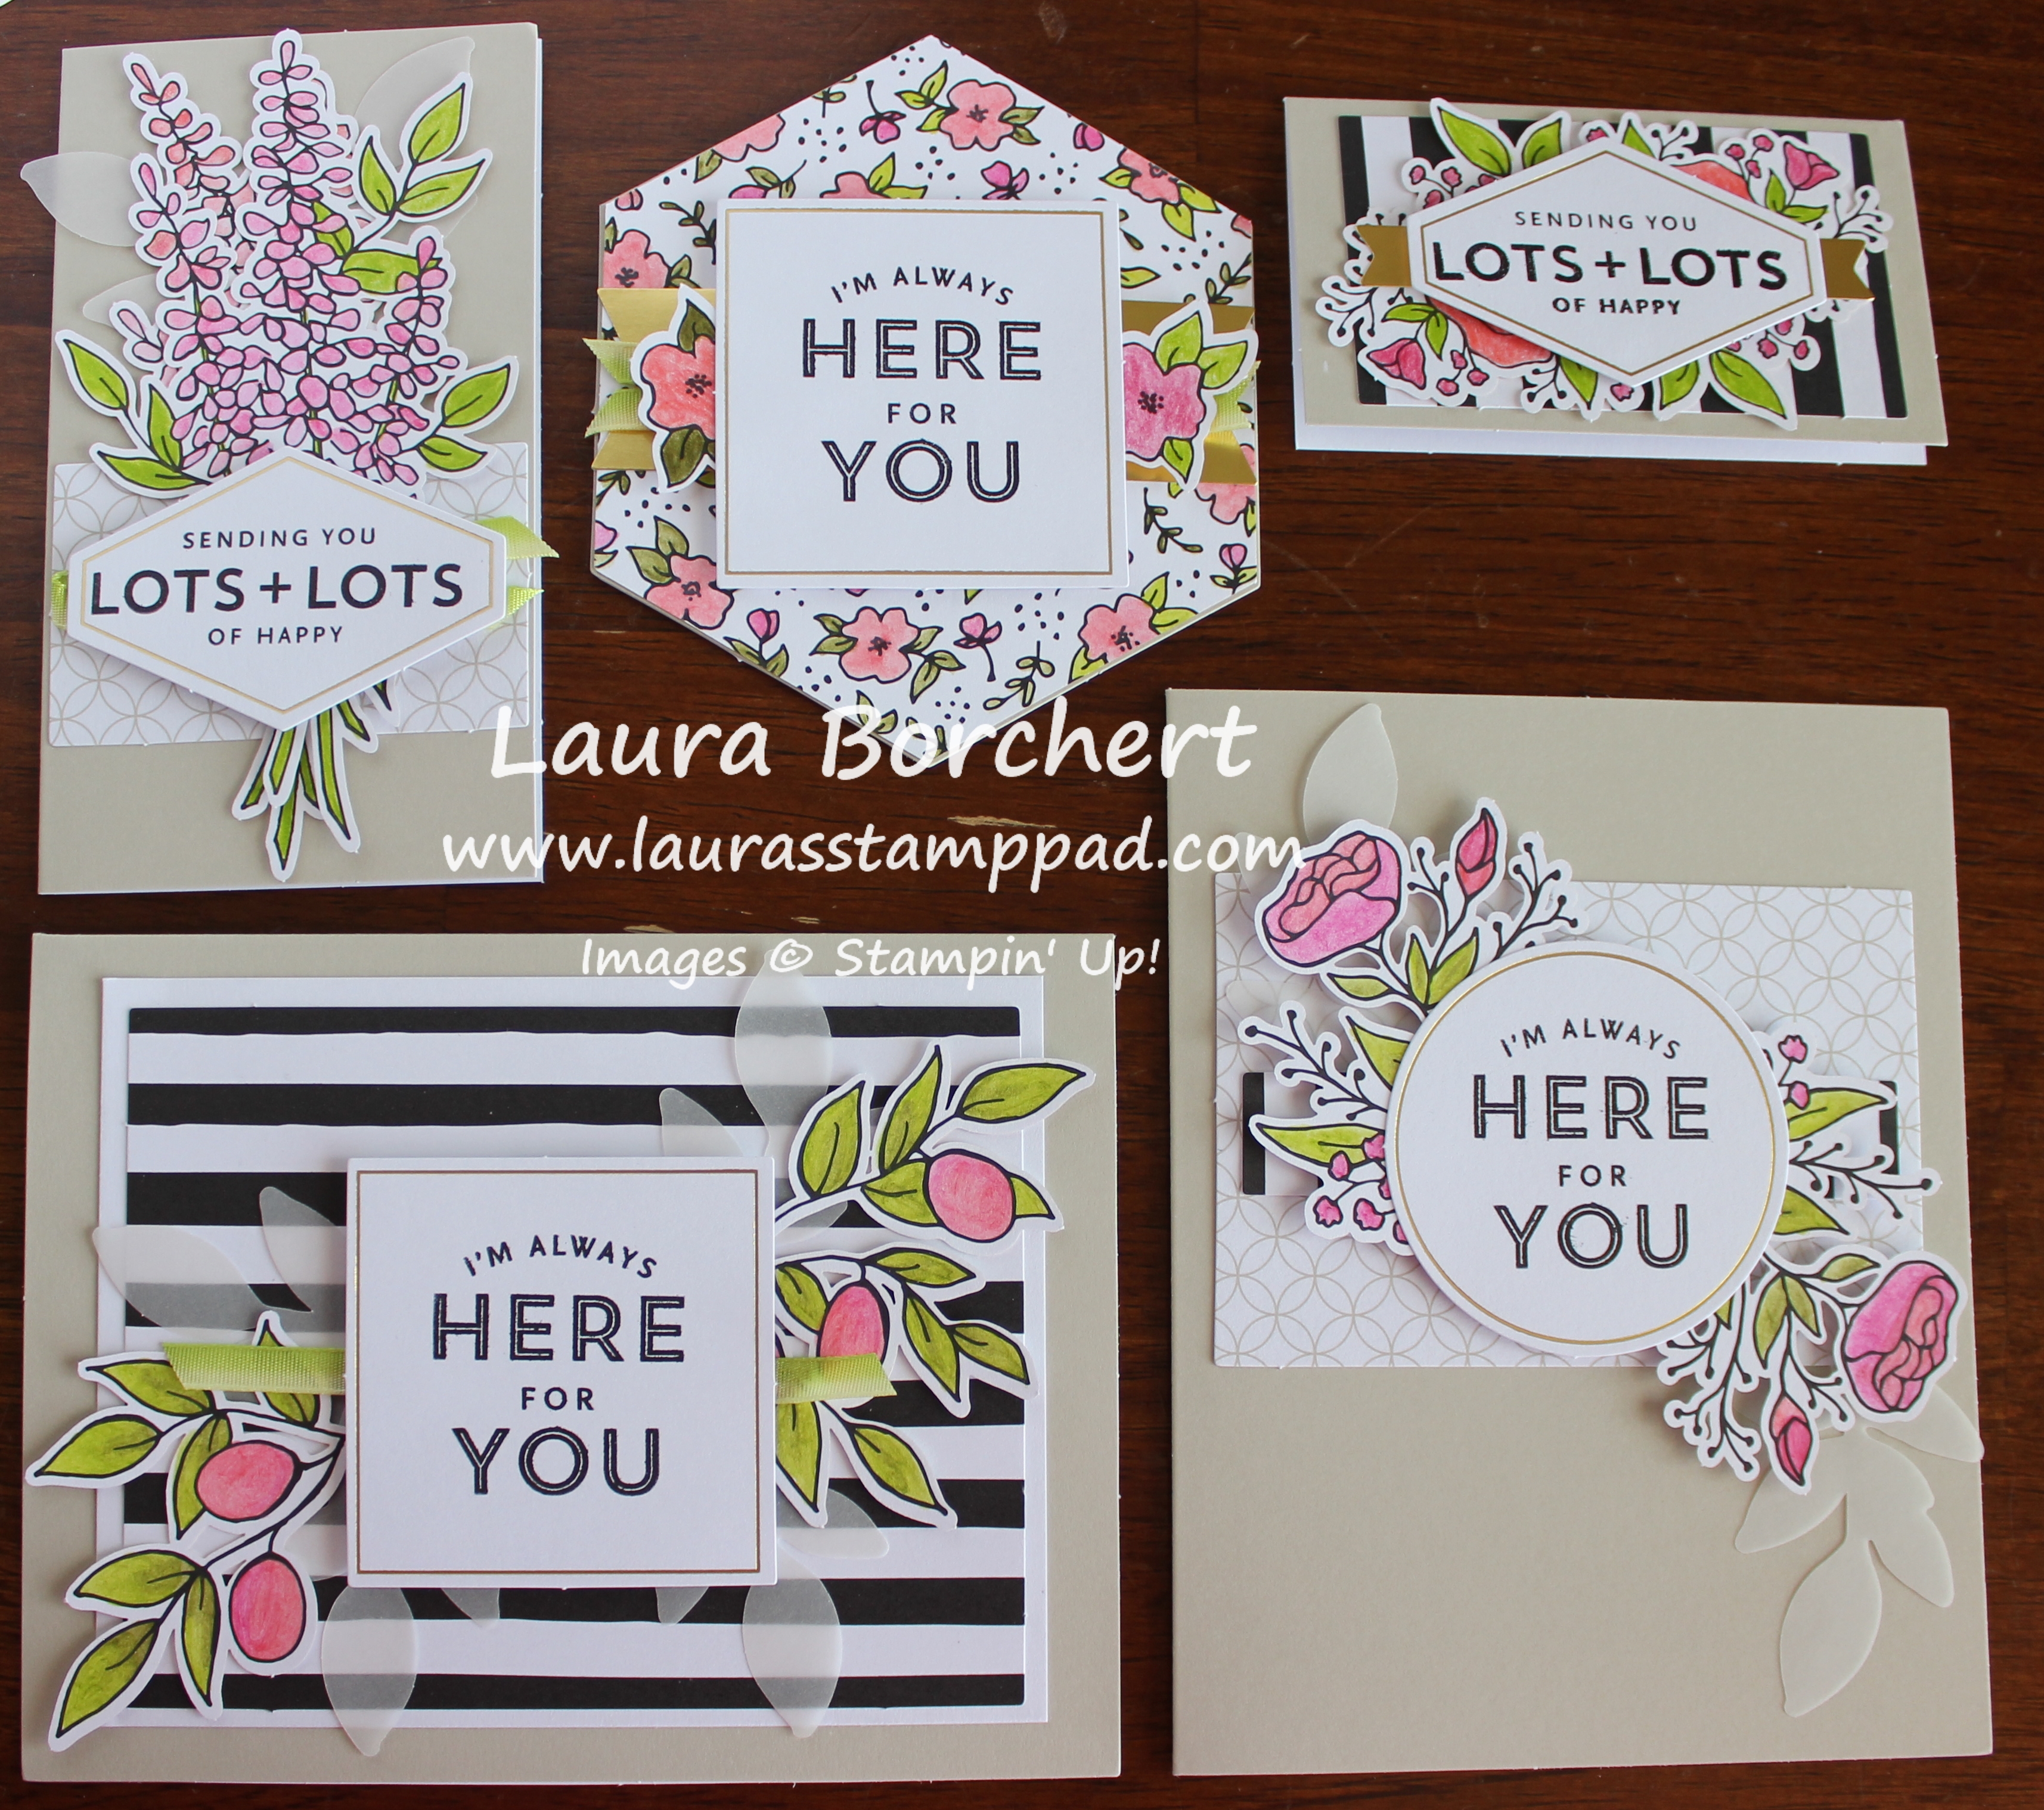
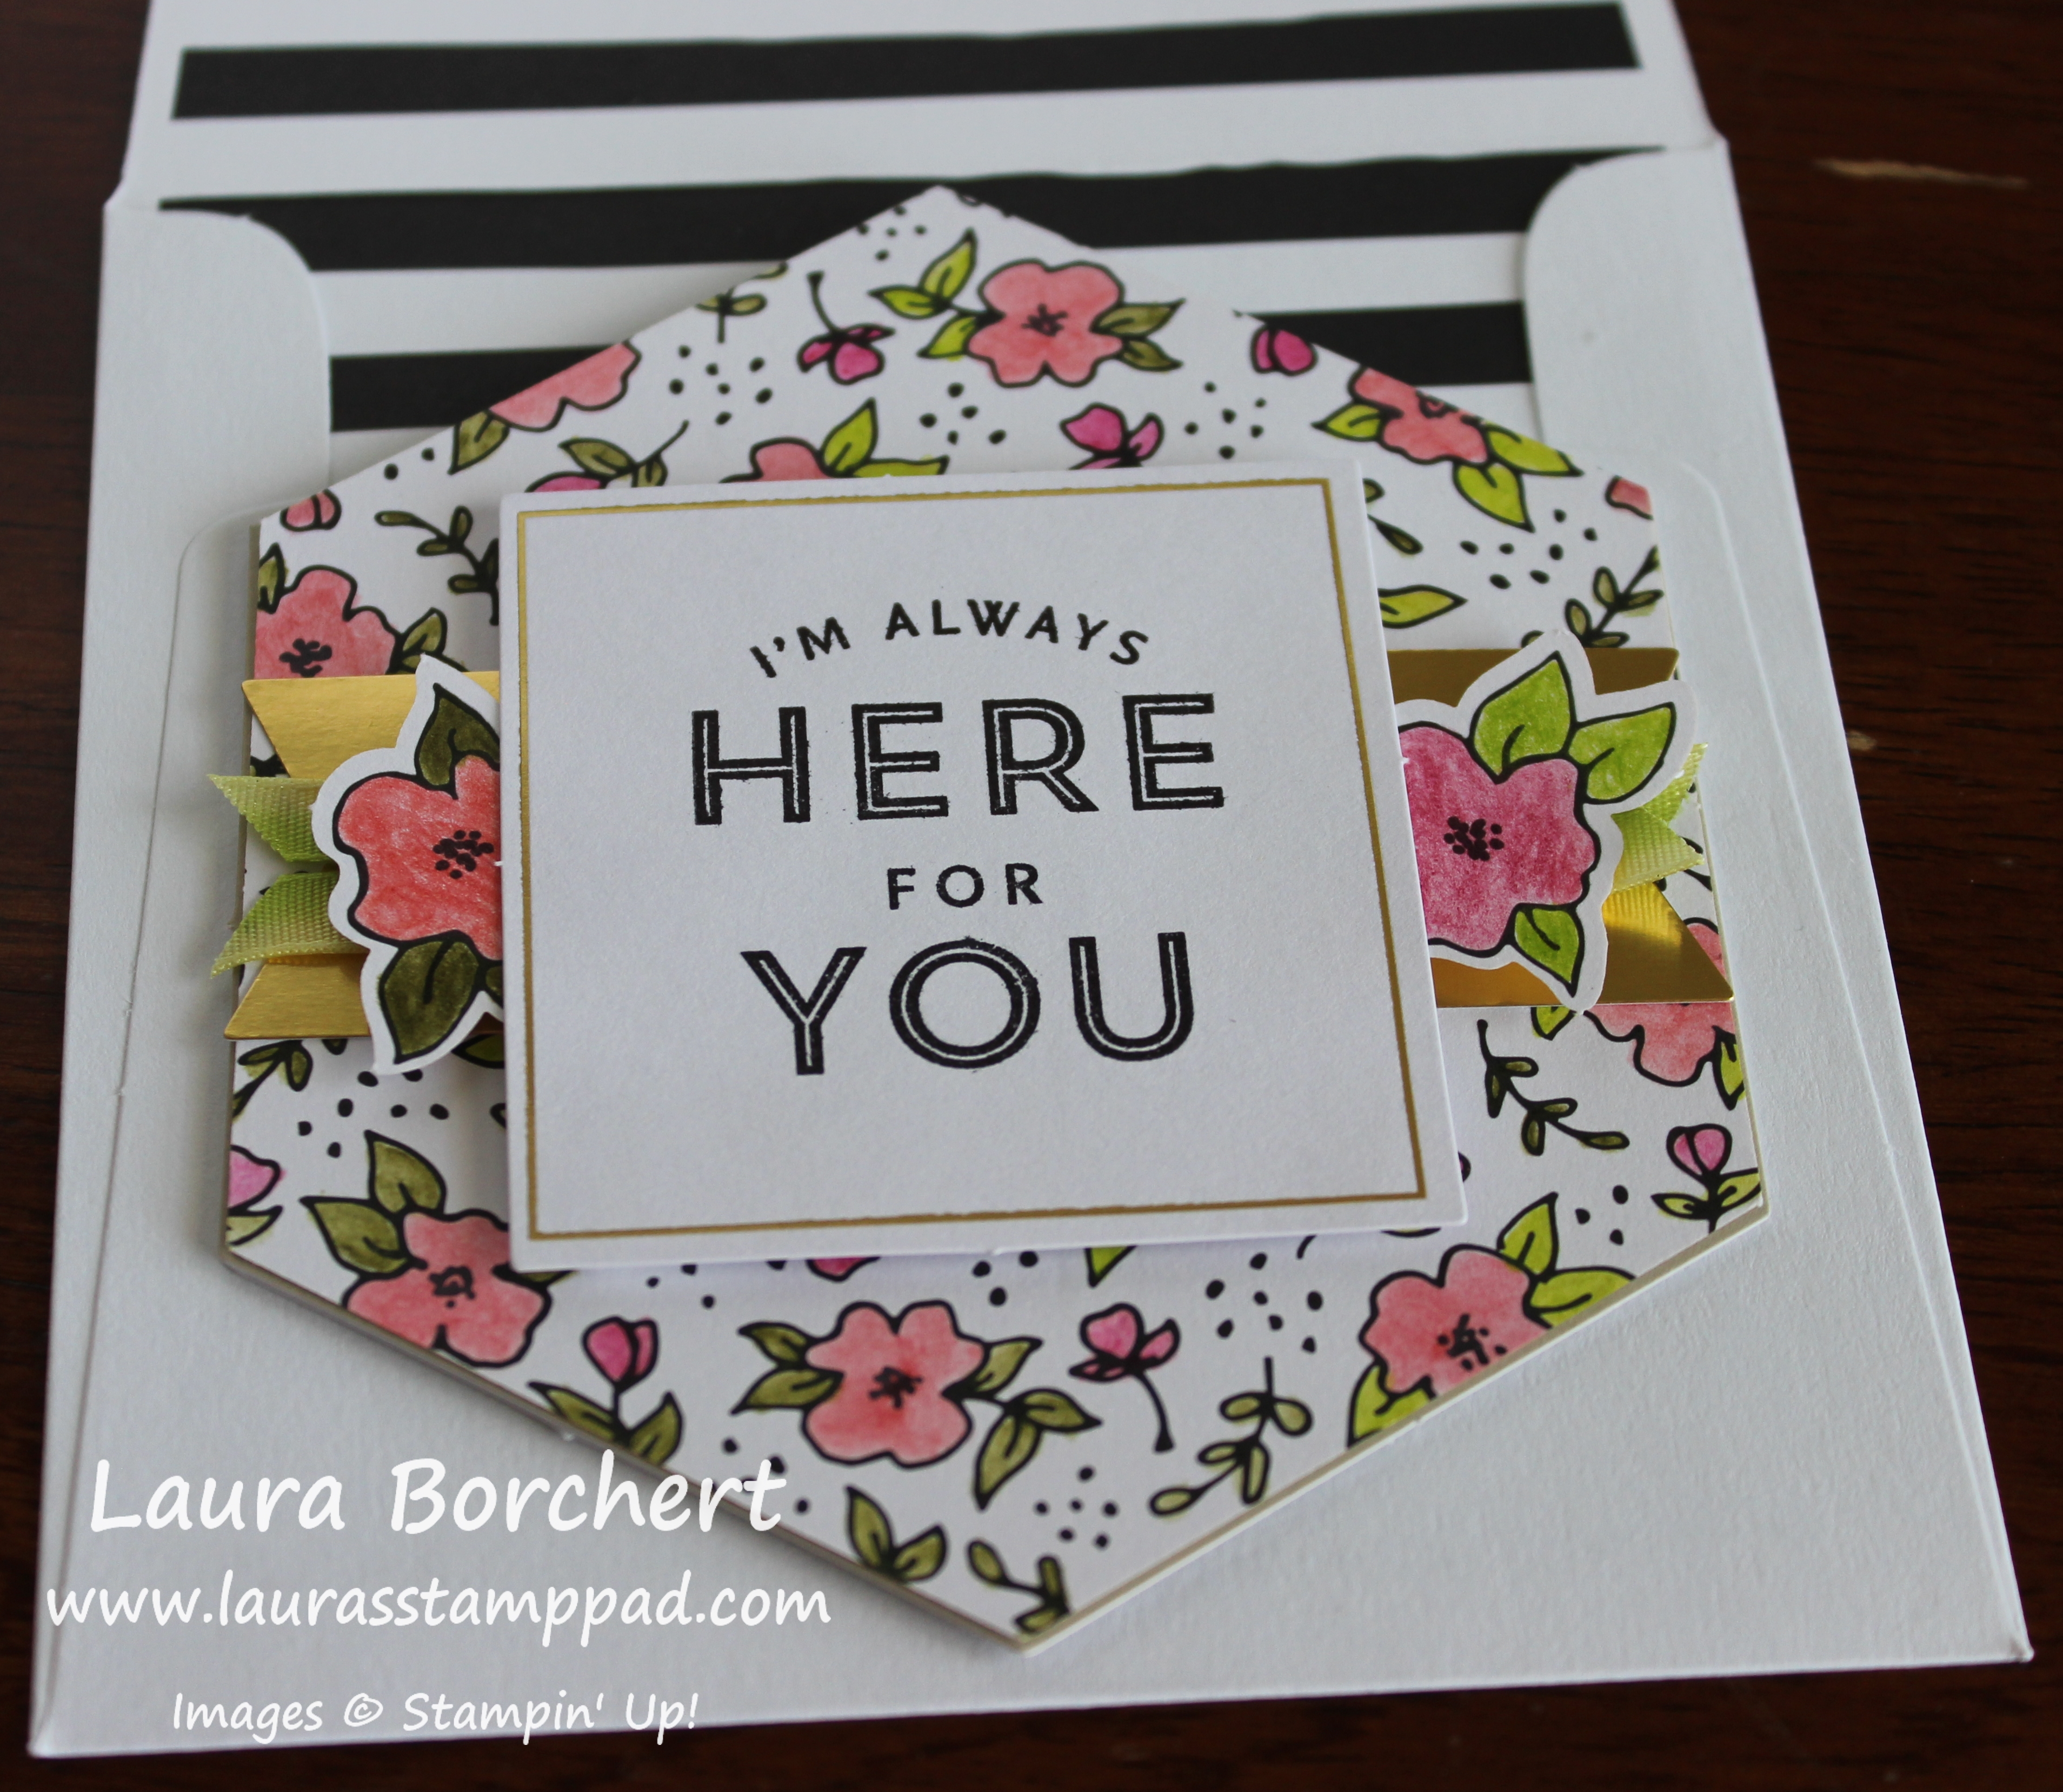
Today, I’m finally sharing the Lots of Happy Card Kit. I got this kit months ago as you can see in the unboxing and reveal video here! I finally completed one each of the 5 designs. Yes, just 1…..there is a lot of coloring in this kit and I just don’t have the patience. LOL The cards are super stunning though!
I mean look at these beauties. They are amazing and the envelopes have a fun black and white strip to them. But again let me just say…..it was way more coloring than I thought or I’m just slow. The kit comes with Exclusive colors of Watercolor Pencils – Flirty Flamingo, Lemon Lime Twist, Old Olive, and Rich Razzleberry. Simply coloring with the pencils works or you can also use a Blender Pen to get some fun color variation. I did that with a few but it slowed me down even more! 🙂
After finishing this sheet of coloring, I realized this was only 1 each of the 5 designs and there are 3 more sheets to go. I do love flowers and pinks though!
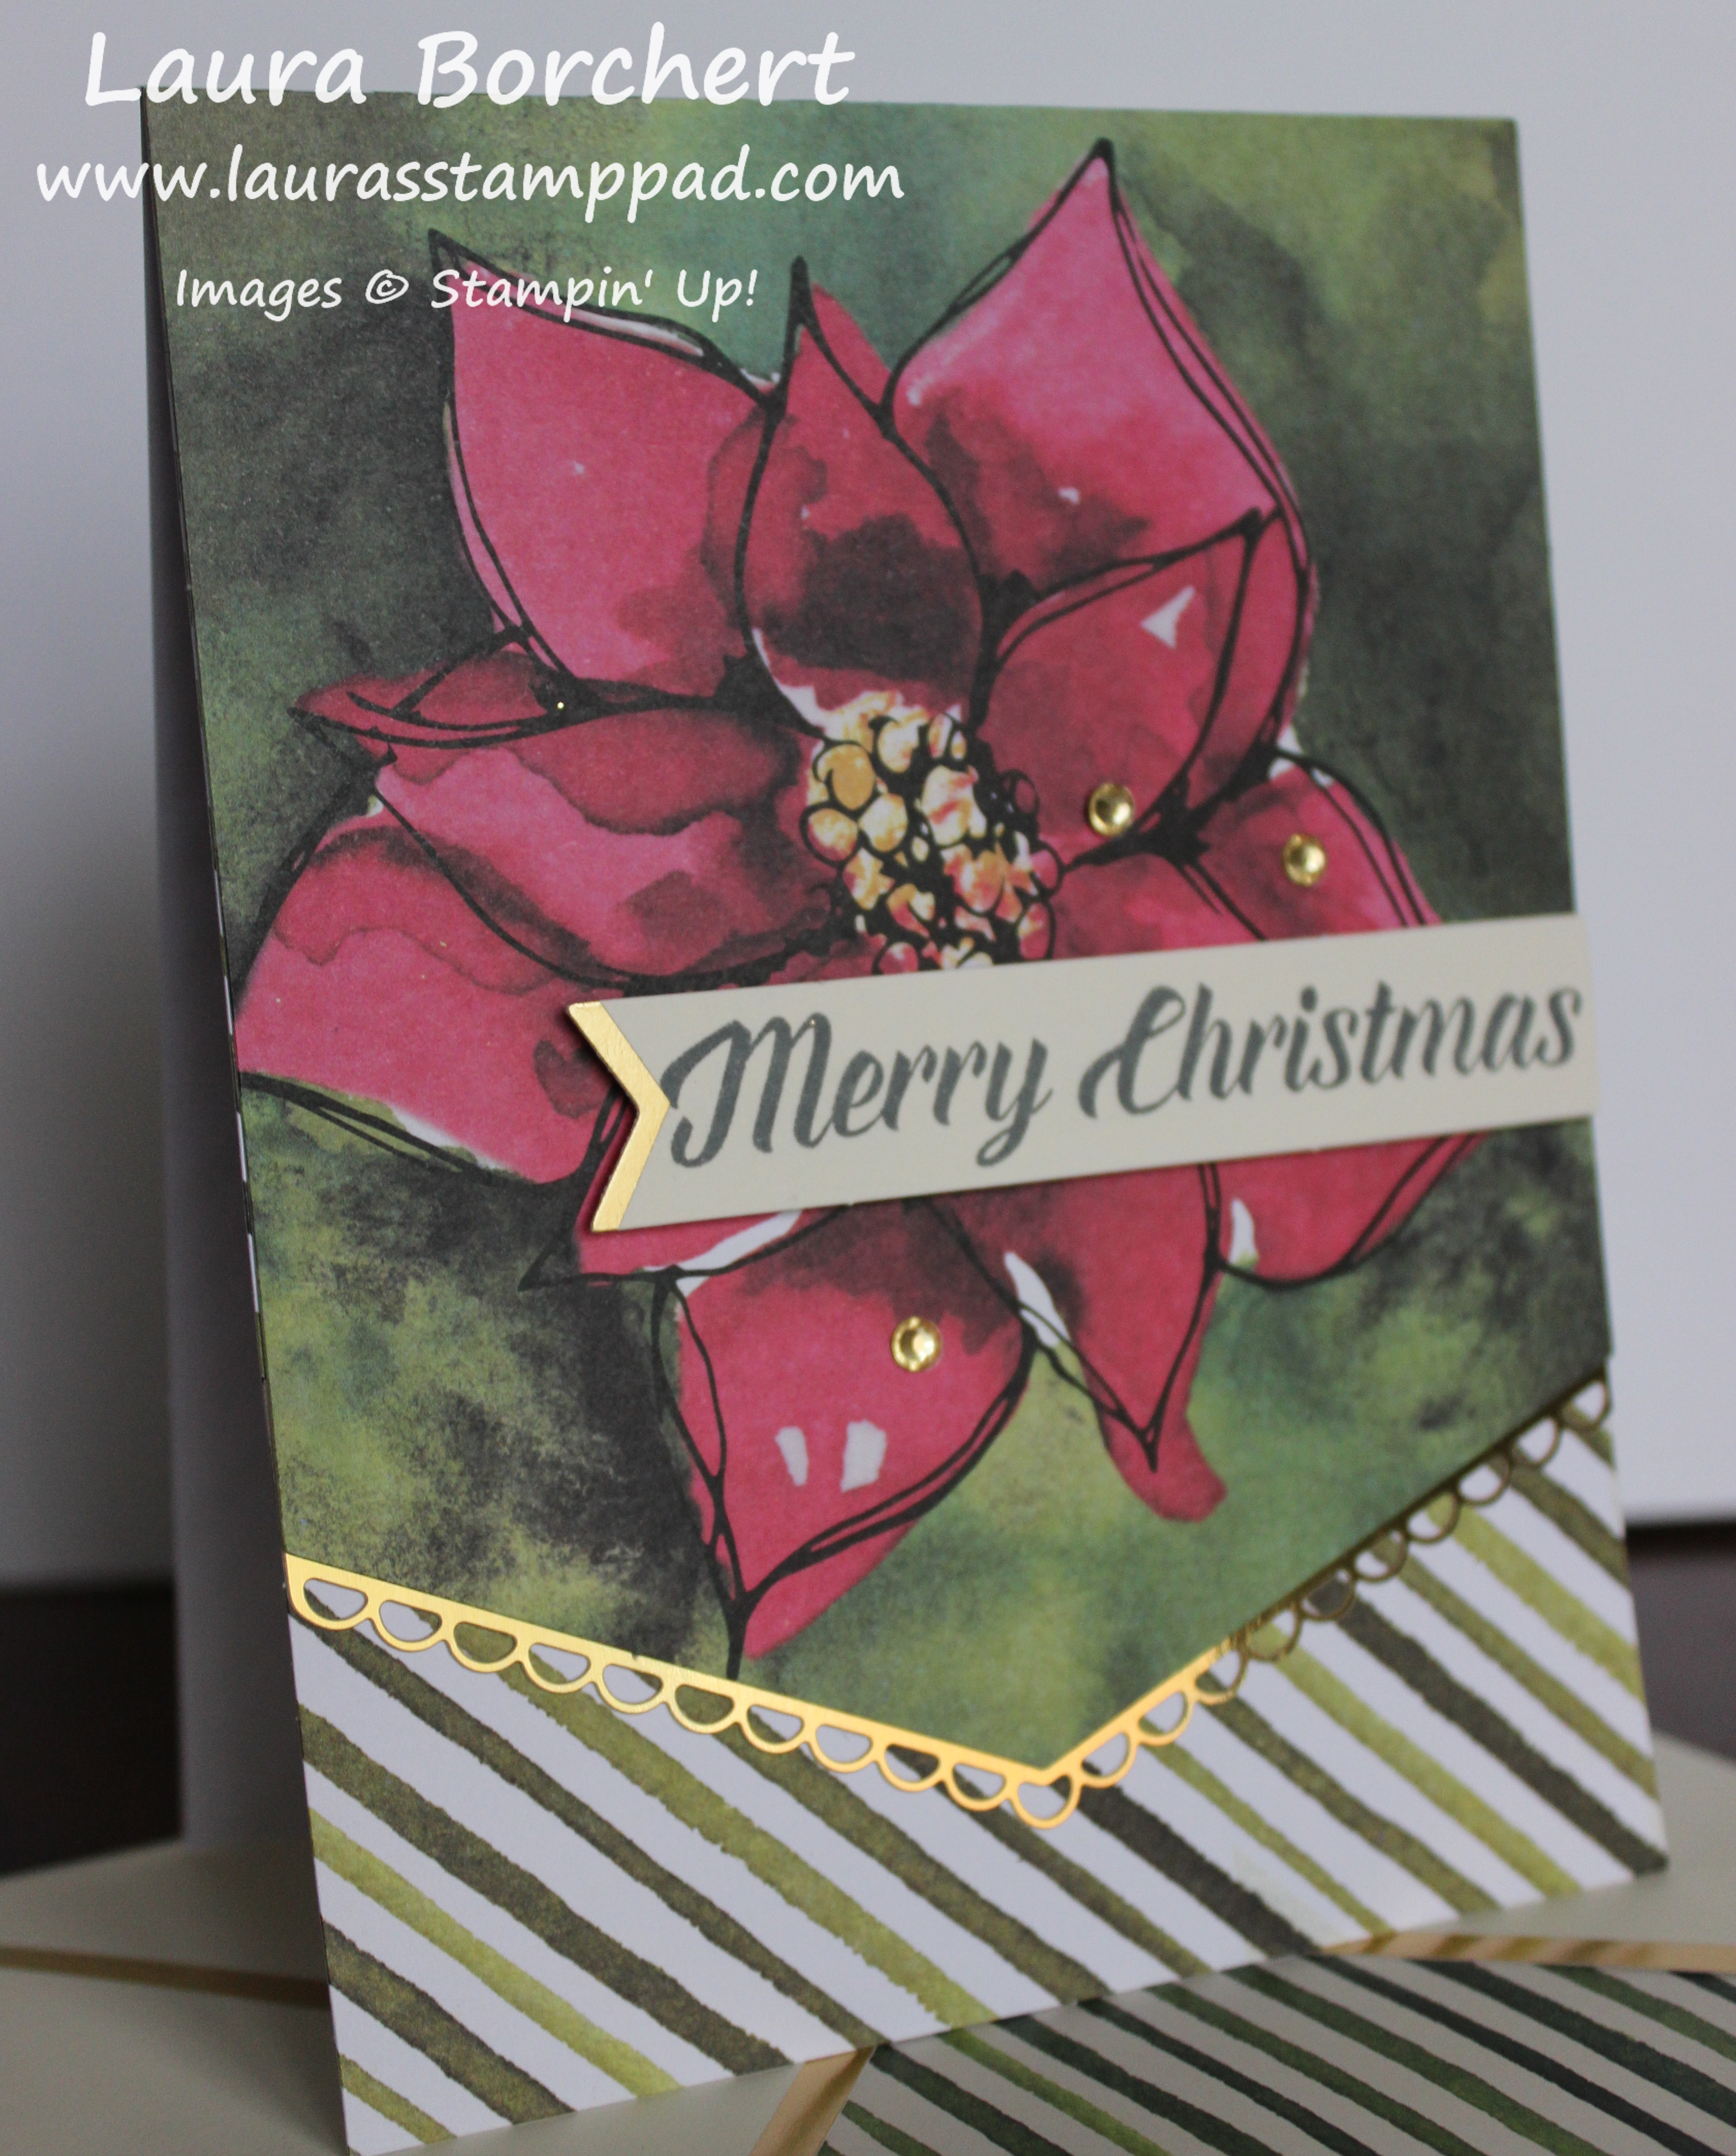
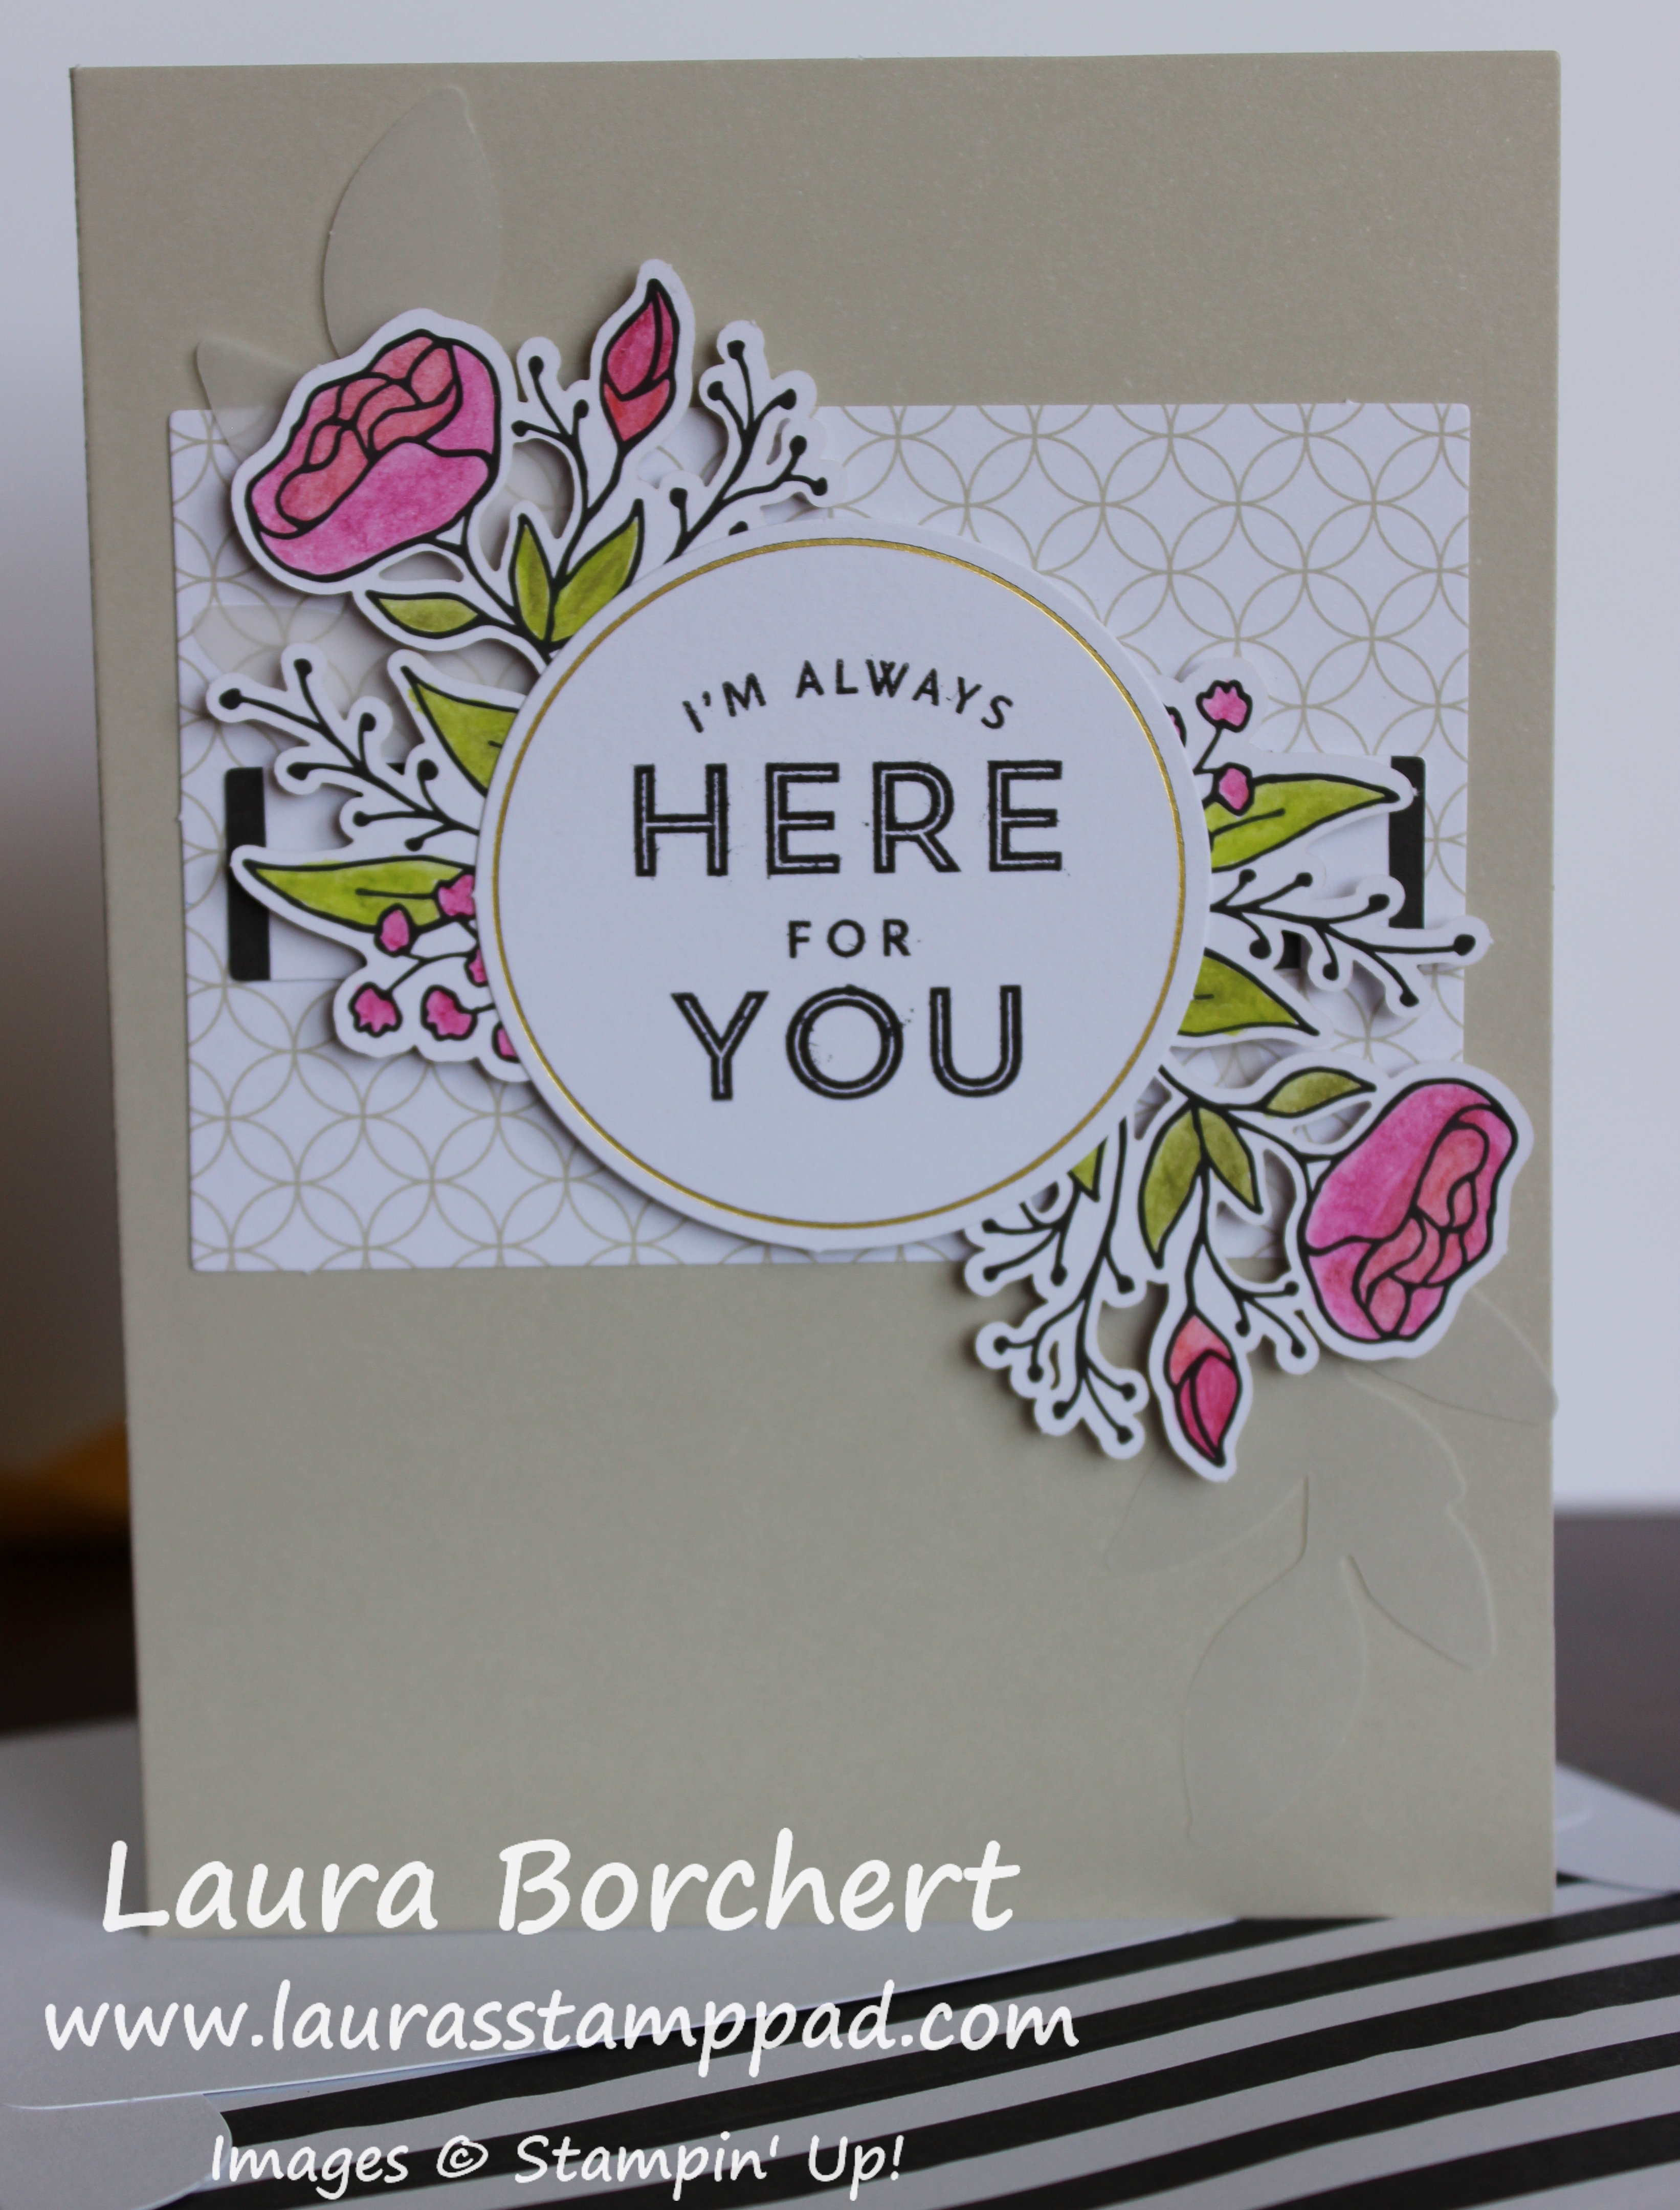
I think this is my favorite card because of the fun shape and design. Another thing I will point out is that I feel like some of the colored flower weren’t necessary for each card and I would use on another project. For example, see those two little flowers on either side of the greeting? They are hard to notice and cover up the gold foil banner. I think for the rest of the cards, I will add one to the inside of the card or use on another project.
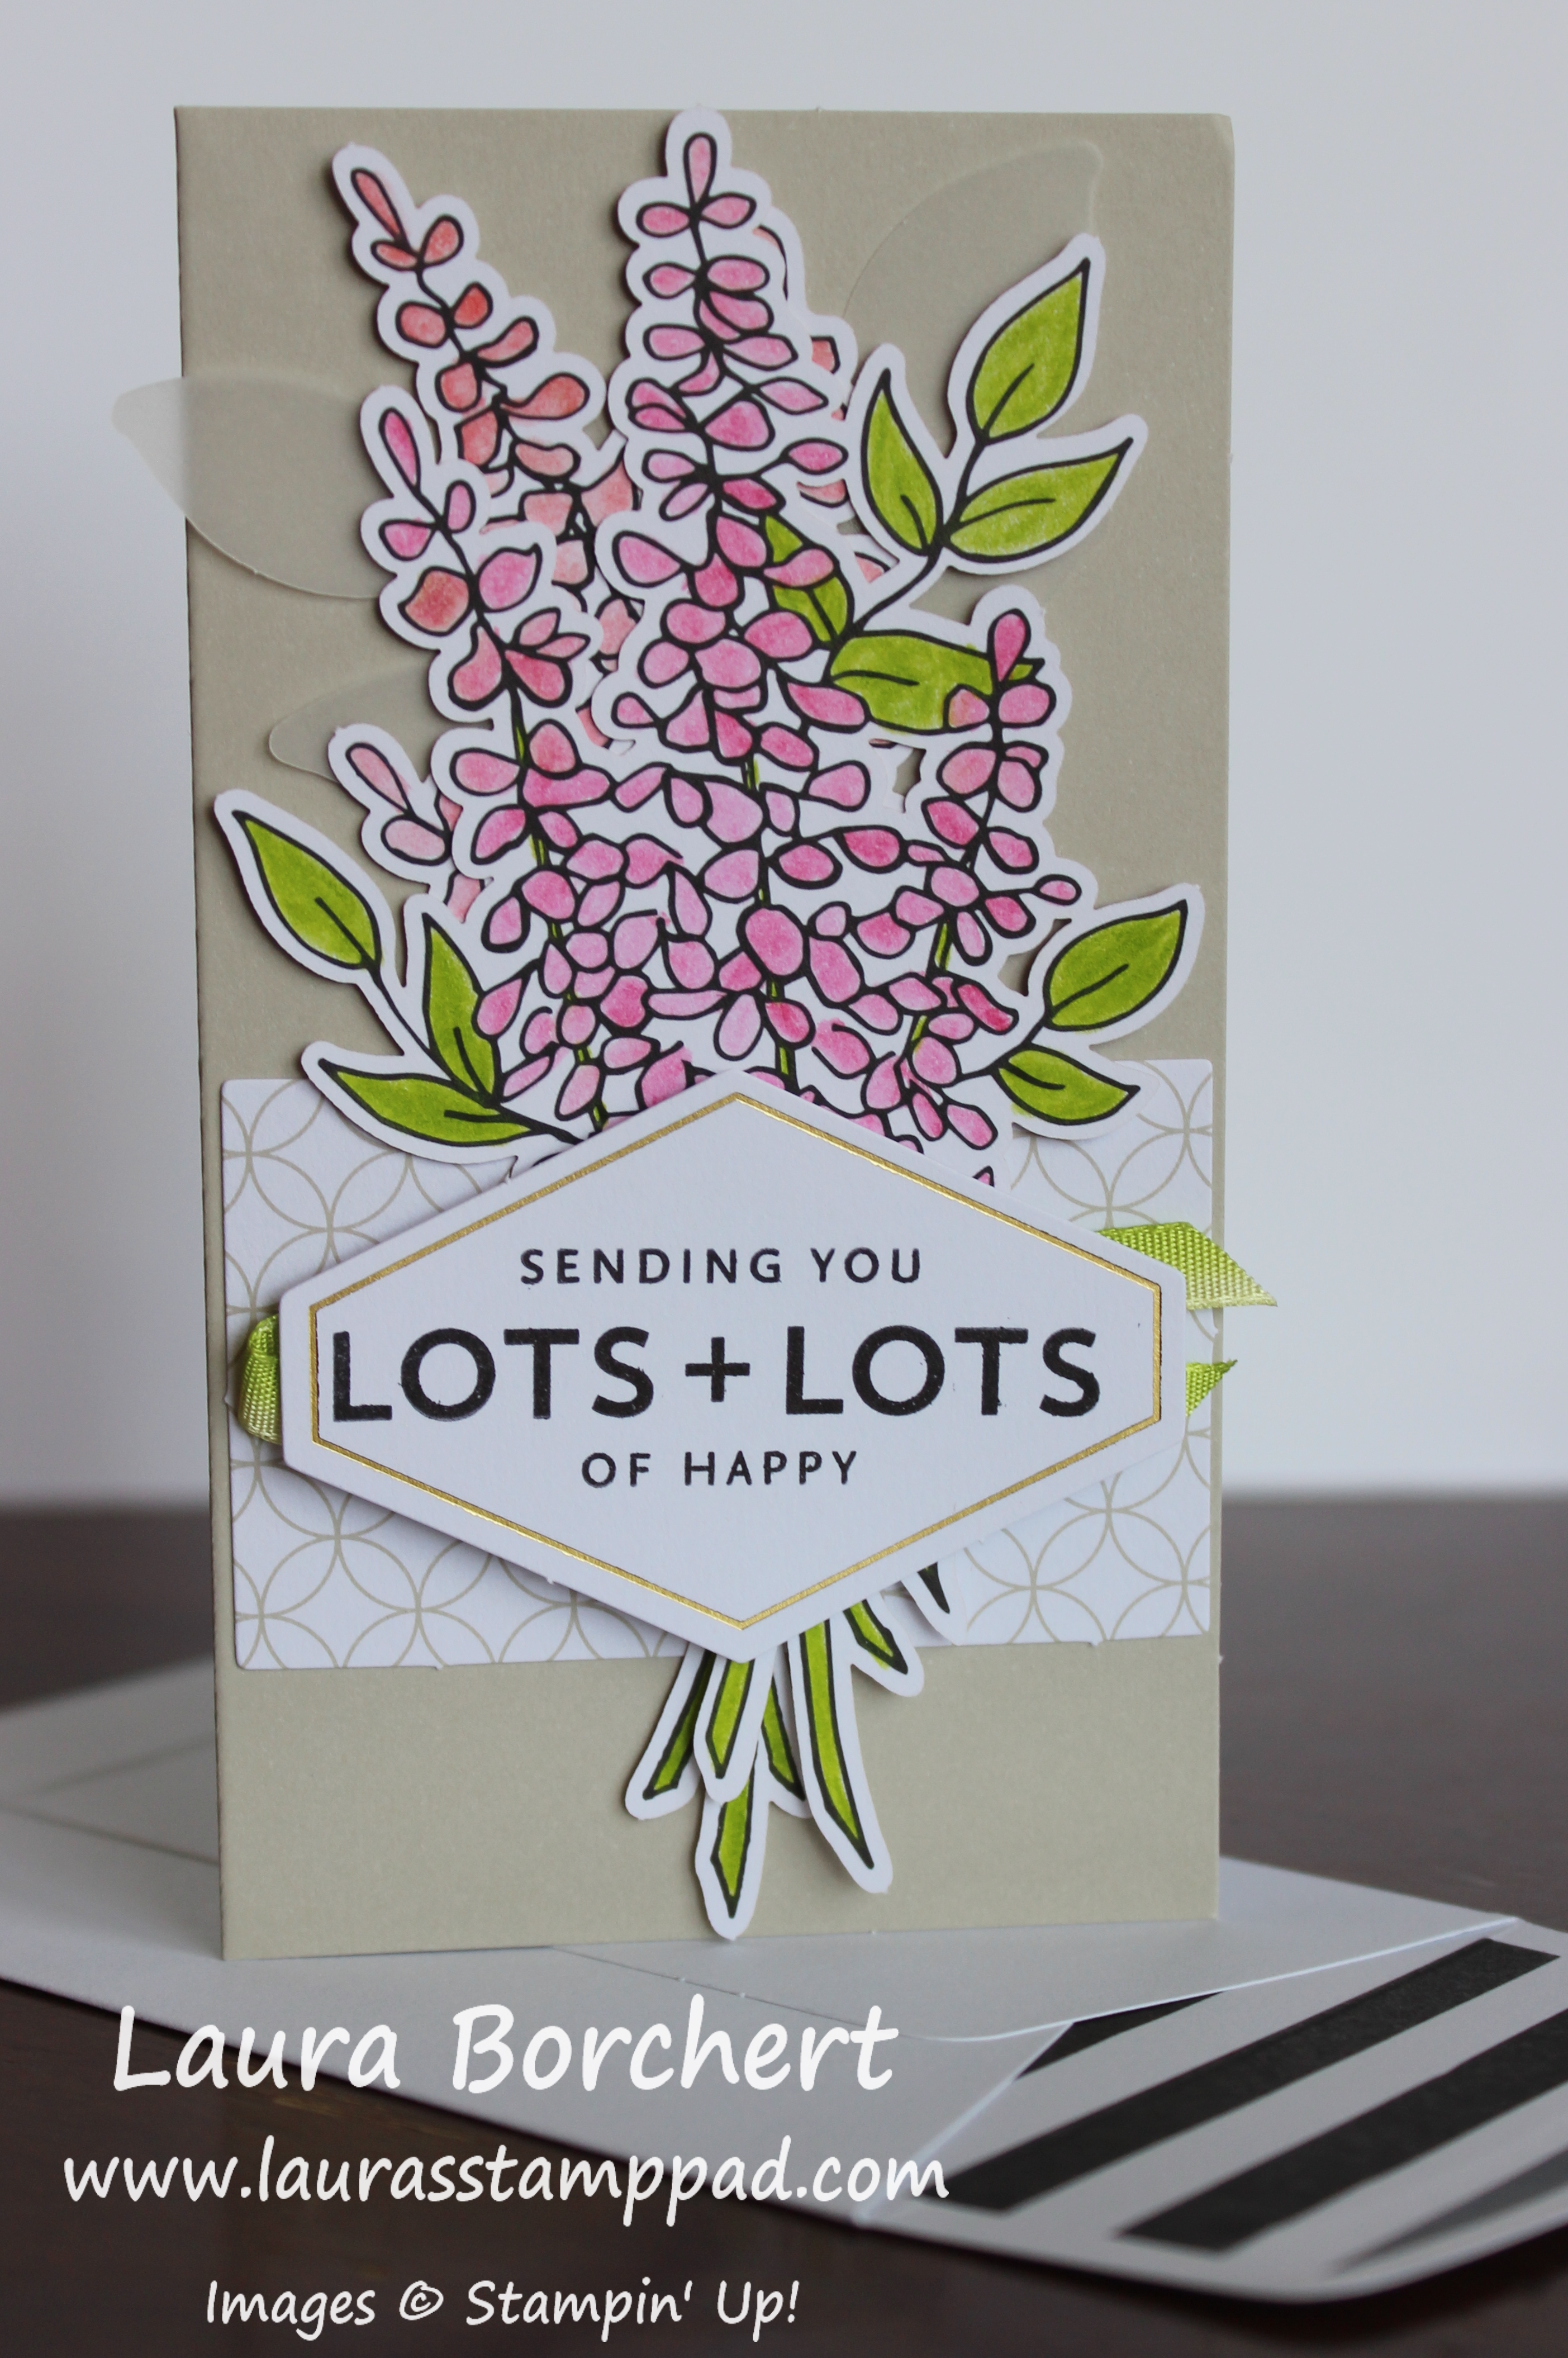
This is my second favorite card! Again, there are 2 lavender pieces overlapped for a nice full arrangement but I really don’t think it is necessary. Most of my fabulous coloring is covered up. I could create another card with some Crumb Cake as a card base and the other extras from the kit!
I do love the little vellum leaves in the background. They are subtle but also add a fun pop to the card! Vellum is one of those things I always forget about….maybe because it’s almost clear. lol Adhering vellum can be a struggle but I just adhered it at the stem/base and let it peak out.
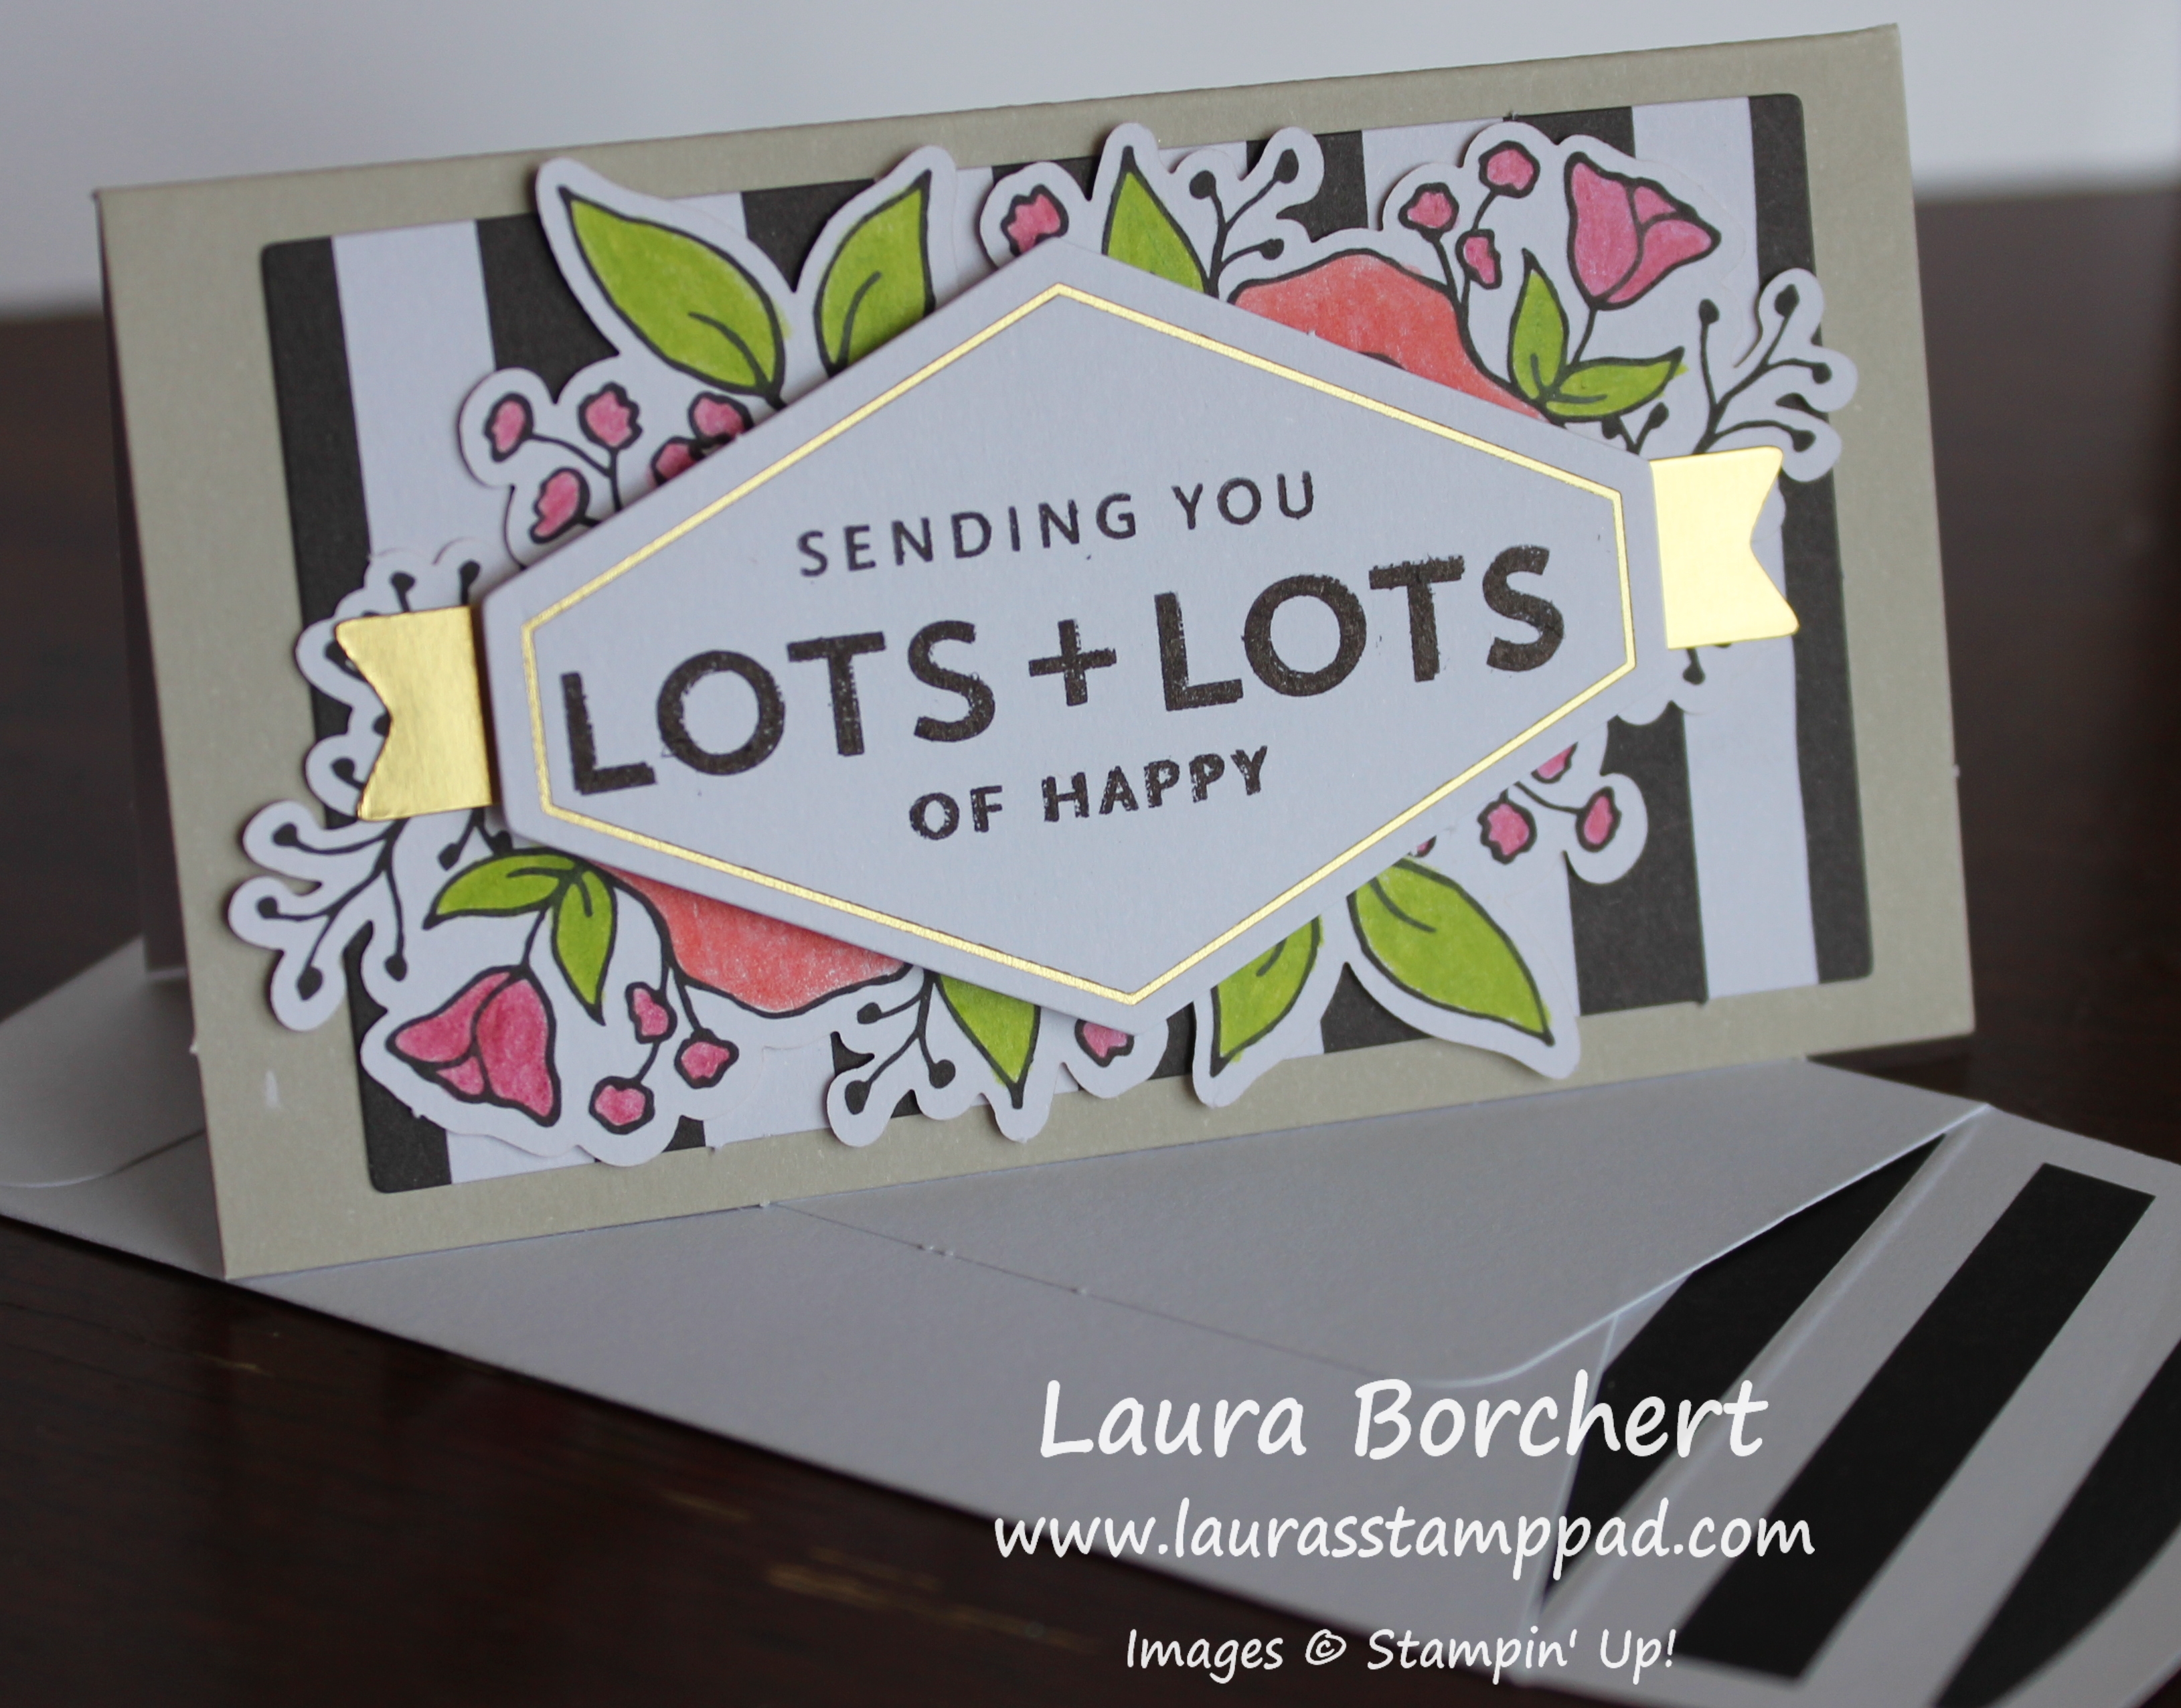
This little card is super cute and perfect for a gift topper or to attach to some homemade goodies to deliver! I was sad that the greeting covered up a lot of my coloring though. Can you tell I worked hard on that coloring and was sad to see it not showing. 🙂
Here is the final card! Did you notice that fun Lemon Lime Twist Ombre Ribbon? I love it!!! It’s so bright and cool looking! More little vellum leaves for this card too!
So that is the entire Lots of Happy Card Kit. This kit is an all inclusive kit which means it comes with the supplies, ink, clear block, and colored pencils. This makes the kit easy to gift or to grab and go. I really did love the kit but it was a lot of coloring which isn’t really my favorite! I do love flowers and pink though! 🙂 This kit also comes with the option to buy refills meaning you get all the consumables to make more cards. Click the photo below to get your kit today!
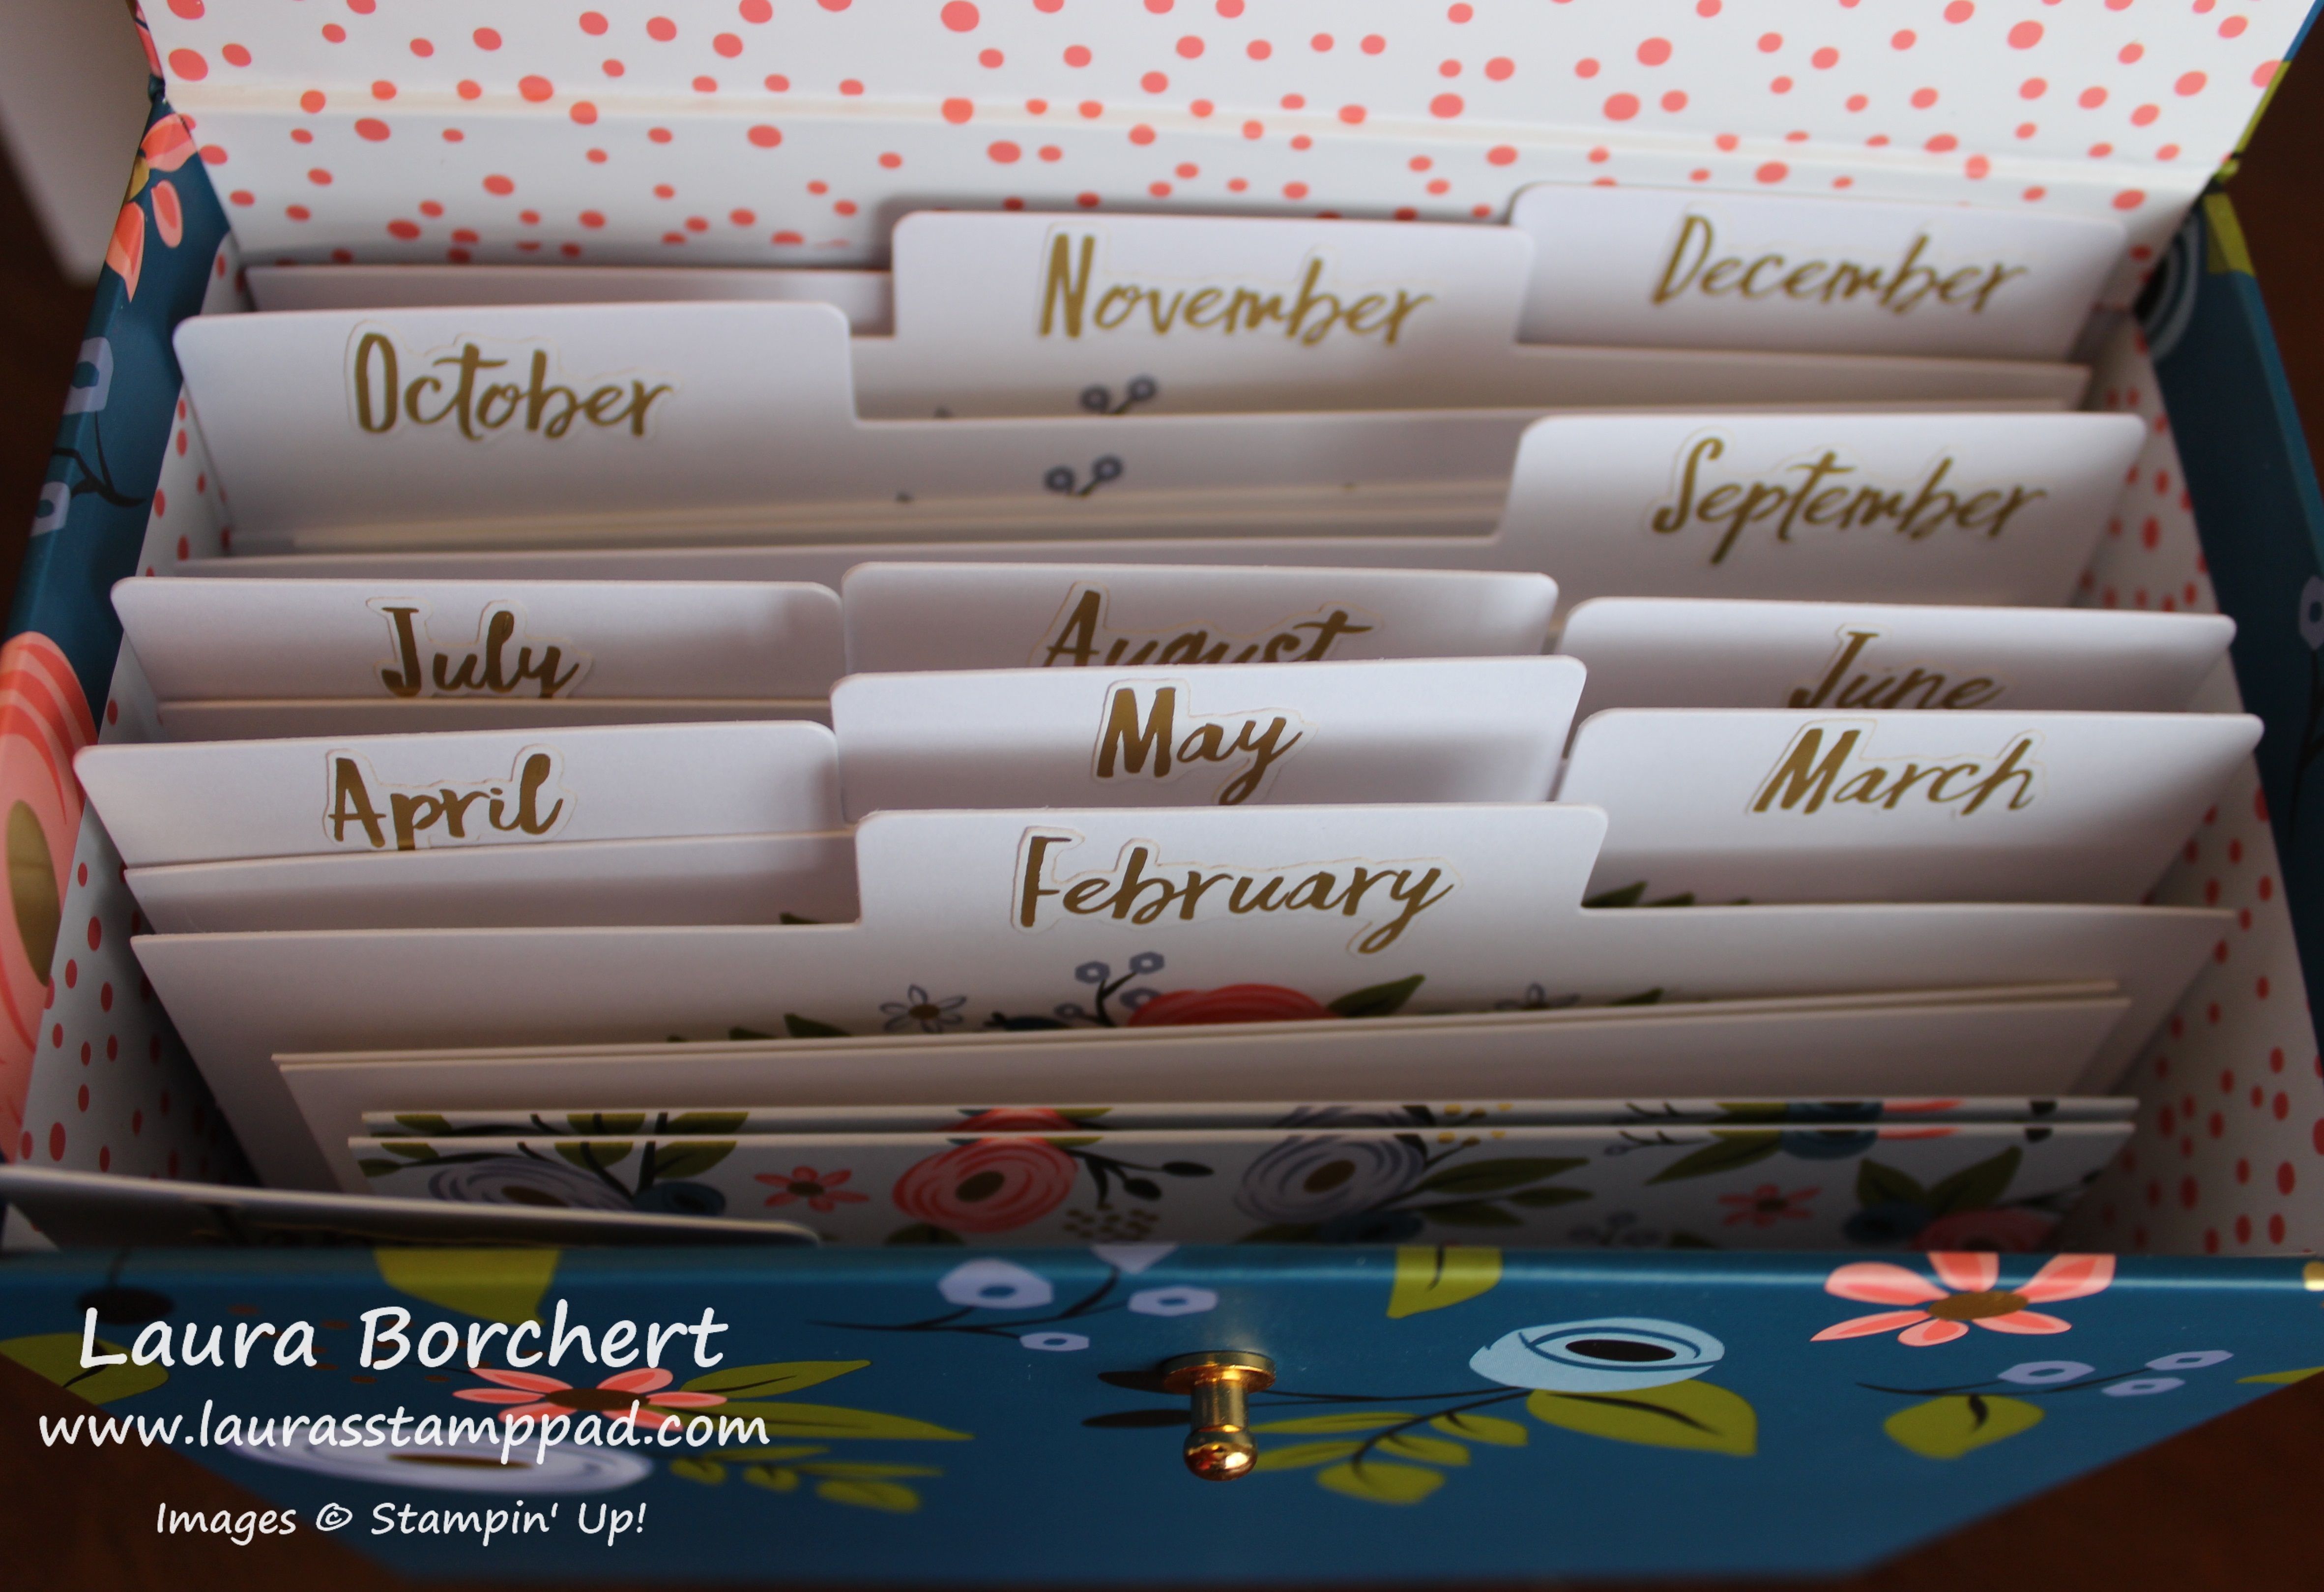
Happy Monday!!! Today I’m sharing the fabulous Perennial Birthday Card Kit which has been super popular lately!!! I’m loving it for the colors, the organization, and cute cards!!!
I love Birthday Calendars and always suggest them to everyone! They make great gifts as well. This card kit is a birthday calendar and card holder all in one! A birthday calendar is one that doesn’t need changed due to dates and days each year. My birthday is on August 29th so on the August Tab my name is on the line for the 29th. Looking into this box, you can see how many cards you will need each month and who to send them too! As you make more cards, add them behind the months that are still needing some. Amazing concept and look at those fun polka dots!!!
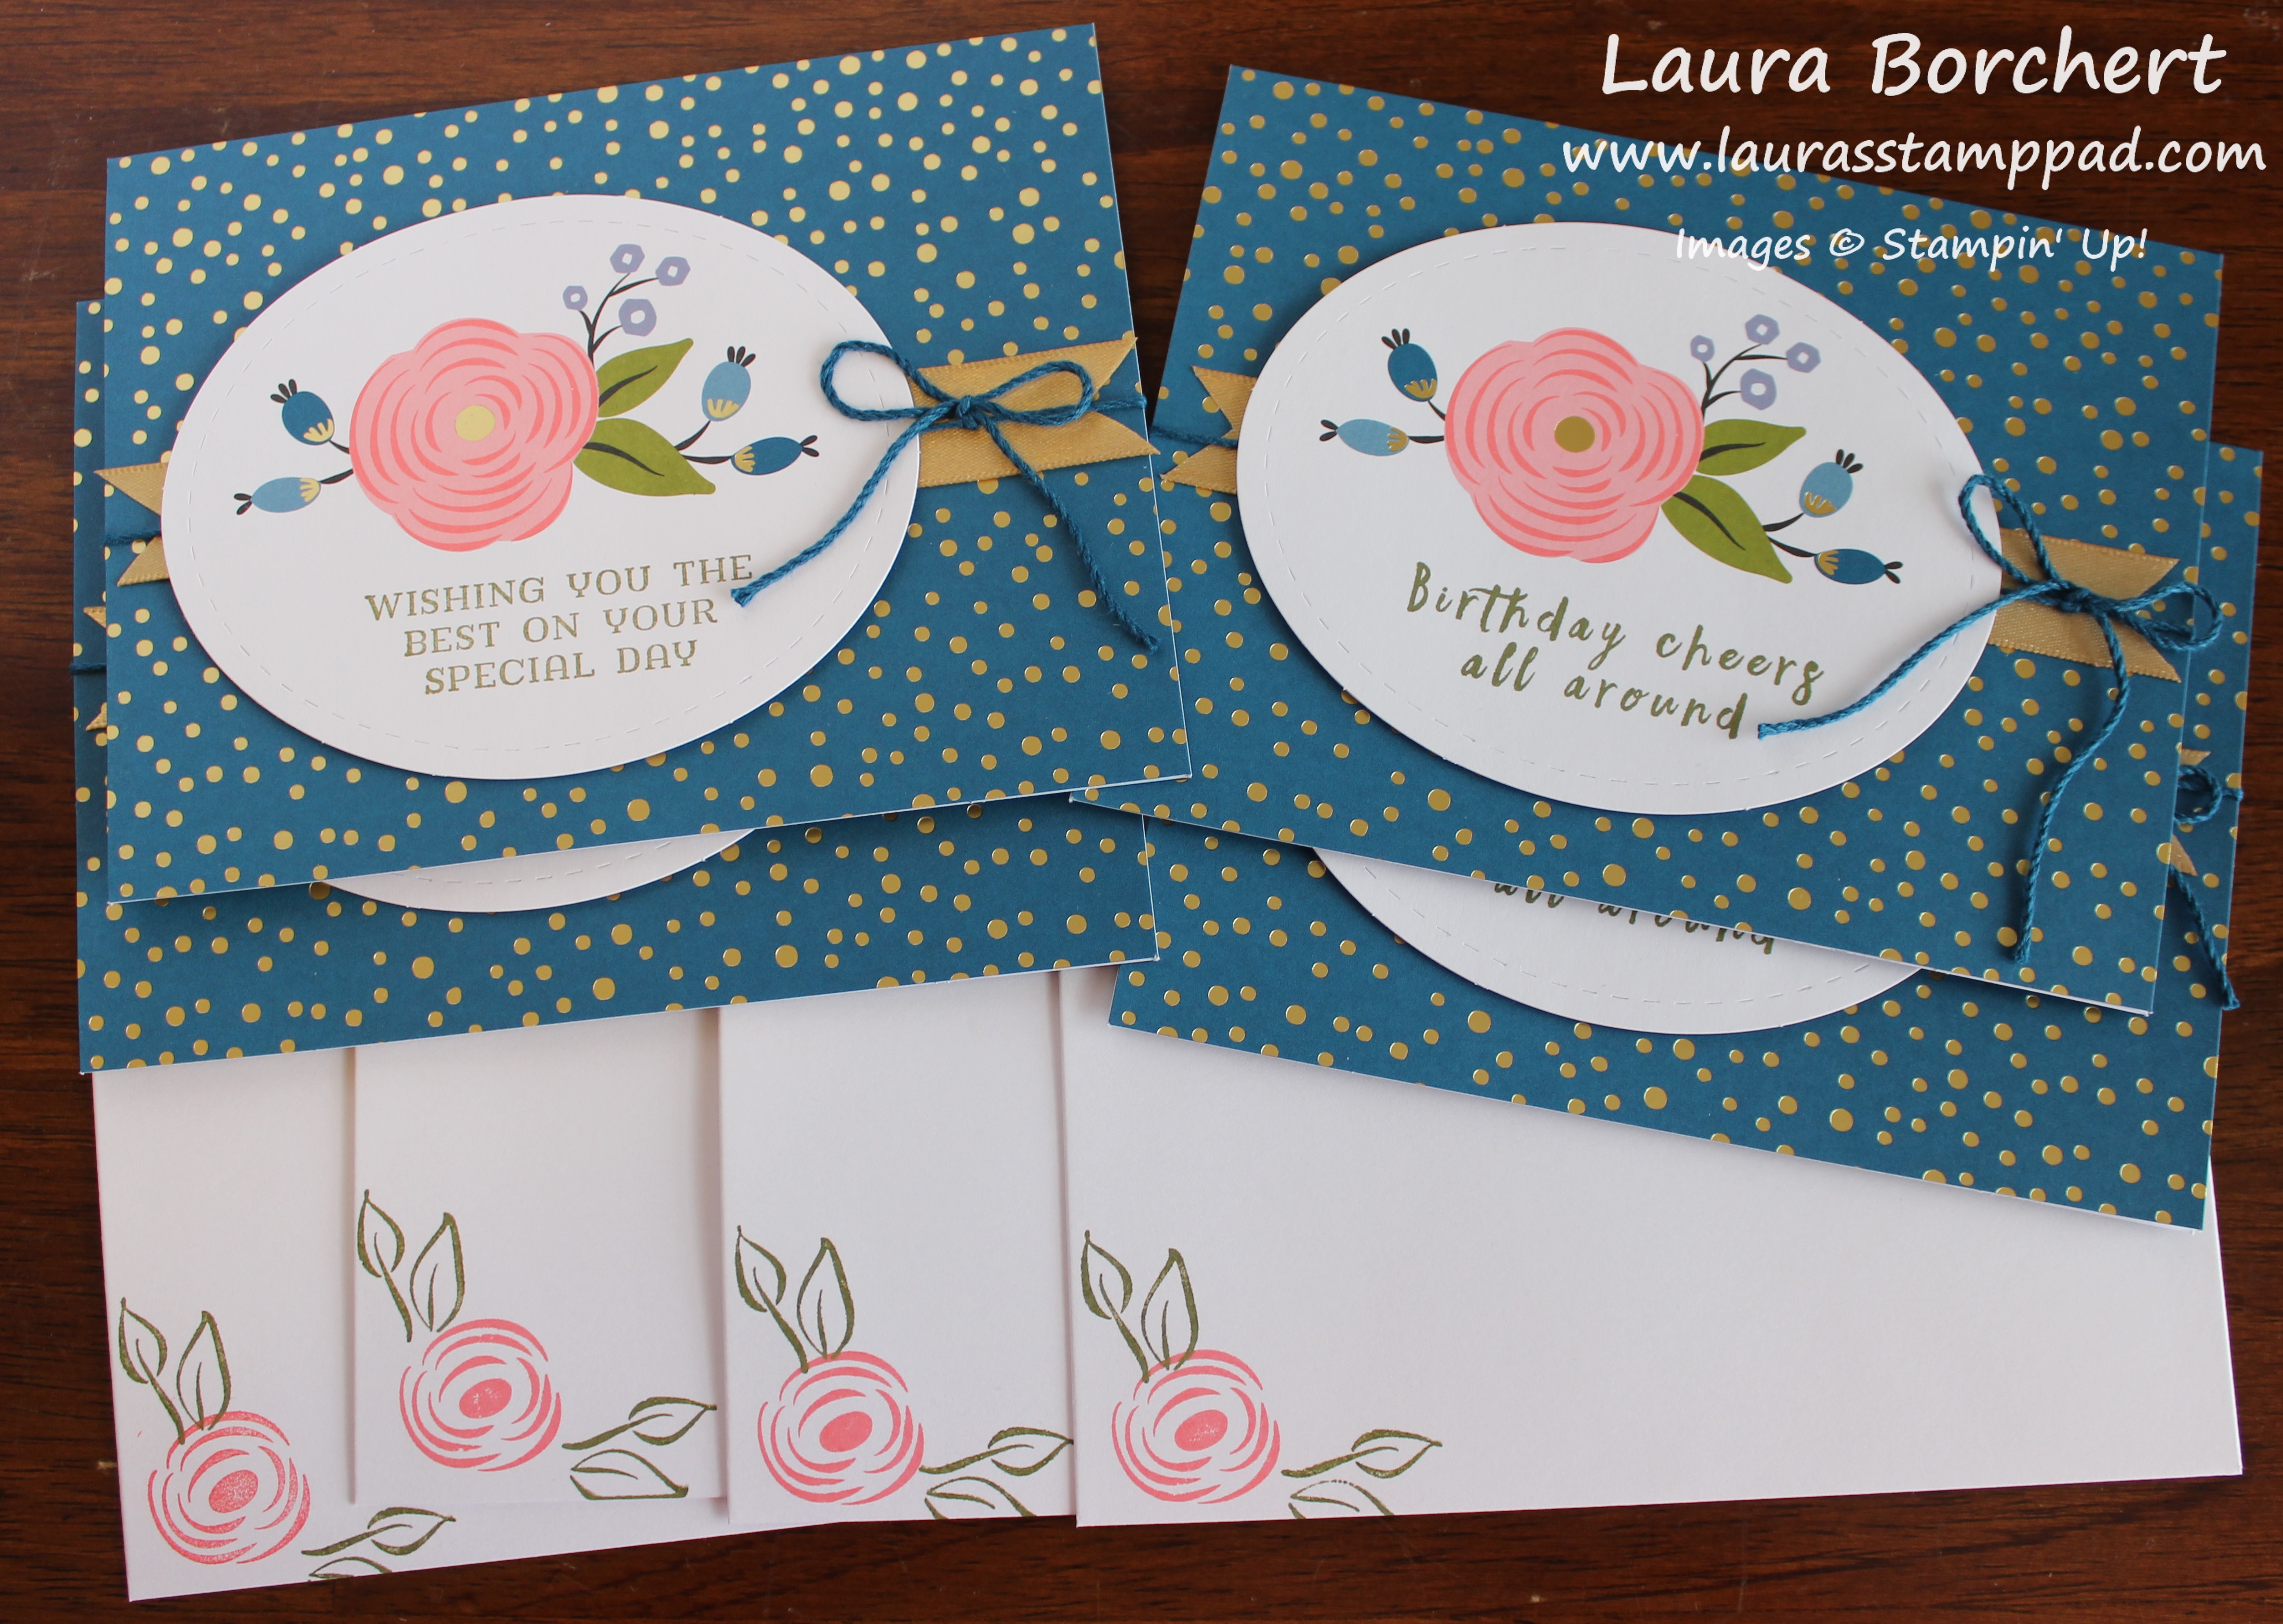
There are 16 total cards that come in the kit – 4 each of 4 designs. I made mine with different greetings to mix it up! There are also great inside and outside greetings in the Perennial Birthday Stamp Set which is super fabulous!! The gold foil adds some bling and fun to these cards as well. Don’t forget to stamp your envelopes for some added fun in the mail!
This kit only needs 3 ink pads – Old Olive, Flirty Flamingo, and Dapper Denim. As you can see I mixed up the colors for this card to see what popped more! The little bow at the bottom was tied into a knot and then I added it to the card front with a little Mini Glue Dot!
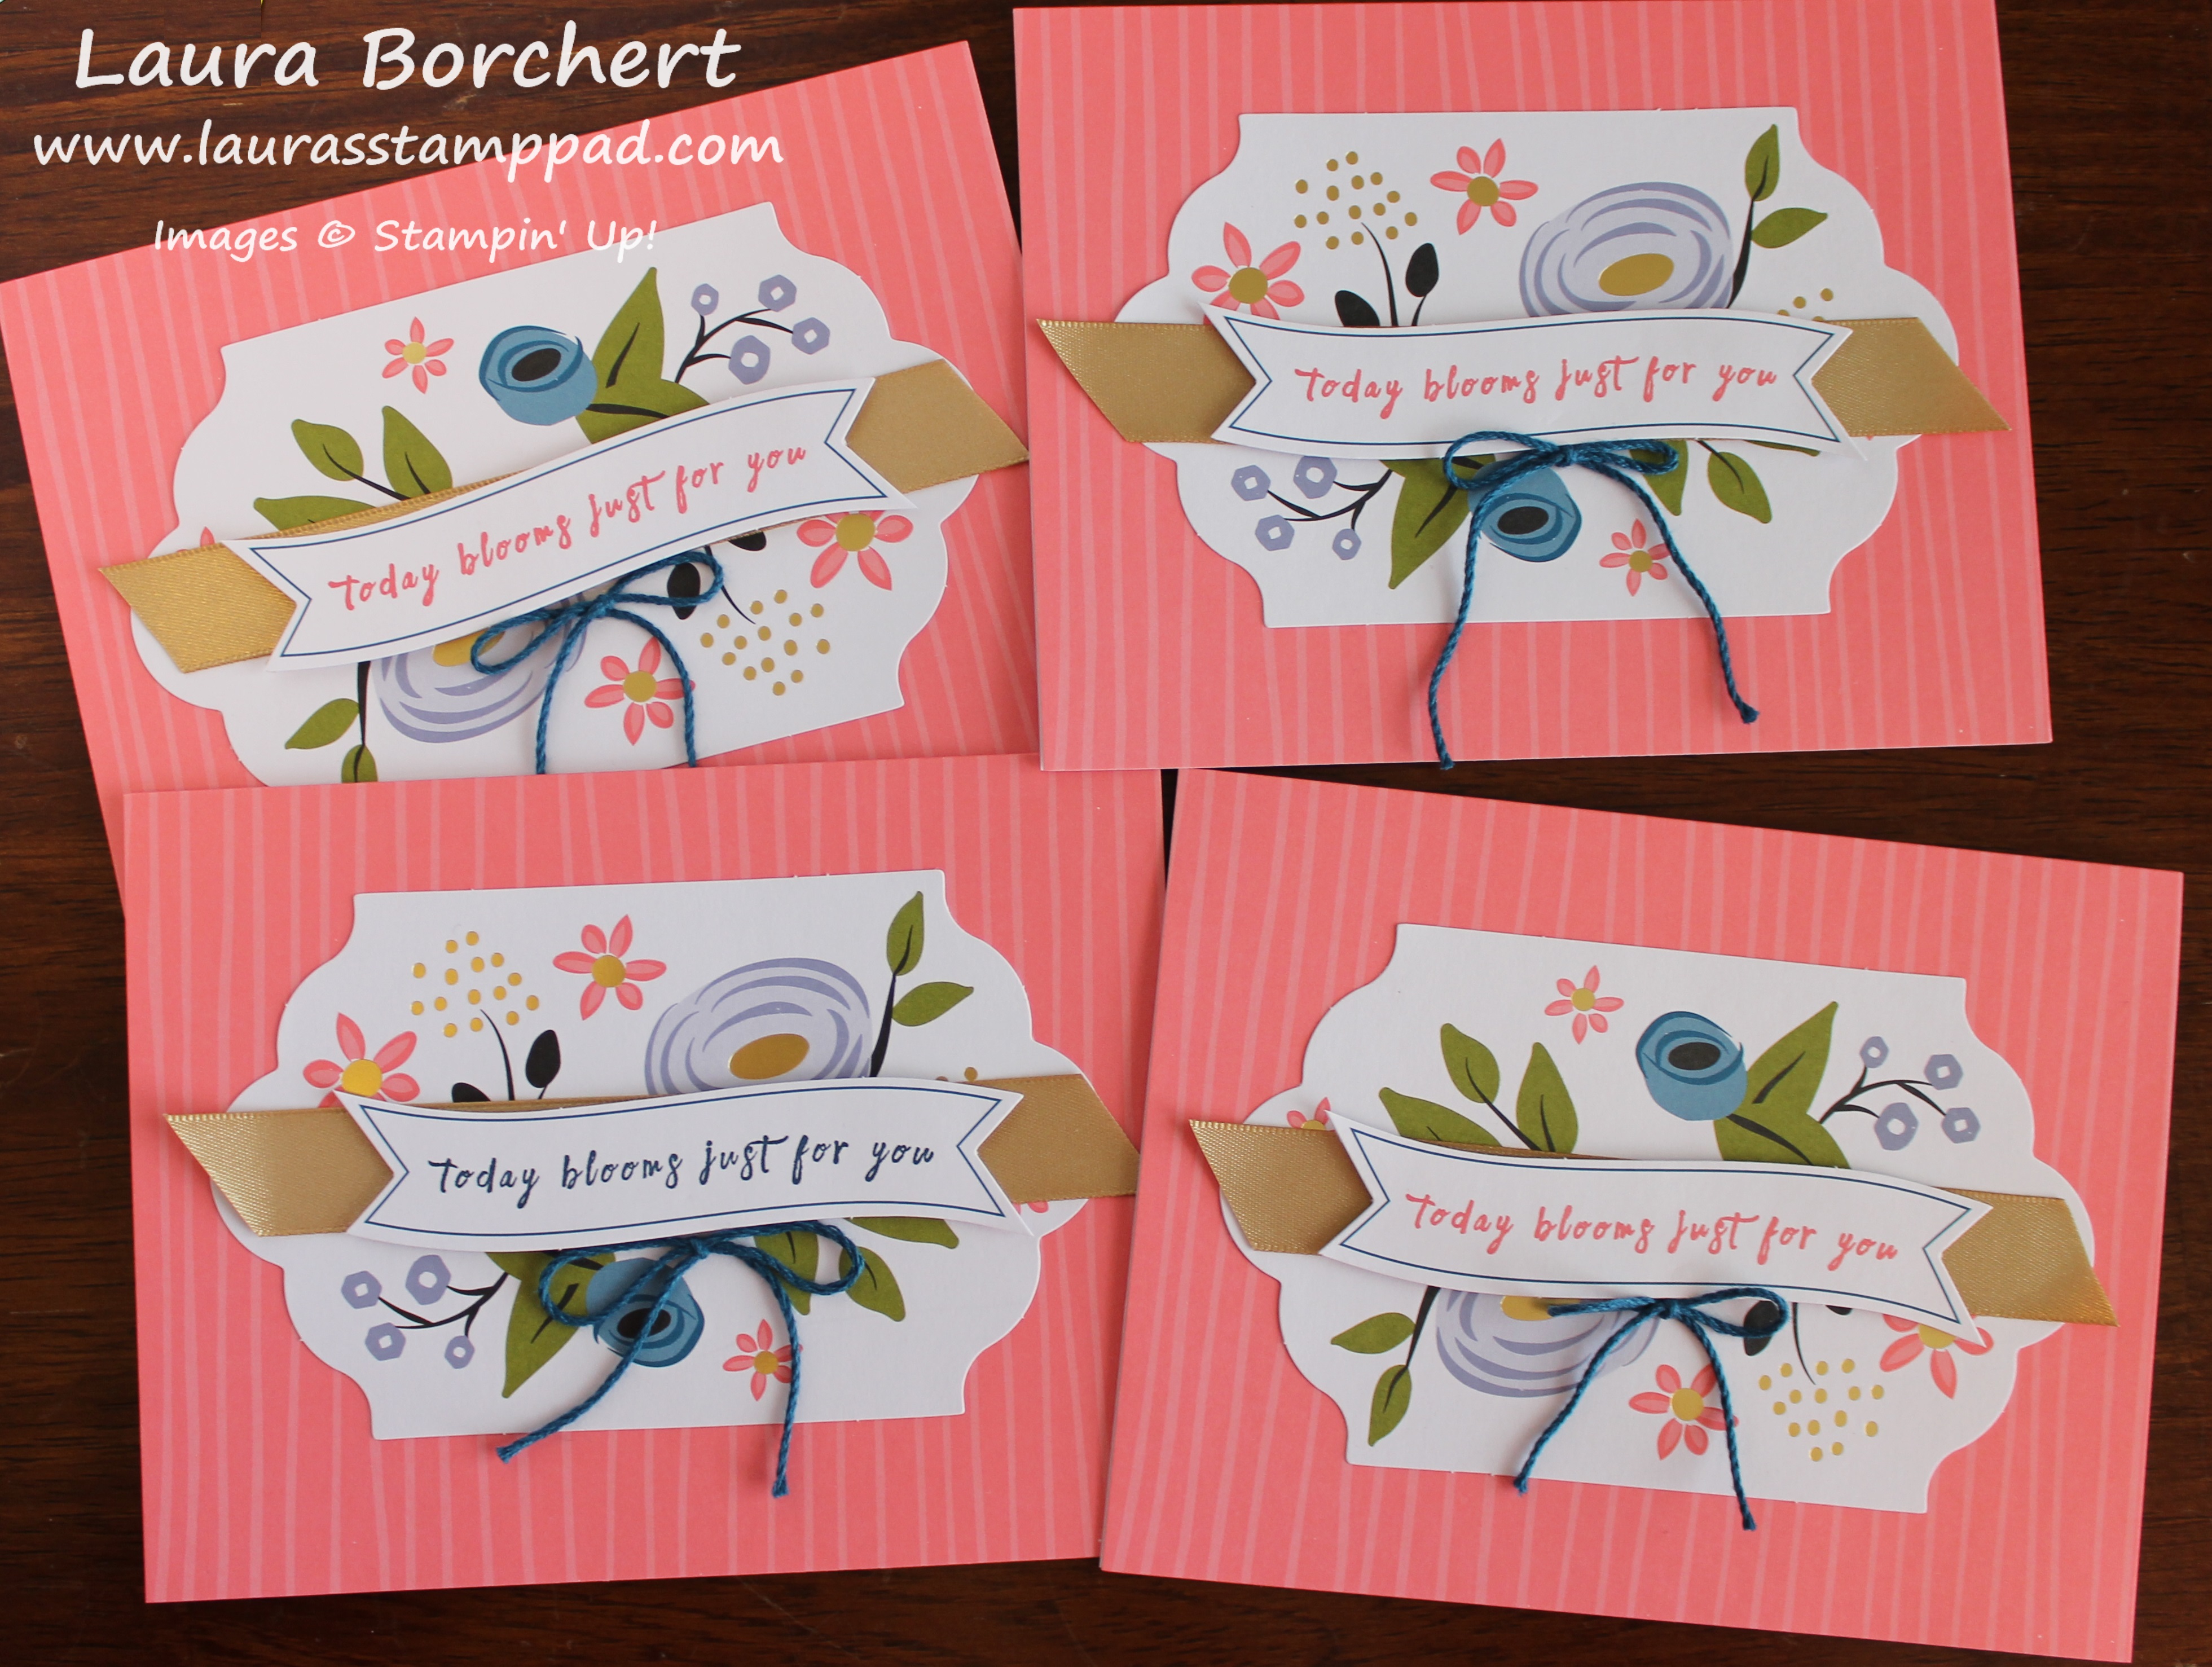
I really loved the color combination and flower print of these cards in the kit! This card is great for anniversary, birthday, wedding, and so much more!! Again, for this one, I didn’t actually tie the Baker’s Twine around the tag hole because I find that my bow ends up sideways. I simply tied a bow and stuck it over the hole with a Mini Glue Dot. This was much quicker for me and came out perfect each time!
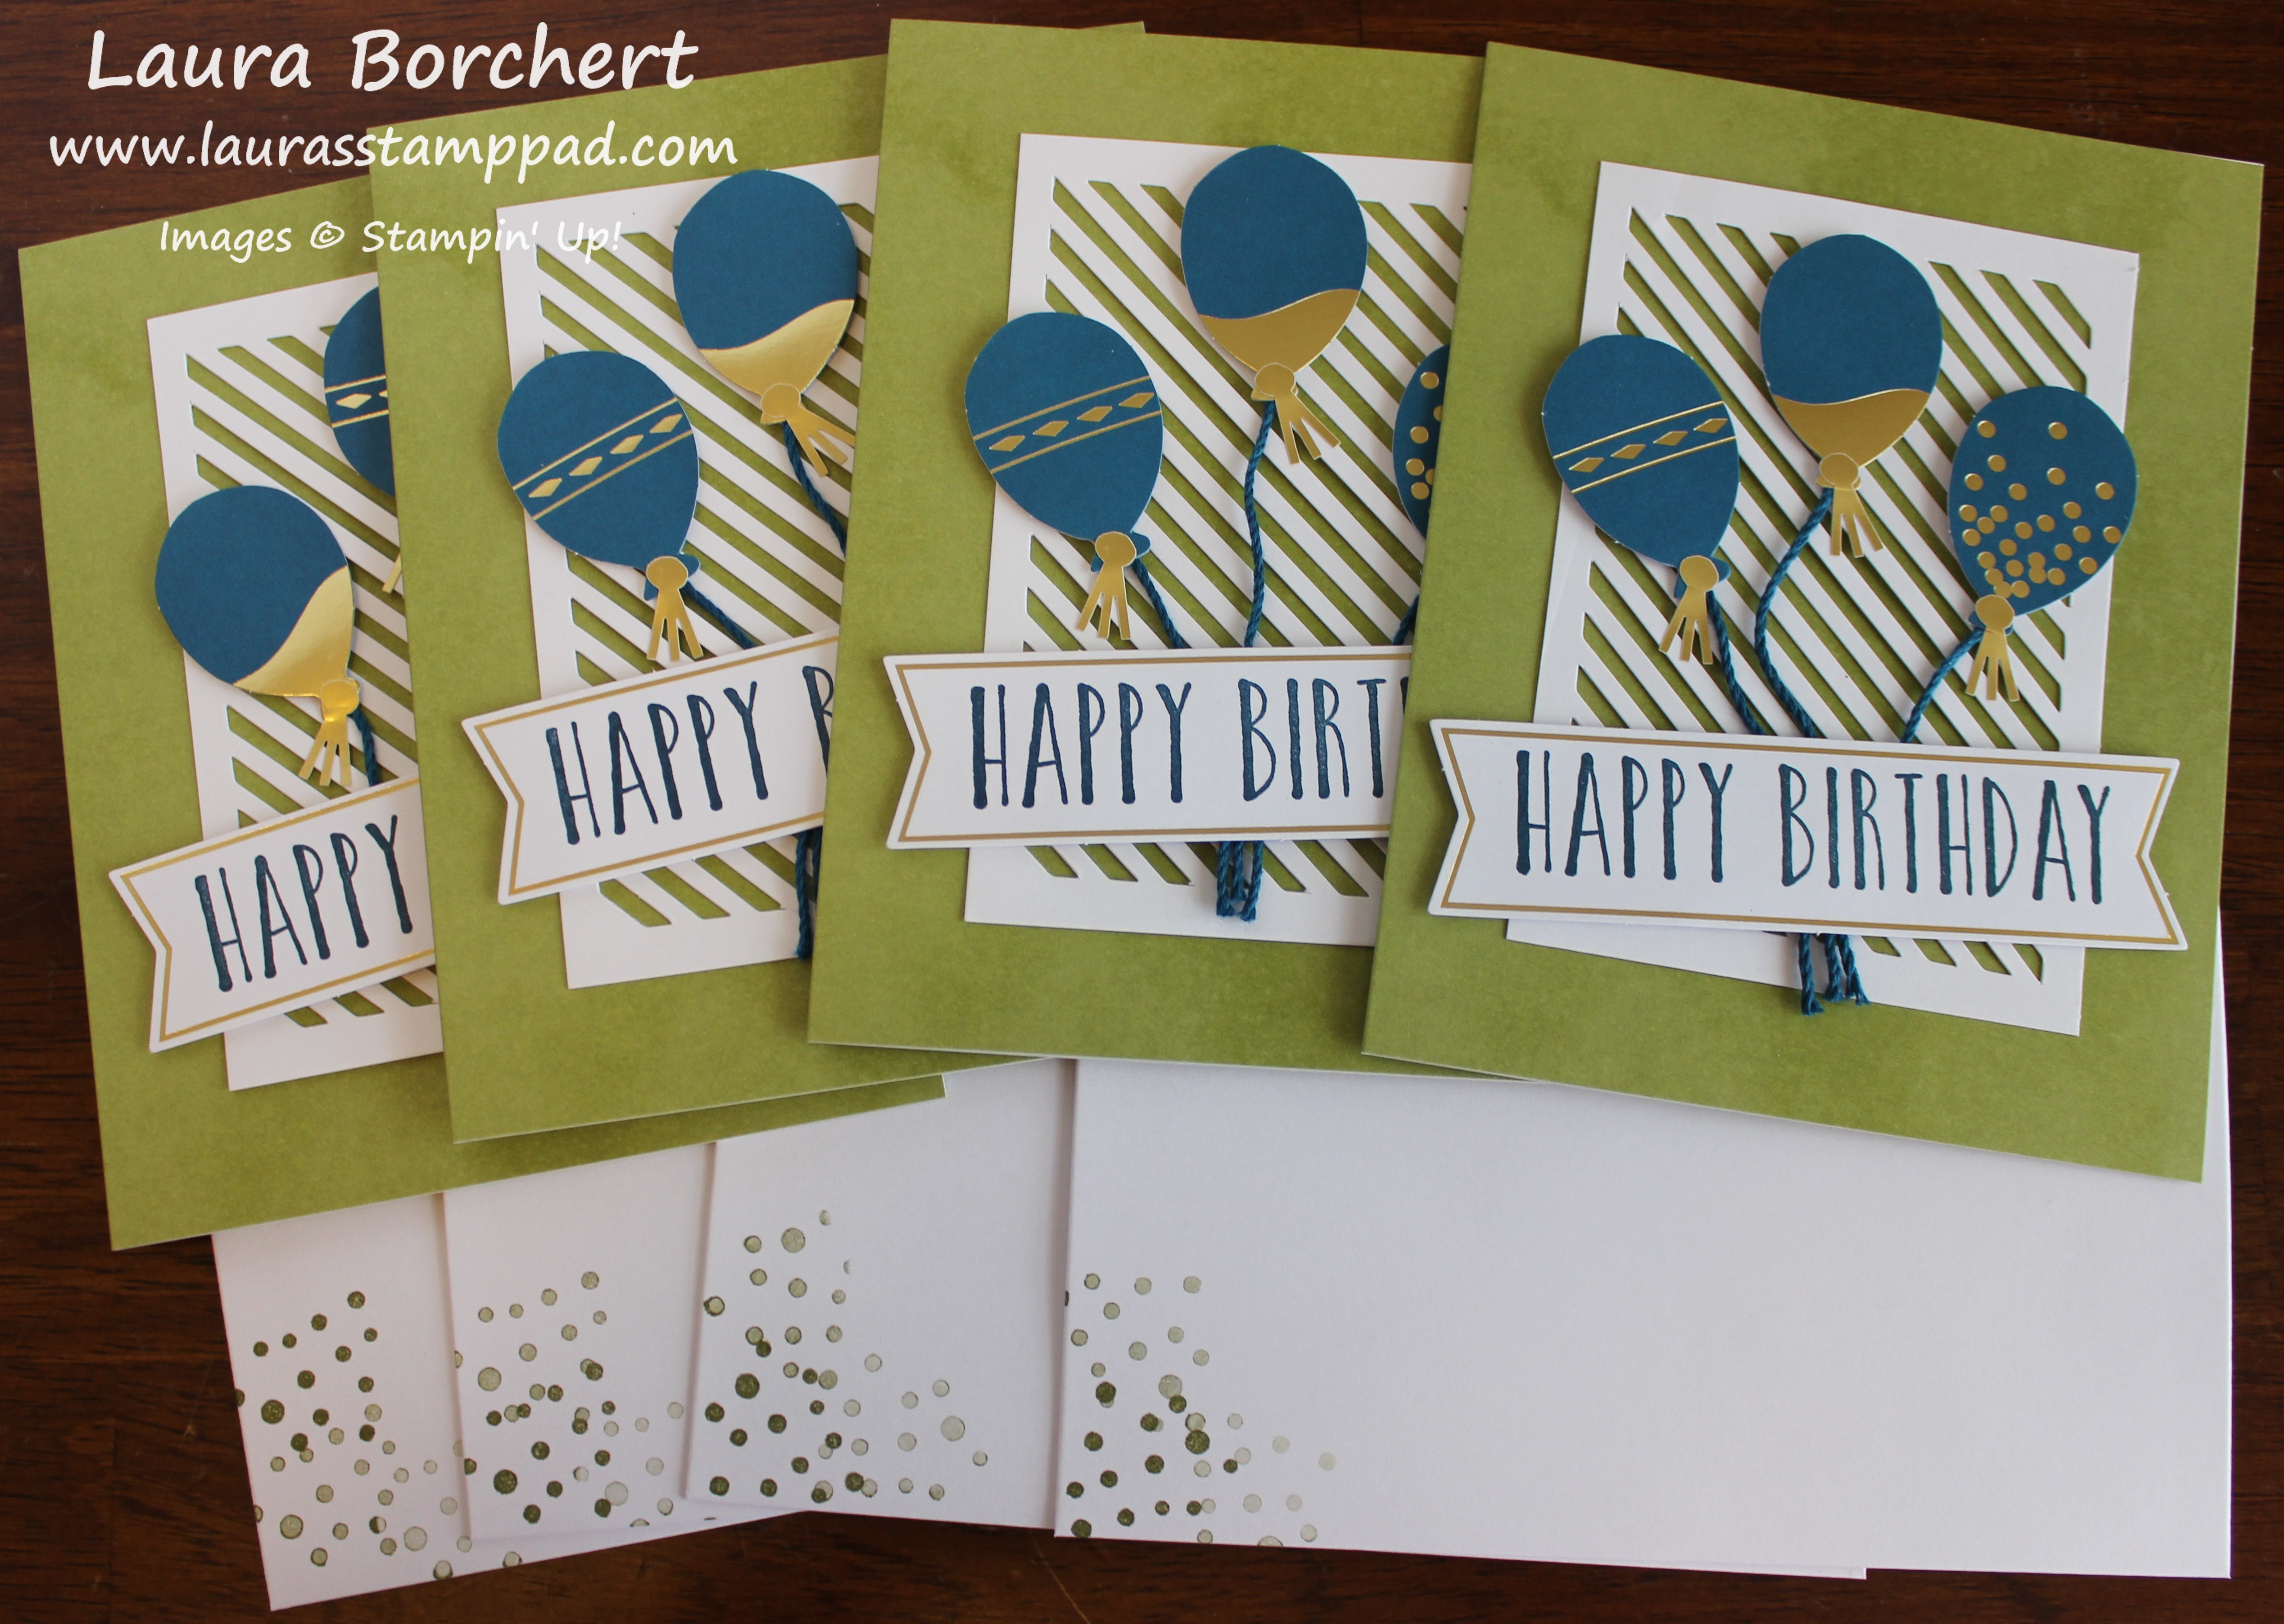
And because flowers aren’t very masculine, there’s always this set of cards! I love how the kit has a little bit of everything and not just all flowers or all masculine! I only added 1 little tassel to my balloons as I thought 2 was just too much. That’s all personal preference. Also, I kept all of the white background pieces together in a stack and was able to punch out the stripes all at once rather than each one individually. The envelopes were stamped with the dots in Old Olive. I just inked it up, stamped once and then a second and third time without going back to the ink.
This kit was super fun and versatile. I love the cards and the box is just so adorable! This makes a great gift or something to keep for yourself. If you would like to see all of the goodies in this kit, check out my unboxing video here! Get your kit and start creating with the supply list below!
In preparation for the Occasions Mini Catalog and Sale-A-Bration Promotion starting tomorrow, I’m not doing Technique Tuesday today! Instead, I’m sharing with you the Mixed Medallions Card Kit that can be earned for FREE with a $50 order tomorrow through the end of March!
I was super excited to see a kit like this again this year! The kit requires no stamping and it’s quick to assemble. I created these cards within minutes. Fun, pretty, and ready to use in no time at all!
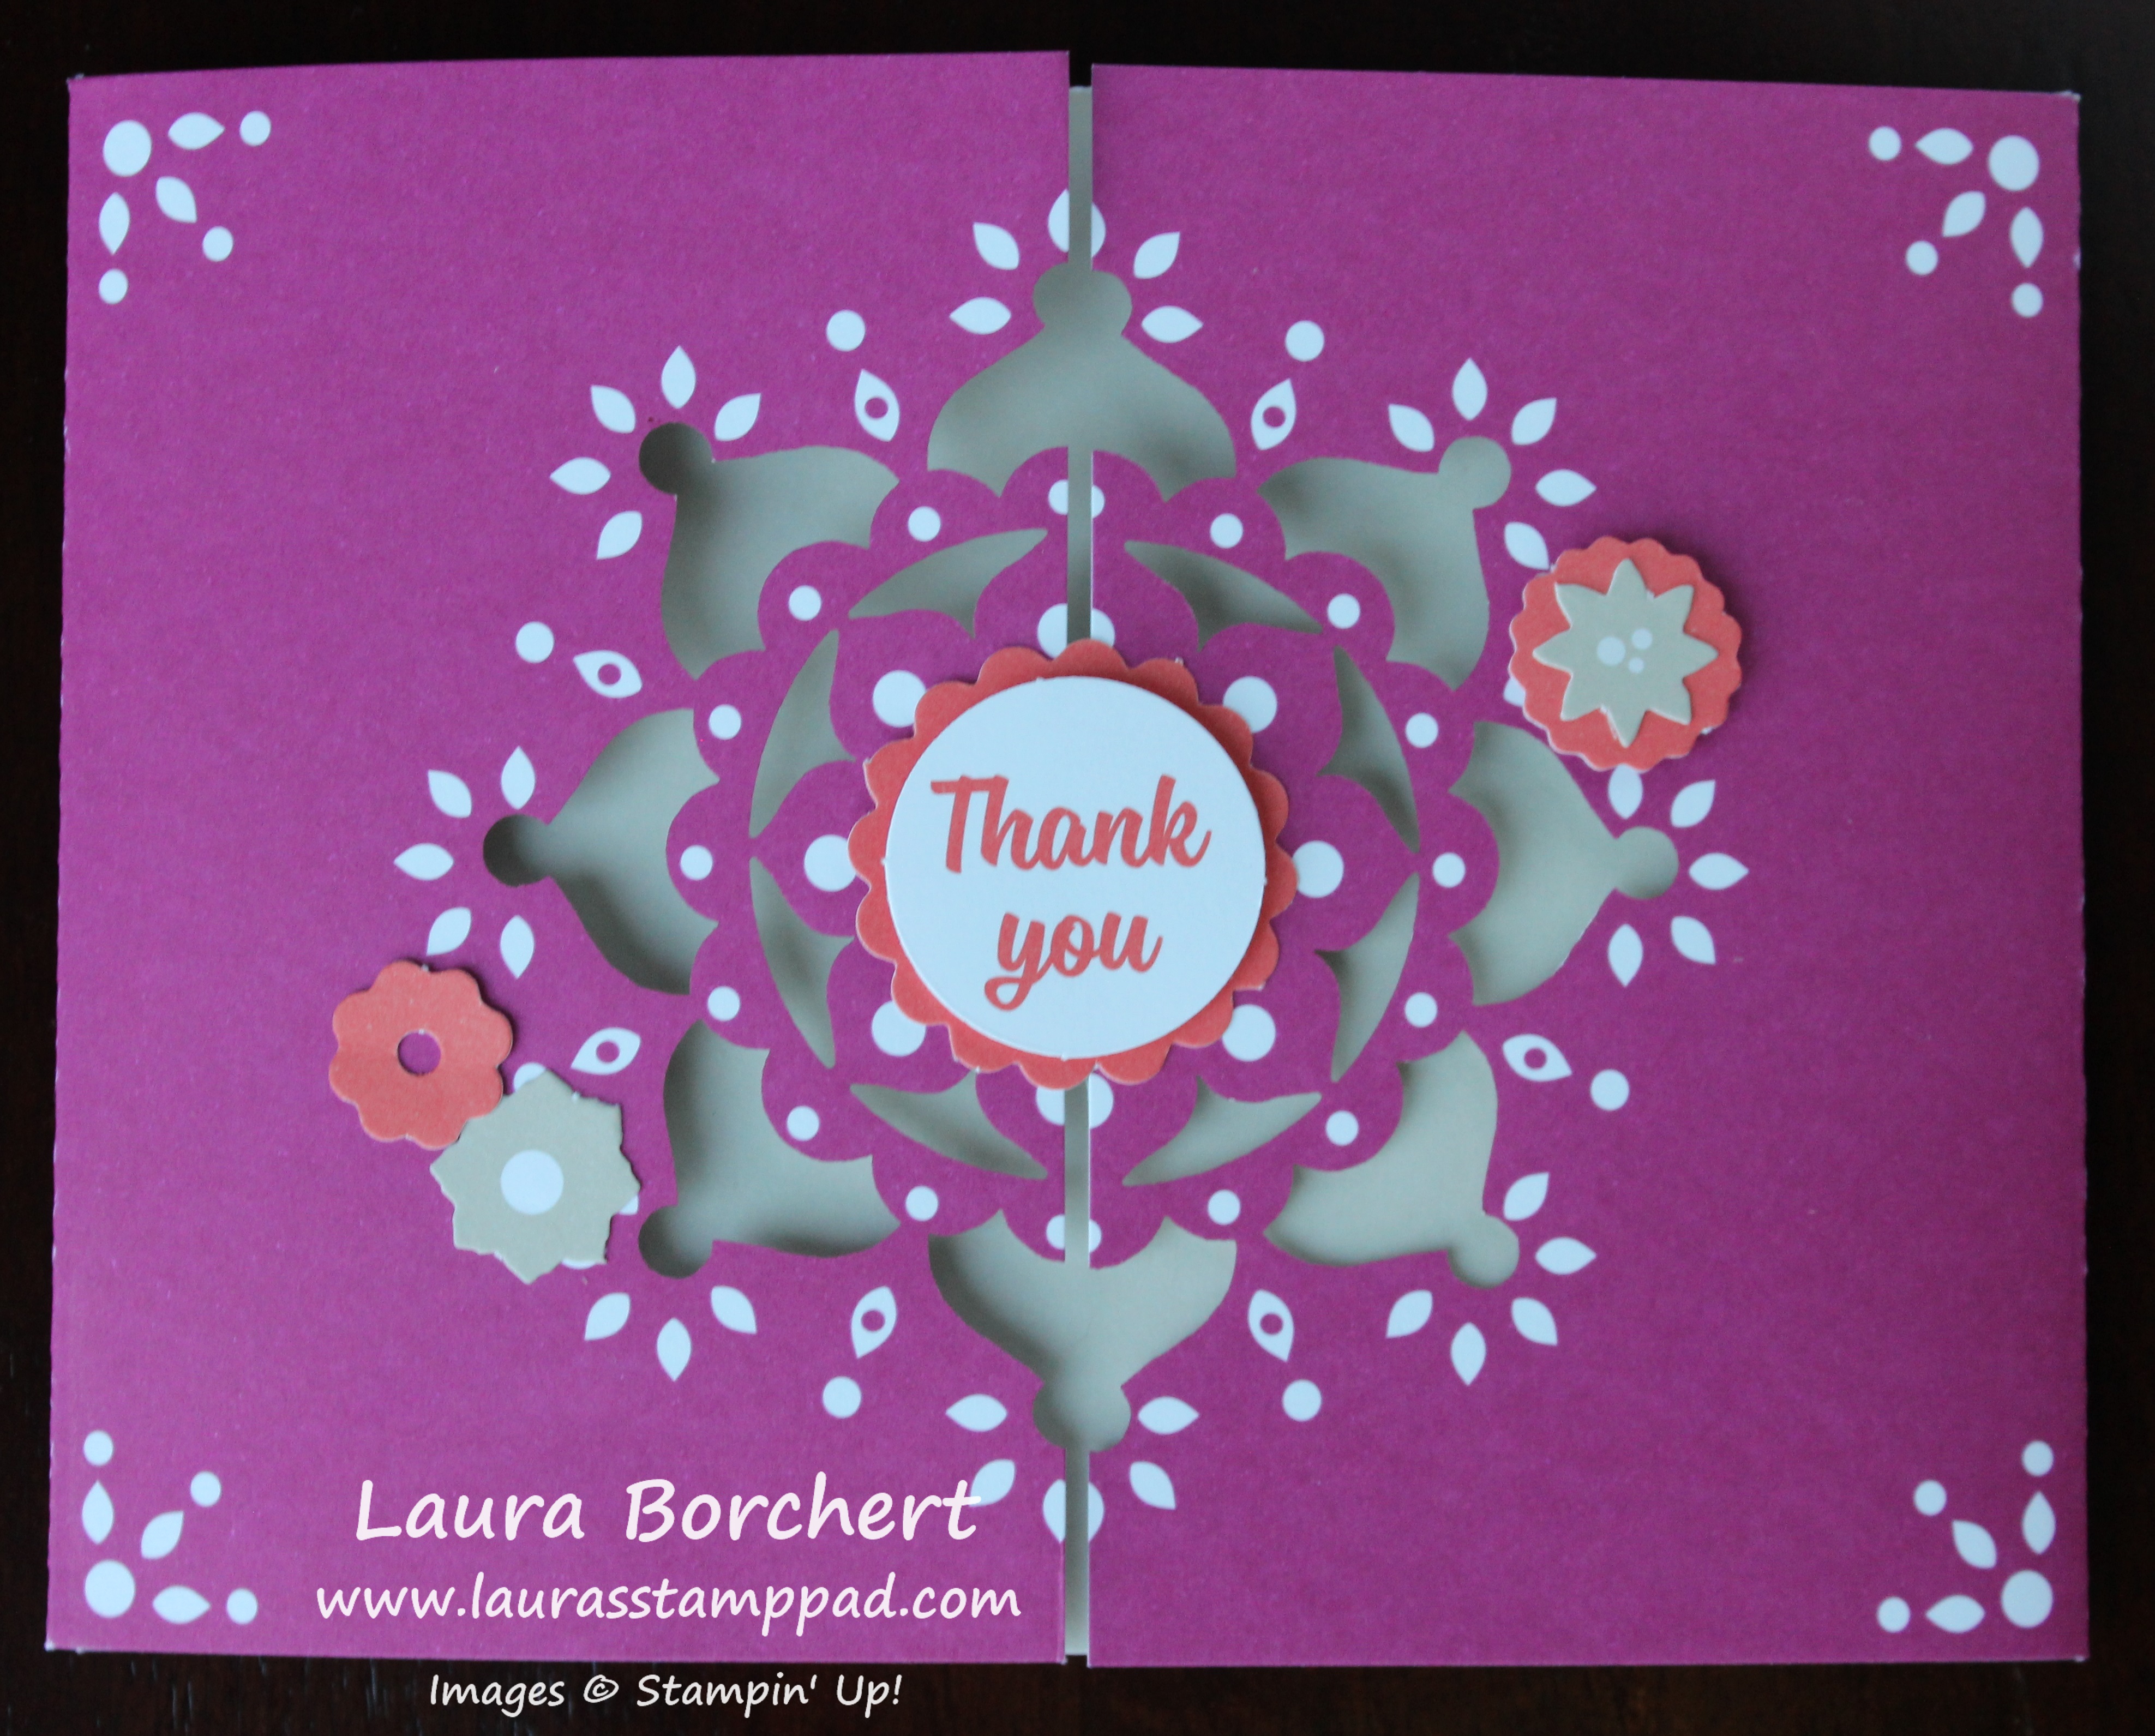
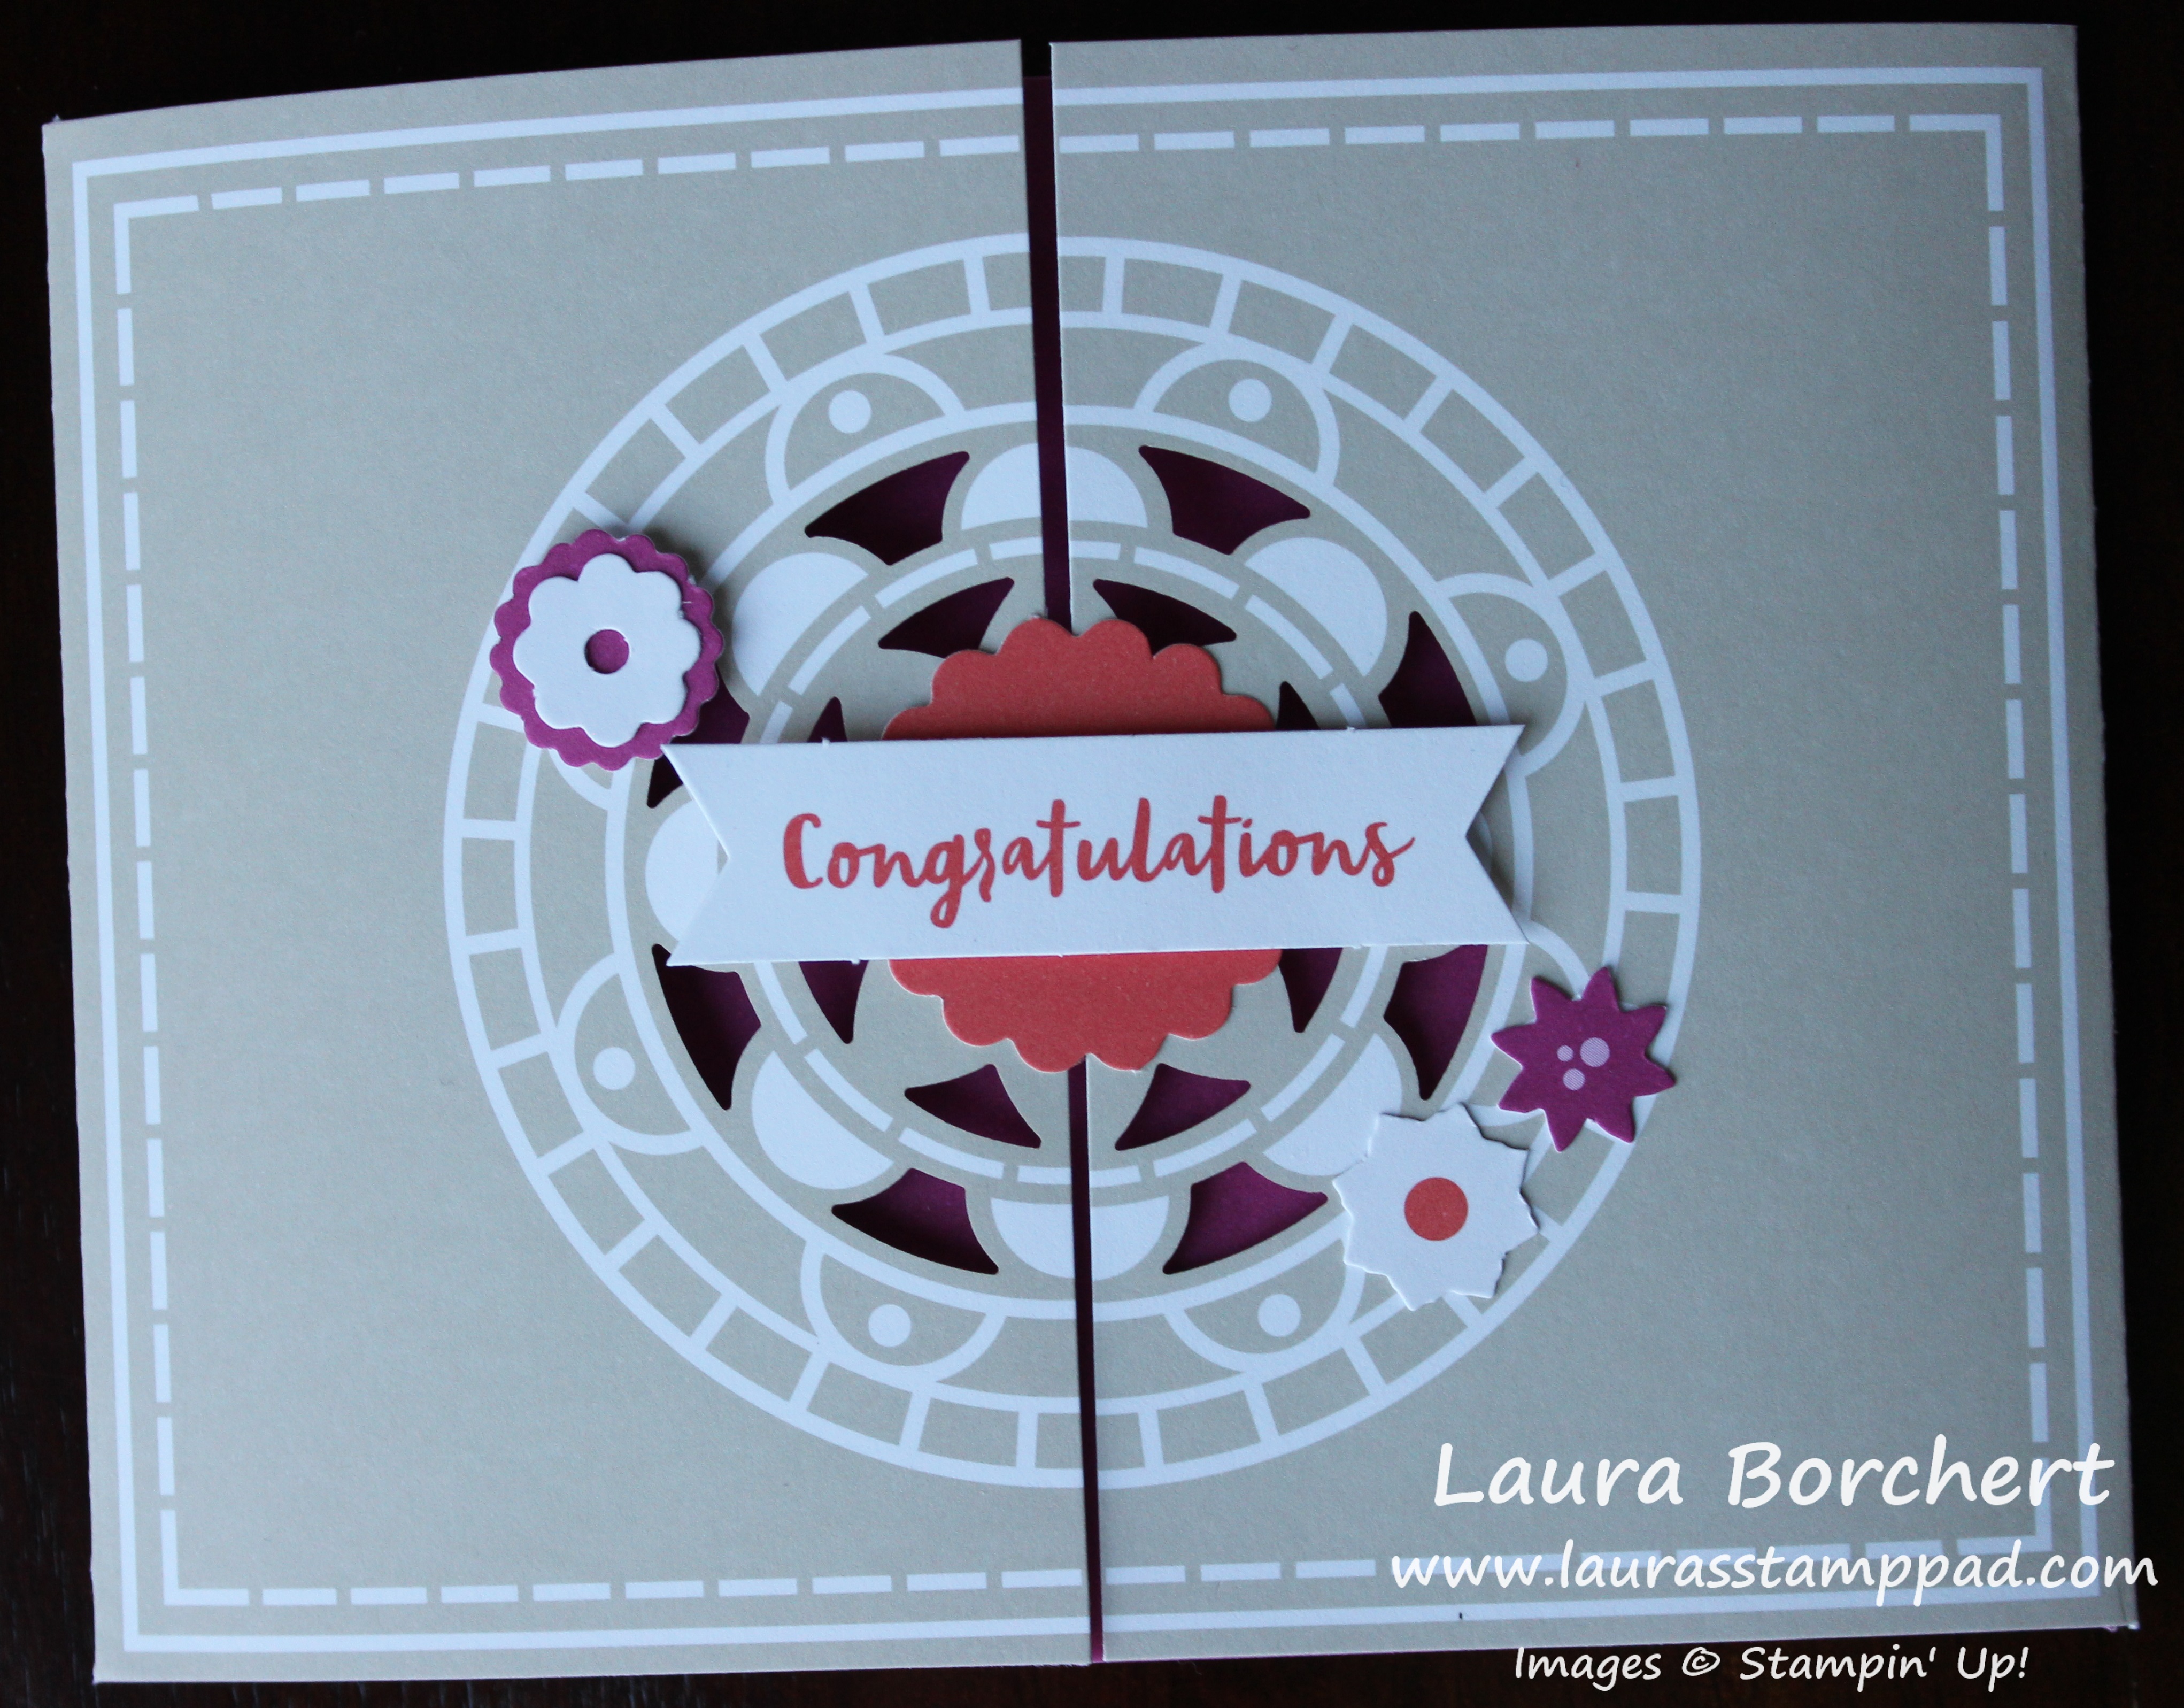
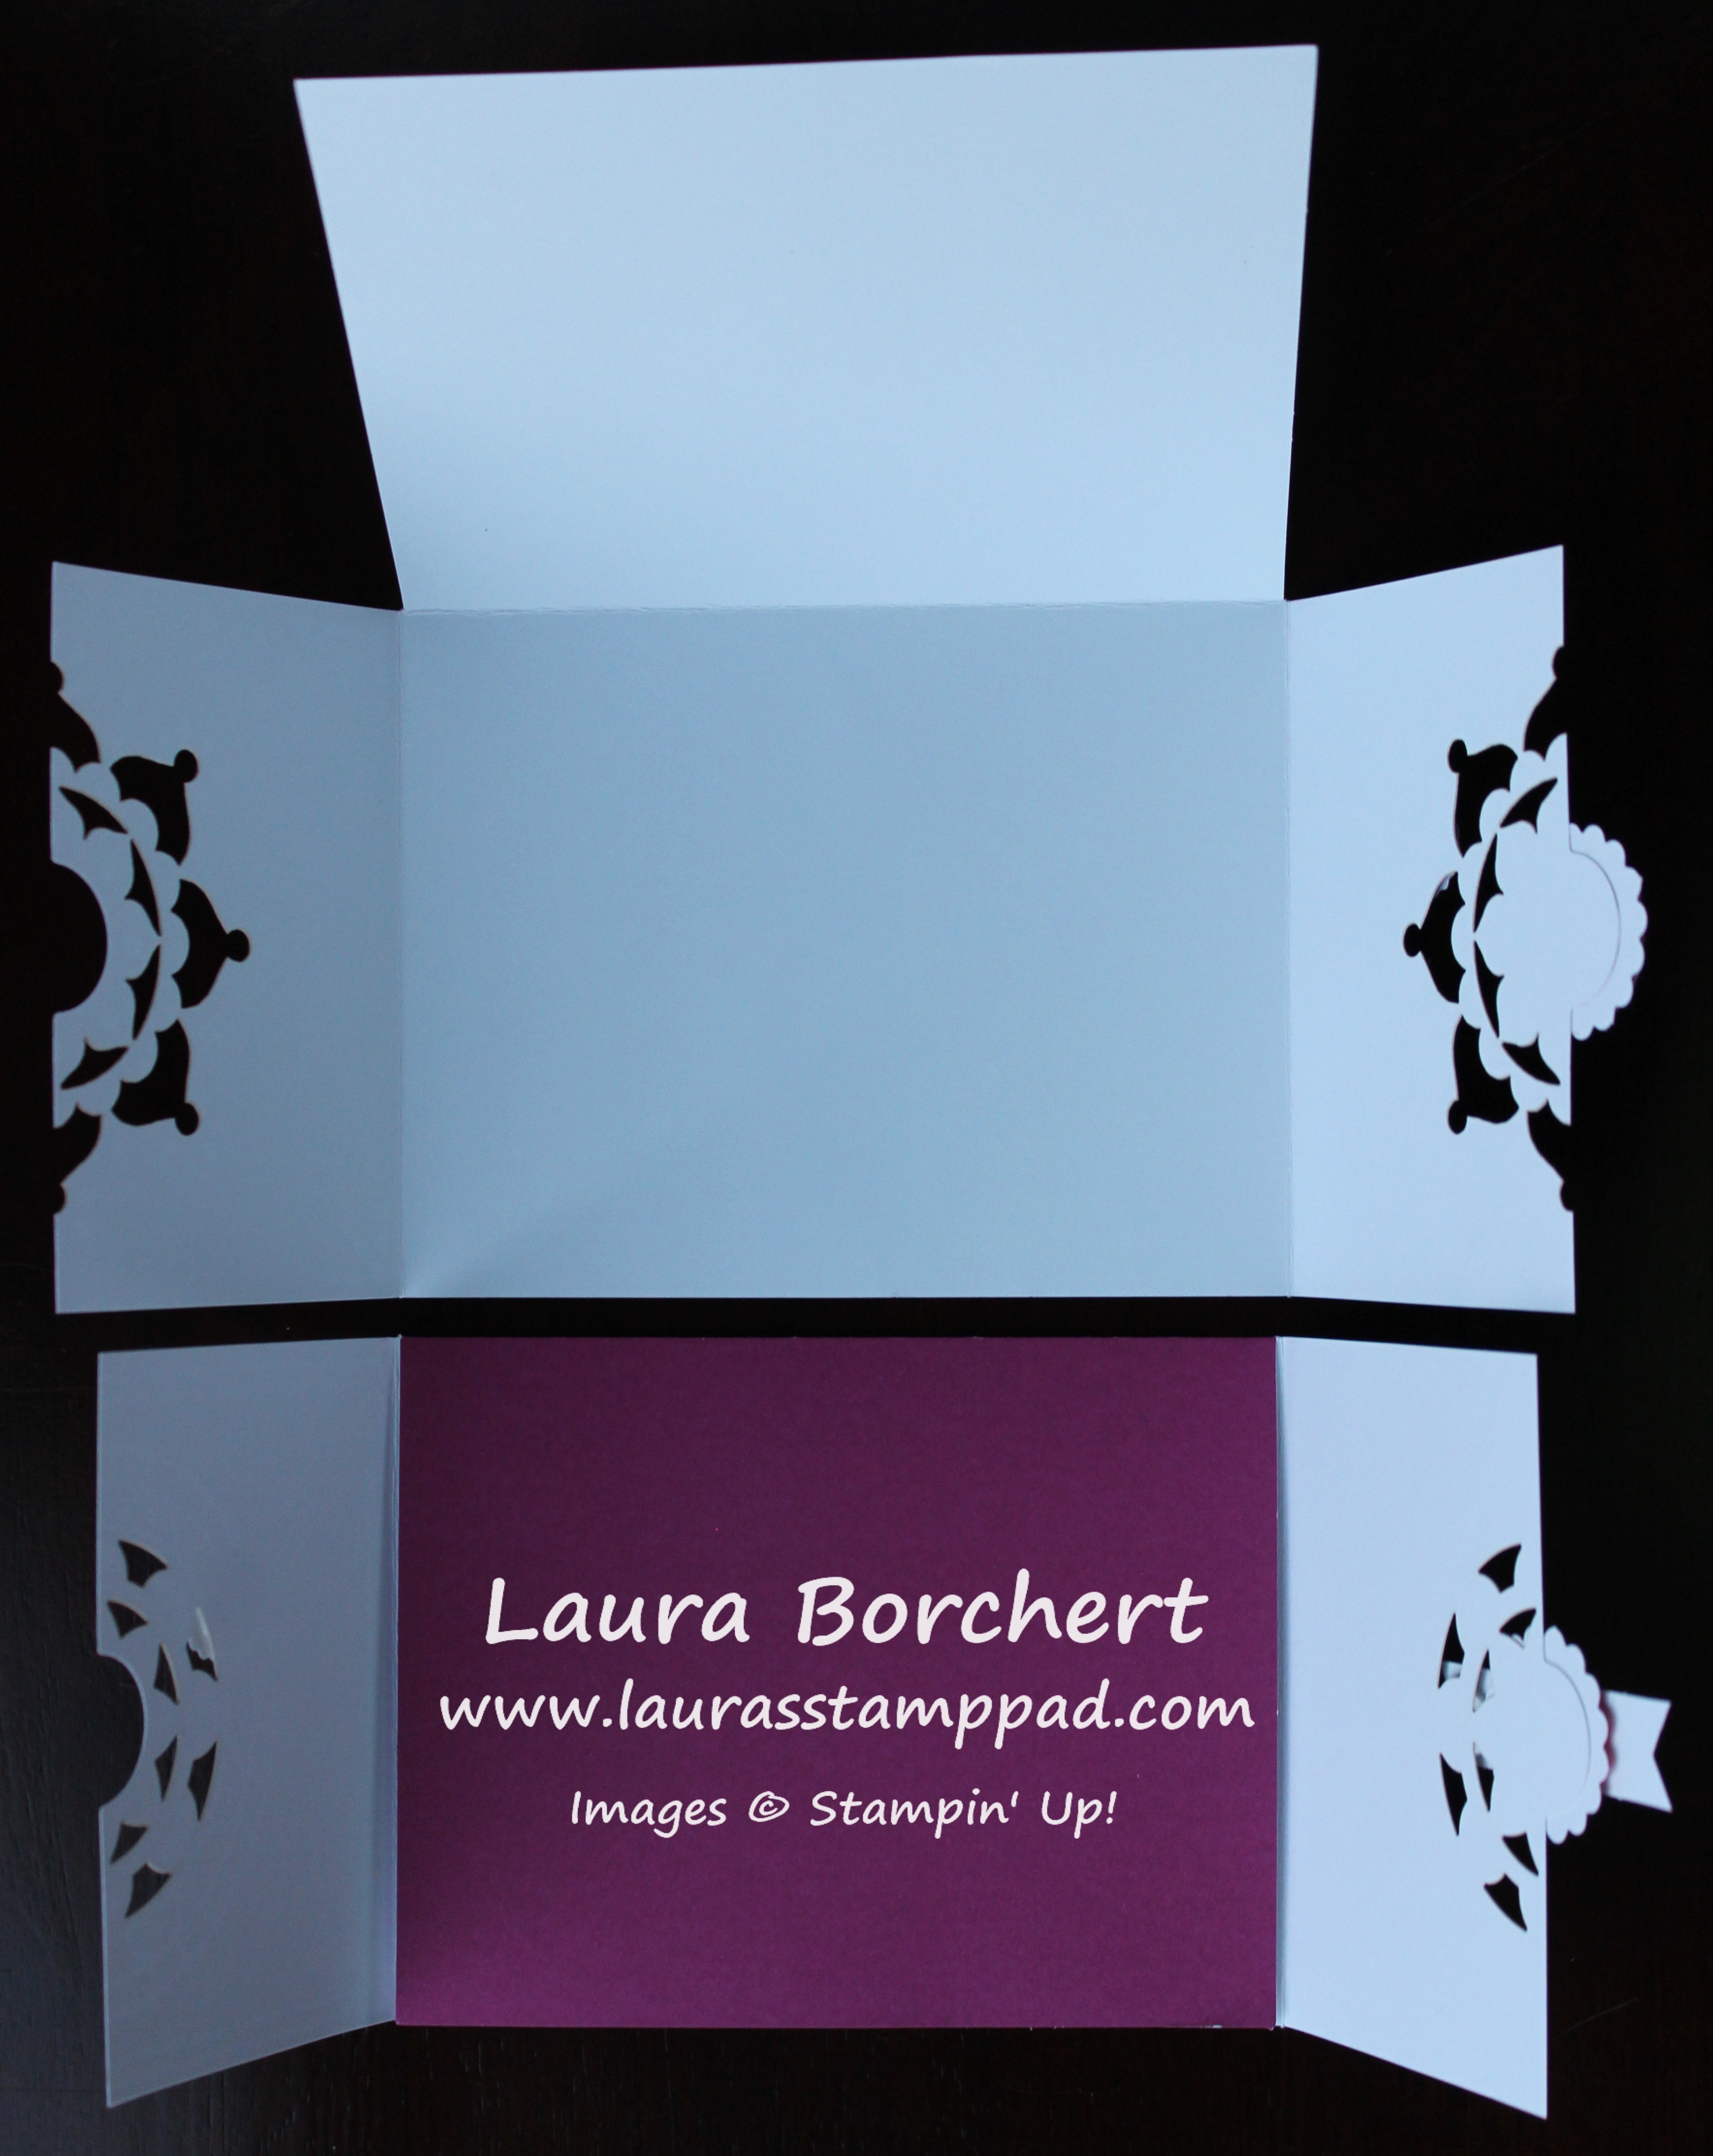
First, I folded on all of the score lines to create this gate-fold card. The only tip that you need to know is that you don’t seal the card shut with the decorations!!! The greeting goes in the center and there are various flower combinations to add all around!
The Crumb Cake, Berry Burst, and Calypso Coral combination is subtle and fabulous! Also, have you noticed how the inside color peaking through is solid?? Stampin’ Up thought of everything with this kit!
There is a panel popping down from the top that covers up the written greeting on the inside. How fabulous is that?!?!?! This way you have that perfect clean look from the outside with the color peaking through. You don’t see your stamping or writing peaking through! I love that. It’s perfect!! Do you like quick and simple card projects like these or do you prefer the more detailed kits? Let me know in the comments below!
You can check out the unboxing and reveal of this kit below or click here! Don’t forget to give it a thumbs up if you are excited about this kit as much as I am! Be sure to subscribe to my Channel it you are new because I have lots of other products from the Occasions Mini Catalog and Sale-A-Bration Promotion to share. Also, Technique Tuesday will return next week!


")