Technique Tuesday – Filter Paper Flowers!

Posted on

Happy Tuesday!!!! You know what that means…..I have a fabulous technique for you! Have you heard of Filter Paper or seen it in the catalog and wondered how do you use that?? Well today I’m going to show you a few ways to use it!!!

Creped Filter Paper Flowers, www.LaurasStampPad.com

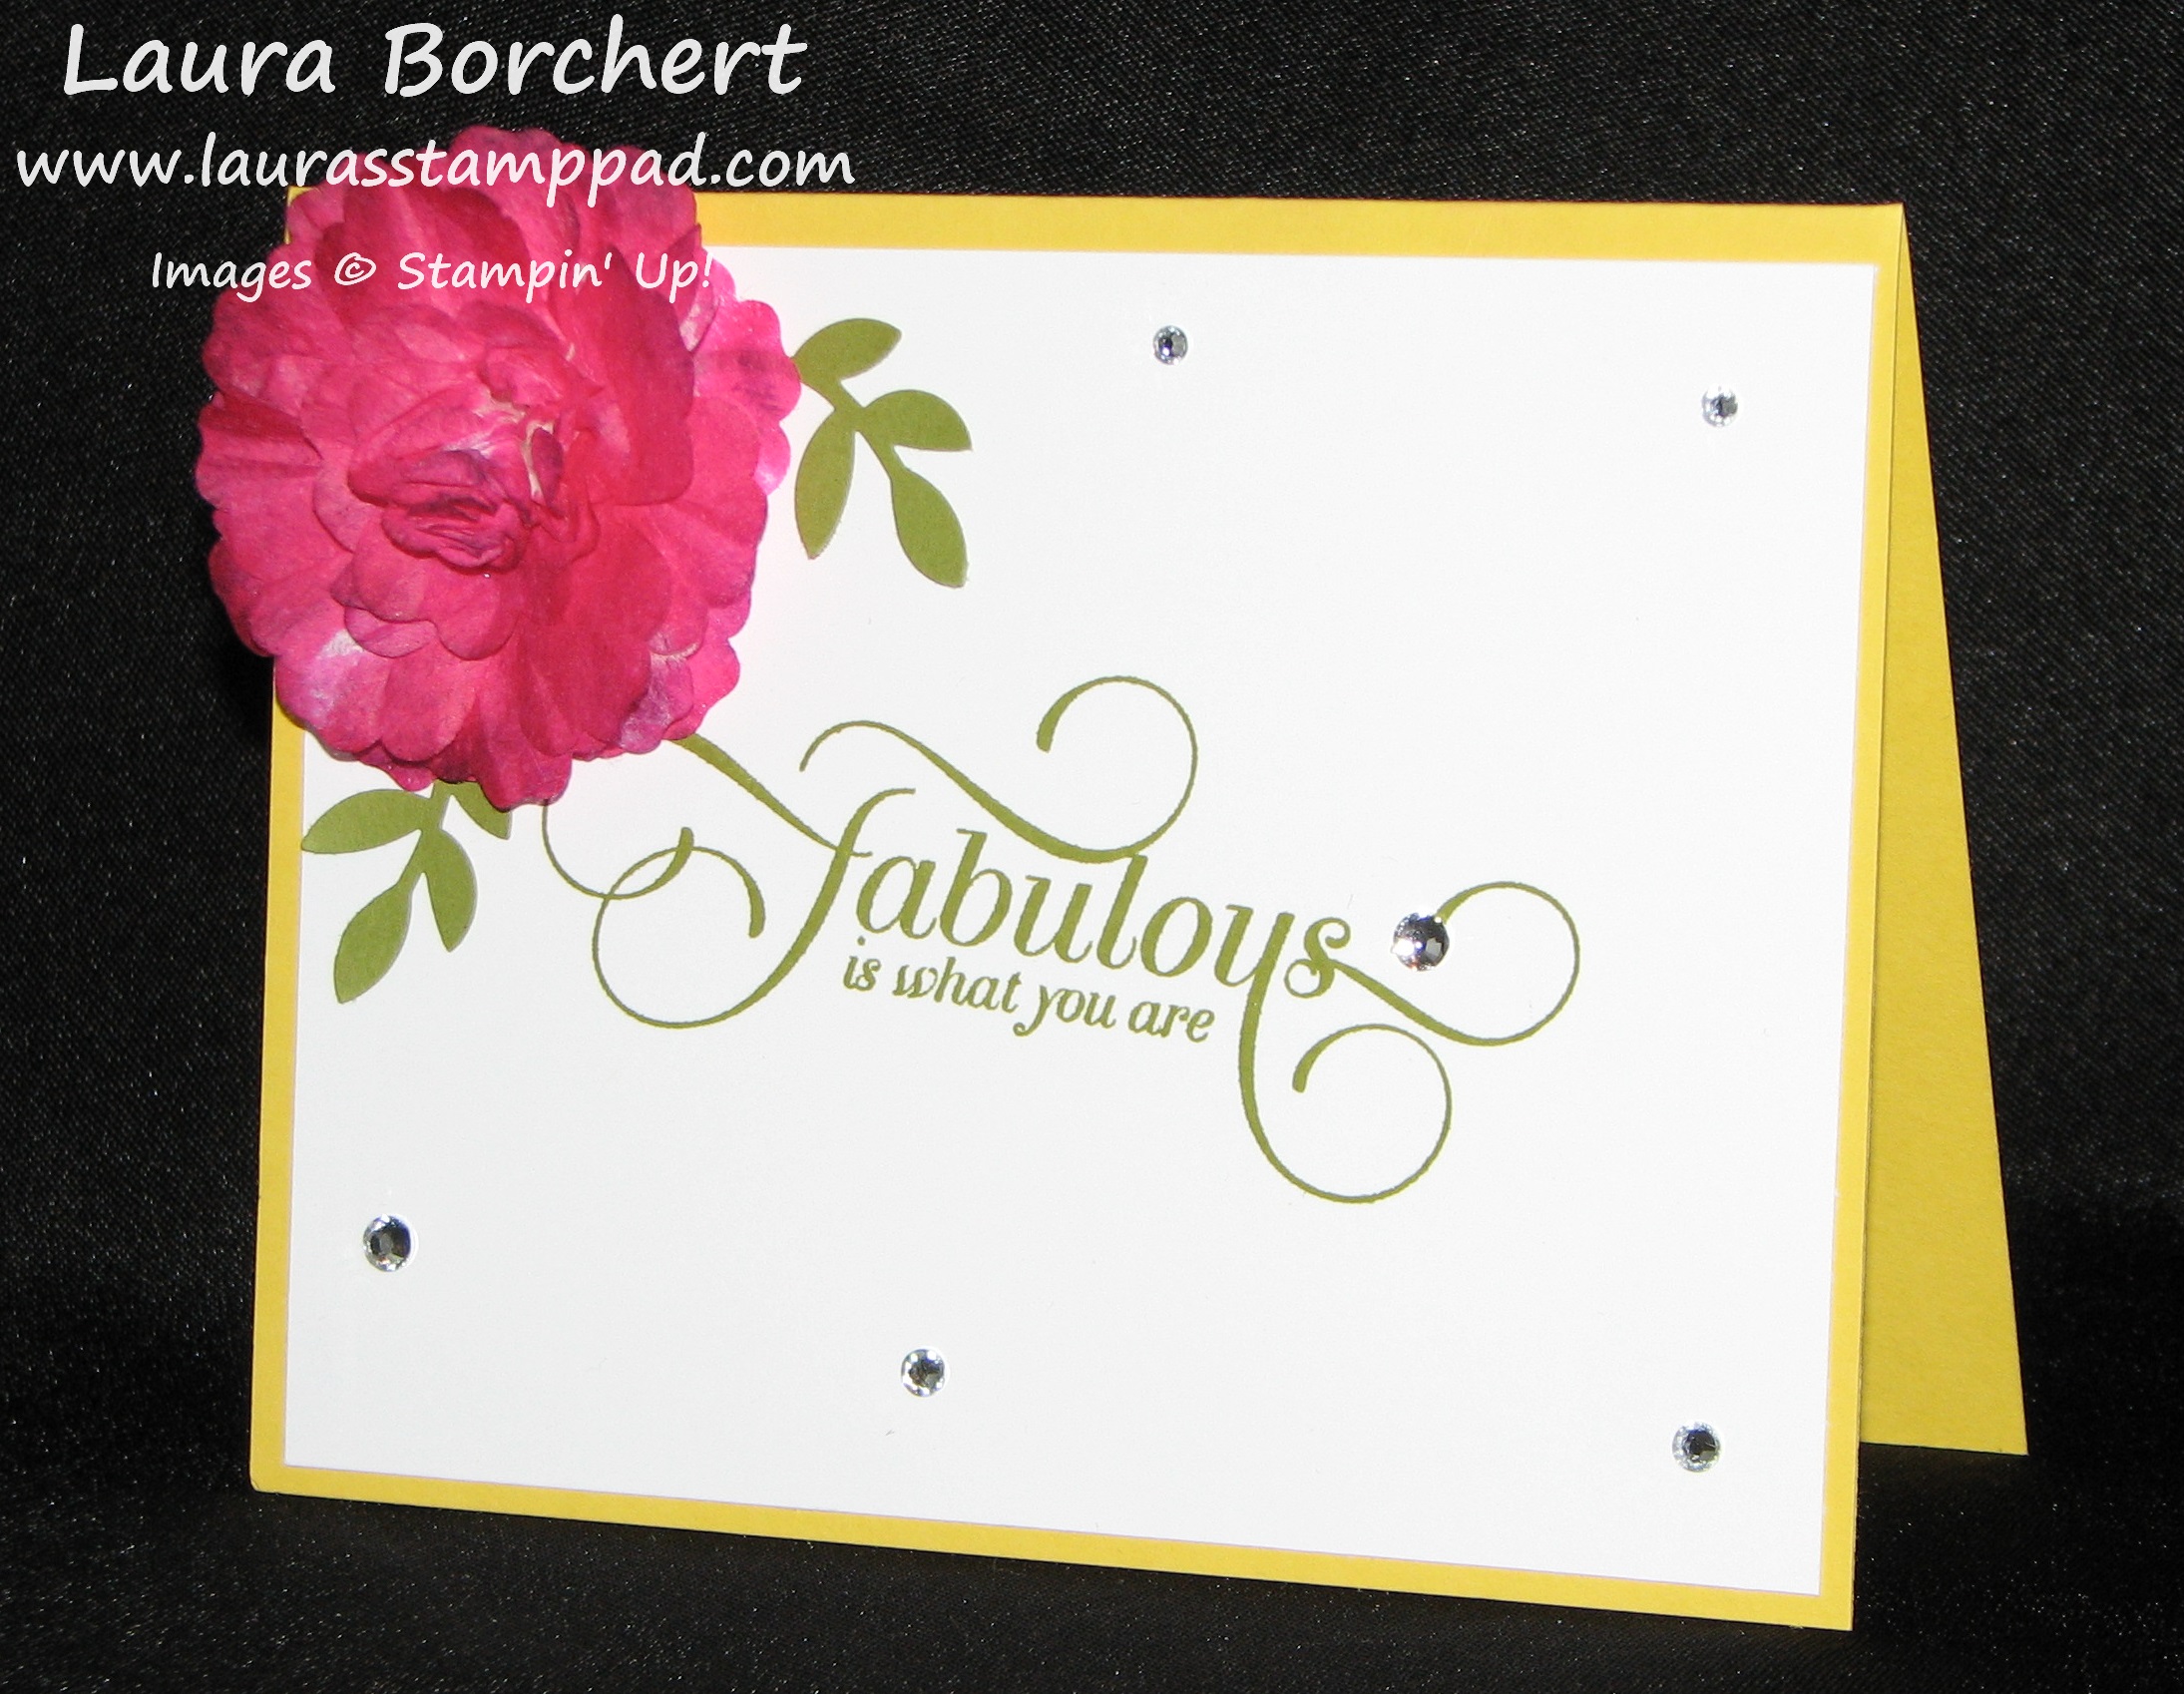
How fabulous is this card? Eee And it says Fabulous!!!!! 🙂 I love it! That amazing 3D flower was created with the Filter Paper. Let’s get started on how to create it.

Supplies Needed: Filter Paper, Punch or Framelit, Handheld Hole Punch, Brad or Staple

For the flower above, I punched out 4 Blossom Punch Filter Flowers and 4 Pansy Punch Flowers. TIP: When punching the Filter Paper, it helps to place a piece of scrap paper in there as well to make it more stiff and punch better! You can punch at least 4 layers and 1 layer of scrap at a time! Now you will lay all of your flowers on top of each other and you can either staple them in the center or add a Brad after punching a hole with your Handheld Punch! Now one by one pull the flowers up and scrunch to the center. You will repeat this until all flowers have been scrunched to the center. Now you can fluff it until you get the desired look. At this point, you can spritz your flower using re-inker and alcohol or water or you can leave it white and brush the edges with your Sponge Daubers. In the photo above, I spritzed the flower with Melon Mambo, let it dry and then gently touched the edges with my Elegant Eggplant Sponge Dauber to get those dark tips and color variation. I attached the flower to a card with some leaves from the Bird Builder Punch peaking out from behind and the amazing greeting if from Million & One!!!!

You can also color your Filter Paper before you get started with Sponge Daubers, Spritzers, or some ink and a Brayer!

Creped Filter Paper Flowers, www.LaurasStampPad.com

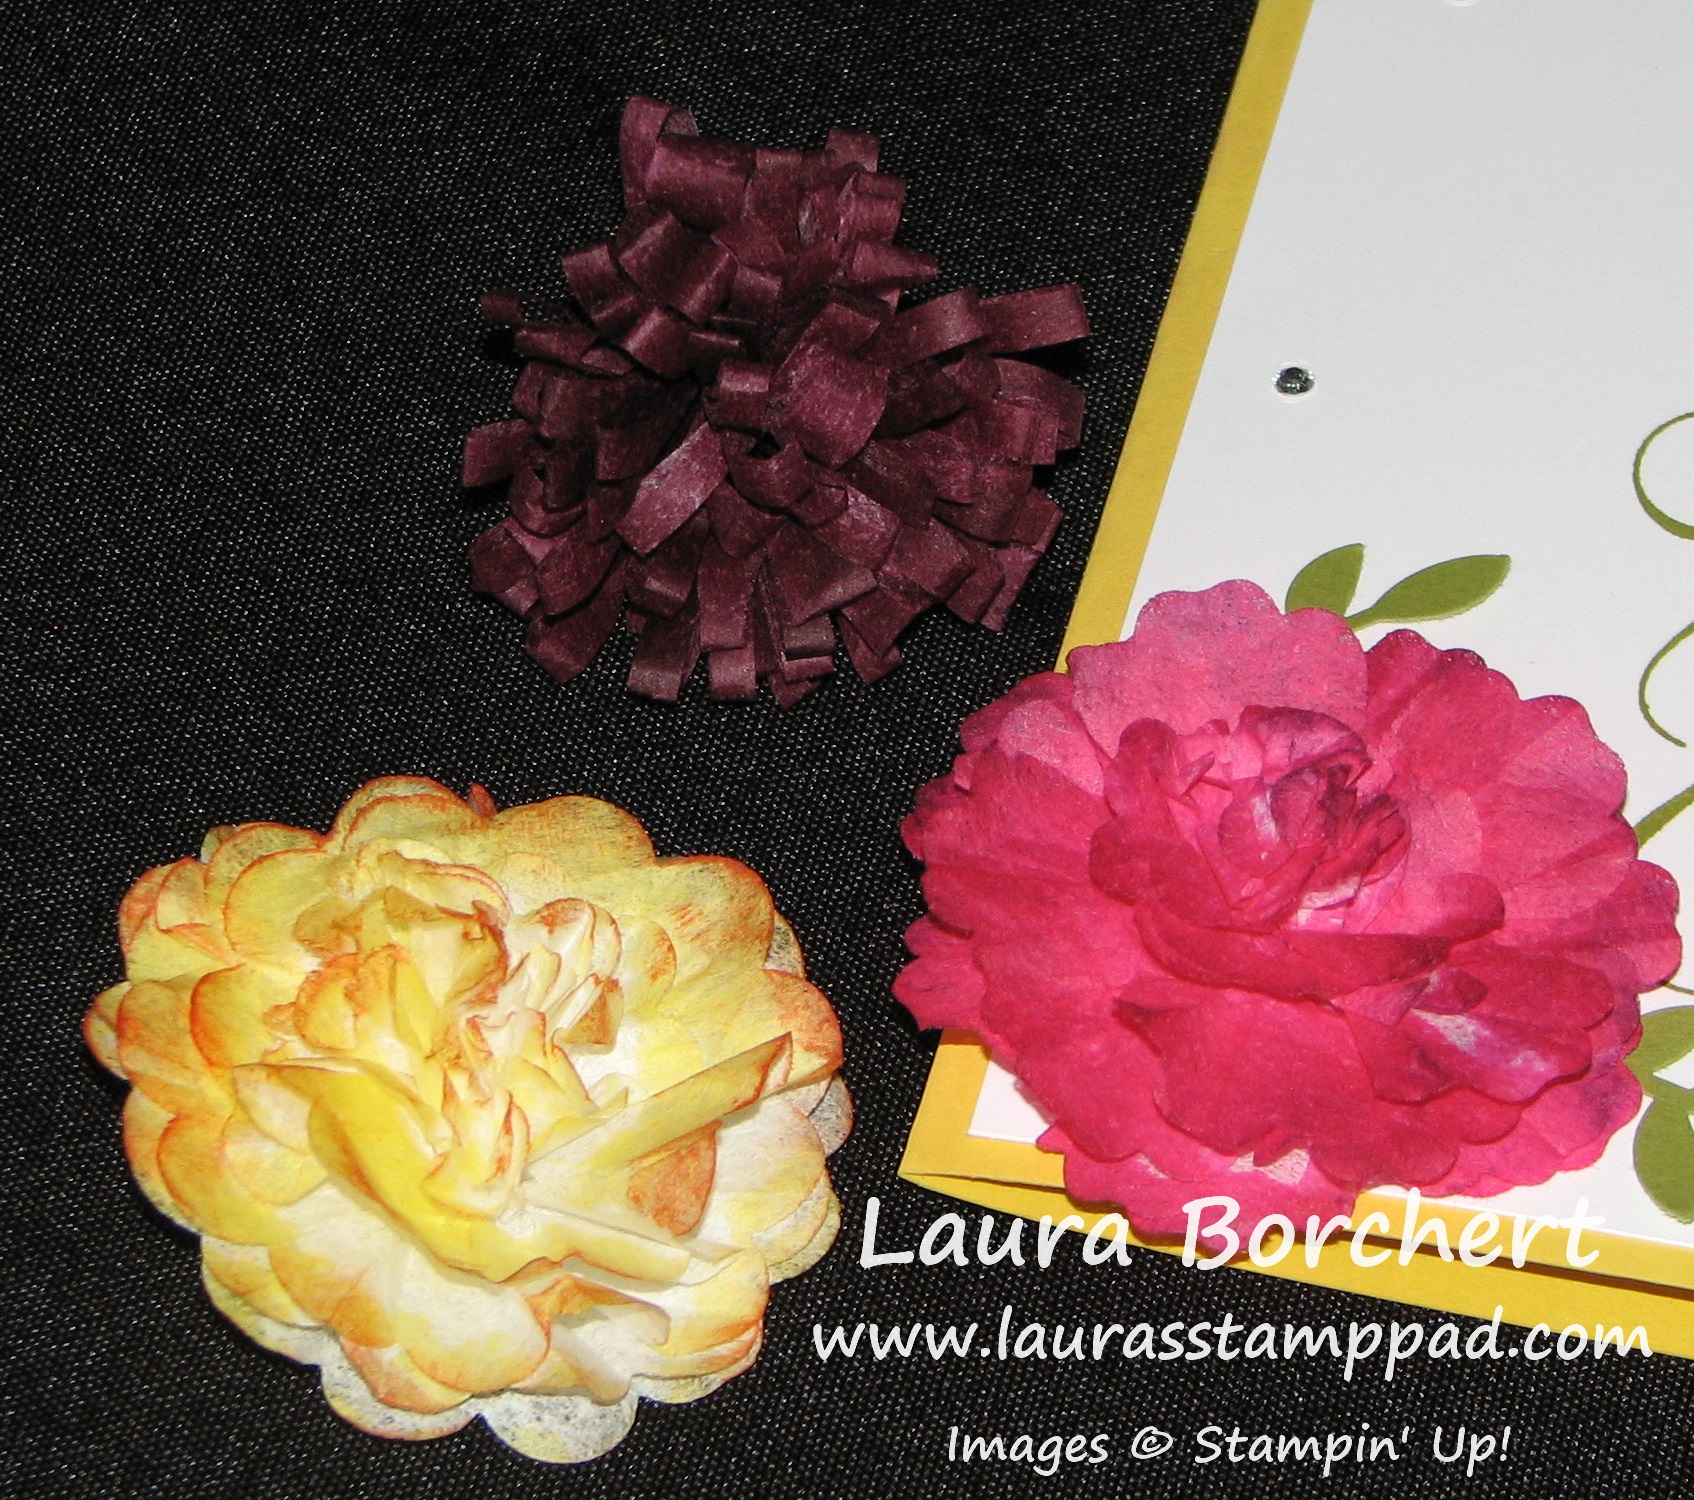
Another style of flower is the Rich Razzleberry flower above. For that flower, I used a Brayer to add the Rich Razzleberry Ink to my Rectangle piece of Filter Paper. I used a piece measuring 3″ x 12″. Once it was dry, I applied Sticky Strip to the long end of the Filter Paper, folded the filter paper over to meat the Sticky Strip. This creates a tube (kind of). Then with your Fringe Scissors, cut all along that loop of folded over Filter Paper. Be sure to only cut half-three quarters of the way down do you are cutting a piece off. Now you will apply another piece of sticky strip all along the bottom (below the loops). Starting at one end, you will roll the Filter Paper onto itself around and around to create this flower. Are you completely lost? I think I would be….so here is a Video Tutorial for you to watch! 🙂 I hope you are liking this videos. Be sure to give me a thumbs up if you are!!!!

Happy Stampin’

~Laura


Fun with Fringe Scissors!!!!

Posted on

I have had so much fun with the Fringe Scissors since they arrived on my doorstep from the Big Brown Truck!!!!  I love making grass so easily like in this card and this card! But then I wanted to think outside the box and see what else I could come up. It seems when we play with them at all of my classes, the ladies always mention cutting hair…..that scares me a bit but check out these other amazing ideas!!!

Fabulous Fringe Scissors, www.laurasStampPad.com

Okay, I’m beyond excited about this card because it has so many of my favorite colors, the word Fabulous :), and some bling – Rhinestones! I love it!!!! I used Elegant Eggplant, Tempting Turquoise, Daffodil Delight, and Melon Mambo! I then tied some White Organza Ribbon along the time of the fringe pieces. I used Daffodil Delight Seam Binding in a few others as well! Then for the greeting….LOVE IT….Million and One Stamp Set! Here is a video showing off the Fringe Scissors! I hope you enjoy it and if so be sure to click the thumbs up button and don’t forget to subscribe so you don’t miss out on any of my videos!

Happy Cuttin’

~Laura


Oh Little Lions Video Tutorial!!!!

Posted on

Lion made with Fringe Scissors, www.LaurasStampPad.com

I can’t believe how many of you are just loving my little lions! I think they are super cute too!!! For the full post on these that went up last week, click here! I got a request to do a Video Tutorial so I have created one for all of you!!!

Be sure to click the little thumbs up button to show you love and don’t forget to subscribe to my Channel so that you don’t miss out on any other videos. And as always, if you have a request, put it in the comments below!

Happy Stampin’

~Laura


Oh Little Lions!

Posted on

Lion made with Fringe Scissors, www.LaurasStampPad.com

Is this not the more precious thing ever? I love them! The little eyes make them come to life and the adorable little noses. Eeee So cute and super simple to create, all you need are a few punches! I used the Blossom Punch for the mane (2 overlapping). On each of the petals, I cut in once with my Fringe Scissors….be careful not to cut too deep or you will end up cutting pieces off! I also used 2 petals from the Blossom Punch for the little feet. For the face, I used my 1-3/8″ Circle Punch and sponge daubered (that’s a word, right? 🙂 ) the edges. The little cheeks were punched out with my 3/4″ Circle Punch and then I took my Chocolate Chip Marker to create the whiskers. I got the little heart nose from the Owl Builder Punch and added on the googly eyes! See how simple was that….just a few punches and you can create just about anything! I love how the fringe scissors add so much texture and fluff to the lion mane and of course make amazing grass too! The colors of cardstock that I used here are Pumpkin Pie, So Saffron, and Hello Honey. I did all of the edges with Hello Honey (I know it looks more brown but it’s Hello Honey)! The Happy Birthday greeting comes from Remembering Your Birthday Stamp Set!

I hope you enjoyed this punch art card and try it out on your own! Let me know in the comments below what your favorite punch art item is. You can check out more punch art cards here and another version of the lion here!

Happy Punchin’

~Laura


Hello There!!!

Posted on

The New Catalog is HERE! That means there are NEW Hostess Stamp Sets too!!! The Hello There Stamp Set is super fun because of the greetings and it has a flower in there! I was sold at the mention of flower! 🙂

Be sure to go vote for the New Catalog Giveaway too! Voting ends tomorrow! Click here to check it out!

Hello There Hostess Set, www.LaurasStampPad.com

Isn’t this precious!?!?!?! I love the soft colors and the Fringe Scissors made perfect grass for my cute little flowers! Love it!!! I also love how big and fabulous the greeting is – perfect for sending to someone to brighten their day!!! The colors used were Crisp Cantaloupe, Wisteria Wonder, Strawberry Slush, and Pear Pizzazz! I can’t wait to try out other colors as well!!!

Now is a great time to Hostess a party (whether in person or an online/catalog party) because there is so much amazing NEW stuff! Let me know in the comments below or by emailing me if you are interested in being a Hostess!!!

Happy Stampin’

~Laura