Spreading Holiday Joy Series!!!

Posted on

I just love going to the mailbox this time of year! Getting a card can really brighten your day….especially when it is hand-made!!!! That is what this Series is all about – showing you great cards to make this season so you can spread Holiday Joy!!! You can check out other cards in this series here, here, and here!

Festive Flurry Card, www.LaurasStampPad.com

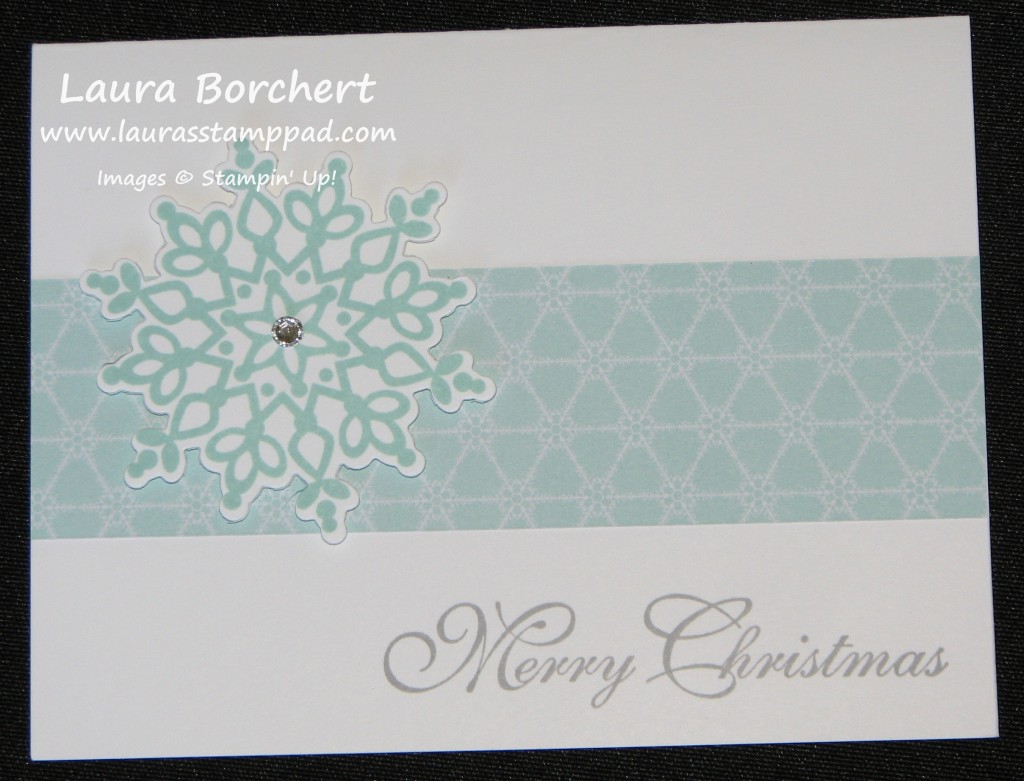
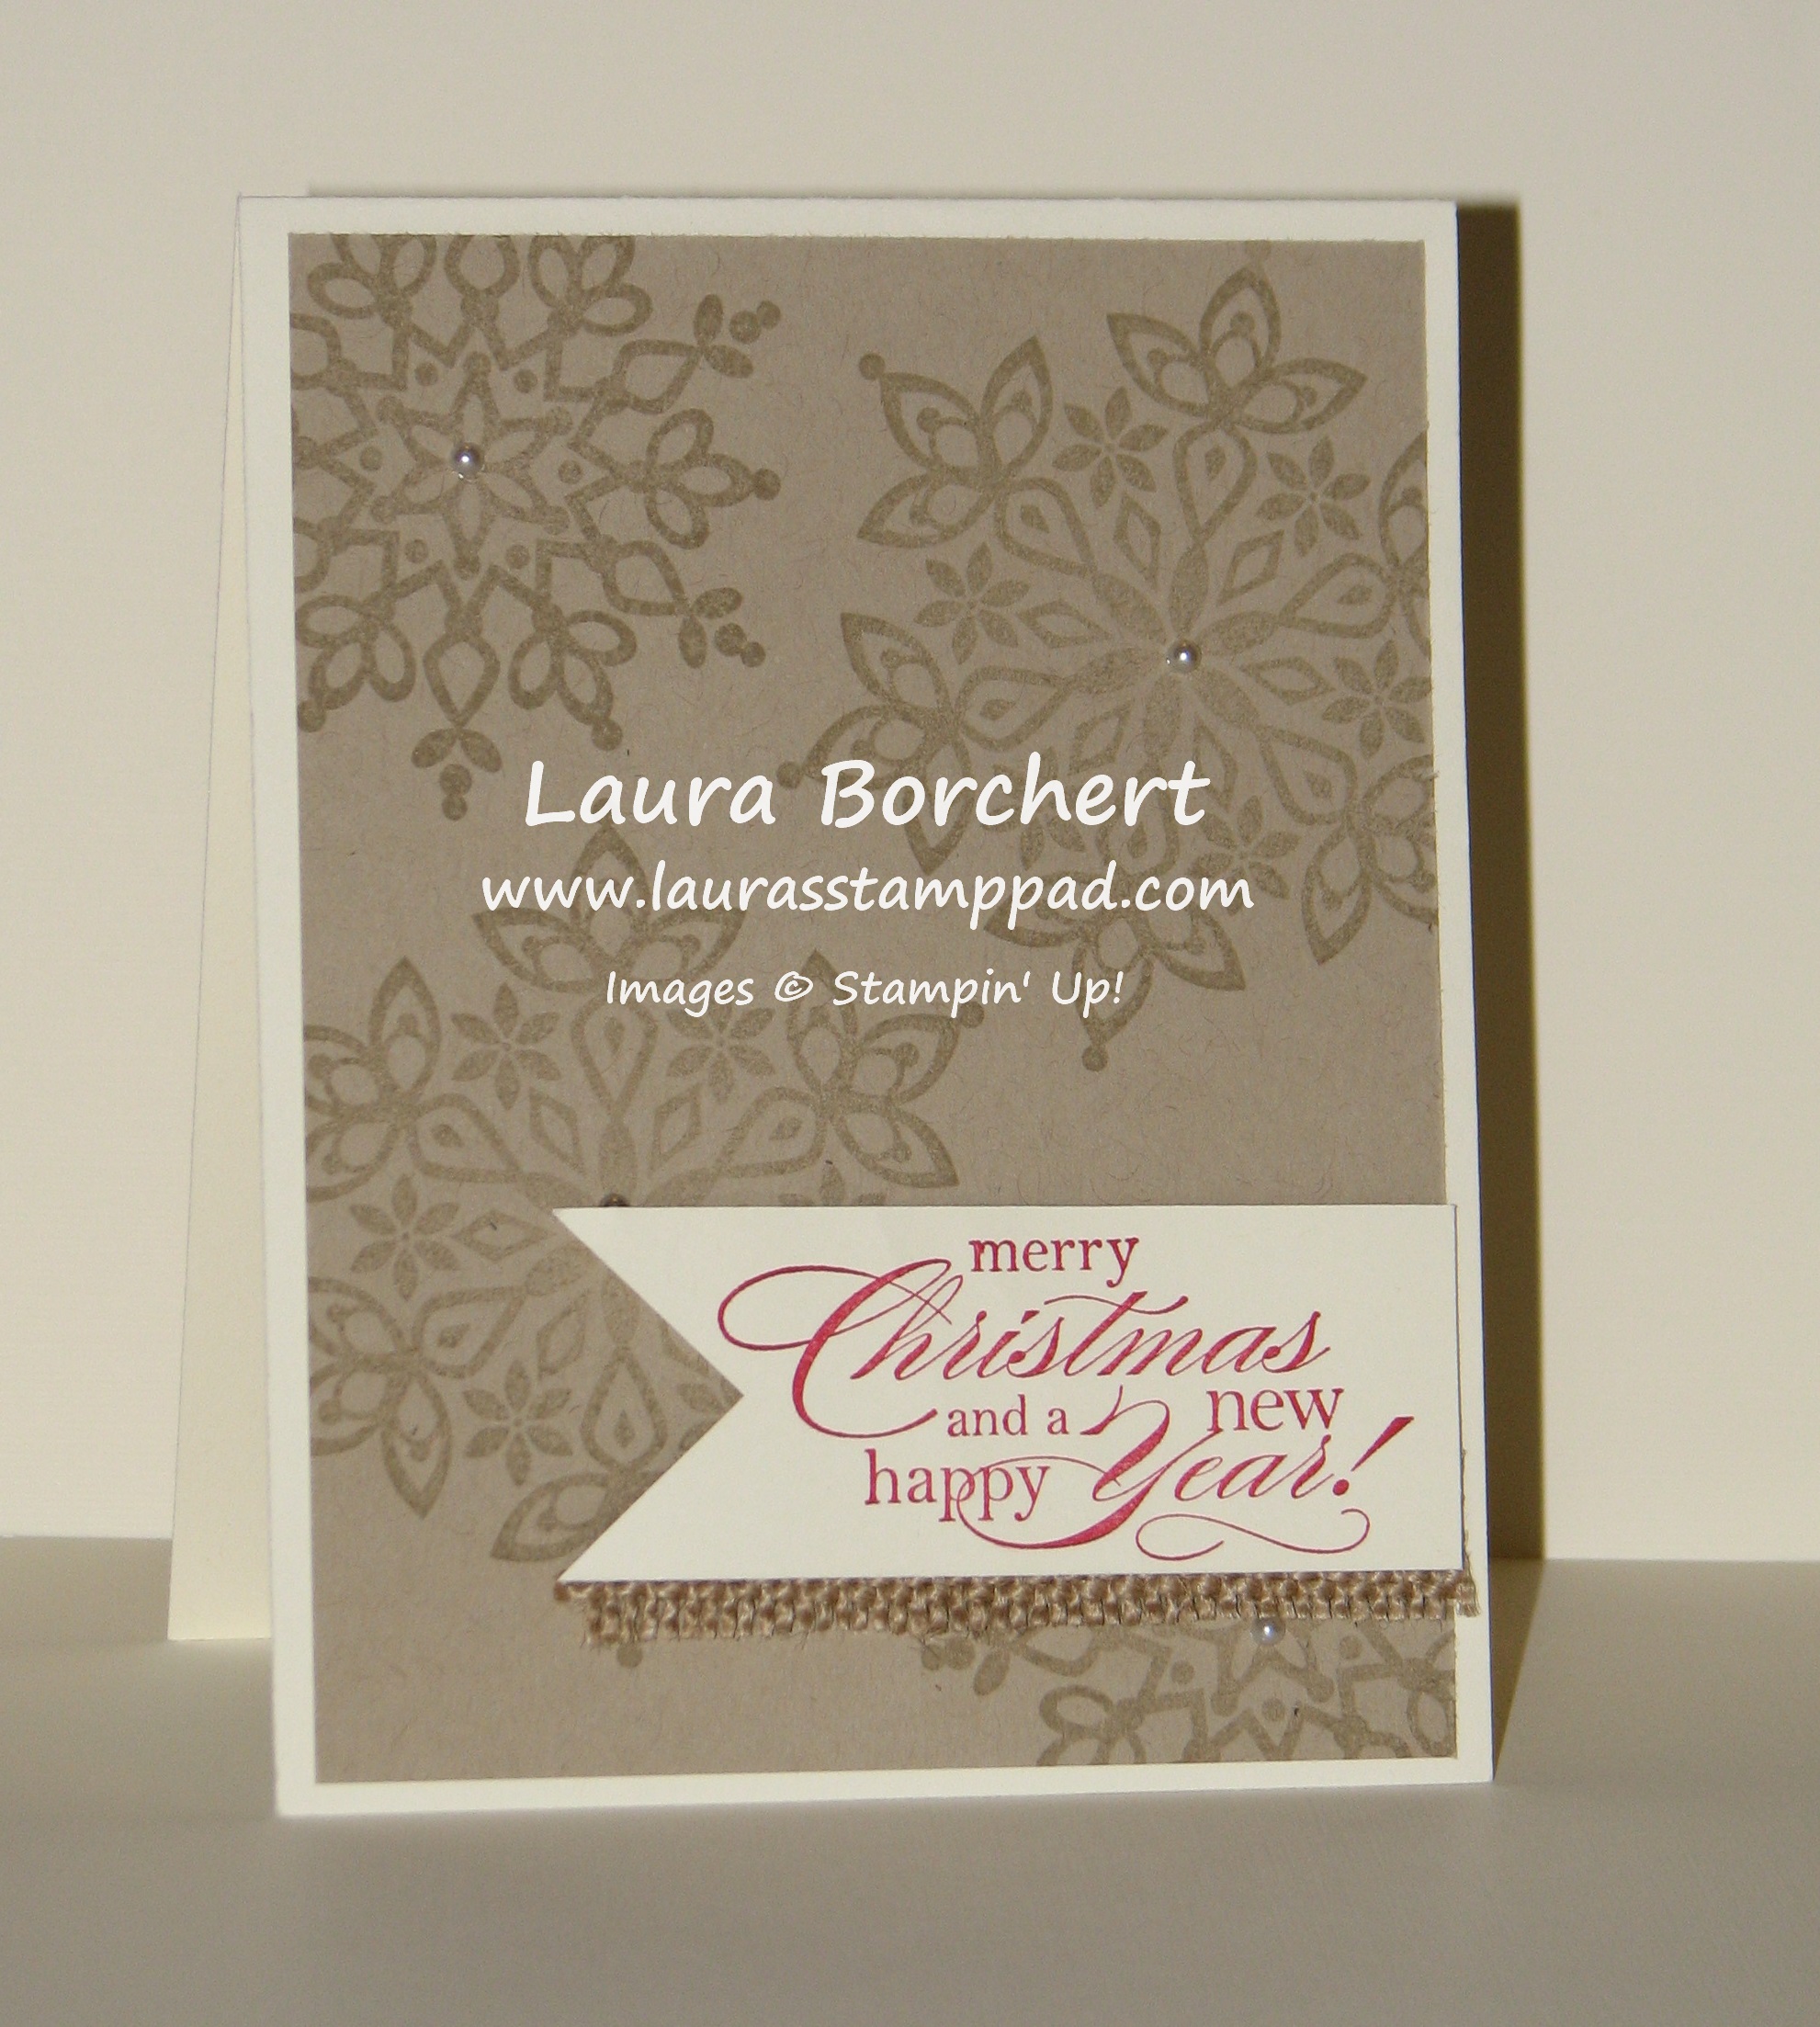
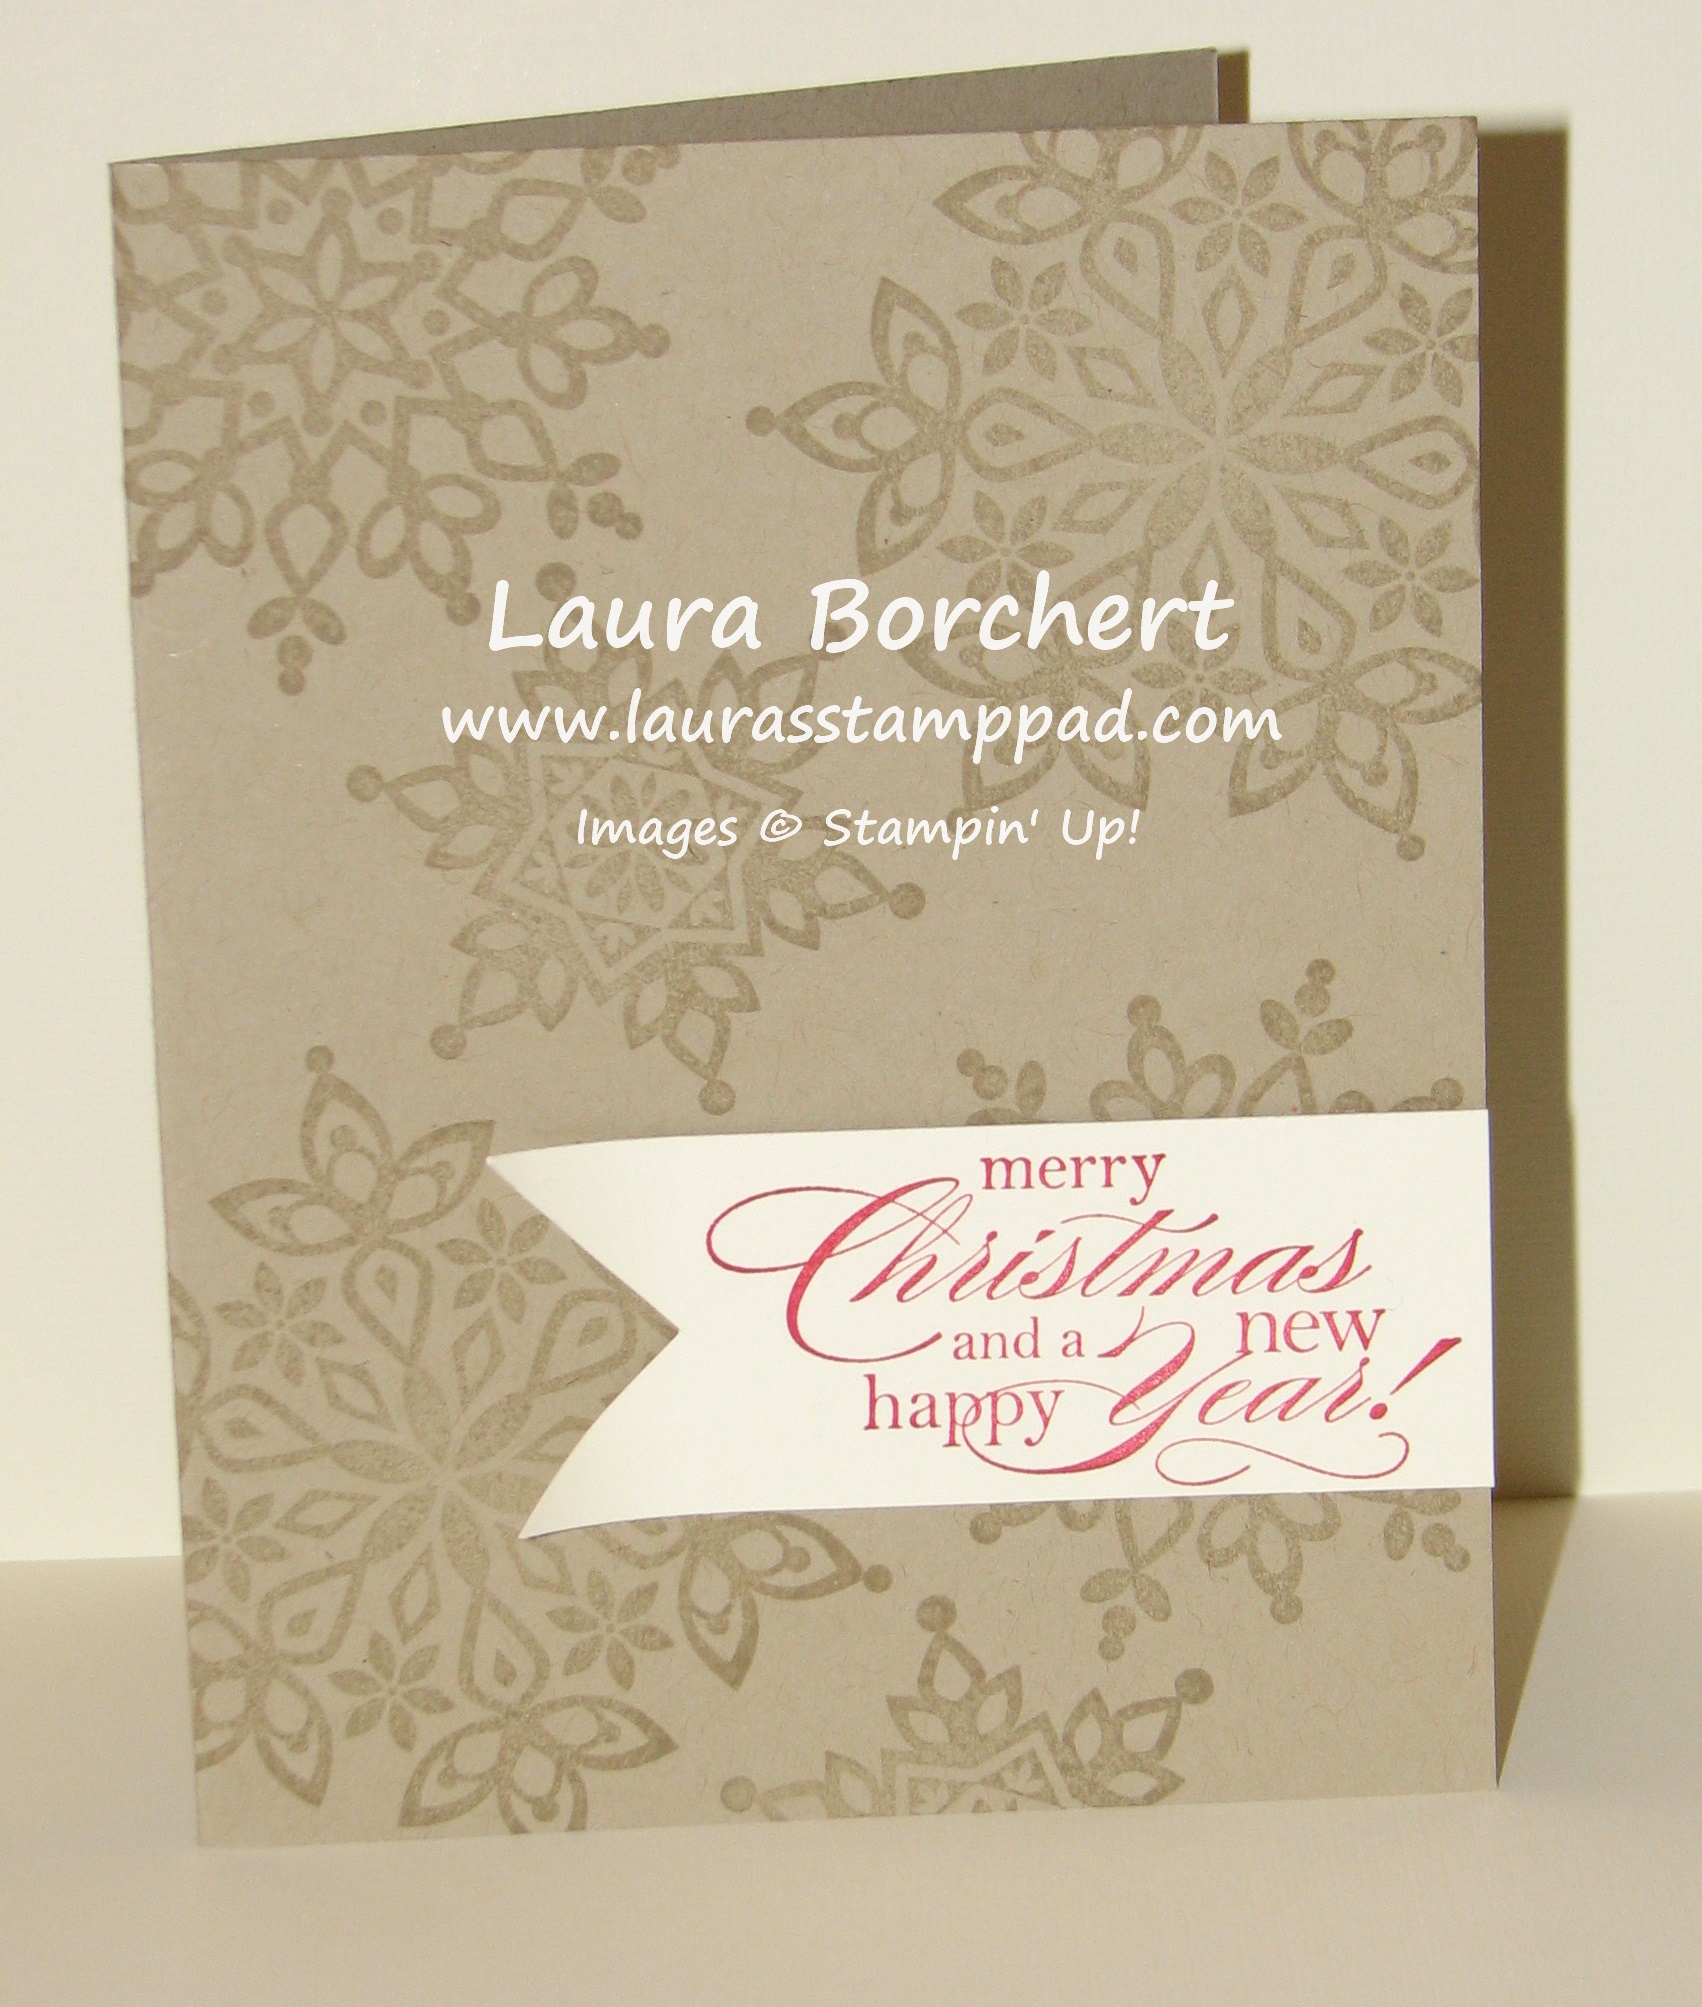
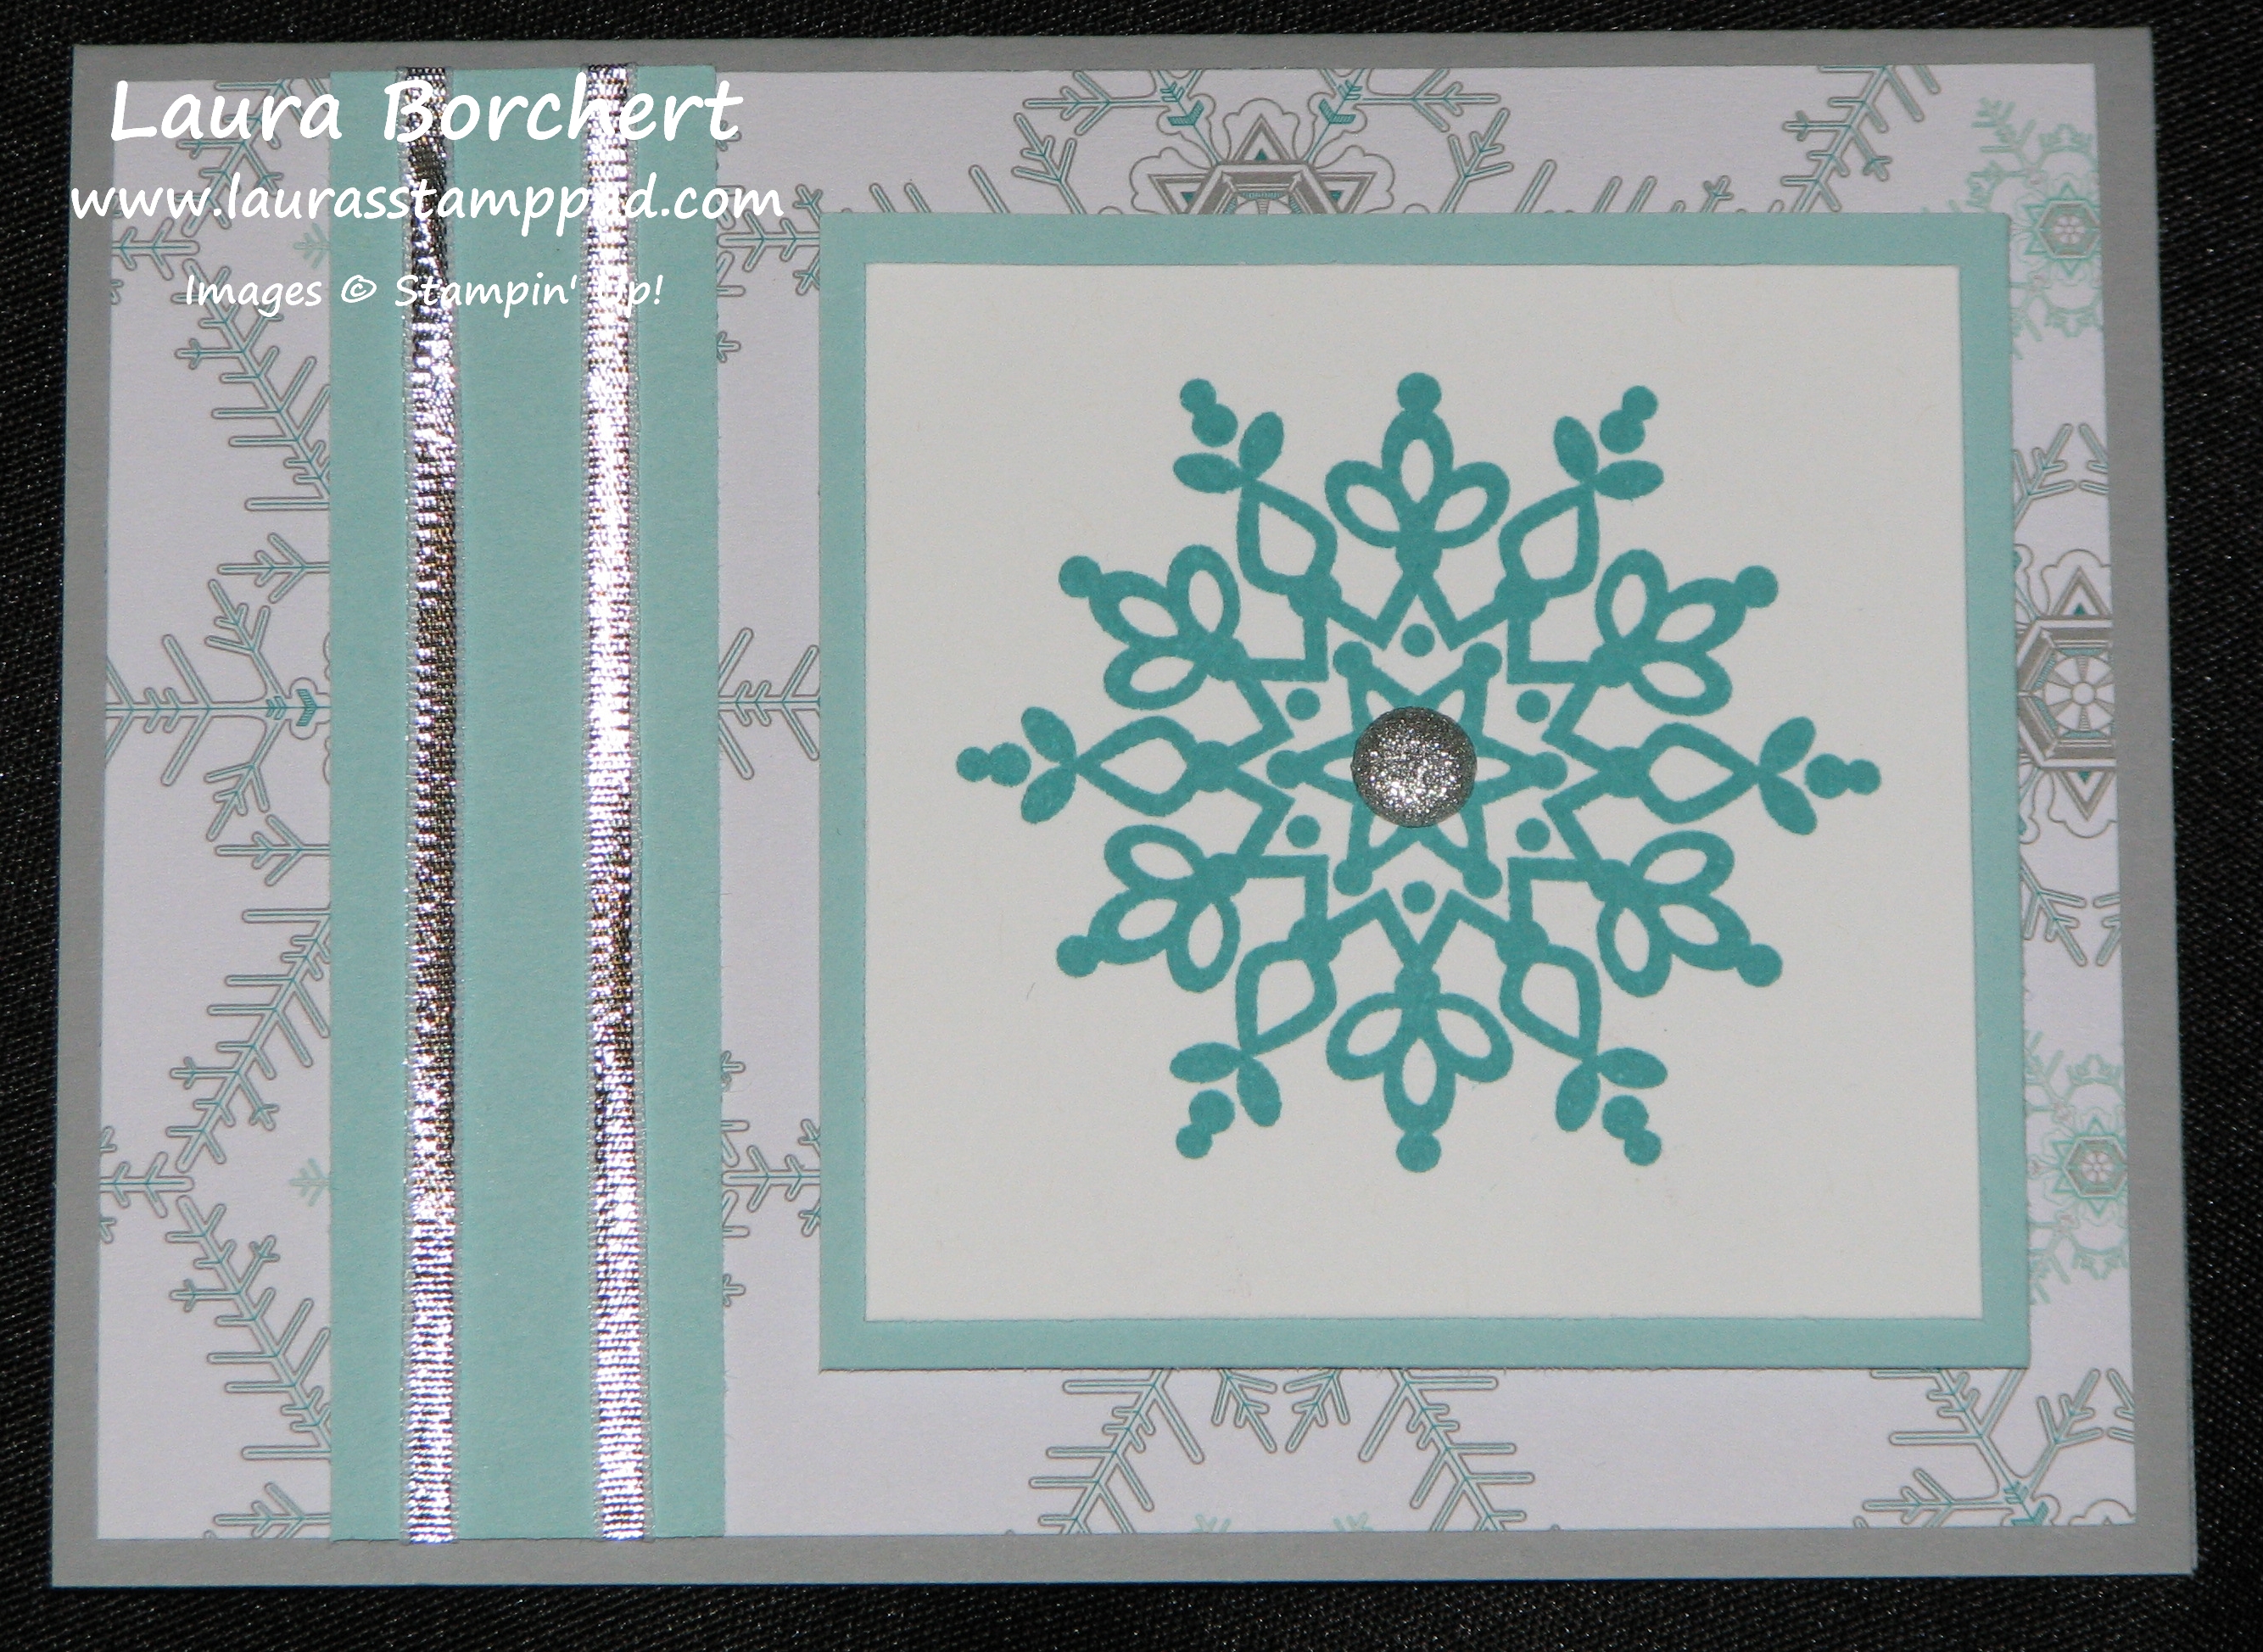
For some reason, I really really love this card and it is super simple to make! I think its the snowflake, or maybe the Pool Party color, or maybe that greeting….that is my all time favorite greeting because of the scrolly (I think that’s a word 😉 ) look to it. Here is how to make this amazing card!

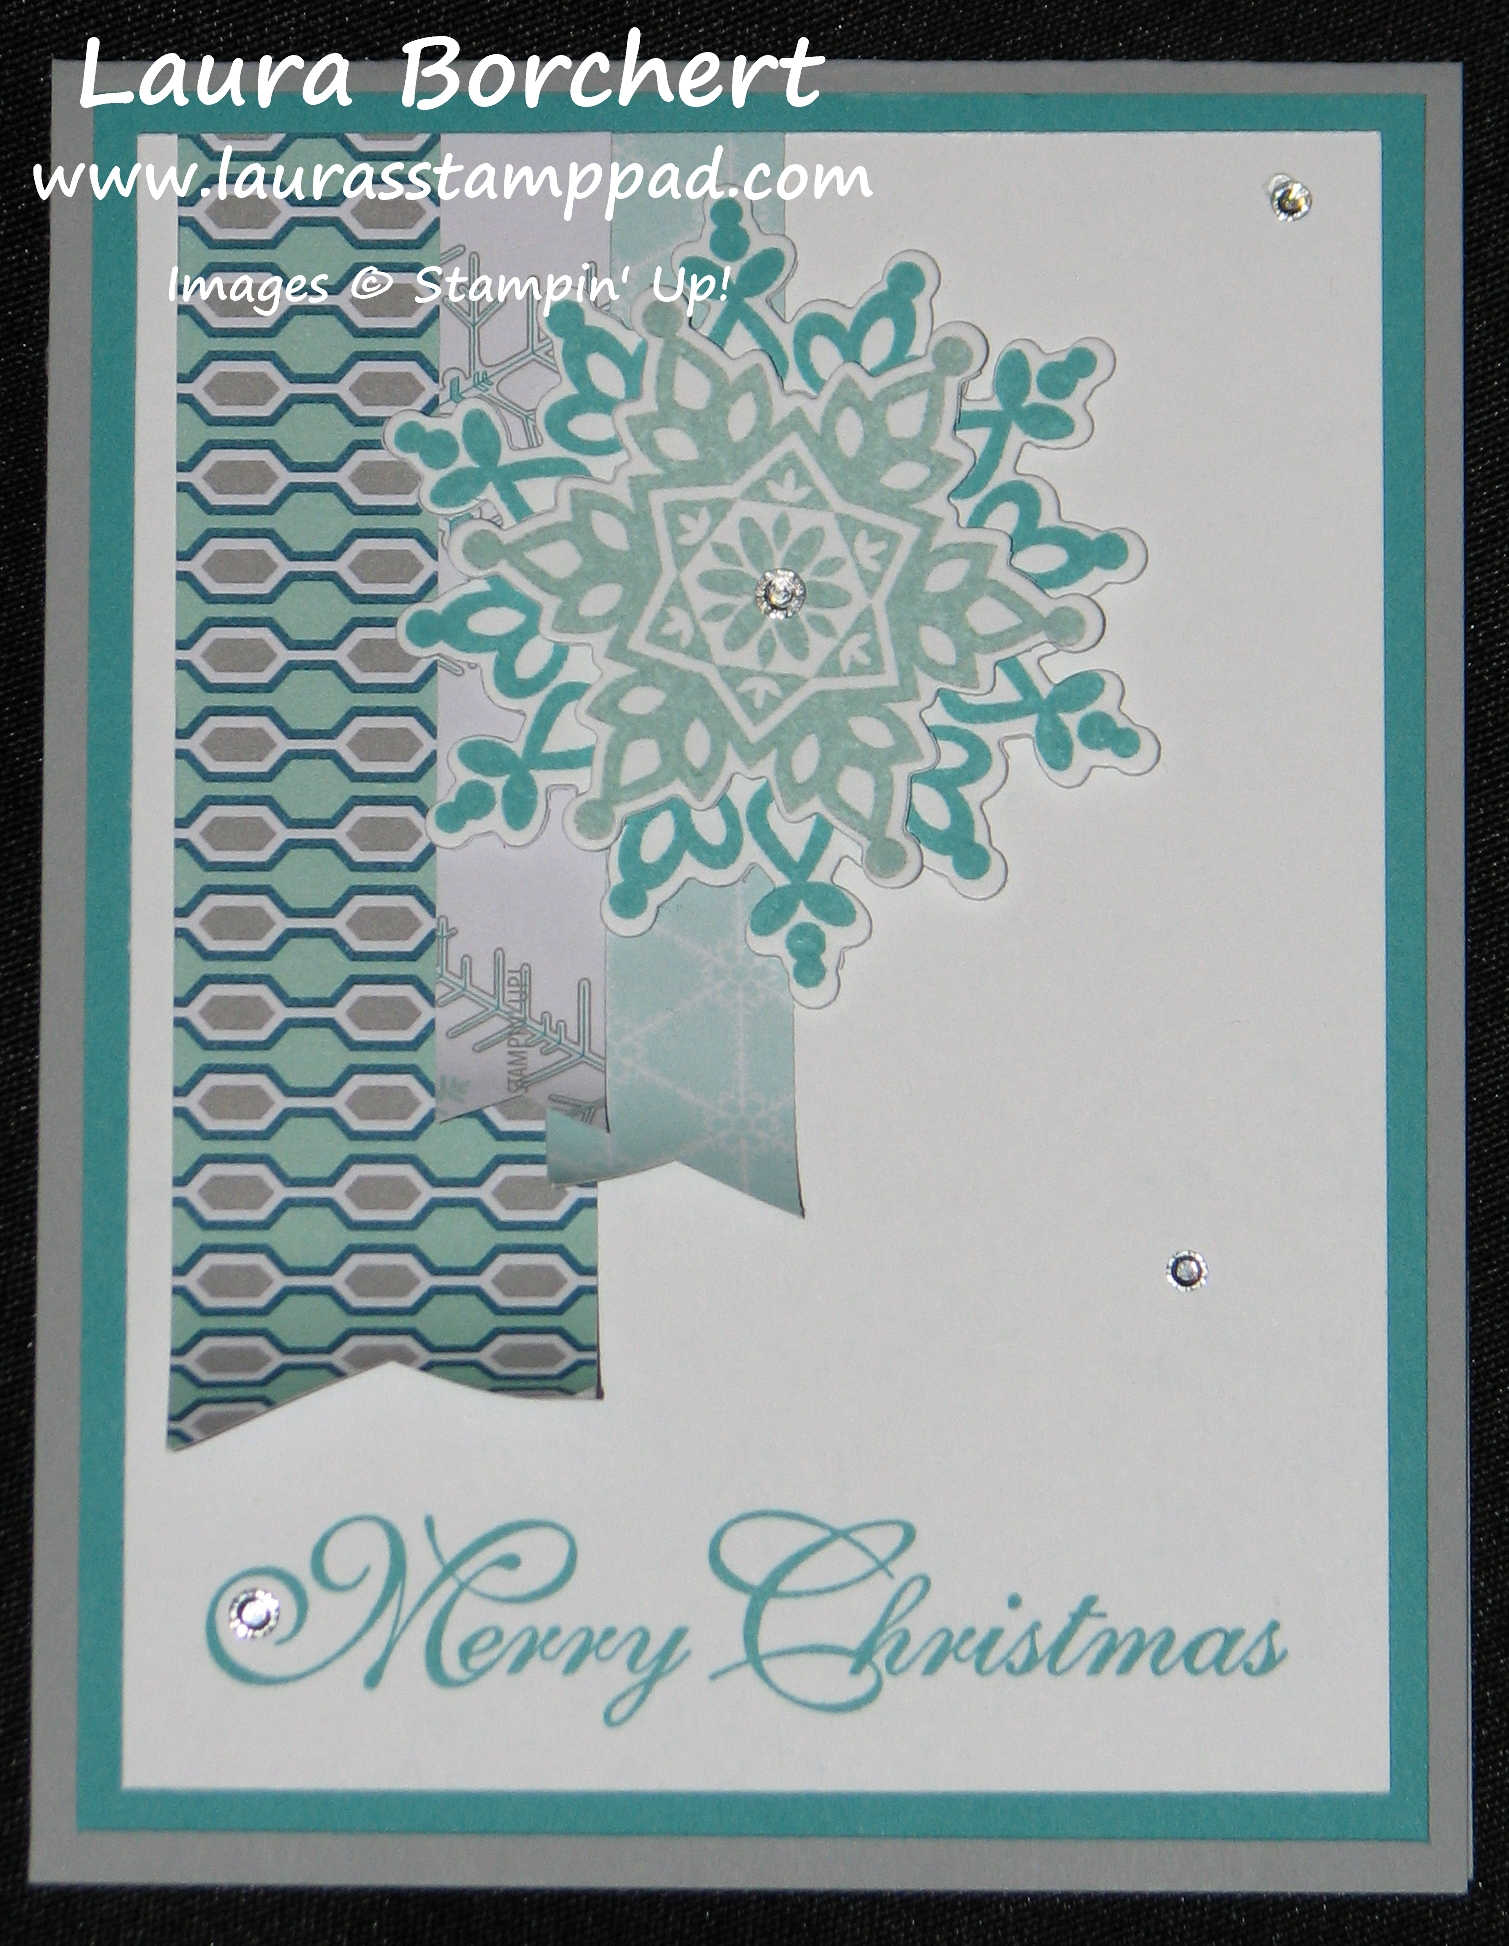
Supplies Needed: Whisper White Cardstock (2 cards per sheet), Winter Frost Designer Series Paper Stack (or Paper Pack), Rhinestones, Festive Flurry Stamp Set and Framelits (as a bundle), and Greetings of the Season Stamp Set

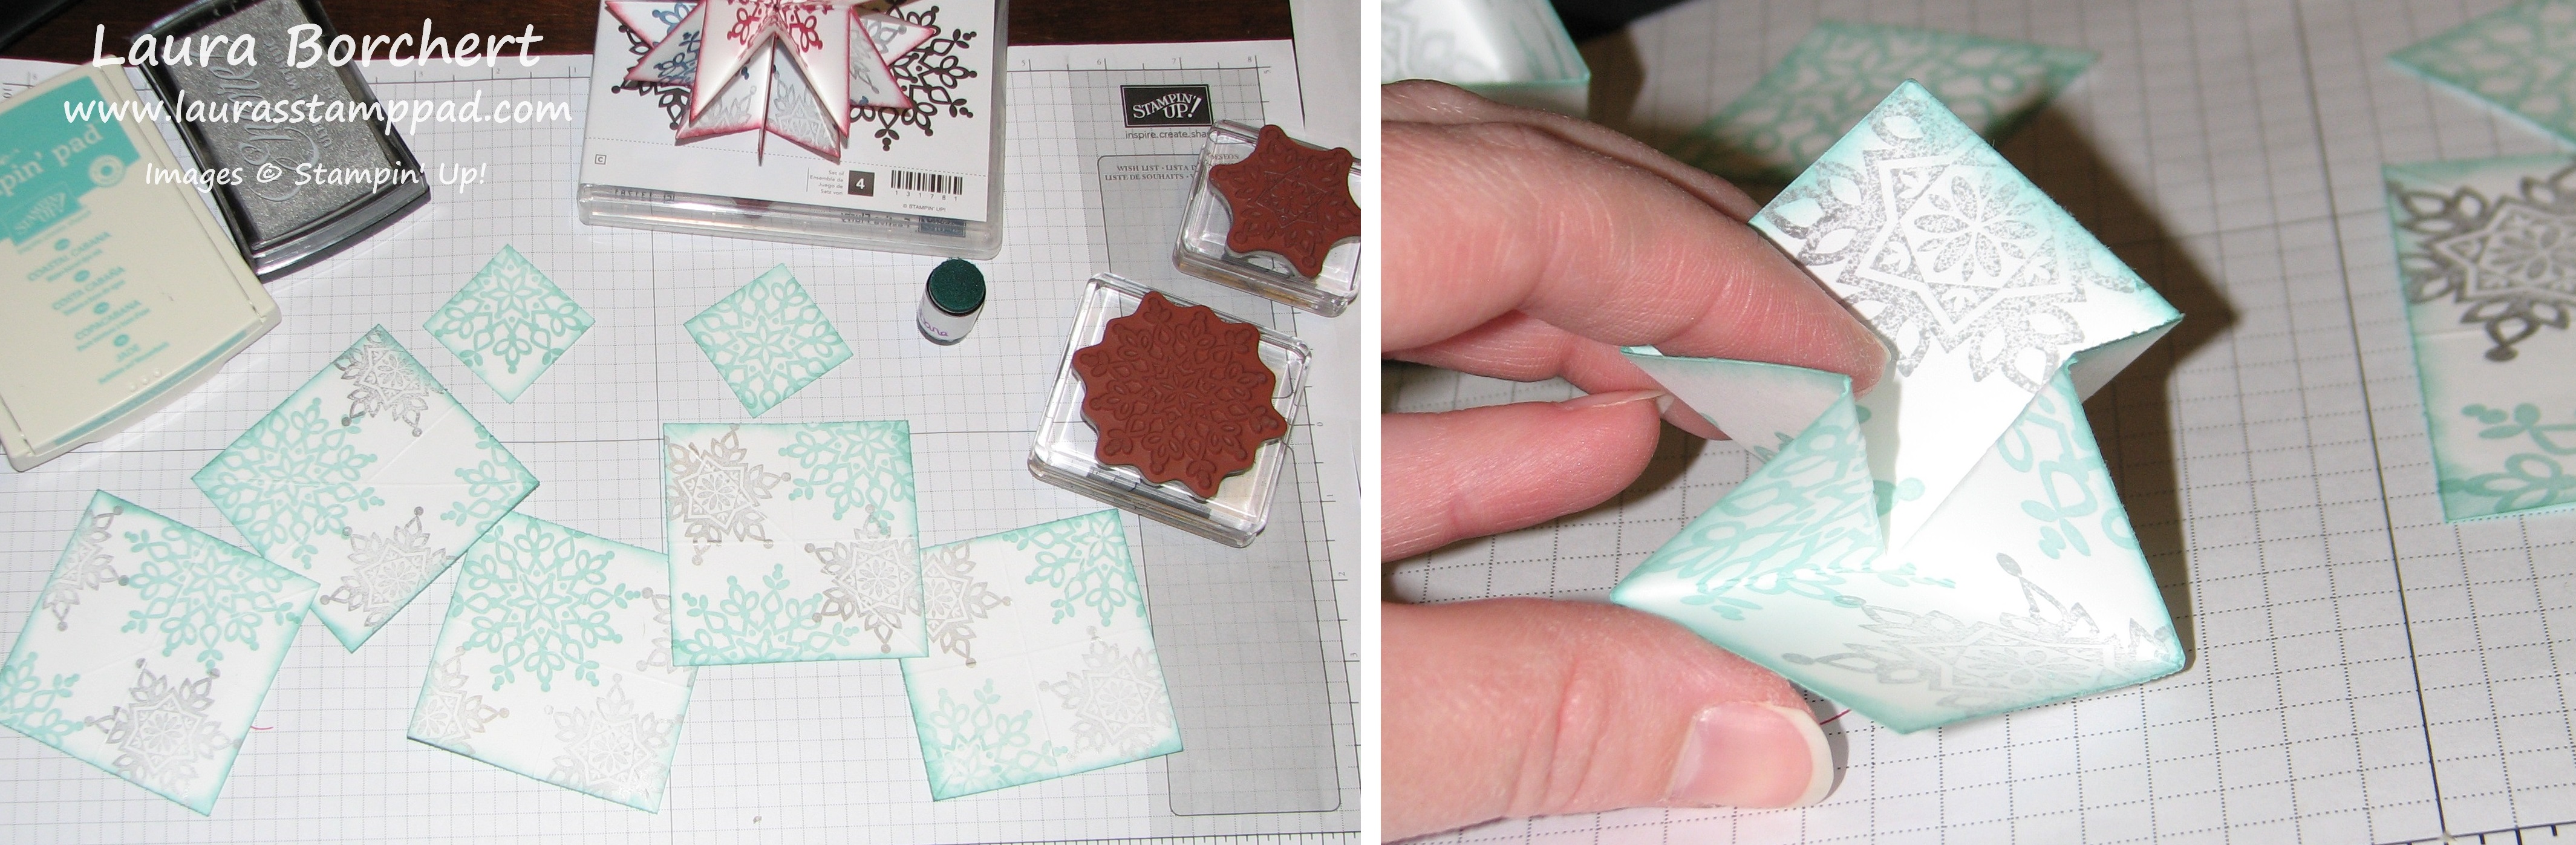
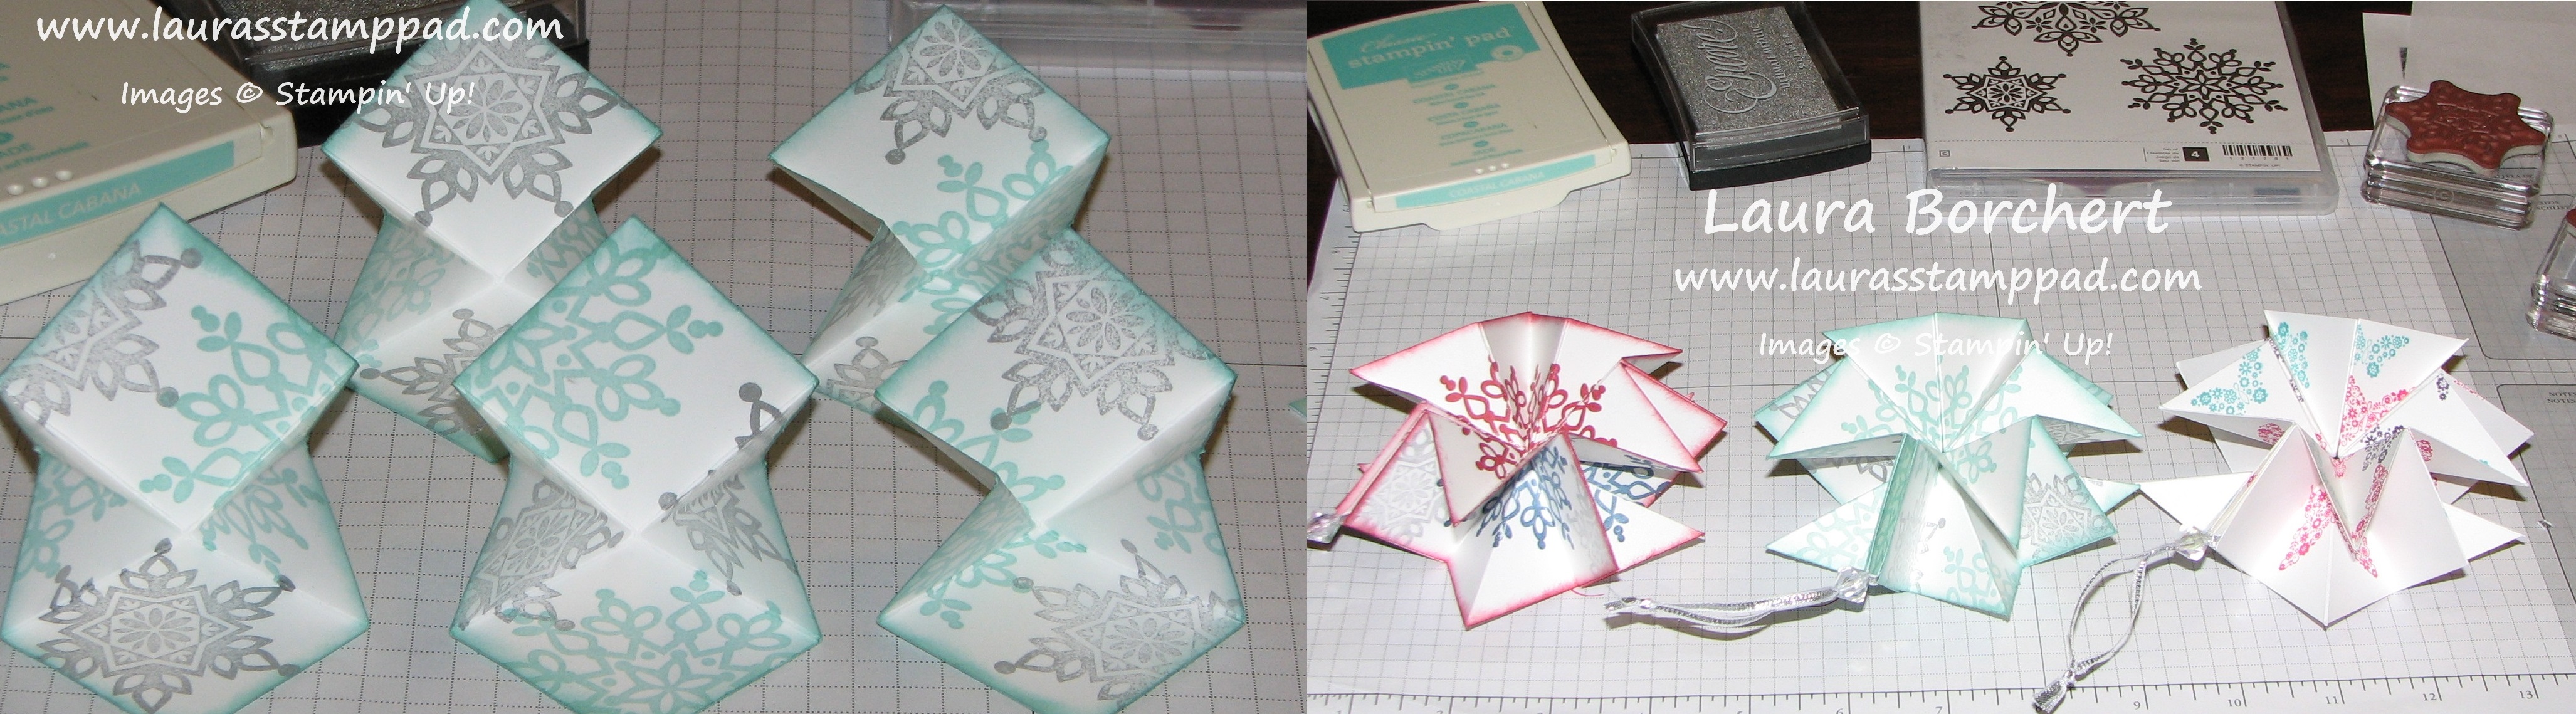
I stamped the greeting on the bottom right in Smokey Slate! Stamp your snowflake image on a piece of scrap white cardstock in Pool Party and die-cut it out with the matching Framelit. Adhere your piece of Designer Series Paper to the center of the card and then using Stampin’ Dimensionals, adhere your snowflake! Finish it off with a Rhinestone in the middle of the snowflake! DONE! Super quick and simple! When doing multiples, you could probably do 10 of these in 30 minutes or so!

Happy Stampin’

~Laura


Spreading Holiday Joy Series!

Posted on

This Series shows lots of fabulous cards for the Holiday Season! I enjoy getting cards in the mail so I thought I would create this Series to show you fabulous cards that you can create to spread Holiday Joy throughout the season! This is the seventh card in my Spreading Holiday Joy Series! You can see the others here, here and here!

Festive Flurry Stamp Set, www.LaurasStampPad.com

My favorite non-pink color is for sure Crumb Cake! I am not a brown person. I actually really don’t like the color brown but crumb cake is so amazing and perfect for every type of card!!!!

Supplies Needed: Very Vanilla Cardstock (2 cards per sheet), Crumb Cake Cardstock (4 per sheet), Festive Flurry Stamp Set, Pearls, Burlap Ribbon, and Delightful Dozen Stamp Set (greeting)

Snowflake Crumb Cake, www.LaurasStampPad.comI stamped various snowflakes in Crumb Cake ink onto the Crumb Cake cardstock! Then using Real Red ink, I stamped the greeting onto a scrap piece of Very Vanilla. The trick to get a perfect banner is to cut a straight line up the cardstock from the end and then cut diagonal from the corners to that center cut! Then take a piece of the burlap ribbon the length of your scrap piece. Cut the burlap in half (long ways) since you only need a little bit hanging out the bottom. Adhere the burlap to your greeting with Sticky Strip and then Dimensionals to adhere to your card! Finish it off with pearls in the center of each snowflake!

The card on the left is a similar card but a more simple version. You can see there are less layers and no embellishments (burlap and pearls). Both cards look amazing! Try it out and see which one you like the best! Leave me a comment as to which one you like more!

Happy Stampin’

~Laura


Spreading Holiday Joy Series!!!!

Posted on

Here is the second card in my Spreading Holiday Joy Series! You can see the first one here!

Festive Flurry, www.LaurasStampPad.com

This card uses some of my favorite colors and my favorite set this season – Festive Flurry!

Supplies Needed: Pool Party Cardstock (2 cards per sheet), Winter Frost Designer Series Paper Stack, Whisper White Cardstock, Island Indigo Cardstock, 2-3/8″ Scallop Punch, 1-3/4″ Circle Punch, Rhinestones, Island Indigo Ink, Festive Flurry Stamp Set, and Sweet Essentials Stamp Set

My strips of the Winter Frost Designer Series Paper are all less than an inch so you can get A LOT from the Paper Stack!!! A little TIP on how to get a perfect banner each time…..on the end of the piece, make a cut in at the center, then from the corners, cut diagonal to that center cut! This will make your banner tips the same length! (I hope that made sense.) Another TIP…..the piece of white cardstock that I used for the greeting is the leftover piece from this card! On that other card, you create 5-1/4″ x 4″ rectangles and you can get 4 from each piece of 8-1/2″ x 11″ sheet of cardstock. You are left with this little strip and I used it for my greeting on this card! Gotta love using those scraps!!! You will stamp the smallest snowflake from the Festive Flurry Stamp Set onto a piece of scrap white cardstock and then punch it out with your 1-3/4″ Circle Punch, layer that onto the punched Island Indigo scallop! Add your rhinestone to the center and adhere to your card! Once your supplies are cut, this card should take about 1-1/2 minutes to 2 minutes! Be sure to check back to see the rest of the cards in the Spreading Holiday Joy Series! Also, if you would like me to send you a card, email me your address!

Happy Stampin’

~Laura


Sparkly Snowflake Ornaments!

Posted on

Snowflake Ornament, www.LaurasStampPad.comWhen it comes to Christmas, I am not a strict red and green decorator! In fact the only “color” I require is BLING! I love lights, glimmer, shiny stuff on my tree because I want it to light up the room! I enjoy sitting in the dark living room on the couch all cuddled under a blanket just staring at the tree! 🙂 This ornament that I have created is so beautiful and it meets my requirements! I used the Festive Flurry Stamp Set and matching Framelits to create this ornament! The colors used are Elegant Eggplant, Silver Glimmer Paper, Soft Sky and Whisper White! The Frosted Finished Embellishment on the top really just brings it altogether! I have to say those little things look amazing in a photo but in person WOW do that sparkle and shine! I wish I could make a crown to wear every day with them! I would love to hear what some of your favorite crafty items are that you decorate with around the Holidays! I could use a few more ideas because I’m really the urge to decorate A LOT this year!

For more samples with the Festive Flurry Stamps and Framelits, check out THIS POST and THIS POST!

Happy Stampin’

~Laura


Technique Tuesday – Pop-Up Ornaments!

Posted on

It is Tuesday and so I’m sharing a fabulous technique with you!!! This week it is Pop-Up Ornaments!!

Pop Up Ornament, www.LaurasStampPad.com

So you are probably thinking…..This doesn’t look like an ornament! This is the ornament all closed up and it would look amazing as a tag for a present. You could put the year and the person’s name on it! (I remember as a kid fighting over which ornament was mine or one of my siblings.) After seeing this adorable tag, you will slide the little bauble up the string and POP!!!!

Pop Up Ornament, www.LaurasStampPad.com

Then you will slide the bauble back in place to hold the ornament tight together and you can hang it on your tree!!! The cool part is it is super simple to create! I got this idea from a fellow stamper – Tami White! I love sharing ideas with others!!!

Here is what you will need: Five 3 x 3″ squares and Two 1.5 x 1.5″ squares of cardstock, a bauble or bead of some sort and some ribbon.

Each of your 3 x 3″ squares will need to be scored at 1.5″ on both sides and only one diagonal. It should then fold in half both ways (up and down & side to side) and then for diagonal. You will then stamp on both sides of your pieces of cardstock. For the one above, I stamped Night of Navy and Silver with the Festive Flurry Stamp Set randomly on one side. On the other side, I stamped one snowflake in Cherry Cobbler in the center of each square using the Stamp-A-Ma-Jig. By stamping each one in the center, when you assemble, you will get that complete Cherry Cobbler snowflake on the sides as shown above. You could always stamp randomly on both sides, or even use Designer Series Paper (or Glimmer Paper!!! I thought about that and want to try it out soon). After you are finished stamping, I added that brushed look to all of the edges (front and back) with my sponge daubers! Now it is time to fold and assemble. You will fold on all score lines to get a crease and then fold in half with the diagonal points going in. I know that probably doesn’t make much sense so I hope these pictures helps!

Pop Ornament, www.LaurasStampPad.com

Pop Ornament, www.LaurasStampPad.com


I hope you enjoy these amazingly adorable ornaments and share them with all of your friends and family during the Holidays! If you have any questions when you try this out for yourself, I would love for you to reach out me. Post in the comments below and I will respond!!!

Happy Stampin’

~Laura


Loving Paper Snowflakes….Not a fan of real Snow!

Posted on

Snowflake RibbonI have been having lots of fun with the Festive Flurry Stamp Set in the Holiday Mini Catalog even though I am not a fan of snow at all. I love the matching Framelits that cut out the intricate image of each snowflake which makes a quick and simple amazing image! When you purchase the stamp set and matching Framelits, you save 15%!!! Love a good deal! Here are some samples I have recently created using this stamp set! This card on the left was created using the Winter Frost Designer Series Paper and Silver Ribbon! Oh the Silver Ribbon….it is even more amazing in person! So shiny and perfect! I’m really loving the Winter Frost Designer Series Paper too! Usually my cards are Night of Navy, Silver, Cherry Cobbler or Old Olive but this year, I’m pretty sure they will be Snowflake BannersBermuda Bay, Pool Party, and Smoky Slate! These colors are just so much fun!!! Here is another fabulous card created with the Winter Frost Designer Series Paper and Festive Flurry Stamp Set! Since banners are so in right now, I thought I would add some into one of my Holiday cards too!!! It’s a great way to showcase more patterns on the paper too!!! I love how the little rhinestones add a pop of bling and make it look like sparkly snowflakes. (Are you picturing that light snow with the sun shining on it and making it sparkle? And in my little world, I hope its melting the snow. So not a fan of snow! :))

I also wanted to share a little tip with you!!! On page 29 of the Holiday Mini Catalog 2013, you will see the Winter Frost Designer Series Paper Stack on the top of the page and Winter Frost Specialty Designer Series Paper! You might be thinking what is the difference. Well that’s what I am here for! To answer all those little crafting questions of your! The Specialty Paper Pack is 12 sheets of 12″ x 12″ paper: 2 ea. of 5 double-sided designs; 1 ea. of 2 single-sided, foil-accented designs. The Paper Stack is 48 sheets of 4-1/2″ x 6-1/2″ paper: 24 ea. of 2 double-sided designs. The Paper Stack is perfect for making cards in multiples! It is amazing because otherwise I would have to buy 5 packages of the Specialty Paper to get my 80+ Holiday Cards! Thank you Stampin’ Up for making things easier!!!!

Happy Stampin’

~Laura


NEW Holiday Mini Catalog is Here!

Posted on

Holiday Mini Image

Although I’m not ready for the Holidays just yet….after all I haven’t even celebrated my Birthday yet (pssst…August 29)! But this Holiday Mini Catalog is amazing and is making me so ready for the Holidays. I think the kits are my favorite product! There is a Halloween Kit, Thanksgiving Kit, and Christmas Kit so it will so easy to decorate and get in the spirit this year!!! Check out this post to see how you can get one of the kits for FREE! Another favorite of mine is the Festive Flurry Stamp Set and matching Framelits! Get the bundle and save 15%!!! Snowflakes are so amazing and you can use those even after the Holidays. Snowflakes can be used for Birthdays, celebrations/events, and even Thank Yous through the winter season!

Festive Flurry Framelit Bundle

If you would like a copy of the Holiday Catalog, email me your contact information and I will get one in the mail to you! If you would like to place an order, you can order online 24/7 and use the following Hostess Code: SJQZYTG6 for a chance to win the Hostess Benefits! Everyone loves FREE stuff!!!! Also, be sure to check out my Calendar of Events to see some of the Holiday Mini Catalog items used!

Happy Stampin’

~Laura