Halloween Goodies for Everyone!!!

Posted on

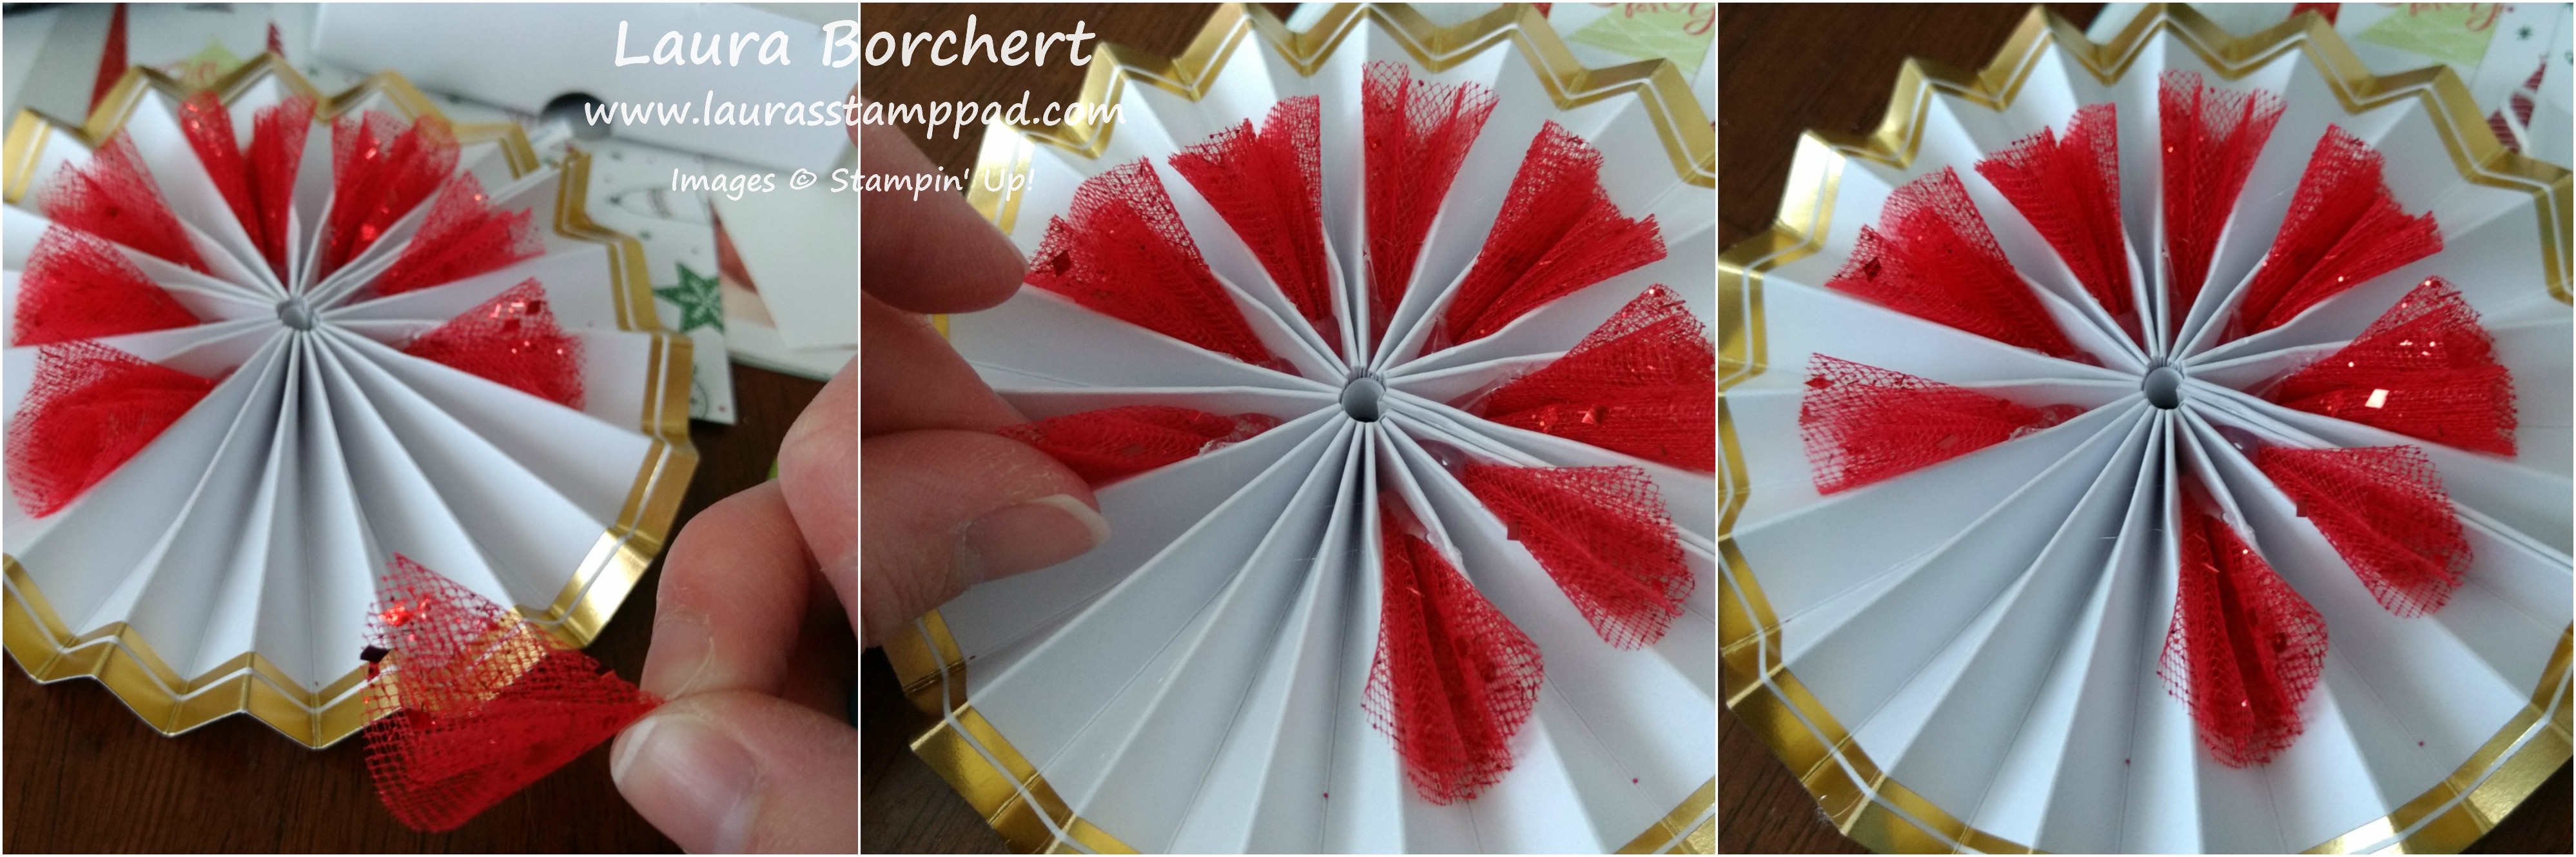
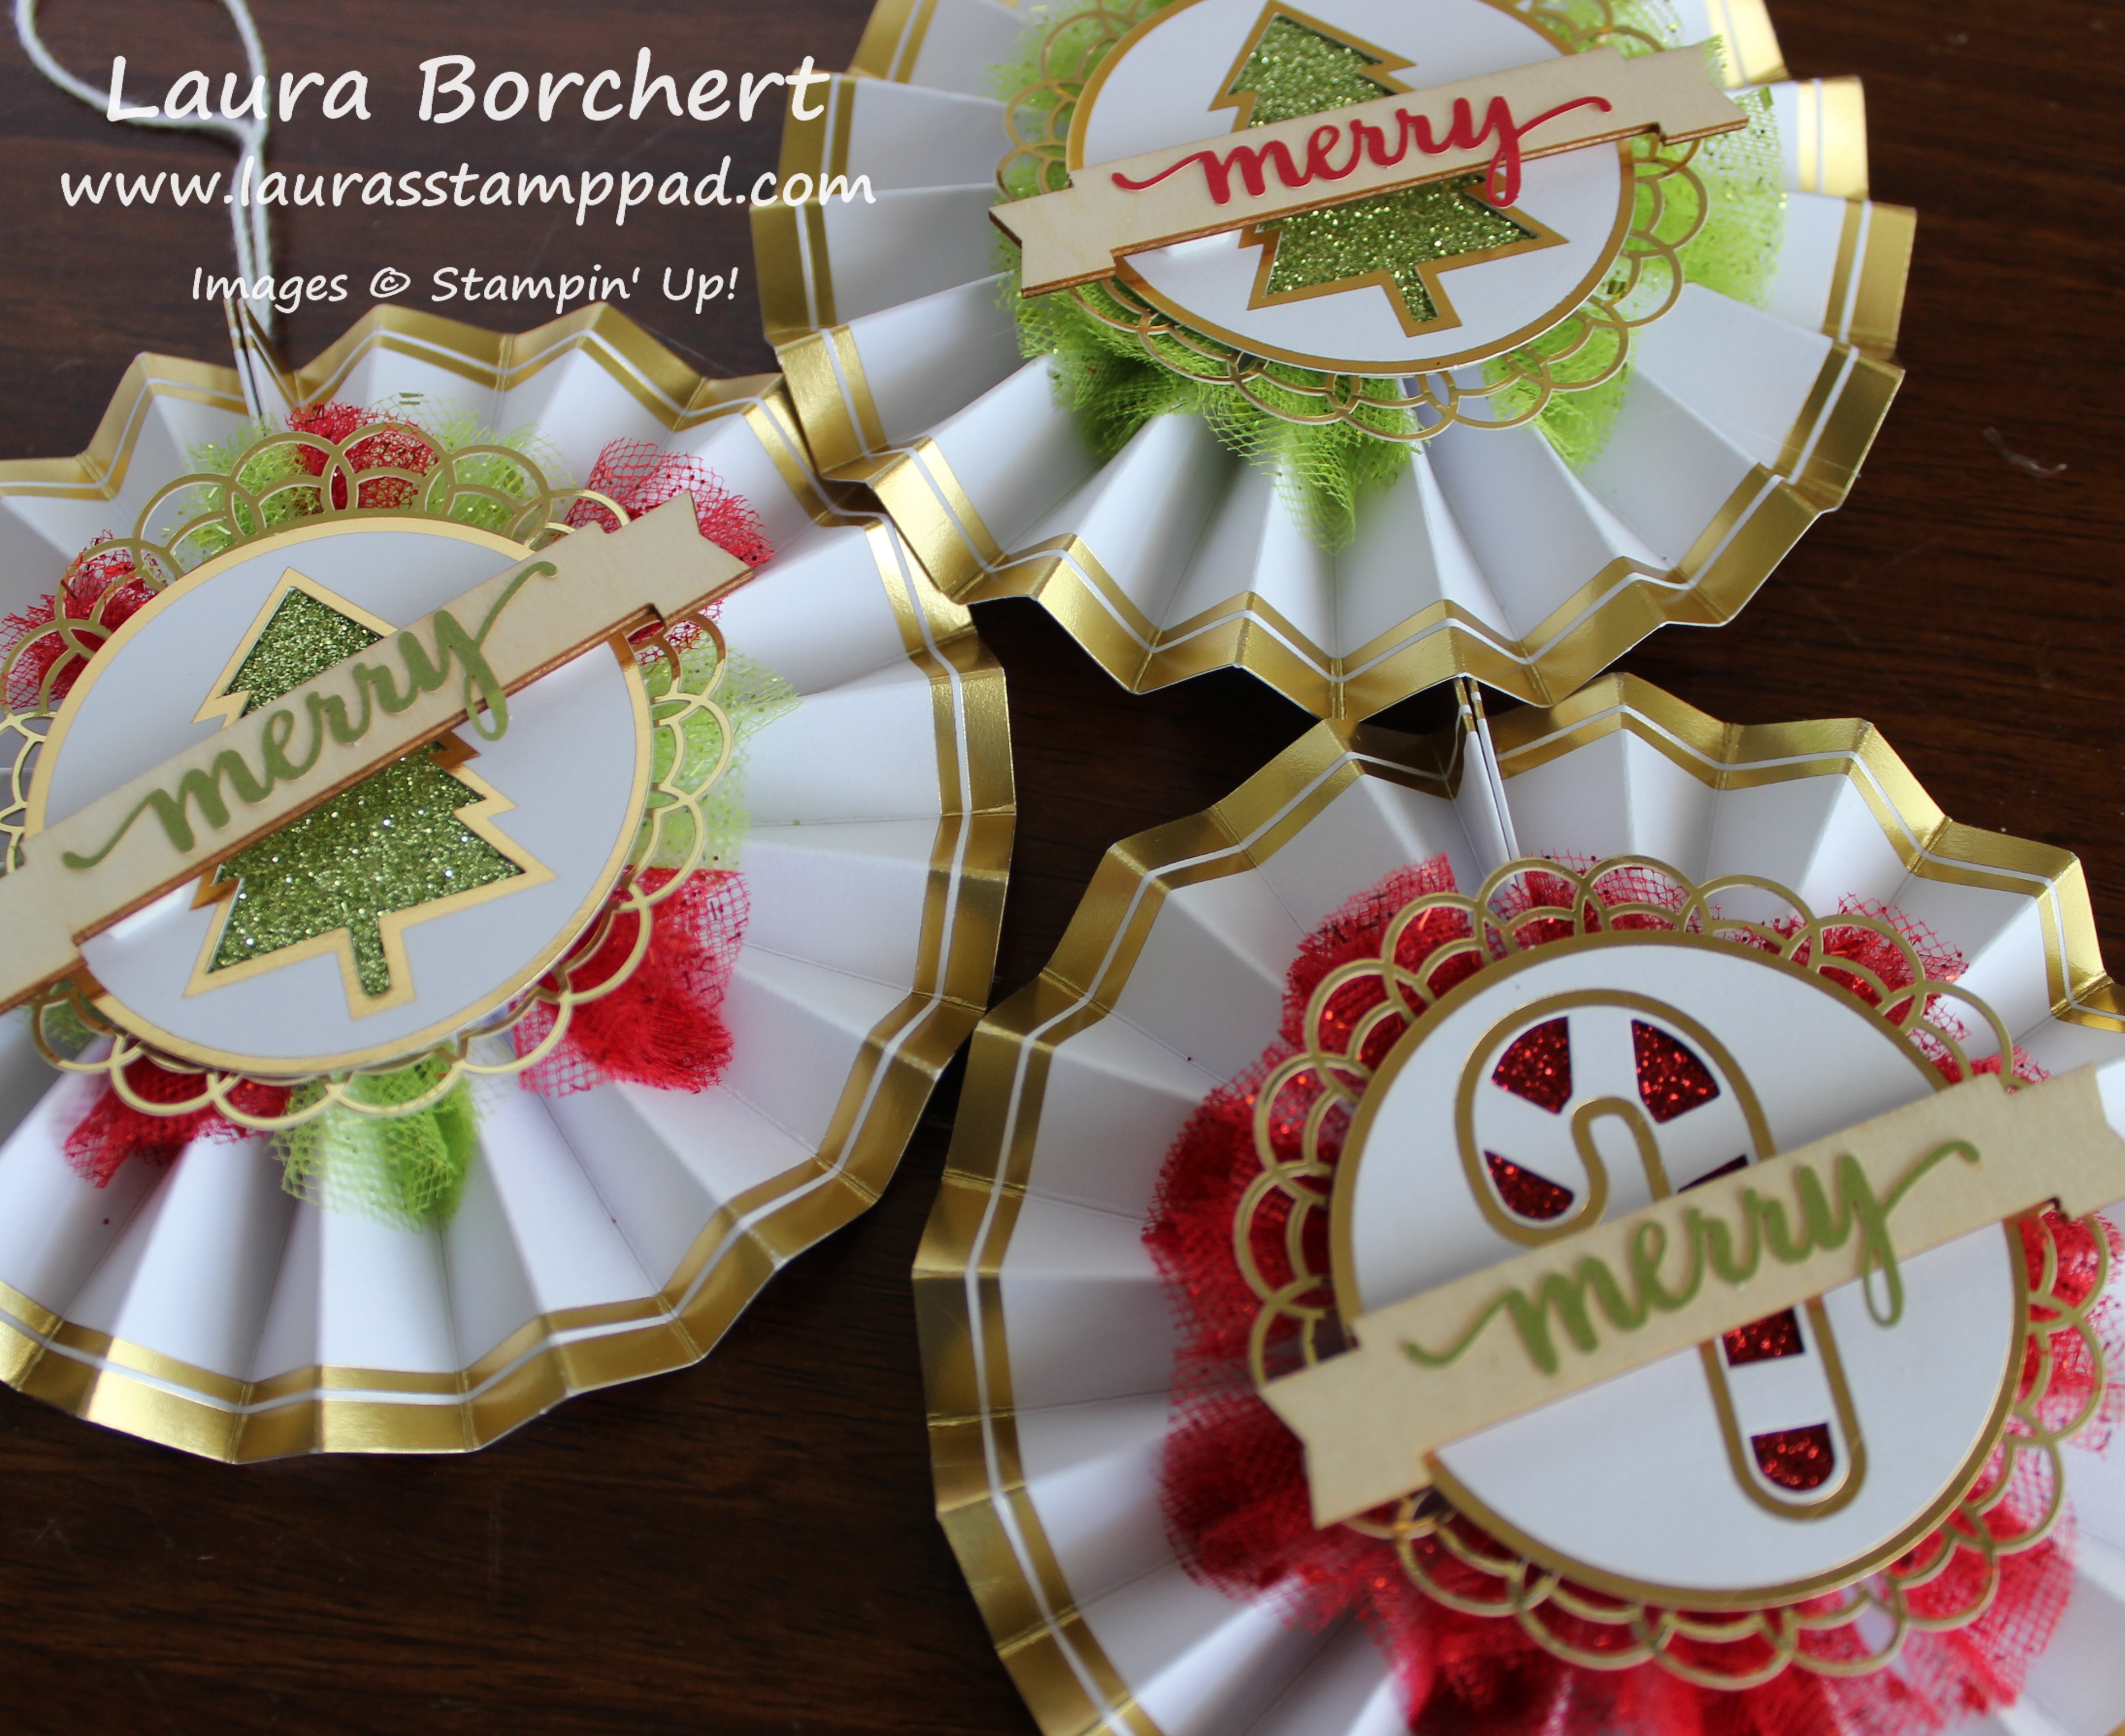
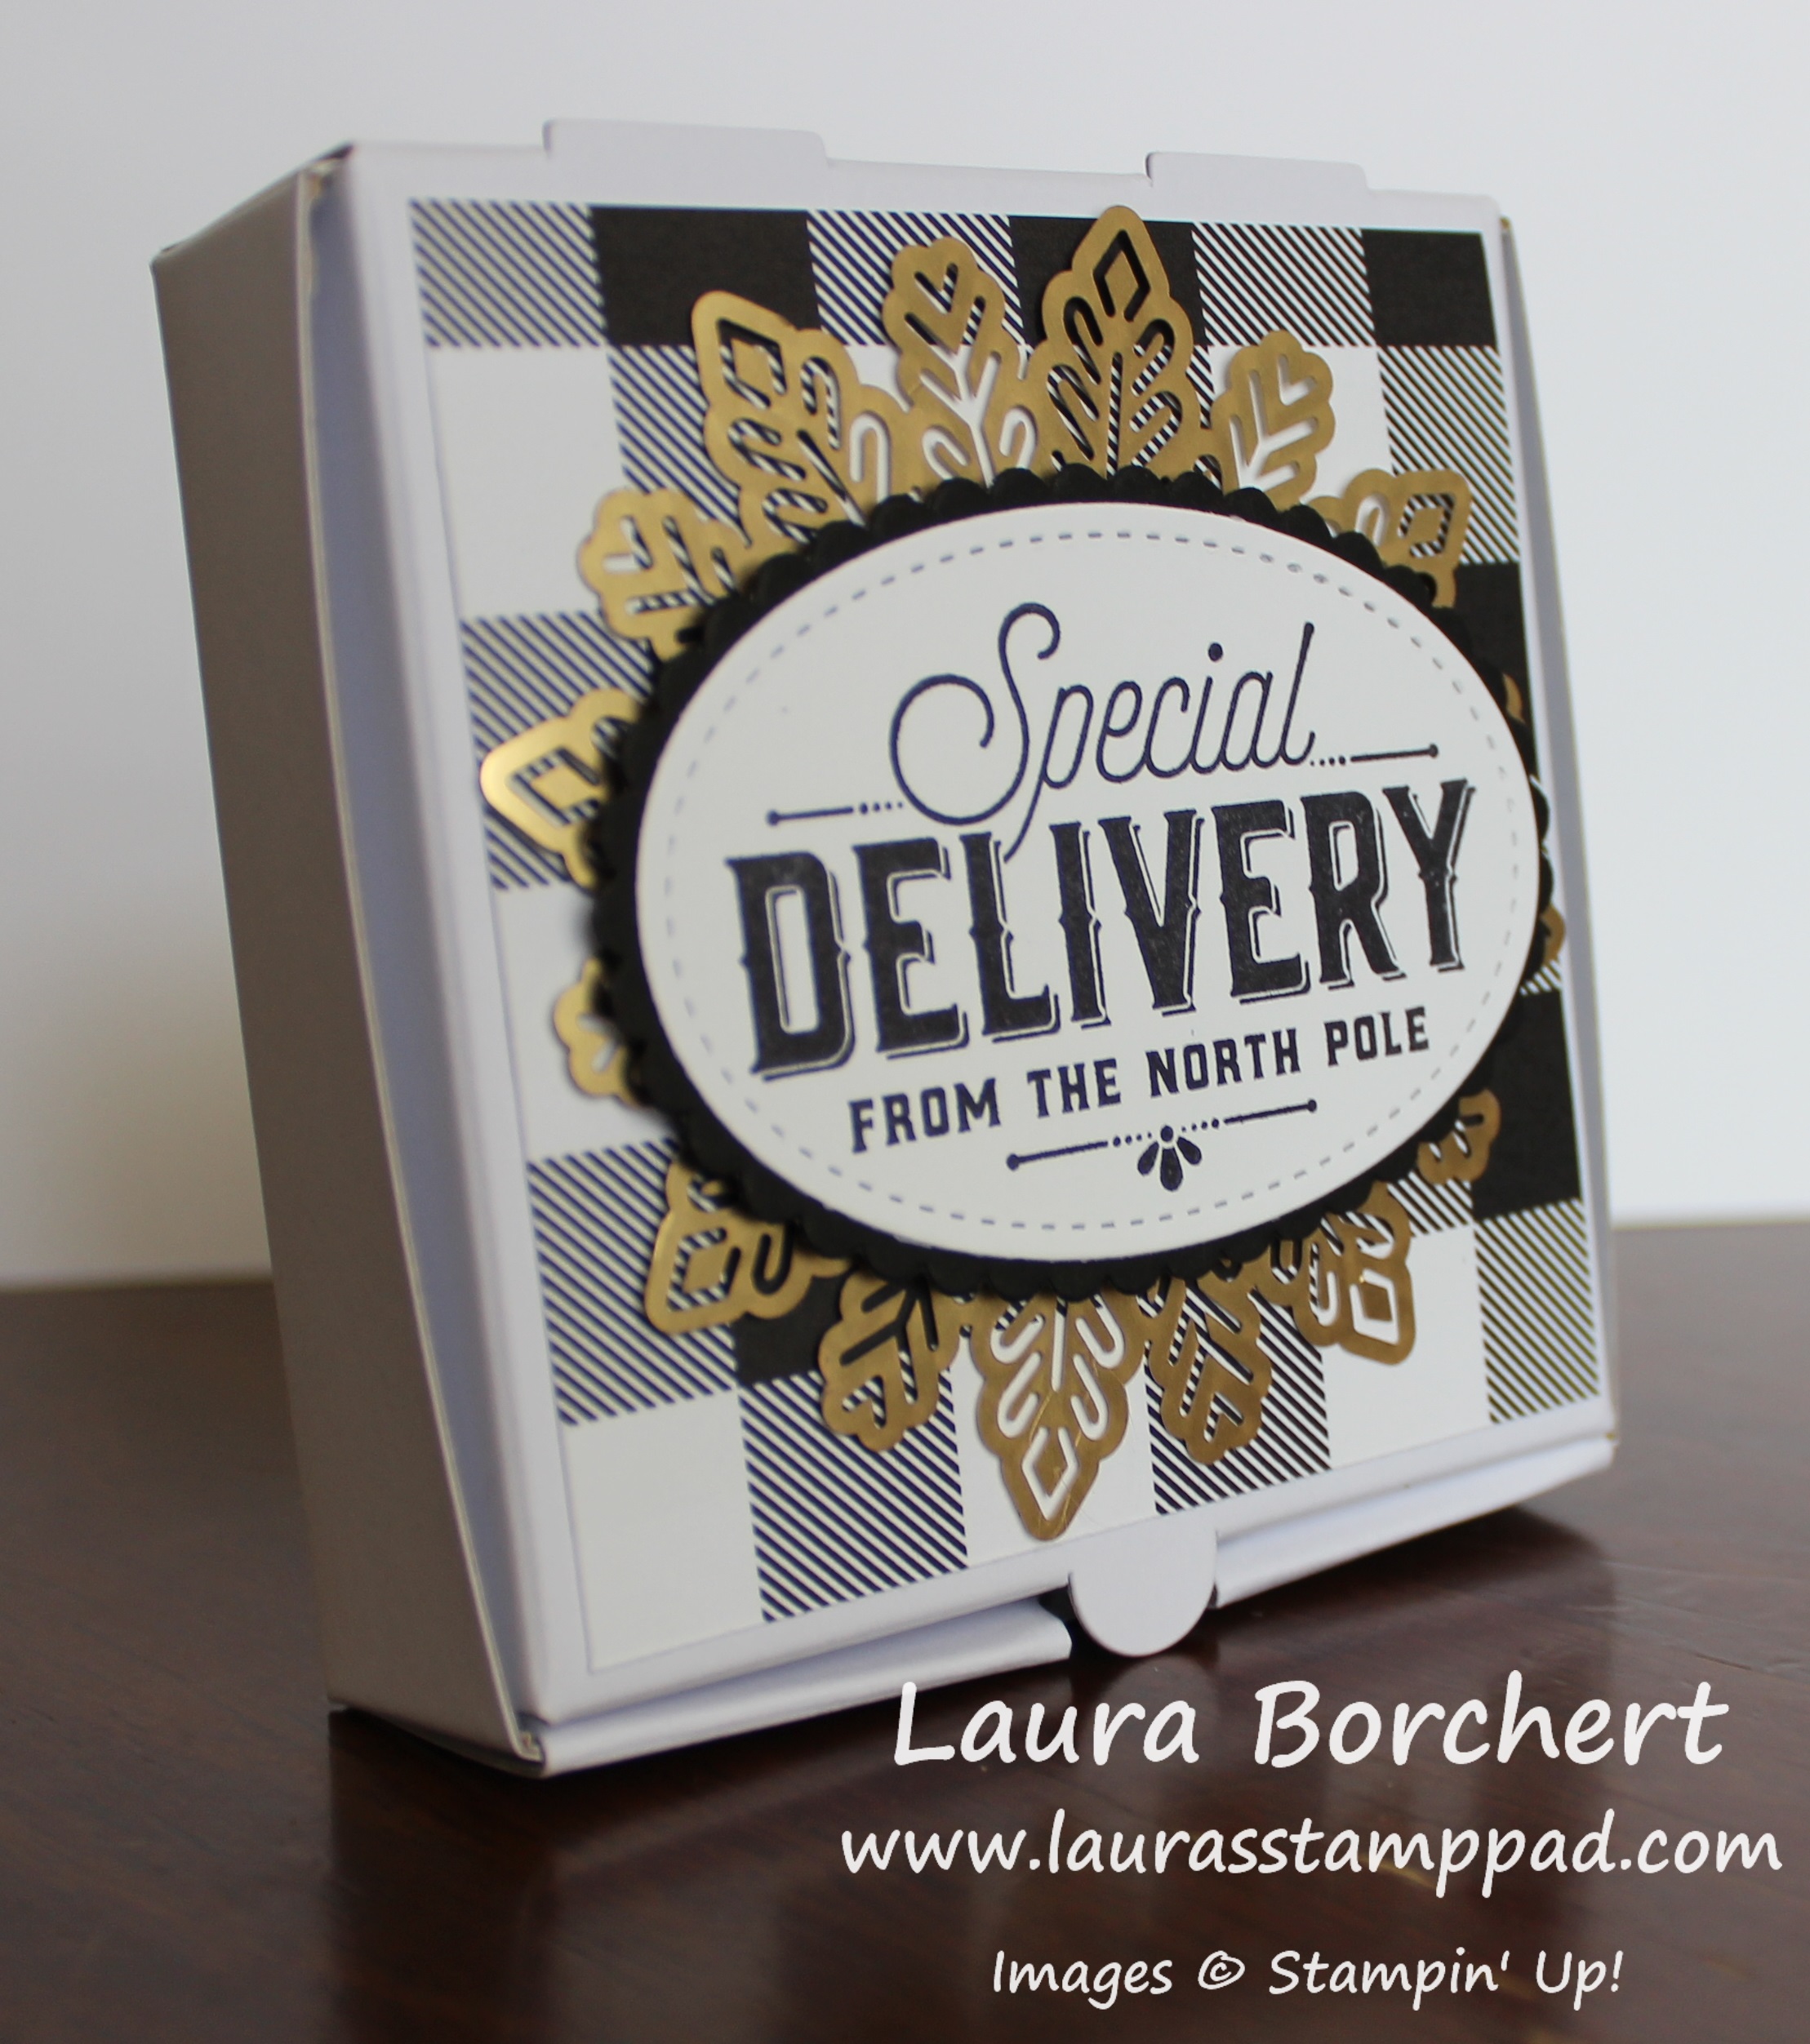
Happy Friday!!! I can’t believe it’s almost Halloween….after all wasn’t it my birthday at the end of August just yesterday? After all, it’s coming whether we are ready or not. Here are the Halloween goodies I made!

Halloween Goodies for Everyone, www.LaurasStampPad.com


I went really simple this year. In a weak moment, I decided to buy my favorite candy – Reese’s Peanut Butter Cups. What was I thinking? Anyway, I had to quickly package them up before I ate them all! I slipped one into a Gusseted Cellophane Bag with a piece of Spooky Night Designer Series Paper in the back. The Designer Paper measures 3″ x 2-3/4″. Using some Black Baker’s Twine, I tied it closed and into a bow! For the decoration on the front, I used the 2″ Circle Punch and the Cat Punch. The cat was punched out from some of the Spooky Night Designer Paper. I added the cat to the circle with Stampin’ Dimensionals and added the circle to the bag with Snail Adhesive. These were really simple, cute, and quick to whip up!

Anna & Ruth, www.LaurasStampPad.com

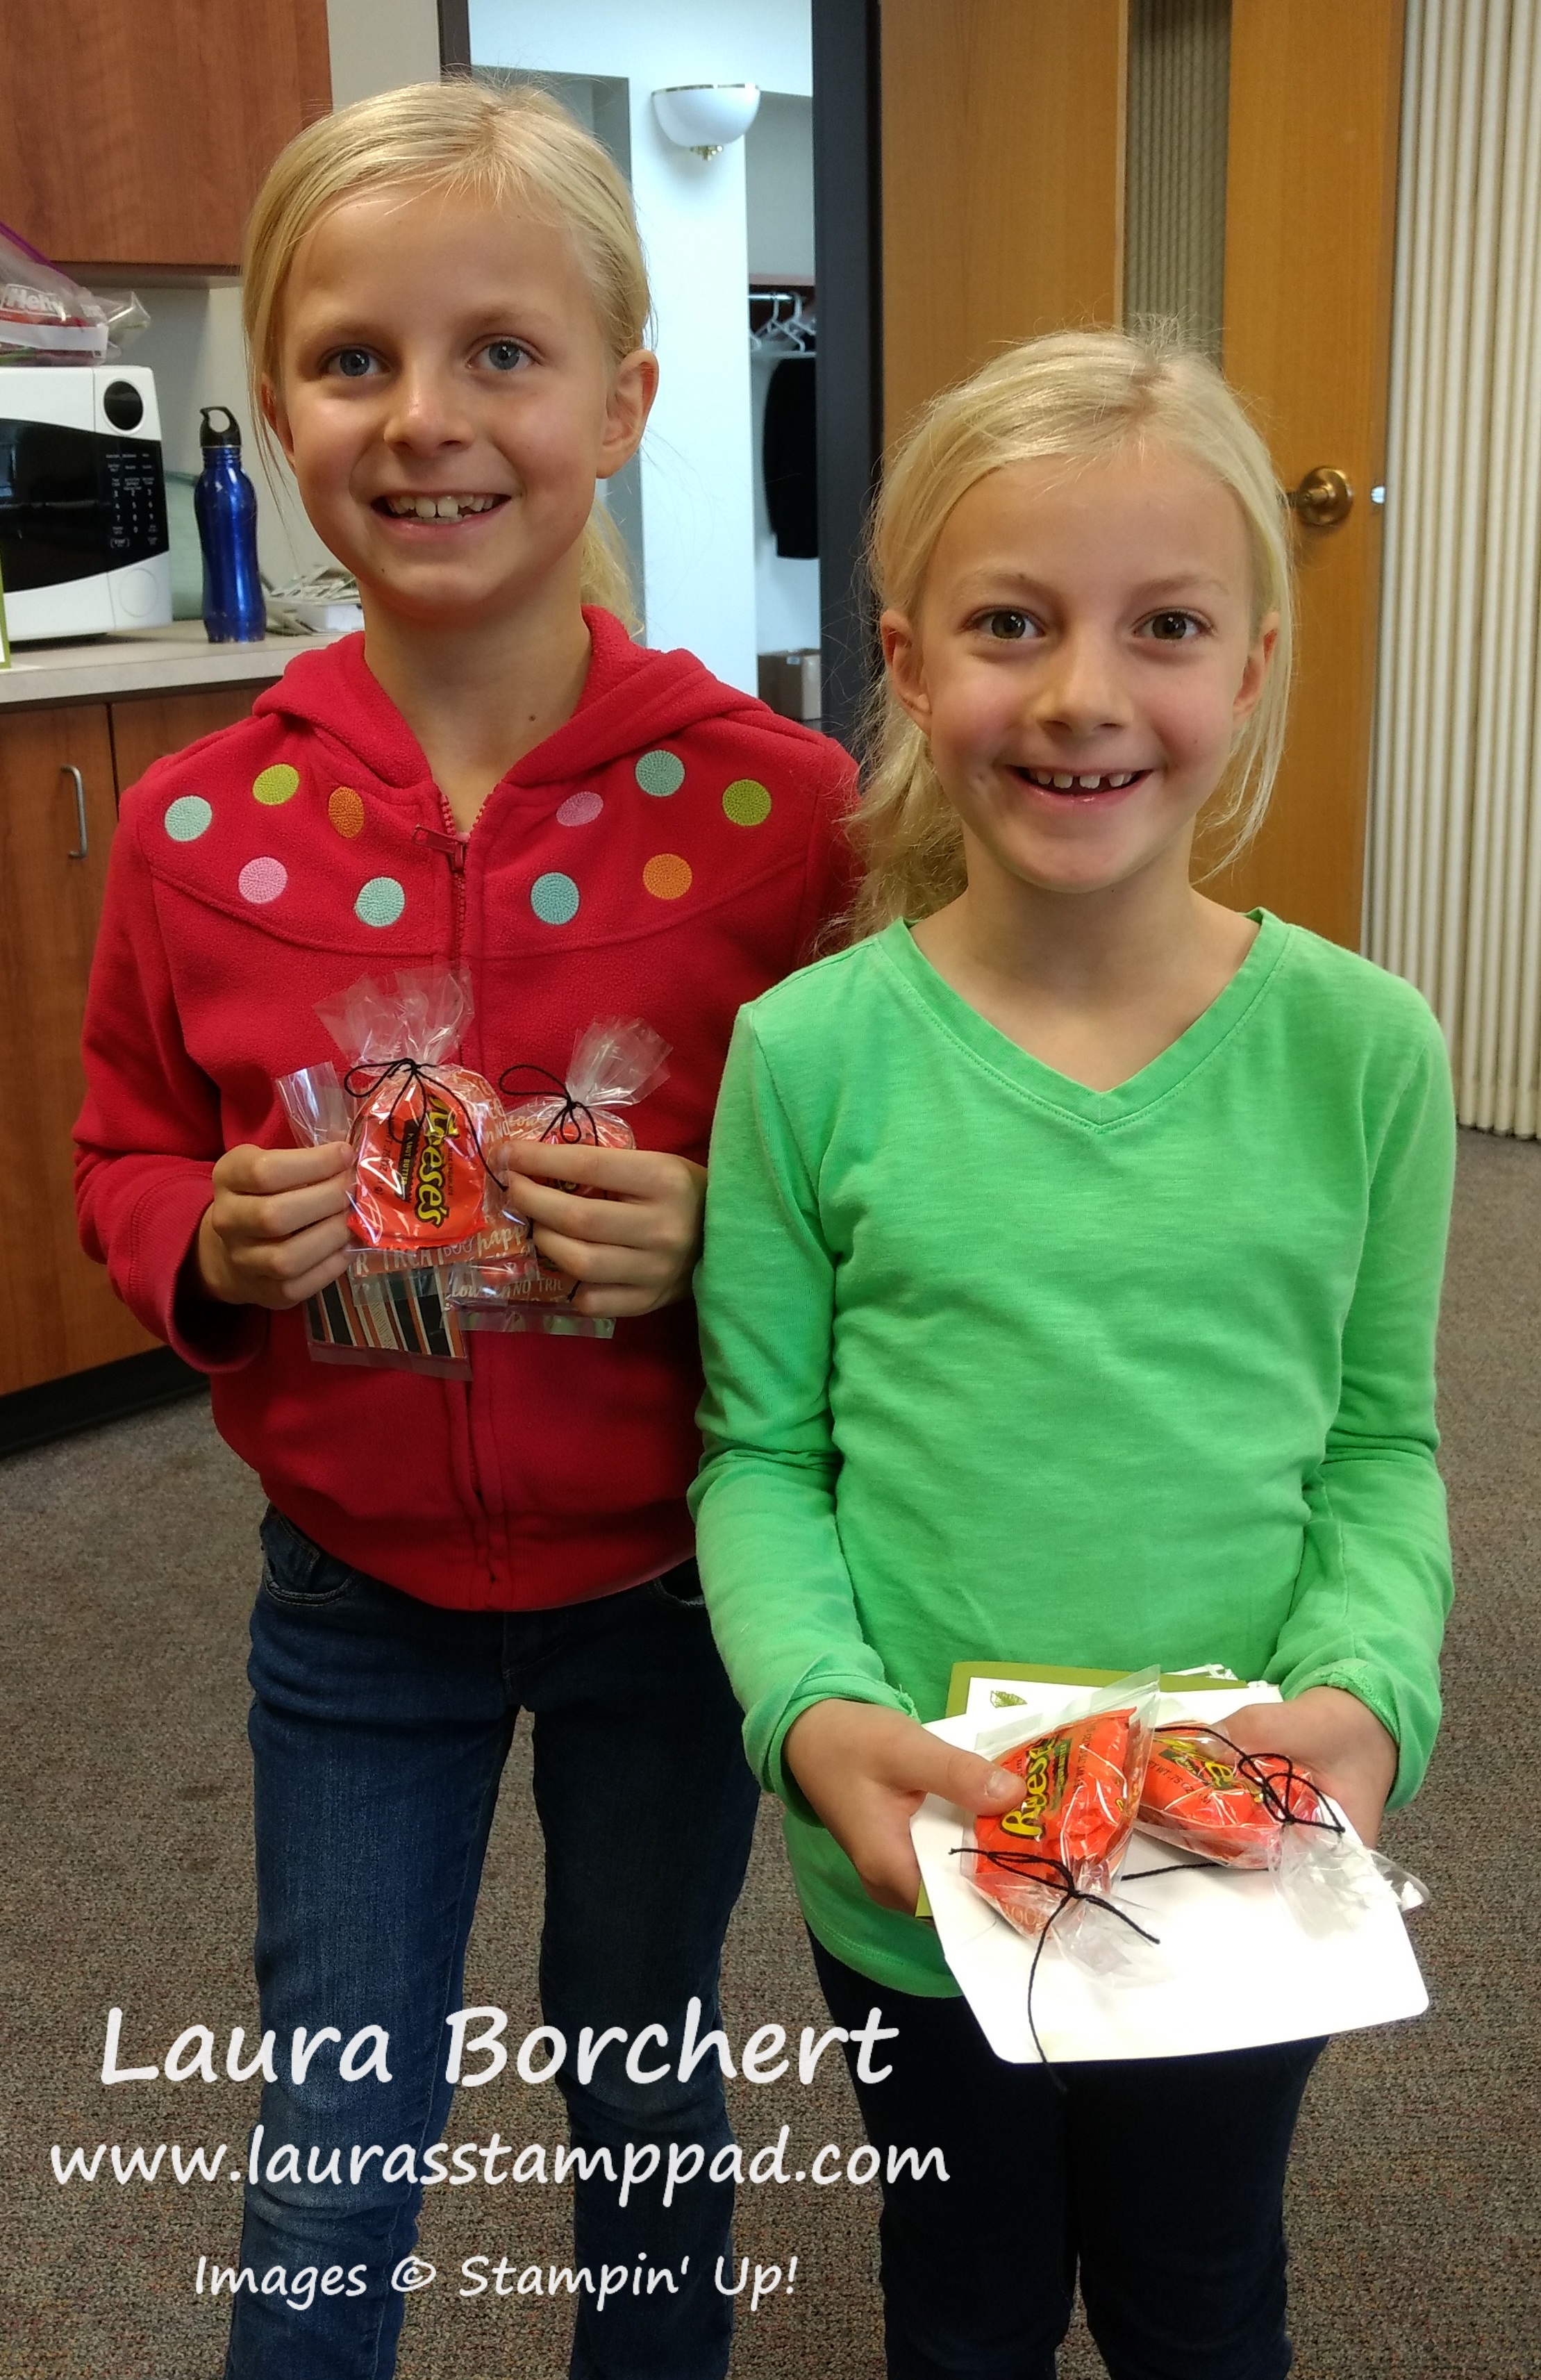
These cuties are my nieces who came to stamp class this past weekend so they got their treats in person!!!

Now, I know I mentioned Halloween Goodies for everyone so here you go!!! I am offering DOUBLE Laura’s Loyal Stampers Stickers to all of you!! All orders placed this weekend (Friday – Sunday) will earn Double Laura’s Loyal Stampers Stickers! Don’t forget about the Buy 3, Get 1 Free Designer Series Paper Special and of course all orders of $75 or more will earn my Free Stamp Set of the Month! It is your choice between Graceful Garden or Daisy Delight!!! Click here to start shopping!

Have a wonderful weekend and I’ll see you back here on Monday! Happy Stampin’

~Laura

Product List


No Peeking….You Have To Wait!!!

Posted on

Happy Friday!!! I thought I would share a little tag inspiration for the upcoming holidays! This is simple and easy to add a handmade touch to your holiday gifts! You can check out more gift packaging ideas here and here!

No Peeking, www.LaurasStampPad.com

This tag was created using the Merry Little Labels Stamp Set and coordinating Everyday Label Punch!!! This punch had me at HELLO since it is very similar to the retired Decorative Label Punch. I simply stamped the greeting in Real Red Ink and punched it out. Then using the 1/8″ Handheld Punch, I added a hole in the top. I used the New Jute Twine from the Holiday Mini Catalog. I love it!!!

Gift Tags, www.LaurasStampPad.com

Here I added in some Designer Series Paper as decoration. For the one on the left, I used some of the Merry Little Christmas Designer Series Paper. I just added Whisper White to the back side with the stamped image and glued the two together before threading them on the twine. The tag on the right was punched into banner tips with the Banner Triple Punch. There are lots of great ways to decorate tags for any occasion. These tags are perfect for gifts, gift bags,  or even to add with some ribbon on a bottle of lotion or bottle of wine! Simple and fabulous!

Product List

I hope you all have an amazing weekend. I am super excited because I’m spending it with family!!! My niece and nephew’s birthday party is tomorrow and the family reunion is on Sunday. There is nothing better than 100+ people gathering for a day of good food and great fun! I’ll see you all back here on Monday.

Happy Stampin’

~Laura

Pick A Pumpkin, www.LaurasStampPad.comDon’t forget that this stamp set – Pick A Pumpkin is the one you can earn for FREE with a $75 order! This offer is all month long. Check out all the details here!


Be Merry Project Kit!!!

Posted on

The Be Merry Project Kit is all inclusive and easy to assemble! These little rosettes make perfect ornaments or gift tag toppers! The best part is no stamping and quick assembly! The rosettes are already scored and ready to go!!! Woot Woot!

Be Merry Project Kit, www.LaurasStampPad.com

The awesome thing about these is that the rosettes are already scored and ready to go with the Baker’s Twine attached. Simply peel off the adhesive and attach one side to the other. If you want to make sure it gets a strong hold, just place a clothespin or binder clip on them. I didn’t have a problem with mine though but it’s a good idea. There are gold trim ornament and gold polka dot ones too!

Homemade Christmas Ornament, www.LaurasStampPad.com

Next step is adding in the tulle. These come in a big stack of pre-cut circles. Be sure to only use one thin little circle for each section. I folded it in half 3 times.

Tulle in Rosettes, www.LaurasStampPad.com

Simply add a glob of Hot Glue in the valley of the rosette and then press the pointed end of the folded tulle into it. One tip that I have for this is to not go in super deep to the center of the rosette. If you go in too deep, there is only a small edge showing after the center decoration is added. Notice how the green only peaks out a little in the sample above. I recommend doing a full ornament first to work the kinks out before doing the rest in an assembly line.

Rosette Gift Tag, www.LaurasStampPad.com

The fun thing about these is that you can do all green, all red, or mix the 2 colors! Super fun!!! The top decorations can all be mix and matched as well with green or red glitter peaking through and green or red Merry greeting. Make sure to adhere the greeting on that it is right side up to the string at the top. 🙂 There are also circles to place on the back of the rosette for a To/From greeting if you wish to use this as a gift tag.

Trees & Candy Canes, www.LaurasStampPad.com

If you would like to see the kit reveal, check out the Video Tutorial below or click here! Be sure to give the video a thumbs up if you liked it and don’t forget to subscribe if you are new. If you would like a notification when I post a new video, be sure to click the bell right next to the subscribe!!!

Happy Stampin’

~Laura

Product List


Mini Pizza Boxes are Amazing!!!

Posted on

These Mini Pizza Boxes are just fabulous and adorable!!! They are in the NEW Holiday Mini Catalog and they are perfect for a gift card, cookie, or little cards /tags. Anything could go in there….and it’s calorie-free!!! 😉

Mini Pizza Boxes, www.LaurasStampPad.com

These Mini Pizza Boxes are precious and decorating them is so simple! You can either just decorate the top square or wrap ribbon all around or do a belly band!

I folded the little Pizza Box on the score lines and popped it together. Be sure the shiny, plastic side is on the inside. This is to make it food safe! Next I added a piece of Merry Little Christmas Designer Series Paper. Then I placed one of the gold Foil Snowflakes in the center. For the greeting, I used the Layering Ovals Framelits and Stitched Shapes! I love layering these 2 styles together. They are just fabulous! The greeting was stamped in the middle from the Merry Little Labels Stamp Set! There are lots of great greetings in that set to pick from! I added the greeting to the box with Stampin’ Dimensionals!

Special Delivery, www.LaurasStampPad.com

Simple switch out the Designer Series Paper and the greeting and this would be perfect for any occasion! Check out other fabulous gift packaging idea in yesterdays post! There is a video tutorial as well!

Product List


What do you all think about the new product lists that I’m showing for each project shown? Do you like this better? Let me know in the comments below!

Happy Stampin’

~Laura


Pick A Pumpkin, www.LaurasStampPad.comDon’t forget that this stamp set – Pick A Pumpkin is the one you can earn for FREE with a $75 order! This offer is all month long. Check out all the details here!