Happy Tuesday, everyone!!! You all know that means I have a fabulous Technique to share with you! Today, I’m sharing the basics of embossing folders and the difference between regular and dynamic ones! It came be frustrating figuring out the layers for each so you don’t break your Big Shot or drive yourself crazy! Been there before which is why I thought I would do this post! 🙂

Both folders in the photo above look very similar and create a stunning embossed image. You might notice that when you order a folder, some are super thick and different from ones you have received in the past. These are the folders with a SUPER long name – Lovely Floral Dynamic Textured Impressions Embossing Folder (right side)! The Garden Trellis Embossing Folder is on the left side! The regular folders are much skinnier whereas the dynamic folders are thick. This makes a big difference when running them through the Big Shot. It can be frustrating trying to figure out the perfect layering. Sometimes you run it through and it isn’t thick enough to emboss and then you try another layer and it’s so tight you just might pull a muscle or break your Big Shot. I’m here to solve that frustration!!!
Layering for the Regular Embossing Folders:
Multi-Purpose Platform – if it is the older style with the hinges, open up Tab #2. If it is the newer style, leave off the Adapter layer.
One Standard Cutting Pad (clear plate)
Embossing Folder with cardstock inside
One Standard Cutting Pad (clear plate)
In the video tutorial below, you will see that I also mention the Precision Base Plate. The majority of the time, I have the Precision Base Plate out for framelits and all so you can replace one of the standard cutting pads with the Precision Base Plate. This would mean Multi-Purpose Platform as described above, Precision Base Plate, Embossing Folder, and then Standard Cutting Pad. Again, I just do this when it’s already out and layered up rather than putting that aside and pulling out more items to layer. 🙂
Layering for the Dynamic Textured Impressions Embossing Folder:
Multi-Purpose Platform – if it is the older style with the hinges, open up Tab #2. If it is the newer style, leave off the Adapter layer.
Embossing Folder with cardstock inside
One Standard Cutting Pad (clear plate)
Due to the thickness of the folder, this layering only requires one Standard Cutting Pad. Another TIP for these folders is to spritz the paper ever so lightly with some water. This will moisten the fibers of the cardstock and allow for them to press into the folder without leaving creases in the cardstock. Many times I just grab my Stampin’ Mist because it’s right there and it works just as well! 🙂 You can always add some water to a Stampin’ Spritzer too!
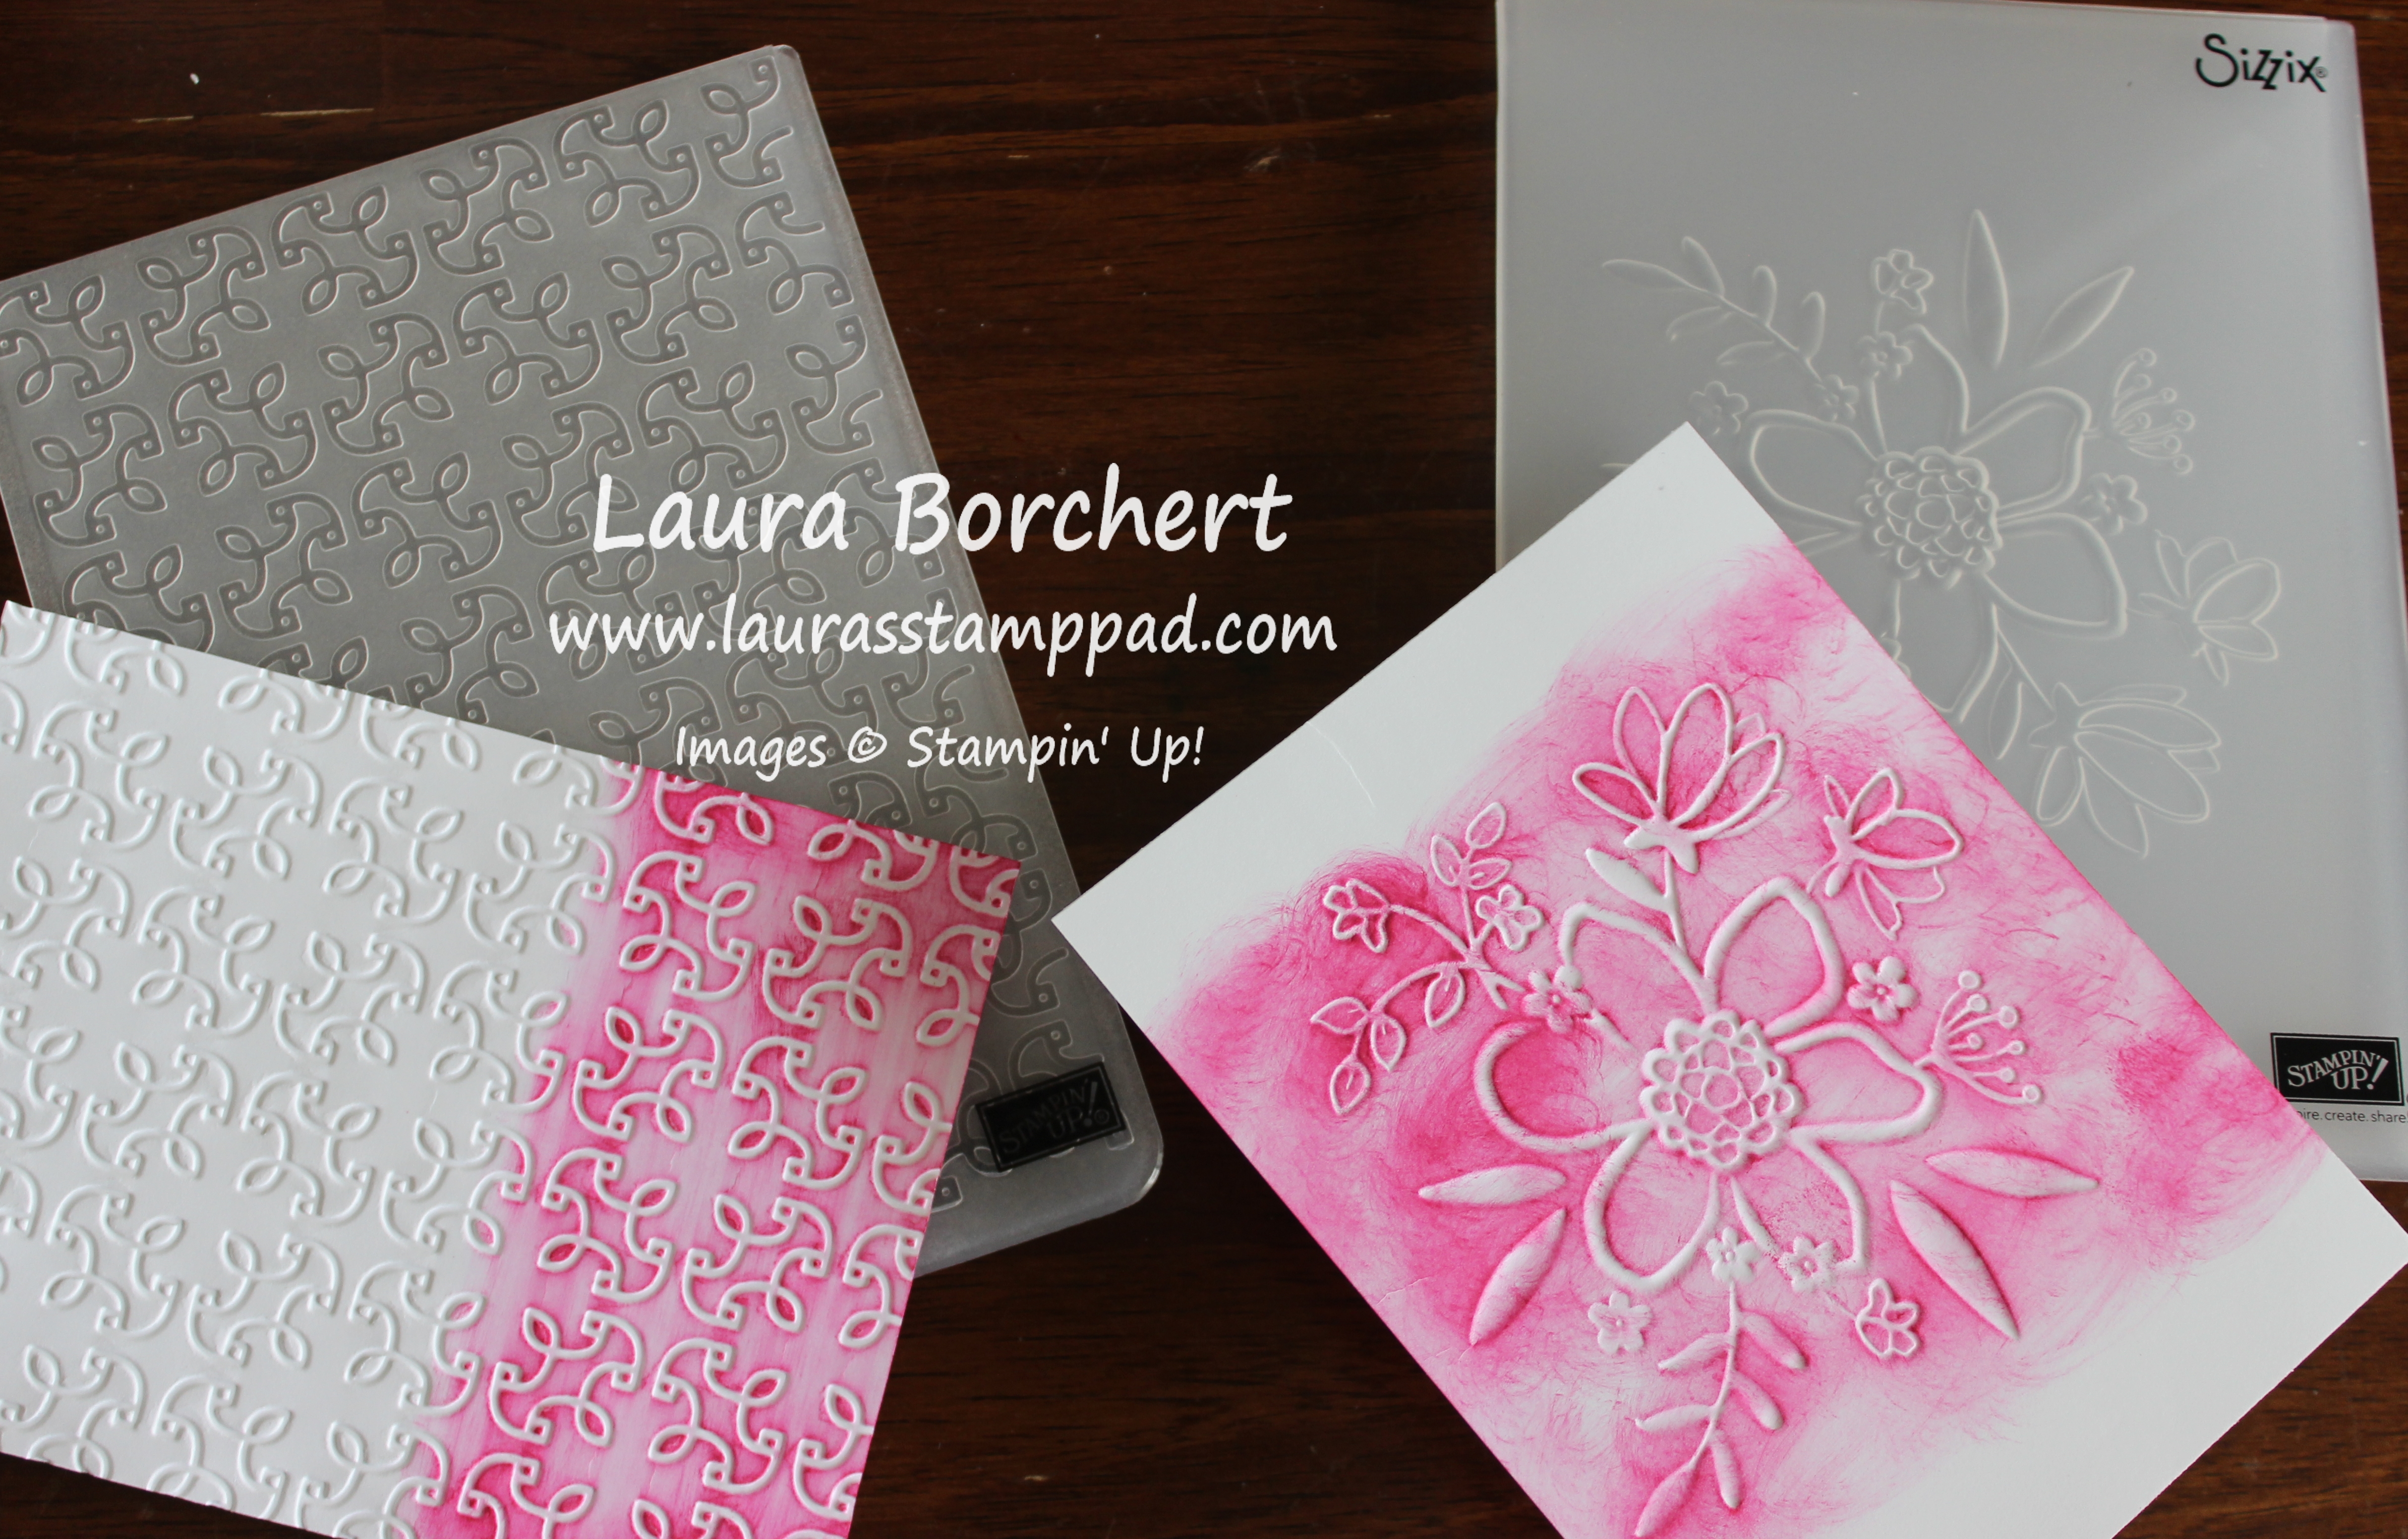
In the photo at the top of the post, the images are Embossed and I lightly went over them with a Sponge Dauber to add color so you could see the image better. In this photo here, I flipped over the image to reveal the Debossed image and added some color. Both images are stunning so keep that mind when creating your next project. There are lots of ways to use embossing folders!
If you would like to see all of this in action, check out the Video Tutorial below or click here! I hope you found this super useful. Be sure to give the video a thumbs up if you liked it and don’t forget to subscribe if you are new. If you would like a notification when I post a new video, be sure to click the bell right next to the subscribe!!!
Happy Stampin’
~Laura
Product List


