Happy Tuesday!!! You all know what that means! I have a fabulous technique to share with you! Today, we are creating a glitter window for the greeting to peek through!
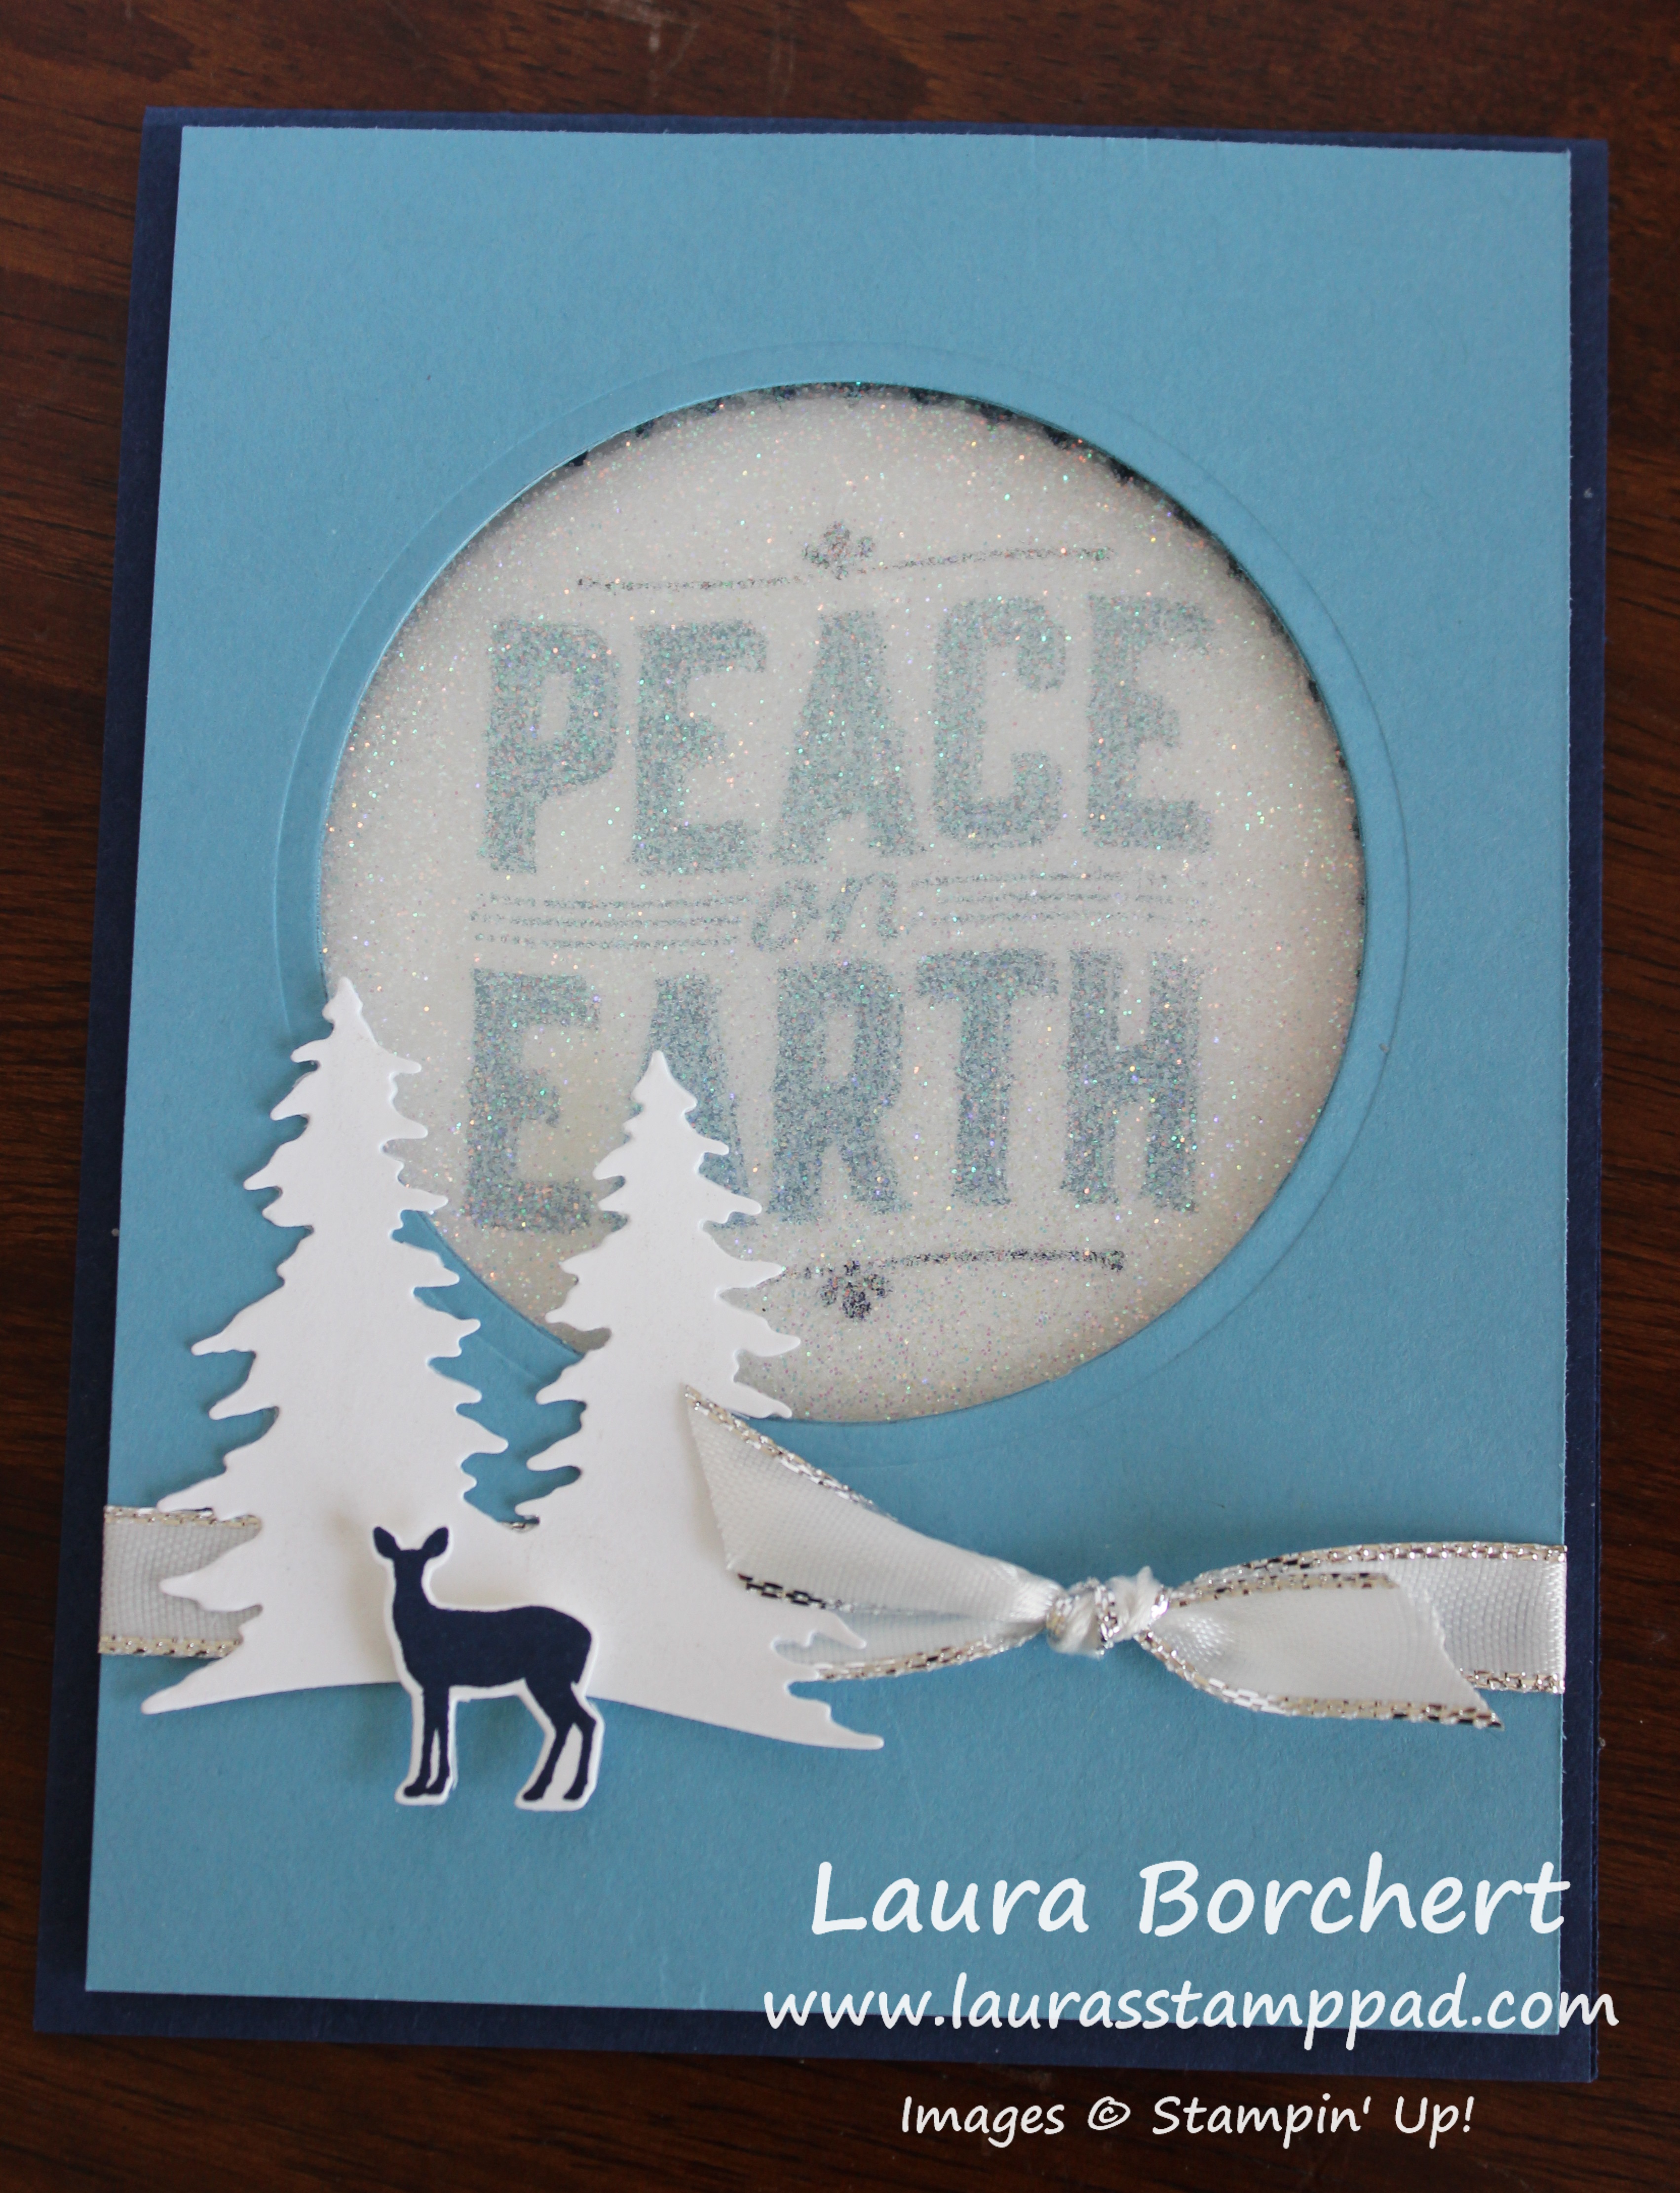
Isn’t this card just stunning with those blues and that glitter and shine! I love it. The best part is that the glitter is contained and won’t flake off all over! Woot Woot! 🙂 Thank you to Julie Davison for the amazing idea! When I first say this, I knew I had to recreate it.
I started with a Night of Navy card base (4-1/4″ x 11″). Next I took a piece of Marina Mist (4″ x 5-1/4″) and die cut a circle using the Layering Circles Framelits. This circle can be in the middle or towards the top, it all depends on how much room you want for the bottom decoration. Then, I set this on the card front and traced a circle onto the navy card front. Using the scallop circle that is just a bit larger, I die cut that from the card front. You don’t have to use the scallop circle but it gives a little texture and cuteness to the inside!

Before completing the glitter window, I stamped the greeting on the inside. First, I took a piece of Whisper White (4″ x 5-1/4″) and placed it on the inside on the card. I closed the card and stamped the Peace on Earth from the Carols of Christmas Stamp Set through the hole in Marina Mist Ink. By stamping in the circle, you have perfect placement of your greeting. I added the little decoration to the top and bottom of the greeting in Night of Navy Ink! Once I stamped the greeting (and there were no mistakes) I adhered the white to the inside of the card!

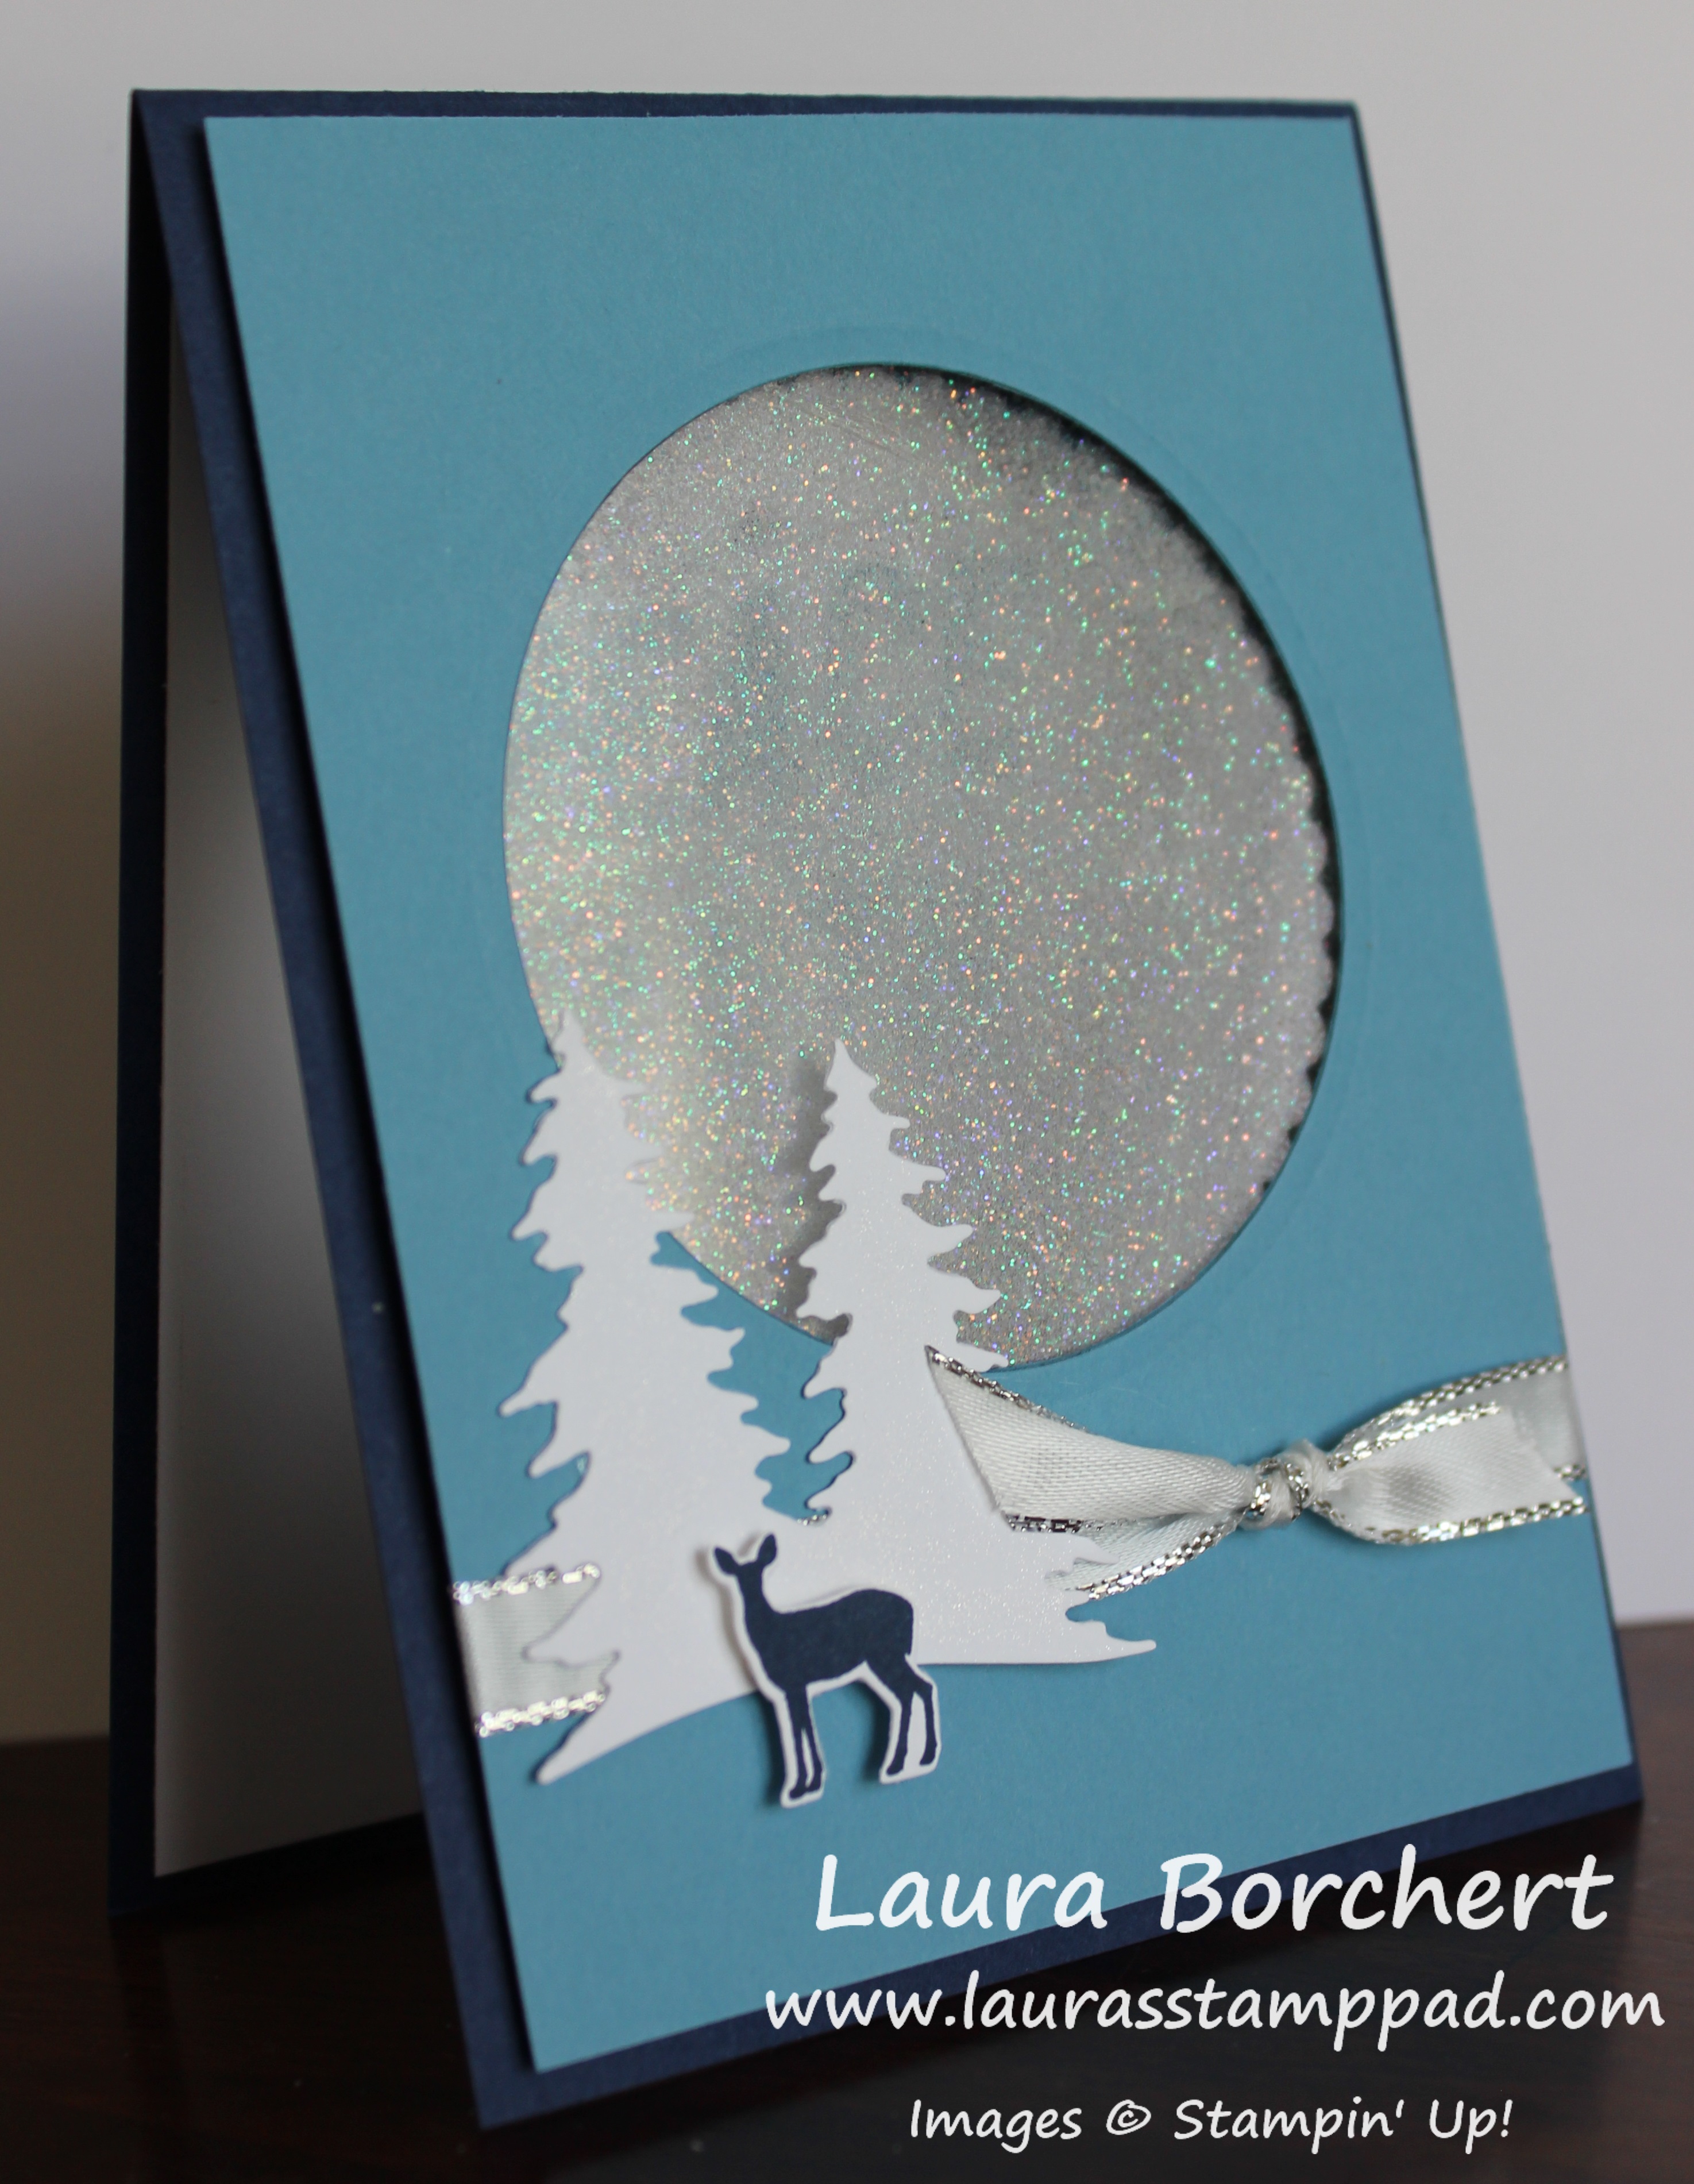
Now for the glitter window, I used 2 squares of Window Sheet and 2 sheets of Adhesive Sheets. I placed a piece of adhesive sheet over each window sheet and covered 1 one of them in Dazzling Diamonds glitter. Then I pressed the two together. It’s okay if the glitter doesn’t go all the way to the edge perfectly because that will hidden anyway! Now to build the window, I added a little bit of Snail Adhesive around the navy circle and placed the window on top. Before adhering the Marina Mist, I tied some Metallic Silver Edge Ribbon around towards the bottom. I used Stampin’ Dimensionals to adhere this to the card front! For the decoration, I stamped the deer from the Carols of Christmas Stamp Set in Night of Navy. Using the coordinating Card Front Builder Framelits (Bundle & Save 10%), I die cut the deer and the trees. Then I added those to the card front!
This isn’t a card I would recommend making hundreds of for your Christmas card this season but it’s fun to make for a special few!!!
If you would like to see this all in action, check out the Video Tutorial below or click here! Be sure to give the video a thumbs up if you liked it and don’t forget to subscribe if you are new. If you would like a notification when I post a new video, be sure to click the bell right next to the subscribe!!!
Happy Stampin’
~Laura
Product List


