
Shaker cards are so much fun so why not combine shaker cards with holiday ornaments and create lots of FUN! The color combination, the fun greeting, and the shaker card magic make this card so wonderful!!!
I started with a Rose Red card base. Then I took a piece of Night of Navy (4″ x 5-1/4″) and Whisper White (3-7/8″ x 5-1/8″) for the next layers. I stamped the greeting from the Merriest Wishes Stamp Set in Rose Red Ink on the bottom right corner. I used the dotted image from the same set and stamped it in Night of Navy Ink twice along the top to look like snow falling….or just a cool background! For the ornaments, I used various images from the same stamp set. I stamped the large circle in Night of Navy Ink onto Night of Navy cardstock and die cut with the circle frame from the coordinating Merry Tags Framelit Set (Bundle & Save 10%). I stamped the large circle image (the one without a center) in Night of Navy Ink onto Rose Red cardstock. You can either punch these out or use your Layering Circles Framelits to do the center and the outside circle. Be sure to keep that inside circle though!!! Die cut out the large ornament from the Merry Tags Framelits and place the stamped circle over top of it. Place the punched out center back in the middle of the ring you created. Now remove the ring but hold the middle circle in place. You should be left with the middle circle in the middle of the large ornament. This is so you can find the spot on your ornament for the shaker pieces so you don’t have to flip it over later when the sequins are inside. Now you will want to trace the punched out circle with a pencil. I lightly trace out farther rather than close to the circle so I am wide enough and the adhesive doesn’t show in the window. Now that you have your traced circle you can remove it and place some Foam Adhesive Strip around your pencil mark. If you traced right next to the circle, make sure your adhesive strip is out farther than that circle. Next I filled the open hole with all the sequins from the Metallic Sequin Assortment. You can use punched pieces, sequins, or silica gel colored to match your project. It is all up to you. You can see other samples using those items here and here as well as Video Tutorials! Now that you have your goodies in there, I placed a circle of Window Sheet over the top to seal in the sequins. You can use the same punch or Framelit you use for the larger circle. Then I added the ring that I stamped and punched out over the top as decoration!
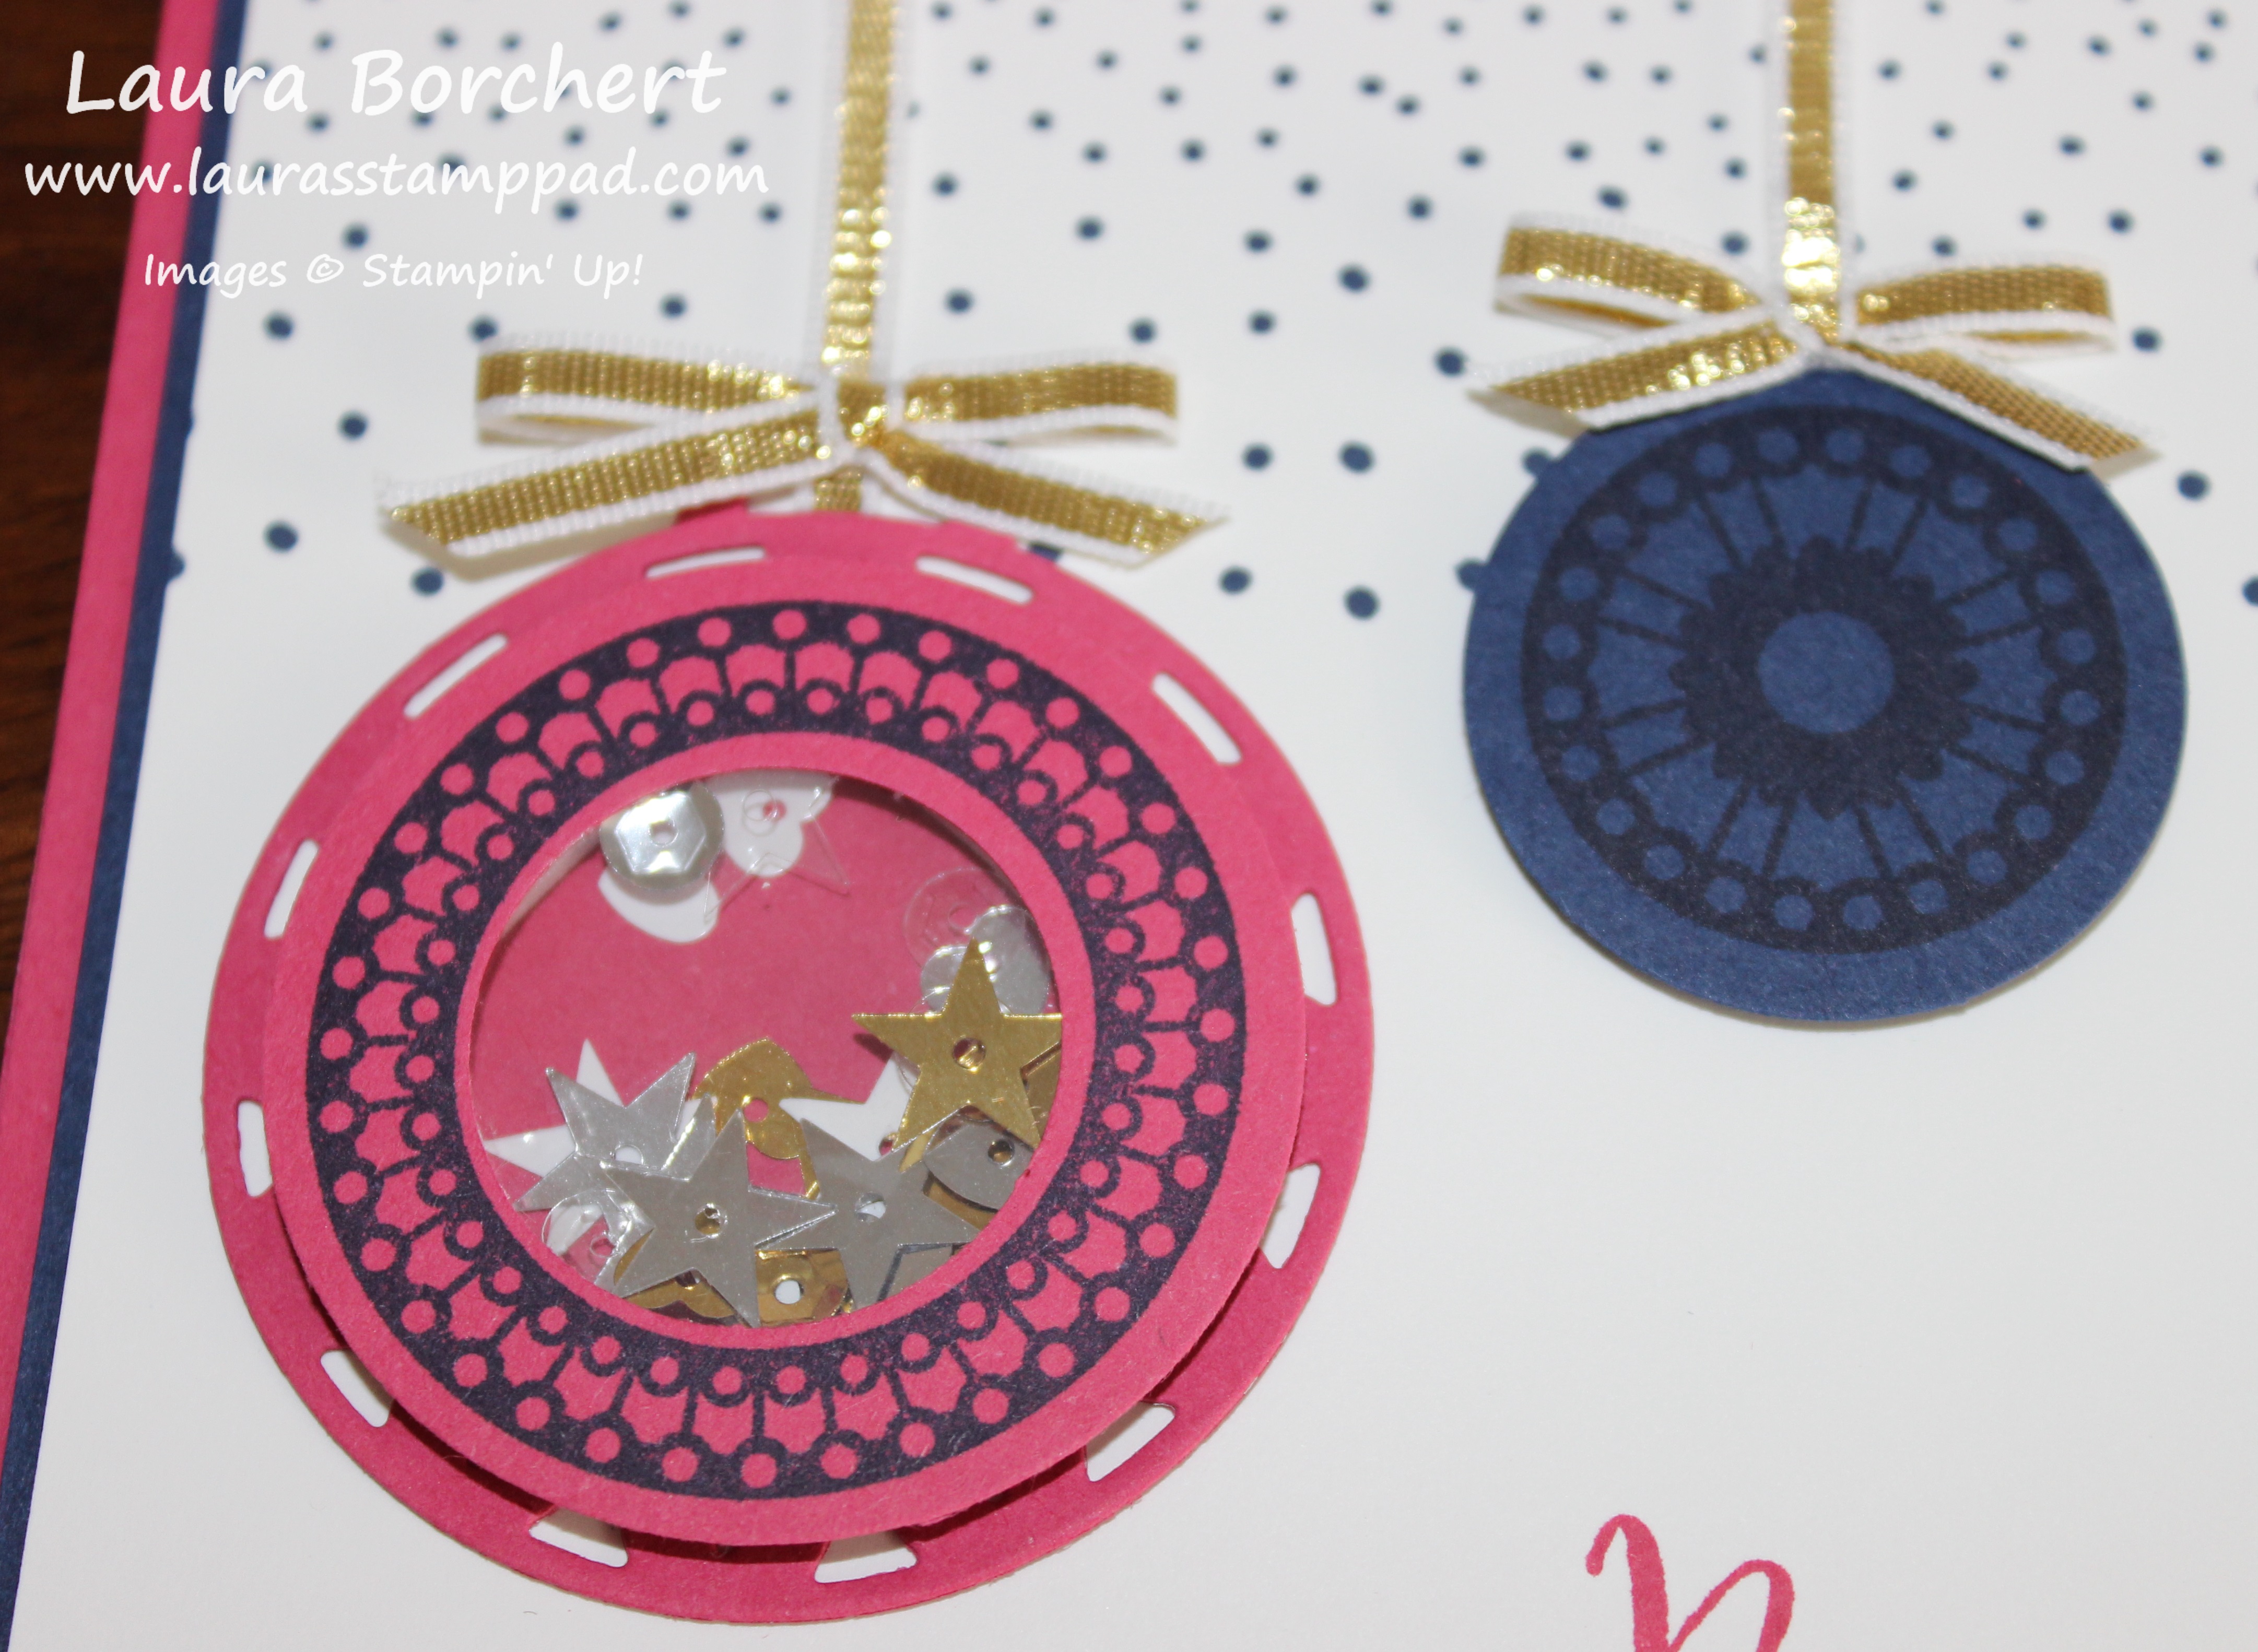
For the ribbons attached to the ornaments, I used Gold Ribbon and adhered the end behind the ornament and then wrapped it over the top of the cardstock. I tied little bows and added those on top with a Mini Glue Dot. Now you can add this layer to the Night of Navy and the card base!!! Fun little holiday card with non-traditional colors!!!
Today I did an Up Close & Personal look at the Layering Circles and Layering Ovals Framelits, you can check that out below or click here! I have been loving these for greetings and so much more. The scallops are just perfect for adding a little pop of fabulousness! Be sure to give it a thumbs up if you liked it and don’t forget to subscribe if you are new! Let me know in the comments below if there is a product you would like to see Up Close & Personal and I will do my best to make it happen!
Happy Stampin’
~Laura

Don’t forget to shop the Year End Clearance Sale!!! Click here to check out the fabulous products!!!
Pingback: This Easy Shaker Card Technique is something you have to try!Laura's Stamp Pad