
Once you start playing with your Sponge Brayer, you won’t be able to put it down!!! You can see more ways I used a Sponge Brayer here and here!!! It’s just so much fun and super easy! The Sponge Brayer comes with 2 handles and 4 sponges. You can rinse out the sponges when you are done and allow them to dry and use another color. How fabulous is that?
In these samples, I simply used the Sponge Brayer to add color to the cardstock that was ran through the Big Shot in an Embossing Folder. Simple, fun and such different looks with every folder you use!!
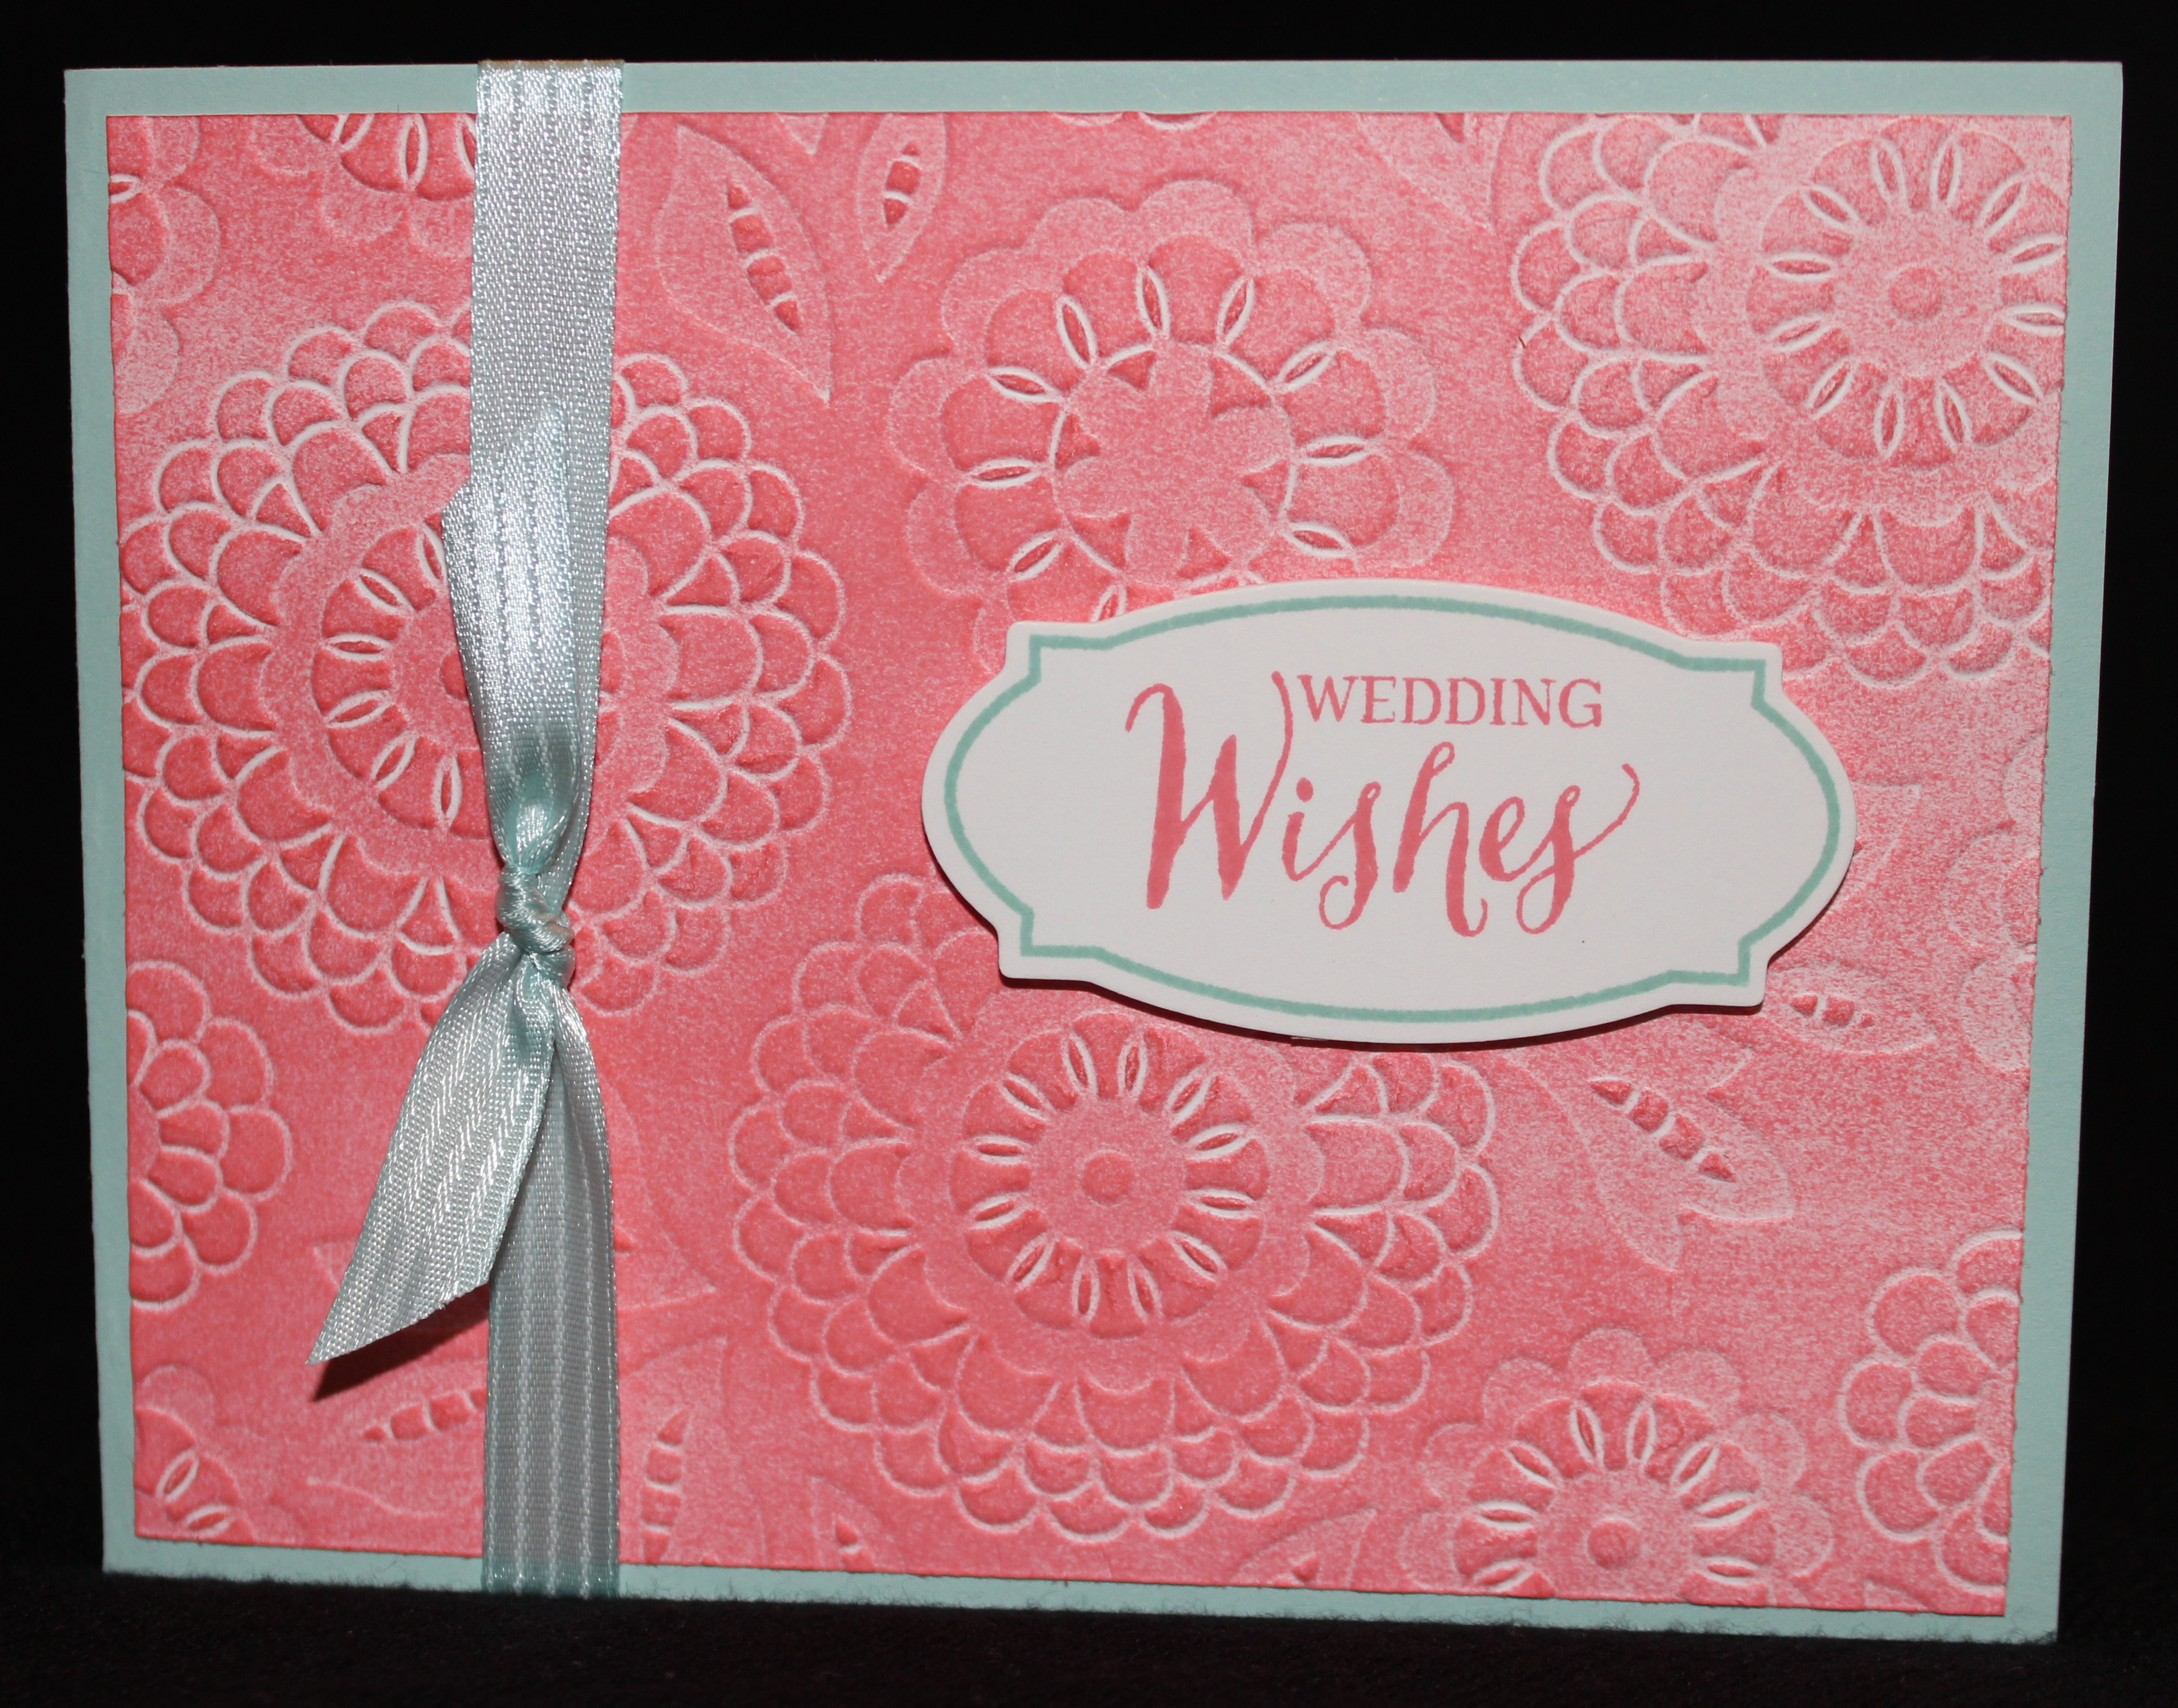
For this card, I took a piece of Whisper White (4″ x 5-1/4″) and ran it through the Big Shot in the Lovely Lace Embossing Folder. Then I took a Sponge Brayer and Flirty Flamingo Ink and rolled over the cardstock over and over until the I got the color I liked it. You don’t want to press super hard, but just a light roll back and forth! I added this to a Pool Party card base and tied some Pool Party Satin Stitched Ribbon around it. For the greeting, I used the Rose Wonder Stamp Set and die cut it with the coordinating Rose Garden Framelit. I added the greeting to the card with Stampin’ Dimensionals!
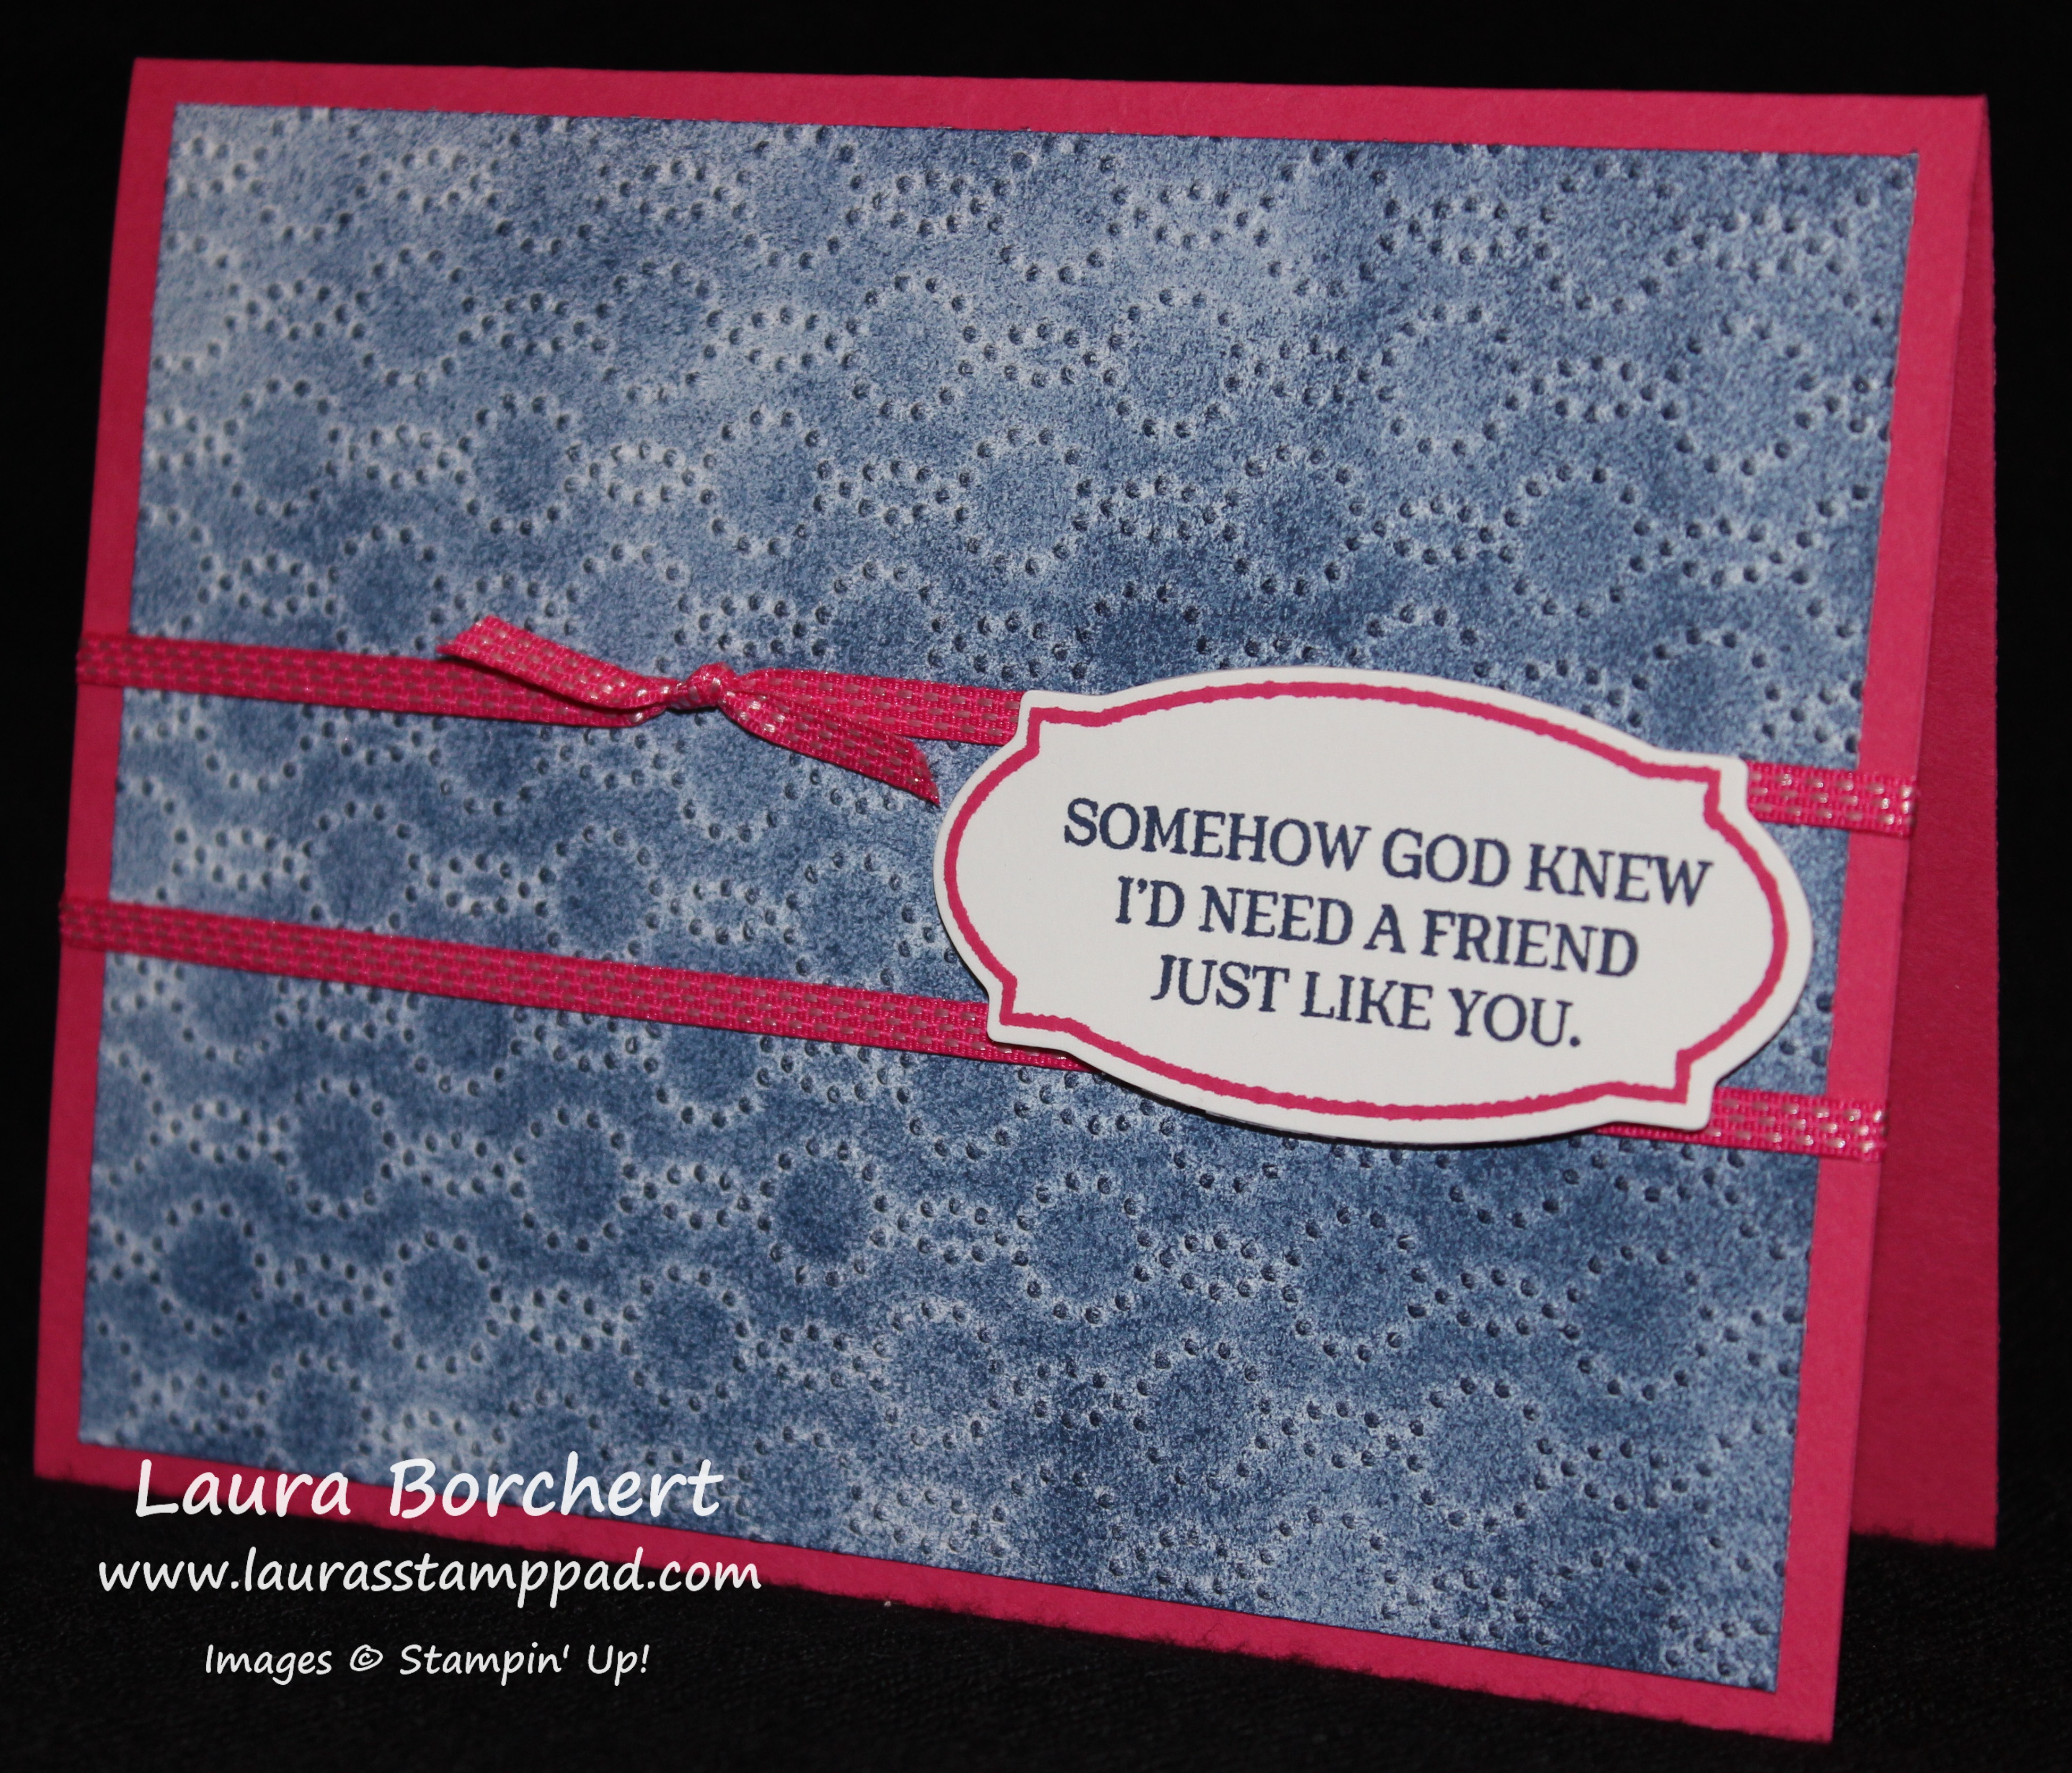
For this card, I took a piece of Whisper White (4″ x 5-1/4″) and ran it through the Big Shot in the Elegant Dots Embossing Folder. Then I took a Sponge Brayer and Night of Navy Ink and rolled over the cardstock. Be sure to roll in both directions – side to side & up and down! I added this to a Melon Mambo card base and tied some Melon Mambo Stitched Ribbon around it. The ribbon is criss-crossed on the inside of the card. For the greeting, I used the Rose Wonder Stamp Set again and die cut it with the coordinating Rose Garden Framelit. I added the greeting to the card with Stampin’ Dimensionals because I find that they work best on a bumpy surface like this one!!!
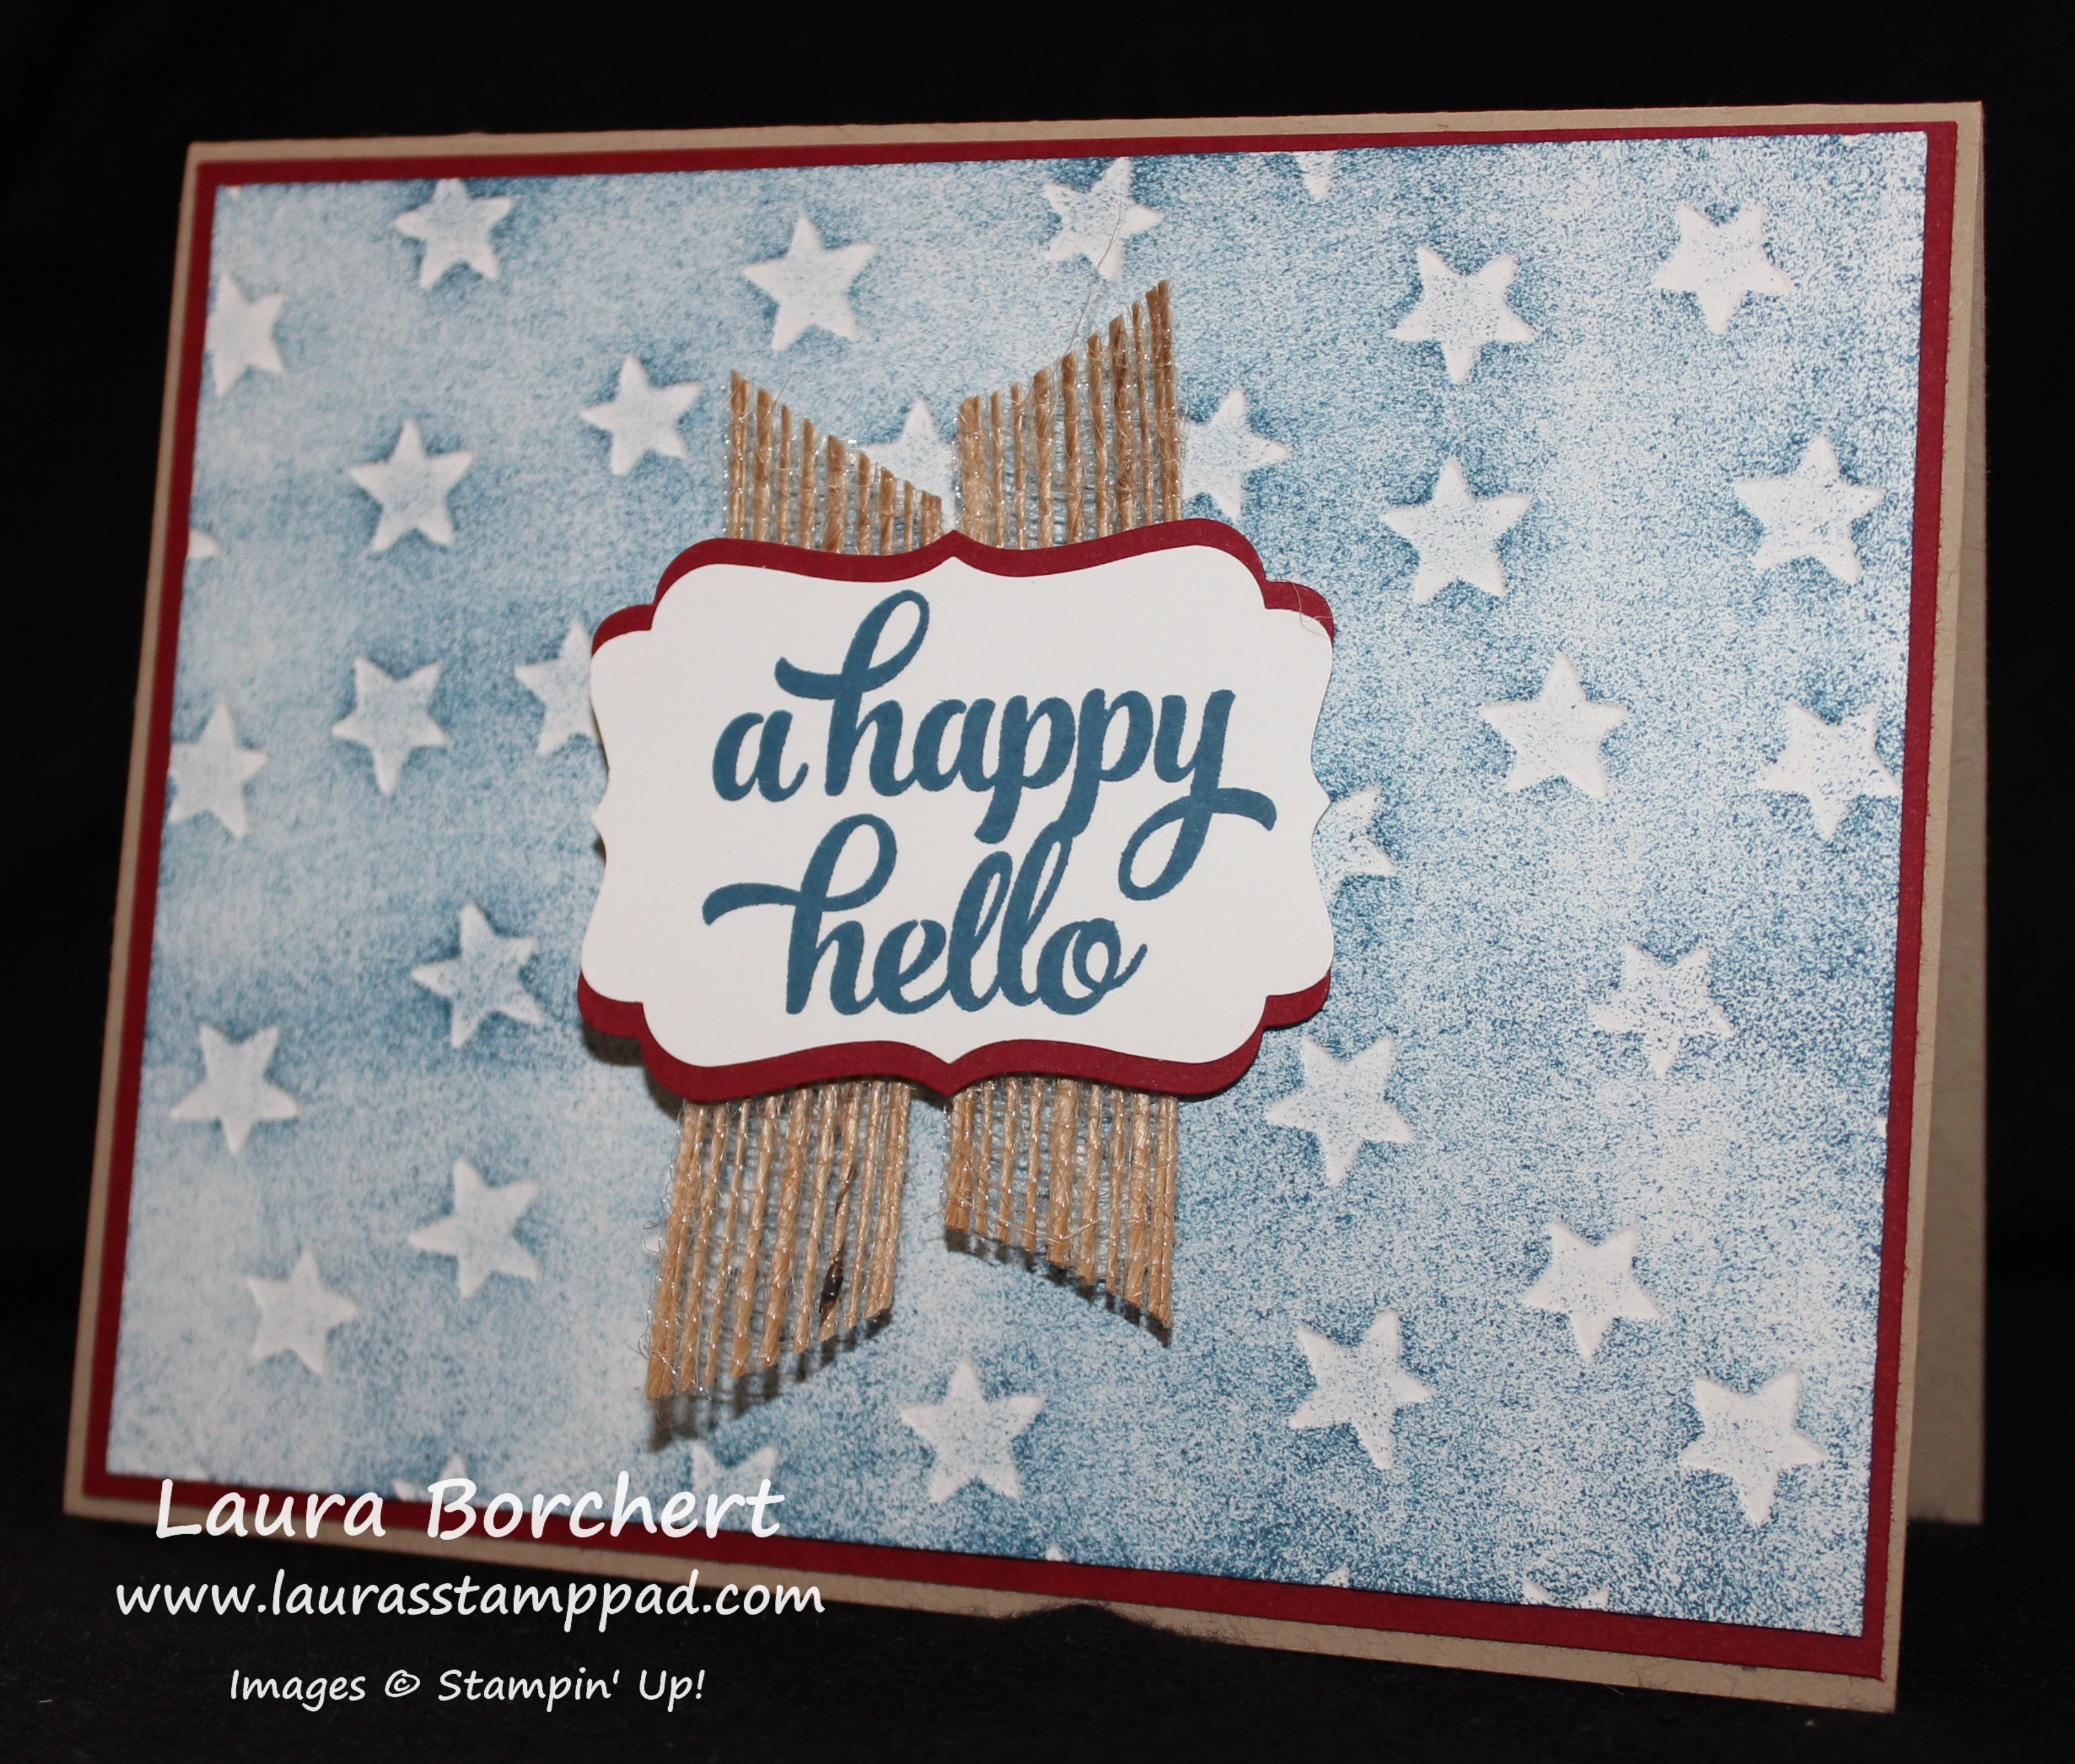
For this card, I actually ran the Sponge Brayer over the de-bossed side…..the side where the stars pop down and not up! I love this rustic/cowboy look that came out of it. I layered it onto Cherry Cobbler (4-1/8″ x 5-3/8″) and then onto a Crumb Cake card base. For the greeting, I used the Tin of Cards Stamp Set and Decorative Label Punch to cut it out. I added a few pieces of the New Burlap Ribbon on the back of the greeting! I love how this card turned out!!!
To see this in action, check out the Video Tutorial below or click here. Don’t forget to give it a thumbs up if you liked it and be sure to subscribe if you are new!!! Let me know in the comments below which card is your favorite!!! I love the stars but I also love the Elegant Dots because of the color combination.
Happy Stampin’
~Laura
Your cards are beautiful. My question is can’t I get the same results with the brayer SU sold previously? I have it & never used it.
You could use the old Brayer style that Stampin’ Up! sold previously but with a very light touch. I will admit I never liked/got the technique down with the rubber brayer. It just always seemed to give to much ink in the first spot that touched paper and then run out. This new brayer gives a light perfect layer of ink over your project and seems to be so much more user-friendly. ~Laura