Happy Tuesday!!! I hope you are all having an amazing week! I have a fabulous technique to share with you today!!! I am showing you how to use the New Sponge Brayer on the Irresistibly Floral Designer Series Paper so you can get this fabulous look!!!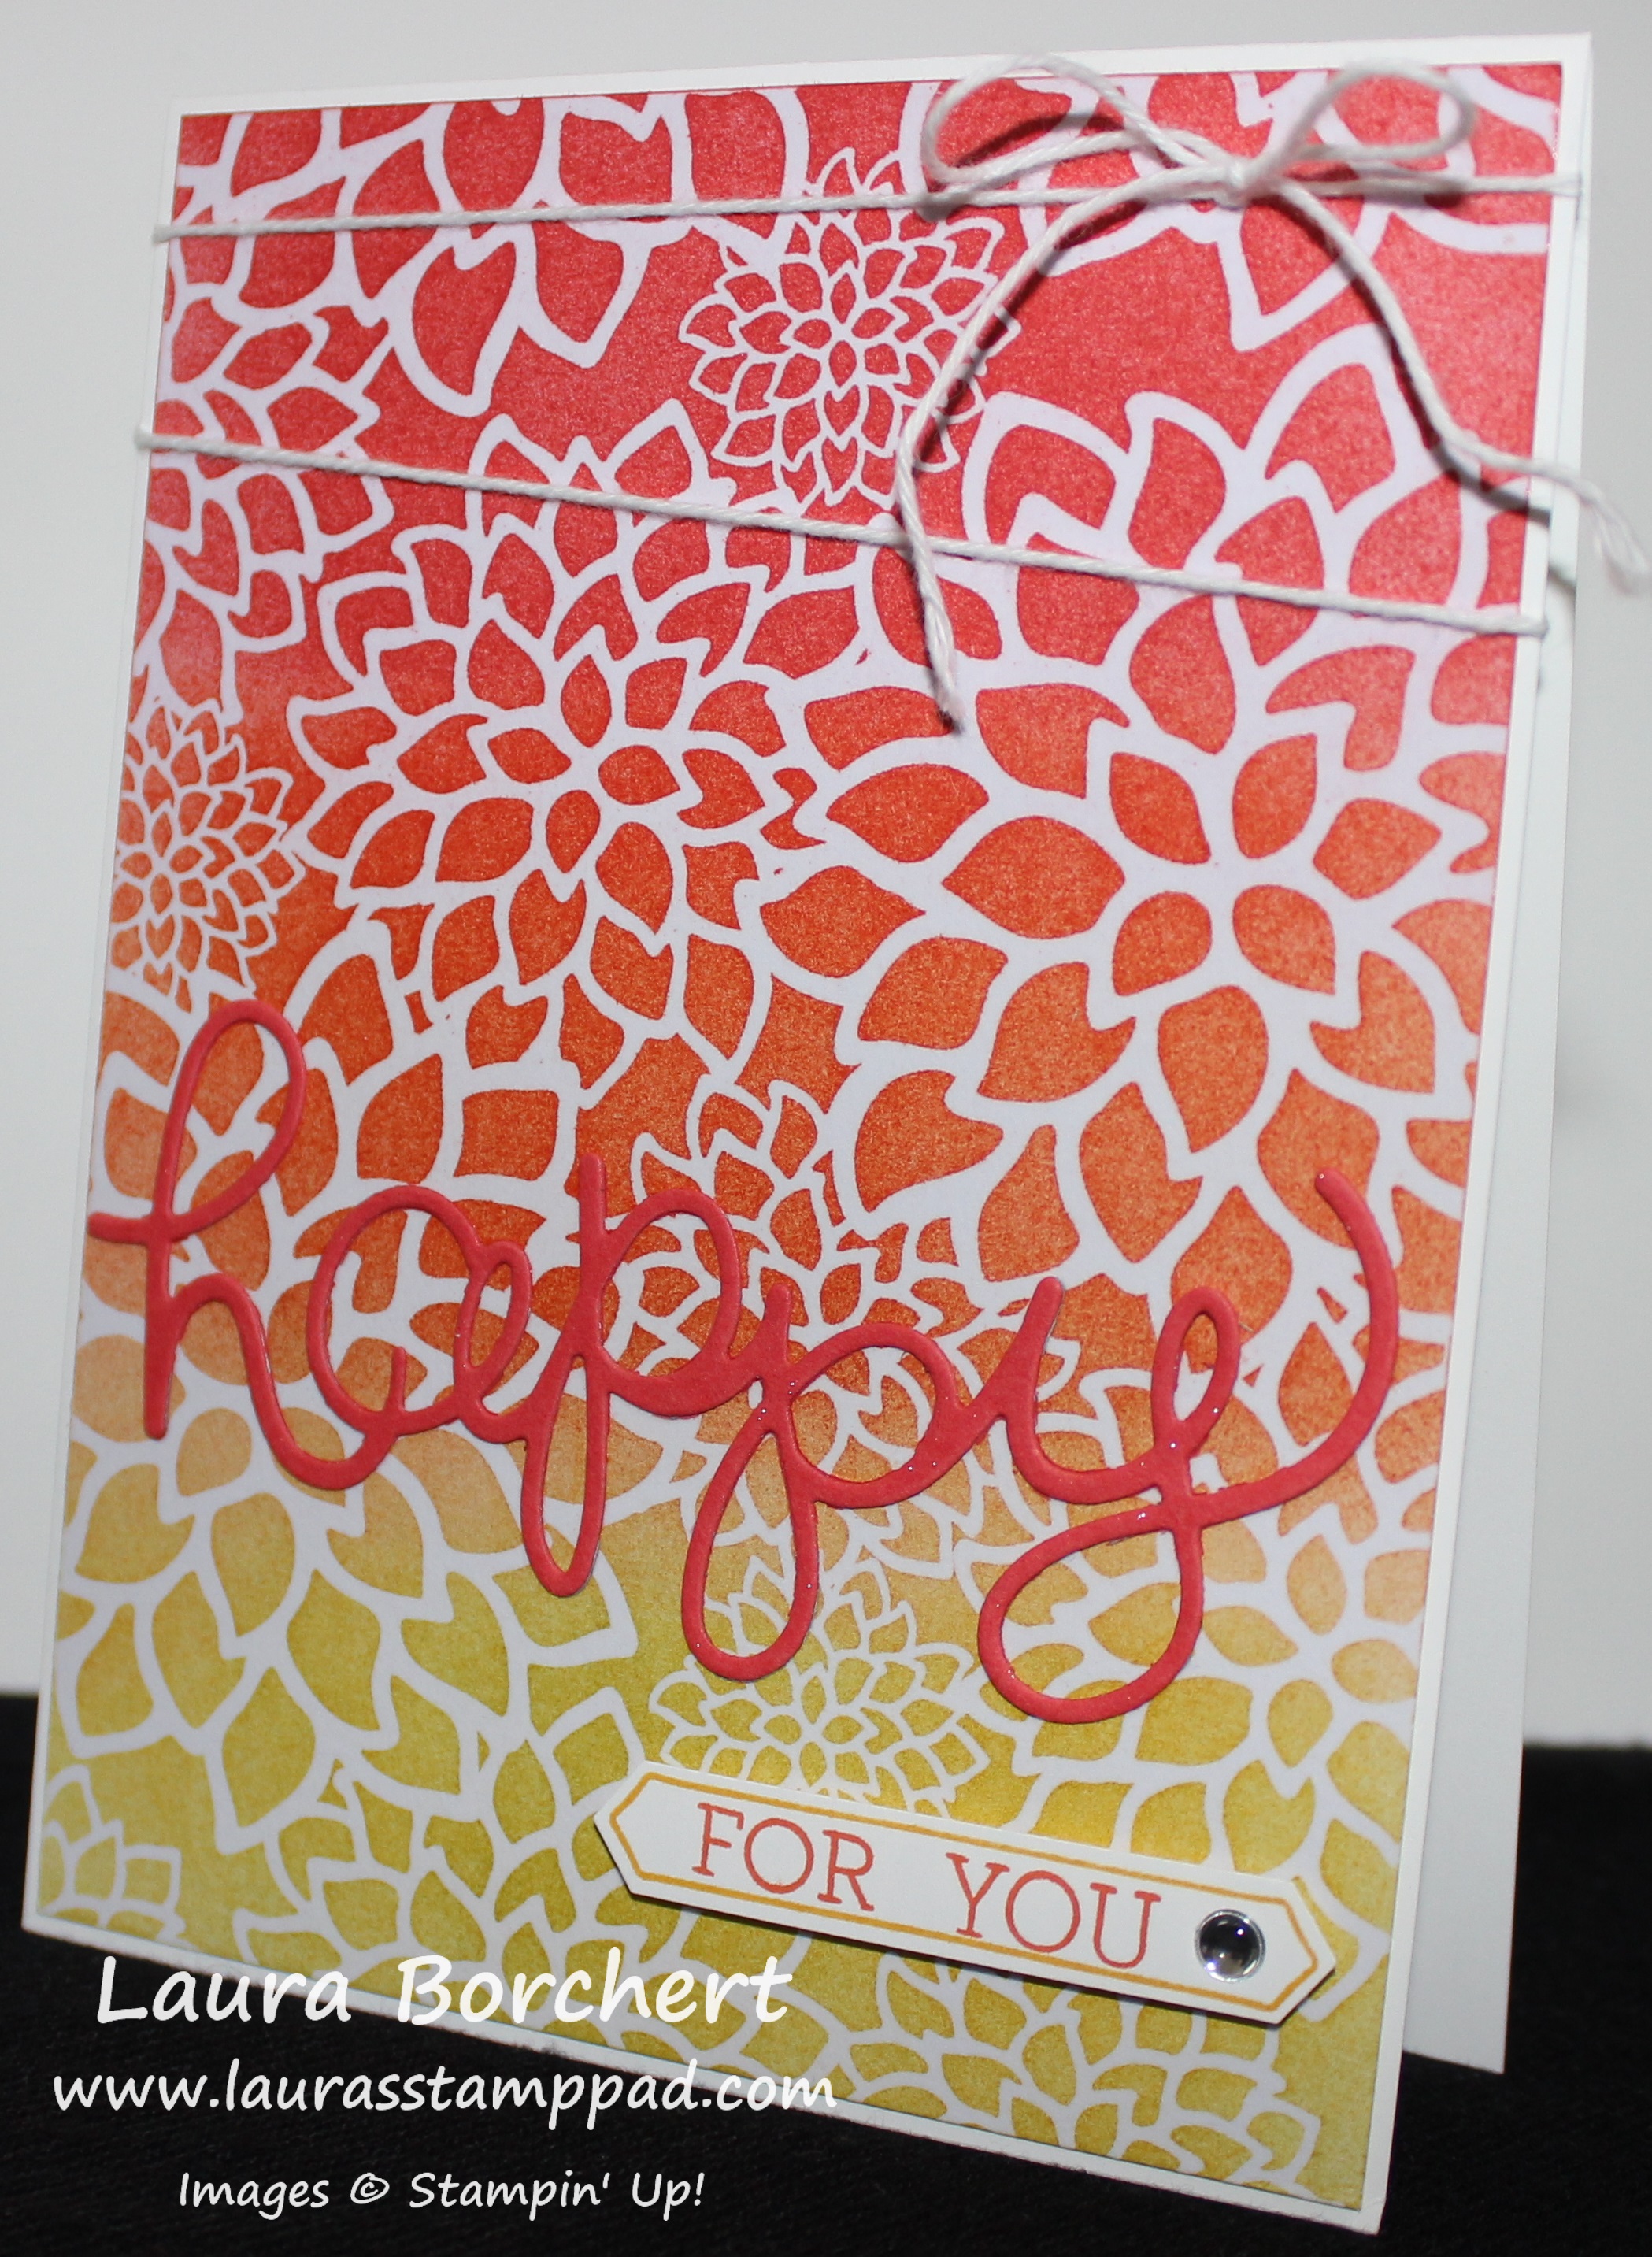
I am having so much fun with the Irresistibly Floral Designer Paper because it has FLOWERS and there are so many different fun ways to add color. I love it!!!
SUPPLIES NEEDED: Irresistibly Floral Designer Series Paper, Sponge Brayer, Ink Colors of Choice
I started with a piece of the floral image from the Irresistibly Floral Designer Series Paper measuring 4-1/8″ x 5-3/8″. I didn’t want much of a border on my card front, just the beautiful flowers! I started with the lightest color – Daffodil Delight and rolled the Sponge Brayer over the ink pad. The sponge won’t pick up the ink like your are mopping up color, it will just be ever so slightly colored. Then I rolled it over the end of the Designer Paper – back and forth. The color will start to appear and you can continue until you have the desired shade. You will want to go about 1/3 of the way across the paper. Using a paper towel, you will want to wipe off any excess ink as it tends to sit on top of the embossed image. Then I changed out the sponge to a new one and did the same with Tangerine Tango. You will want to go over the top of the yellow a bit on that overlap portion so that it doesn’t look like stripes but instead like it fades into the next color. Wipe off the excess ink with the paper towel and then change out the sponge and finish off the Designer Paper with Watermelon Wonder. Be sure to go over that Tangerine Tango just a bit so your colors fade into each other! Wipe off the excess ink and you are all done!!! You can wash out your sponges with water and just keep squeezing them until they run clean and allow them to dry.
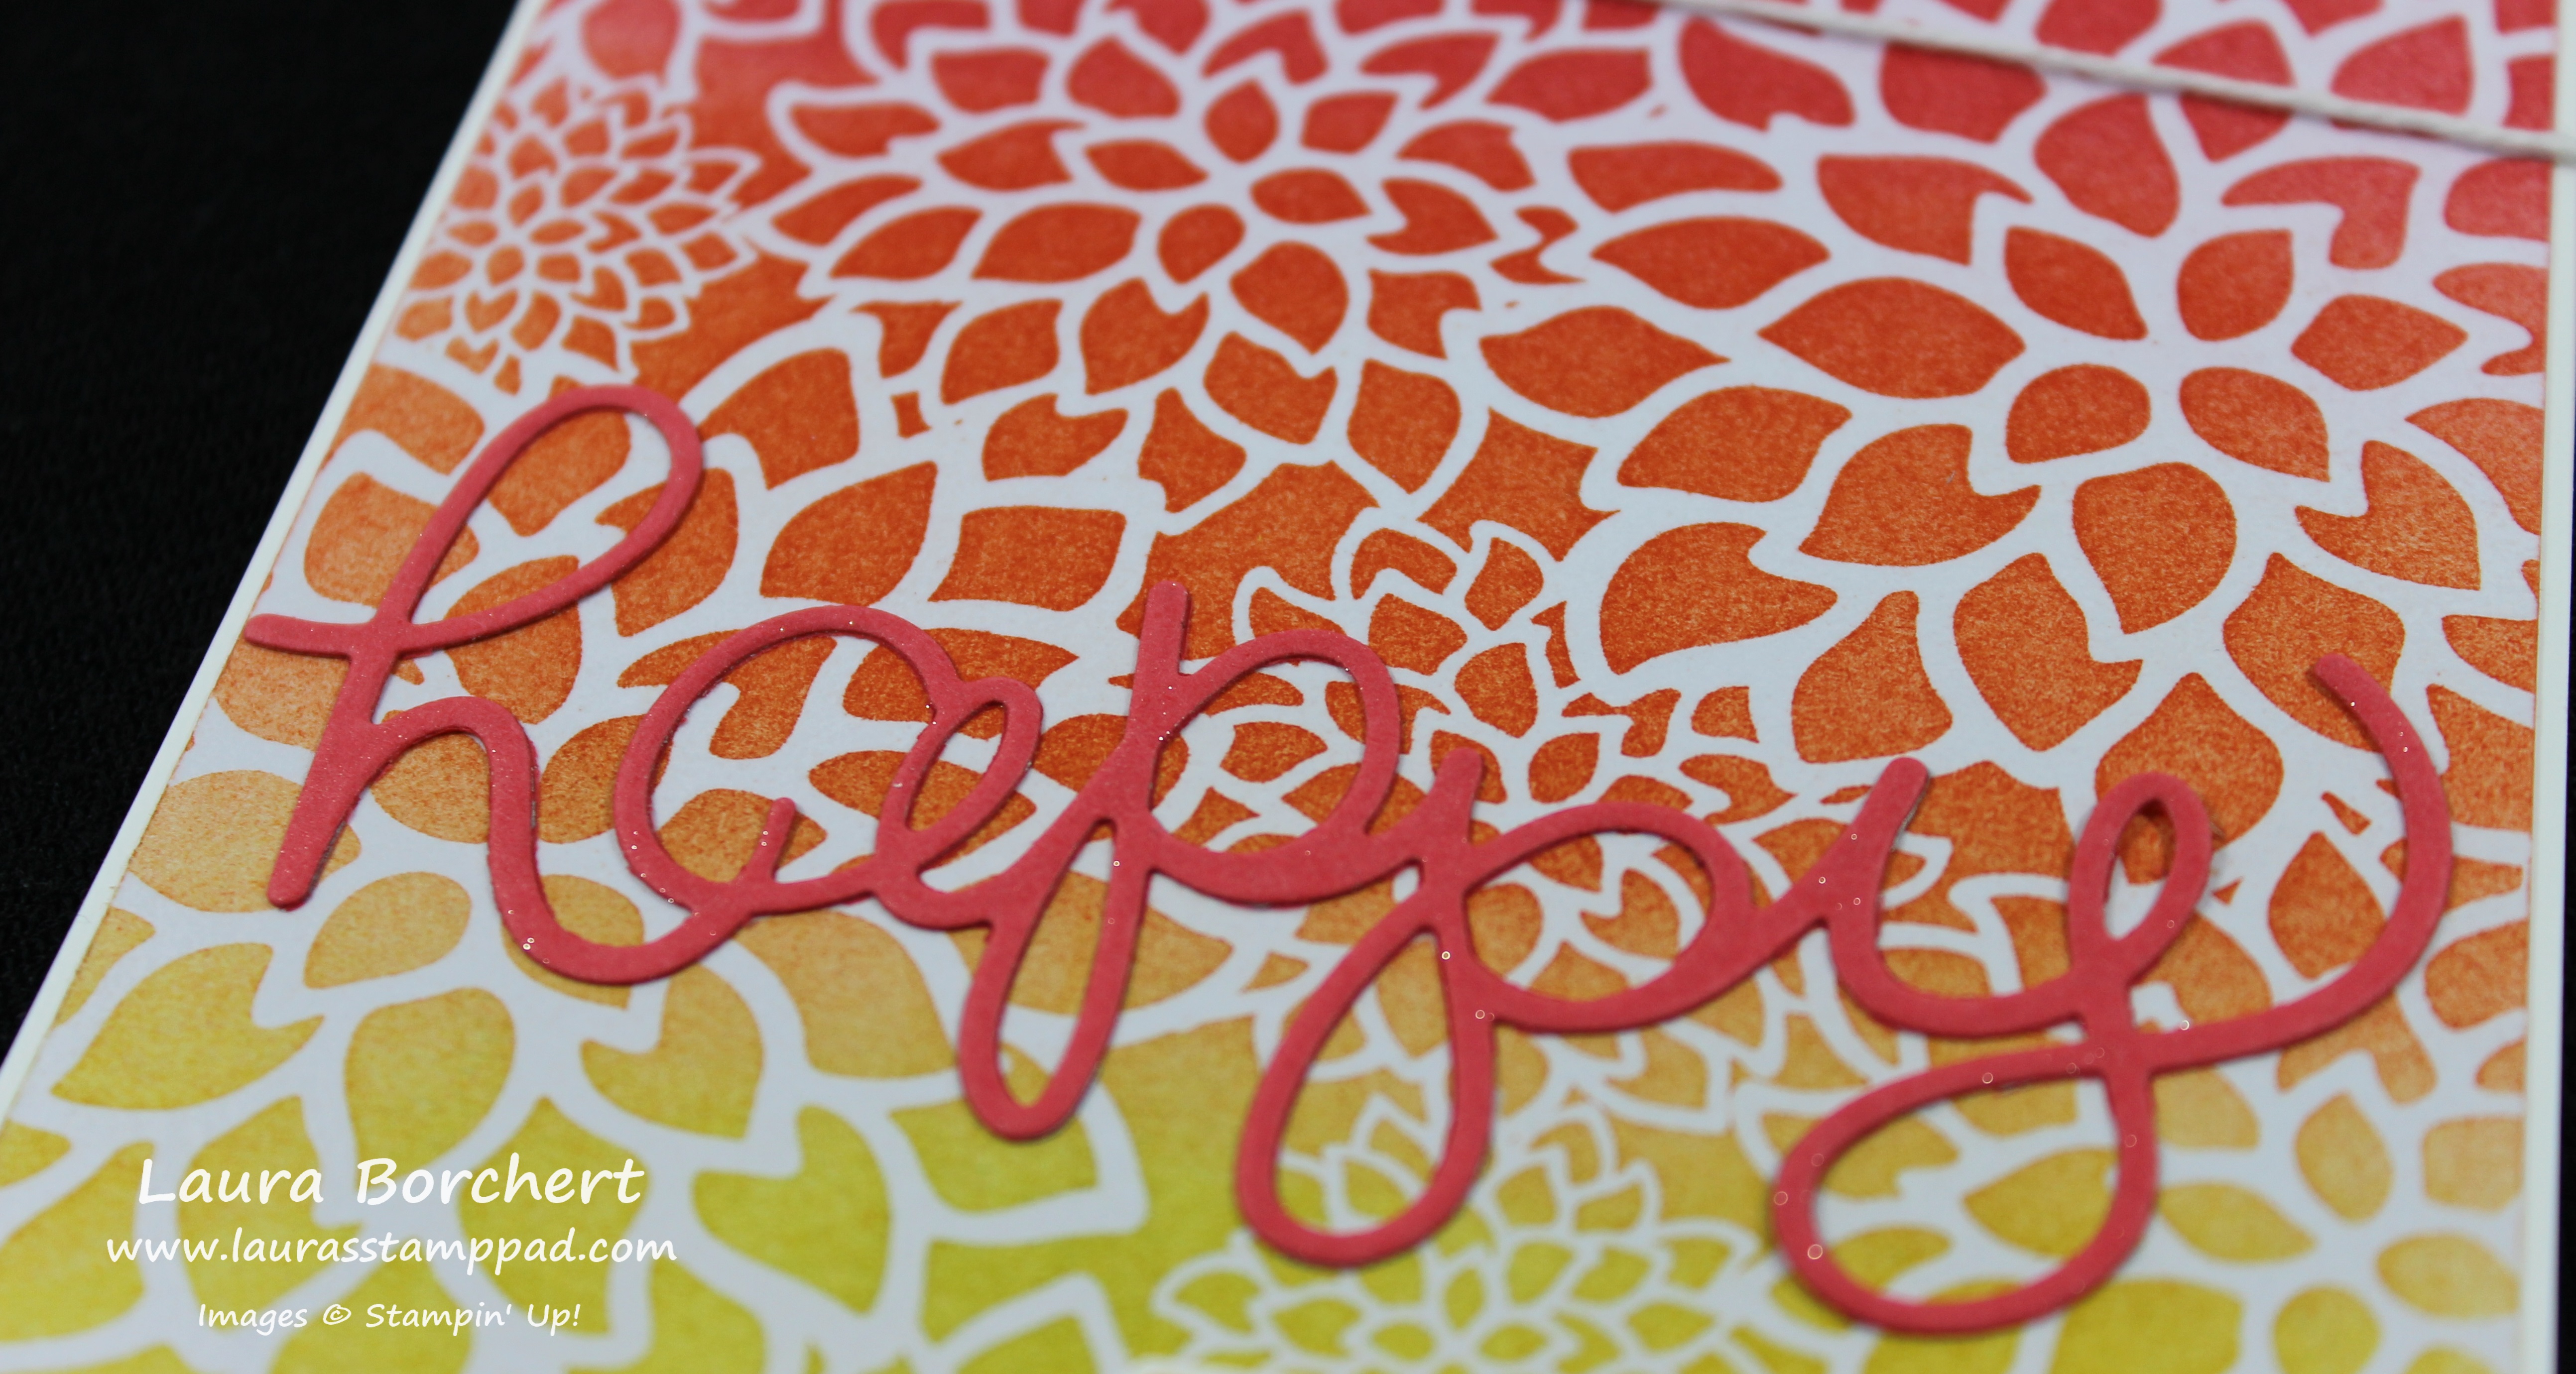
To finish off the card, I added this piece to a Whisper White card base and tied some Whisper White Baker’s Twine around the top of the card. For the greeting, I die cut the Happy from the Hello You Thinlits. I brushed some Wink of Stella over the top for a little shimmer and added it to the card front with the Fine Tip Glue Pen! If I would have planned this card out a little better, I would have put the yellow on the top of the card and placed the greeting up there so it popped some more. I already had it adhered to the card so I just went with it! I stamped the Crushed Curry border from the Thoughtful Banner Stamp Set and added the greeting from the Crazy About You Stamp Set (it coordinates with the Hello You Thinlits). I punched out the greeting with the Classic Label Punch and added it to my card with Stampin’ Dimensionals. I added a little Metallic Enamel Shape for a little more bling! This card is so bright and cheery and could be used for any occasion!
If you would like to see this in action, check out the Video Tutorial below or click here. Don’t forget to give it a thumbs up if you liked it and be sure to subscribe if you are new. I post every Tuesday and Thursday!
Happy Stampin’
~Laura
Pingback: Sponge Brayer Over Everything!!! | Laura's Stamp Pad